

To master latte art for hearts and tulips, start with a rich, balanced espresso shot that pours well with good crema. Froth your milk to create shiny microfoam by steaming just below boiling and introducing air carefully. Hold the cup at an angle, pour steadily from a height to push aside the crema, and then move closer to form your shapes. Focus on wrist control and consistency, and you’ll soon shape beautiful, recognizable designs. Keep practicing—more techniques await you.
Key Takeaways
- Use high-quality, region-specific espresso shots with good crema as a solid base for better latte art.
- Froth milk to a shiny, velvety microfoam by introducing air gently and controlling temperature precisely.
- Hold the cup at a slight tilt and pour steadily from a height to push aside crema and create a smooth canvas.
- For hearts, pour in a steady stream with a wiggle motion to form a pointed bottom; layer and pull up for tulips.
- Practice wrist control and consistent pouring speed to improve shape accuracy and develop recognizable latte art designs.
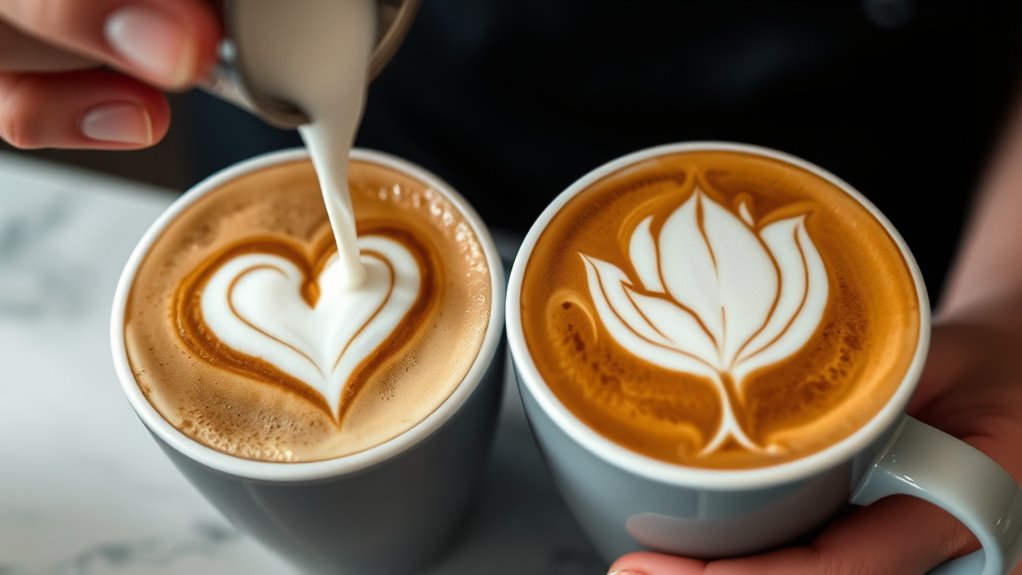
Latte art transforms a simple cup of coffee into a work of art, showcasing your barista skills and creativity. To master the basics of creating hearts and tulips, you need to understand how different coffee bean varieties influence your espresso shot, as well as perfect your milk frothing techniques. The quality and flavor of your espresso form the foundation for beautiful latte art, so start with selecting coffee bean varieties that produce rich, balanced shots. Beans from regions like Central America or Ethiopia often have bright, fruity notes, while those from South America or Africa tend to offer a smooth, chocolatey profile. Experimenting with different varieties helps you find the shot that pours well and provides the necessary crema, which is essential for creating distinct latte art designs. Mindfulness practices such as focused attention can also improve your pouring precision and consistency.
Once you’ve pulled a good shot, focus on your milk frothing techniques. Achieving the right microfoam is *vital*; it should be shiny, velvety, and pourable without large bubbles. To do this, start by steaming your milk just below boiling point, keeping the steam wand tip near the surface to introduce air and create microfoam. Then, submerge the wand deeper to heat the milk evenly, swirling gently to incorporate air smoothly. Properly frothed milk will have a glossy appearance and a smooth texture, which allows you to manipulate the flow of the milk into the espresso to form shapes.
When pouring, hold the cup at a slight angle and start with a steady, thin stream of milk from a height to push the crema aside. As the cup begins to fill, lower your pitcher closer to the surface and increase your pouring speed. For a heart shape, then, you’ll pour steadily, then wiggle the pitcher slightly to form the pointed bottom. To create a tulip, you’ll repeat this process by layering multiple hearts, each one slightly smaller and on top of the other, then finishing with a quick, upward pull to lift the design. Practice your wrist movement and control the pour, aiming for consistency in your flow and speed.
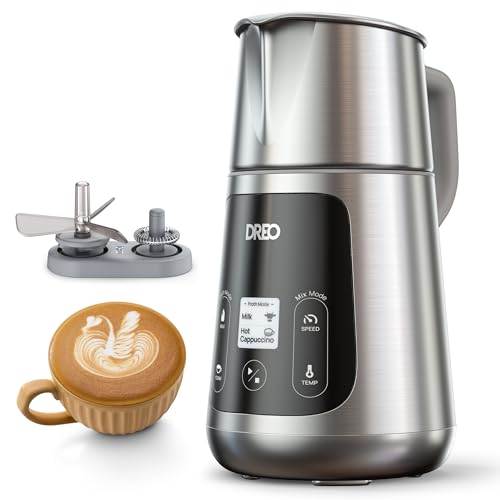
DREO Milk Frother, All-in-1 Electric Foam Maker for Coffee, 15oz/450ml Automatic Foam Frother for Latte Art-level Microfoam, 30+ Drinks, Easy to Clean, Dishwasher Safe, LED display
𝘼𝙡𝙡-𝙉𝙚𝙬 𝘿𝙍𝙀𝙊 𝙈𝙞𝙡𝙠 𝙁𝙧𝙤𝙩𝙝𝙚𝙧: [Upgraded Version] Completely reengineered to deliver café-quality mastery at home. Create latte art-level microfoam…
As an affiliate, we earn on qualifying purchases.
As an affiliate, we earn on qualifying purchases.
Frequently Asked Questions
What Equipment Is Best for Beginner Latte Art?
You should start with a good espresso machine that has a steam wand, which helps you master milk frothing techniques essential for latte art. Invest in basic latte art tools like a microfoam pitcher, thermometer, and a toothpick for pouring control. These tools make it easier to create clear designs, and practicing with them will improve your milk frothing skills, giving you the perfect canvas for hearts and tulips.
How Do I Troubleshoot Common Latte Art Mistakes?
Remember, practice makes perfect. If your latte art isn’t coming out right, check your milk texture—aim for smooth, glossy microfoam. Adjust your pour technique by starting slow and steady, moving closer as you pour. If designs are blurry or uneven, try refining your wrist movement and pouring height. Keep experimenting and stay patient; even experienced baristas keep fine-tuning their skills.
Can I Create Latte Art With Non-Dairy Milk?
Yes, you can create latte art with non-dairy milk. Just choose dairy alternatives like almond, soy, or oat milk, which often froth well. Focus on achieving the right foam consistency—smooth, microfoam without large bubbles. Proper steaming techniques help, and with a bit of practice, you’ll be able to make beautiful latte art even with non-dairy options.
How Long Does It Take to Master Latte Art Skills?
It typically takes a few months of consistent milk frothing techniques and dedicated latte art practice routines to master latte art skills. You’ll see progress faster if you focus on perfecting your foam texture and pouring techniques daily. Keep practicing regularly, experiment with different designs, and be patient with yourself. With persistence, you’ll develop the confidence and skill to create beautiful hearts and tulips in your cappuccinos.
Are There Any Health Benefits to Practicing Latte Art?
Practicing latte art through milk frothing and latte art training can offer health benefits. It helps reduce stress and improve focus as you concentrate on creating designs. The process encourages mindfulness, which can bolster mental well-being. Additionally, learning proper milk frothing techniques guarantees you’re working with fresh, healthy milk, promoting better digestion and overall health. So, while honing your skills, you also support your physical and mental wellness.

Lavazza Espresso Barista Gran Crema Whole Bean Coffee Blend, Medium Espresso Roast, Oz Bag (Packaging May Vary) – 2.2 LB, 35.2 Ounce
One bag of 2.2lb Lavazza Espresso Barista Gran Crema Whole Bean Coffee Blend
As an affiliate, we earn on qualifying purchases.
As an affiliate, we earn on qualifying purchases.
Conclusion
Now that you’ve learned the fundamentals of creating hearts and tulips, imagine the creamy white foam swirling into beautiful shapes atop your perfect cappuccino. With each steady pour, you’re painting a tiny masterpiece that invites smiles with every sip. As you practice, your skills will blossom, turning simple coffee into an artful moment of joy. Keep pouring with confidence—soon, your latte art will become as enchanting as the aroma of fresh coffee filling the air.

Milk Frothing Pitcher 350ml/600ml/900ml/1500ml (12oz/20oz/32oz/50oz) Steaming Pitchers Stainless Steel Milk/Coffee/Cappuccino/Latte Art Barista Steam Pitchers Milk Jug Cup with Art Pen,12oz
Perfect Combination Of Milk Frothing Pitcher And Latte Art Pen: The milk frother jug can be used in…
As an affiliate, we earn on qualifying purchases.
As an affiliate, we earn on qualifying purchases.

Magnoloran 44 Coffee Stencils+2 Mesh Powder Shakers+1 Coffee Latte Art Pen, Coffee Decoration Stencils Coffee Art Templates Coffee Mold Tool for Christmas Thanksgiving Cake Coffee
44 Piece Professional Art Stencils: The stencils are made from food-approved and easy-clean PP plastic, which is durable…
As an affiliate, we earn on qualifying purchases.
As an affiliate, we earn on qualifying purchases.