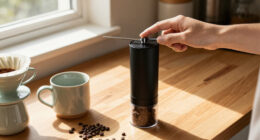
Use this guide to grind whole coffee beans with an electric grinder, choose a starting grind size for your brewing method, and clean up afterward. It is for beginners using a home blade or burr grinder; the first grind takes about 10-15 minutes, including setup and cleanup.

Get coffee and tea gear delivered free with Prime
- Fast, free delivery on millions of items
- Prime Video, Amazon Music and more included
- Member-only deals all year

Hamilton Beach Fresh Grind Electric Coffee Grinder for Up to 12 Cups
- ✔ Brand: Hamilton Beach
- ✔ Model: 80335R
- ✔ Capacity: Up to 12 cups

Black+Decker One Touch Coffee Grinder, 2/3 Cup Capacity
- ✔ Brand: Black+Decker
- ✔ Model: CBG110S
- ✔ Capacity: 2/3 cup (56.6 g)

YOYIKKO Electric Coffee Grinder 400W
- ✔ Brand: YOYIKKO
- ✔ Model: JWL400
- ✔ Power: 400 W
Difficulty: Beginner | Time: 10-15 minutes
What You’ll Need
Tools & Materials:
- Electric coffee grinder with its lid or hopper
- Whole roasted coffee beans
- Brewing equipment, such as a drip machine, French press, or espresso machine
- Dry brush or soft cloth for cleanup
Knowledge:
- Know which brewing method you will use
- Know how to operate the grinder’s power switch or controls
Read the grinder’s manual for its capacity, operating instructions, and cleaning limits. Unplug the grinder before touching the blades, burrs, or interior. Never rinse an electric grinder or put water inside it unless the manual explicitly says those parts are washable.
Hamilton Beach Fresh Grind Electric Coffee Grinder for Up to 12 Cups
The Hamilton Beach Fresh Grind is the most balanced choice in this group for everyday coffee because it pairs a larger stated capacity with a removable grinding bowl. That bowl can go in the dishwasher, which makes transferring grounds and cleaning up simpler than working around a fixed chamber. Its one-button operation keeps the process straightforward, and hidden cord storage helps keep the counter tidy between uses.Compared with the Black+Decker, Hamilton Beach is the better fit when we regularly prepare more than a small batch; Black+Decker’s listed capacity is only 2/3 cup. The tradeoff is control: Hamilton Beach offers no adjustable grind settings, so we rely on grind time and visual checks rather than selecting a defined consistency. YOYIKKO offers more motor power and four blades, but that does not erase the Hamilton Beach’s practical advantage in bowl cleanup. Choose this model for simple brewed-coffee routines, and skip it if repeatable fine adjustments are essential.
Pros:
- Removable stainless-steel bowl is dishwasher safe.
- Stated capacity supports up to 12 cups.
- One-button operation is uncomplicated.
- Hidden cord storage keeps the counter neat.
Cons:
- No adjustable grind-size settings.
- Maximum batch size is limited to its stated 12-cup capacity.
Best for: Households making regular small-to-medium batches who value easy cleanup and simple one-button use.
Not ideal for: Coffee drinkers who need defined grind settings or routinely grind very large quantities in one batch.
Bottom line: We recommend Hamilton Beach for the best blend of practical capacity, easy cleanup, and uncomplicated operation in this lineup.
“We recommend Hamilton Beach for the best blend of practical capacity, easy cleanup, and uncomplicated operation in this lineup.”
Black+Decker One Touch Coffee Grinder, 2/3 Cup Capacity
Black+Decker makes the strongest case when a grinder needs to occupy little counter or cupboard space. Its listed dimensions are 3.5 by 3.4 by 7.28 inches, and at 0.65 kg it is the lightest option here with a stated weight. The 2/3-cup chamber is suited to grinding a modest amount at a time, while a lid-locking safety mechanism helps prevent spills and accidental operation.Its push-button control is described as letting users adjust grind consistency from coarse to fine, but it does not provide numbered settings or a calibrated dial. We still need to watch the grounds and control the grind duration. Compared with Hamilton Beach, Black+Decker is easier to fit into a compact kitchen but gives up batch capacity and the removable, dishwasher-safe bowl. YOYIKKO offers substantially higher stated power, while this model prioritizes a small footprint and a two-year warranty. Pick it for occasional small batches; pass if we frequently brew for a group.
Pros:
- Compact listed dimensions and light 0.65 kg weight.
- Lid lock helps prevent spills and accidental activation.
- Push-button operation gives manual control over grind duration.
- Two-year warranty is the longest listed in this lineup.
Cons:
- 2/3-cup capacity limits batch size.
- No calibrated grind-size dial or numbered settings.
- No removable, dishwasher-safe bowl is specified.
Best for: People with limited kitchen space who grind coffee in small batches and want a locking lid.
Not ideal for: Households that regularly prepare larger amounts or need repeatable, precisely specified grind settings.
Bottom line: We would choose Black+Decker when compact storage and small-batch convenience matter more than capacity.
“We would choose Black+Decker when compact storage and small-batch convenience matter more than capacity.”
YOYIKKO Electric Coffee Grinder 400W
YOYIKKO is the performance-oriented option on paper: its 400 W motor and four 304 stainless-steel blades are designed for fast grinding across coffee, spices, seeds, and nuts. A transparent cover lets us watch the grounds as they change, and the lid interlock and overheating protection add safety features not listed for the other two models. Its timed, one-touch approach also gives us a way to alter coarseness by controlling how long we grind.That flexibility is still manual. Unlike a machine with fixed grind settings, YOYIKKO asks us to apply pressure and judge the result, so consistency depends on attention and repeatable technique. Compared with Hamilton Beach, it emphasizes motor power and visible progress rather than the convenience of a removable dishwasher-safe bowl. Compared with the compact Black+Decker, it has a larger listed footprint and no stated capacity or weight in the supplied specifications. Choose it if speed and multi-ingredient use are priorities; skip it if documented batch size or low-effort cleanup matters more.
Pros:
- 400 W motor is the highest stated power in this comparison.
- Four 304 stainless-steel blades.
- Transparent cover makes progress visible while grinding.
- Interlock lid and overheating protection are specified.
Cons:
- Grind size depends on manual timing and pressure.
- No batch capacity is stated in the supplied specifications.
- No removable or dishwasher-safe bowl is specified.
Best for: Users who want a higher-powered blade grinder for coffee and occasional spices, nuts, or seeds, and are comfortable monitoring grind time.
Not ideal for: Buyers seeking fixed grind settings, clearly stated batch capacity, or a removable dishwasher-safe bowl.
Bottom line: We favor YOYIKKO for users who value stated motor power and flexible multi-ingredient use over preset control and documented capacity.
“We favor YOYIKKO for users who value stated motor power and flexible multi-ingredient use over preset control and documented capacity.”
As an Amazon Associate we earn from qualifying purchases.
Before You Start
Choose a grind setting based on the brewing method, then adjust by taste. Grinder labels and settings differ, so use the ranges below as starting points. For a blade grinder, which chops rather than setting a precise grind size, use short pulses and check the grounds often. Keep fingers and utensils away from the grinding parts.
Step-by-Step Instructions
Step 1: Choose your grind size
Match the grinder setting to your brewing method. Start with coarse grounds for French press, medium grounds for most drip coffee makers and pour-over brewers, and fine grounds for espresso machines that use a grinder. For cold brew, start coarse. If the grinder has numbered settings, consult its manual for a suggested range; numbers are not consistent across brands.
Tip:Grind size affects how quickly water extracts flavor. If coffee tastes sour or weak, try a finer grind next time. If it tastes bitter or the brew runs too slowly, try a coarser grind.
Check: You have a starting grind setting that suits your brewing method, or a plan to check the grounds as you pulse a blade grinder.
Step 2: Measure the beans
Measure the amount of whole beans you need for one brew. Use your coffee recipe or the markings and instructions on your brewing equipment. If you have a kitchen scale, weigh the beans for repeatable results. Do not exceed the grinder’s stated capacity.
Tip:Grinding only the amount you plan to use helps limit leftover grounds and keeps the grinder from being overfilled.
Check: The beans are measured, and their volume fits within the grinder’s capacity.
Step 3: Load the grinder
Place the grinder on a dry, stable surface and check that it is switched off. For a blade grinder, remove the lid, add the beans to the grinding chamber, and secure the lid. For a burr grinder with a hopper, add beans up to the marked fill line or the amount recommended in the manual. Keep beans and fingers clear of the grinding mechanism while loading.
Tip:If the grinder has removable parts, fit them as the manual directs before switching it on.
Check: The beans are loaded below the capacity limit, and the lid or hopper is correctly seated.
Step 4: Grind the beans
For a burr grinder, select your starting setting and use the grinder’s normal controls to grind the measured beans. For a blade grinder, hold the lid securely and use short pulses. Pause between pulses to let the grounds settle, then check their size through the lid or after switching the grinder off. Continue until most grounds look close to the size you need.
Tip:Do not run a blade grinder continuously for a long period. Short pulses make it easier to control the grind and reduce heat buildup.
Check: The grinder has stopped, and the grounds are mostly uniform for a burr grinder or close to your chosen size for a blade grinder.
Step 5: Check the grounds and adjust
Switch the grinder off before opening it. Inspect a small amount of grounds against the size you need: coarse grounds should be visibly chunky, medium grounds should resemble coarse sand, and fine grounds should be much smaller and more even. If the grind is too coarse, grind briefly again or change the burr setting according to the manual. If it is too fine, use a coarser setting for the next batch; grounds cannot be made coarser once they have been ground.
Tip:Change burr settings only as directed by the manual. Some grinders require the motor to run while you adjust the setting; follow the manufacturer’s instructions for your model.
Check: The grounds are a reasonable starting size for the chosen brewing method, with no need to reach a perfect appearance on the first attempt.
Step 6: Transfer the grounds and brew
Open the grinder only after it has stopped. Carefully pour the grounds into your brewer or its filter basket, keeping them away from the grinder’s electrical base. Brew promptly using your usual recipe. If grounds cling to the chamber, use a dry brush or a gentle tap as the manual recommends.
Tip:Avoid touching blades or burrs while removing stuck grounds. Unplug the grinder first if you need to brush inside the chamber.
Check: The grounds have reached the brewer, and the grinder is switched off and clear of loose beans.
Step 7: Clean and store the grinder
Switch off and unplug the grinder. Brush loose grounds from the chamber, lid, or accessible burr area with a dry brush, following the manual’s directions. Wipe the exterior with a dry or slightly damp cloth, keeping moisture out of openings and electrical parts. Let any damp exterior areas dry, then store the grinder in a clean, dry place.
Tip:Do not use water, soap, or cleaning tablets inside the grinder unless its manual specifically approves them. Remove burrs only if the manual describes how to do so.
Check: The grinder is unplugged, free of loose grounds, dry, and stored safely.
Common Mistakes to Avoid
- Using a grind size that does not suit the brewing method. — Start with the grinder manual’s recommendation or the coarse, medium, and fine guidance in this guide, then adjust based on the brewed coffee’s taste and flow.
- Overfilling the grinder or packing beans into the chamber. — Measure the beans first and stay within the capacity listed in the manual. Grind a second batch if you need more.
- Holding a blade grinder on continuously until the grounds turn to powder. — Use short pulses and inspect the grind between them. Stop when the grounds are close to the size you need.
- Washing the grinder chamber or burrs with water without checking the manual. — Unplug the grinder and use a dry brush for routine cleaning. Wash only parts that the manufacturer identifies as washable.
Troubleshooting
Problem: The grinder will not start.
Solution: Check that it is plugged into a working outlet, the switch is on, and the lid or hopper is properly seated if your model has a safety interlock. Unplug it before checking for jammed beans. Follow the manual if the grinder still will not run.
Problem: The grinder makes a loud or uneven sound, or beans remain stuck.
Solution: Switch it off and unplug it. Remove beans or grounds only as the manual directs, using a dry brush rather than fingers near the grinding parts. If the noise continues or the mechanism appears damaged, stop using the grinder and contact the manufacturer or a repair service.
Problem: The grounds are too coarse or too fine.
Solution: For a burr grinder, adjust the setting in the direction shown by the manual and grind a small amount to check it. For a blade grinder, pulse for longer to make grounds finer; grounds that are already too fine cannot be made coarser, so use a fresh batch.
Problem: The brewed coffee tastes weak, sour, or bitter.
Solution: Keep the bean amount and brewing method the same, then change the grind one step at a time. Try a finer grind if coffee tastes weak or sour, and a coarser grind if it tastes bitter or the water drains too slowly.
What Success Looks Like
You have ground the measured beans, and the grounds are reasonably close to a starting size for your brewing method. They have been transferred to the brewer, the grinder is switched off and unplugged for cleanup, and no moisture has entered its electrical parts. After brewing, check that the coffee flows at a suitable pace and tastes balanced to you; adjust the grind slightly on the next batch if needed.
Next Steps
Record the bean amount, grinder setting, and brewing result so you can repeat a good cup. Brush out loose grounds regularly and follow the manual’s schedule for deeper cleaning. If you change beans or brewing equipment, begin with the recommended grind range and adjust gradually.
Frequently Asked Questions
How long should I grind coffee beans?
It depends on the grinder, the amount of beans, and the grind size. Use the grinder’s recommended time if provided. With a blade grinder, use short pulses and check the grounds between pulses instead of relying on one fixed time.
Can I use the same grind size for every brewing method?
No. Different methods usually work better with different grind sizes. Start coarse for French press and cold brew, medium for most drip and pour-over brewing, and fine for espresso, then adjust to suit your equipment and taste.
Can I put ground coffee in an electric grinder to make it finer?
Most home grinders are designed for whole beans. Do not load ground coffee unless the manual says your model supports it; it can clog the grinder or make a mess. Grind whole beans and adjust the setting or pulse time instead.
How often should I clean my electric coffee grinder?
Brush out loose grounds after grinding or whenever you see buildup. Follow the manual for deeper cleaning, since burr removal and washable parts vary by model. Always unplug the grinder before cleaning inside it.
Can I grind beans ahead of time?
You can, but ground coffee loses freshness faster than whole beans. For the best flavor, grind shortly before brewing. If you need to grind ahead, store the grounds in a sealed, clean container away from heat, light, and moisture.