Connect with us

Tips and Tricks

Optimize Your Machine: How to Adjust a Breville Coffee Machine!

Jumpstart your coffee experience with Breville by learning how to adjust your machine for a tailored brew, and discover new ways to elevate your coffee game!

Published

on

adjust breville coffee machine

To optimize your Breville coffee machine, start by adjusting shot volume and extraction temperature for a personalized brew. Fine-tune settings to customize your coffee just the way you like it. Participate in the Perfect Cup Quiz to discover your ideal coffee preferences with valuable insights. Sign up for Sage's email updates to stay informed about the latest releases and promotions. Register your machine for troubleshooting aid and eligibility for the Breville Innovation Program. Adjust shot volume for a tailored taste experience. And remember, there's more to explore for enhancing your coffee journey! Lastly, don’t forget to consider adjusting coffee grind size to further enhance your coffee experience. Experiment with different grind sizes to find the perfect balance of flavor and strength for your ideal cup of coffee. With these personalized adjustments, you can truly optimize your Breville coffee machine to create the perfect cup of coffee every time.

Key Takeaways

  • Adjust shot volume for espresso strength and flavor customization.
  • Fine-tune temperature settings for personalized brew profiles.
  • Experiment with shot volume to intensify or mellow taste.
  • Utilize interactive tools like quizzes for optimal coffee preferences.
  • Explore support resources for troubleshooting and product registration.

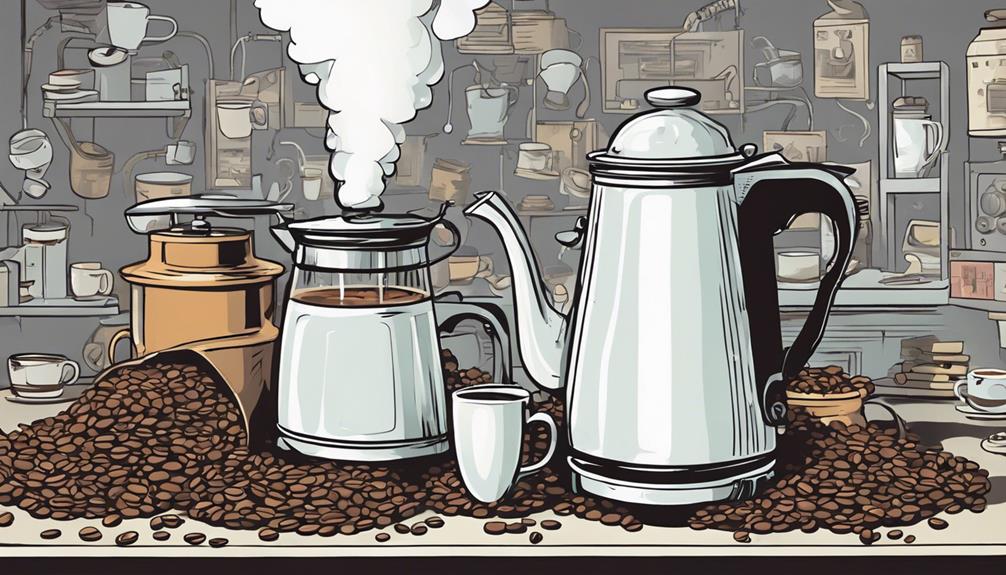
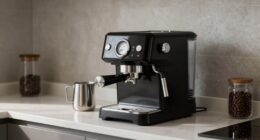
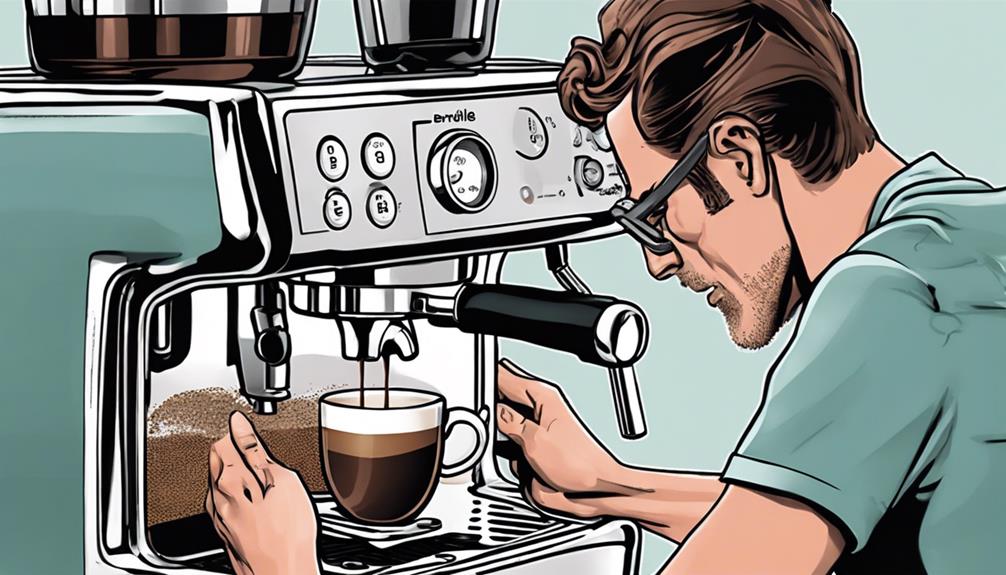
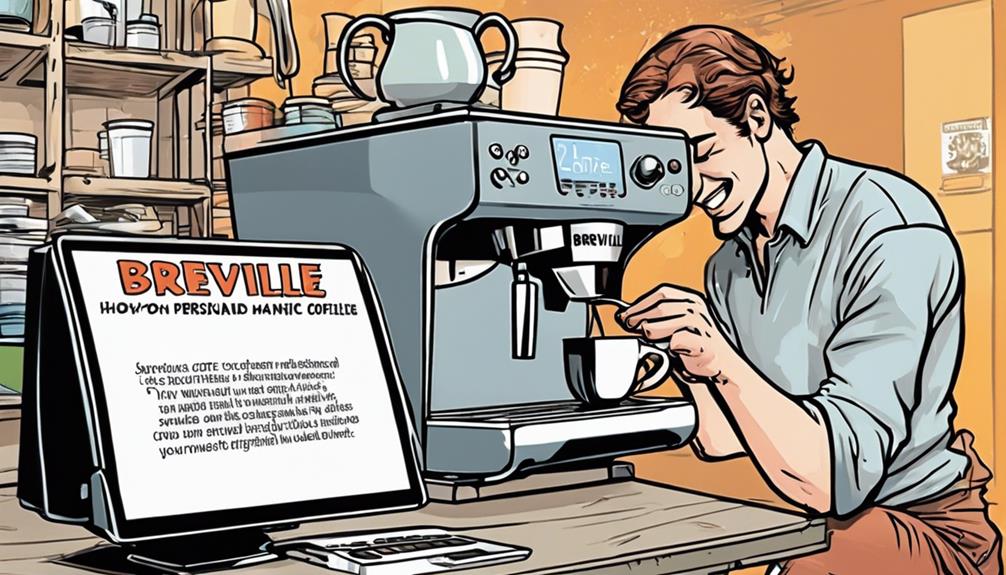
Shot Volume and Temperature Adjustment

Adjust shot volume and temperature on The Barista Pro™ for a personalized coffee experience tailored to your preferences. By fine-tuning these settings, you can truly customize your brew to perfection.

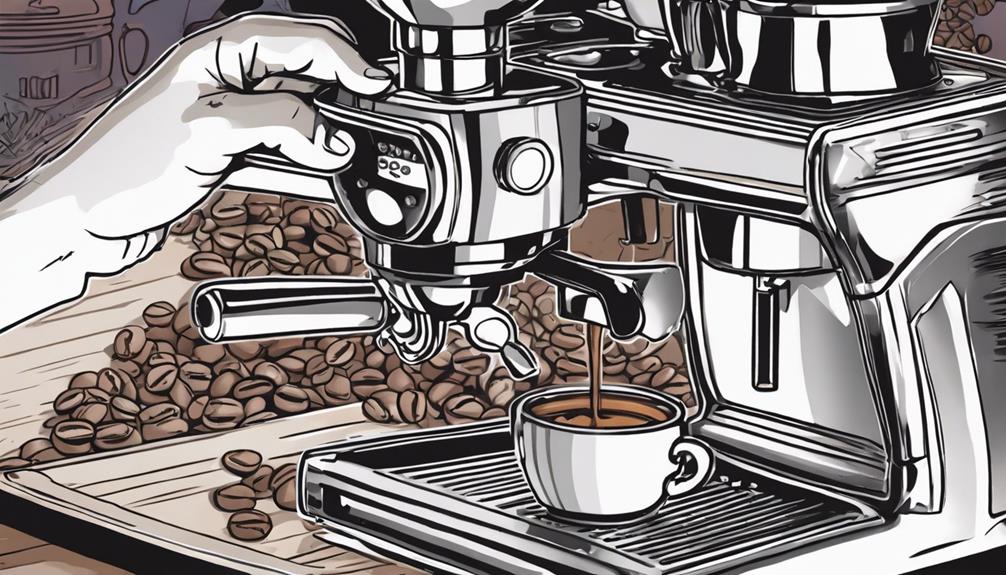
The shot volume refers to the amount of espresso extracted, influencing the strength and flavor of your coffee. Increasing the shot volume can result in a more intense brew, while reducing it may create a milder taste.

Moreover, the extraction temperature plays a pivotal role in determining the overall flavor profile of your coffee. Higher temperatures can bring out bolder, more robust flavors, whereas lower temperatures may highlight more delicate notes.

With The Barista Pro™, you have the power to experiment with different combinations of shot volume and temperature to find the ideal balance that suits your taste buds. This level of control allows you to consistently craft high-quality coffee that caters specifically to your preferences.

Experimenting with these settings can lead to a truly customized coffee experience that elevates your daily brew to new heights.

Advertisement

Perfect Cup Quiz Participation

coffee lovers quiz fun

Discover your ideal coffee preferences and perfect pairing by engaging in our interactive Perfect Cup Quiz. Click on the provided link to easily access the quiz, where you can answer questions tailored to reveal your coffee taste profile.

By taking the quiz, you'll gain insights into the types of coffee that best suit your palate and lifestyle, guiding you towards your ideal coffee match.

If you're considering purchasing The Barista Express™ or The Barista Pro™ to brew your perfect cup, the quiz can provide valuable recommendations based on your preferences.

Whether you prefer a strong espresso or a velvety latte, this quiz is designed to help you navigate the world of coffee and find your perfect brew.

In addition to the quiz, explore our blog section for more coffee tips and information that can enhance your coffee experience.

Sage Email Subscription

informative email updates available

Want to stay in the loop with the latest Sage updates and promotions?

Sign up for their email updates by providing a valid email address and agreeing to their Privacy Policy.

Advertisement

Email Updates Registration

To stay informed about the latest product releases from Sage, consider signing up for their email updates. By subscribing to the Sage email list, you'll receive valuable information about their Barista products, promotions, surveys, and exclusive content directly to your inbox. It's an easy way to stay in the loop with all the news and updates regarding Sage's offerings.

When you decide to register for email updates, remember that you can easily opt-out at any time if you no longer wish to receive communications from Sage. This guarantees that you have full control over your subscription and can manage it according to your preferences.

Don't miss out on the opportunity to be the first to know about new releases and special offers. Joining the Sage email list is a convenient way to stay connected and up-to-date with everything happening in the world of Sage products.

Privacy Policy Agreement

When subscribing to Sage's email list, you must agree to their Privacy Policy. By agreeing to receive promotions, you're giving consent to receive promotional offers and surveys from Sage.

It's essential to read our Privacy Policy to understand how your information will be used and safeguarded. Here are some key points you should consider:

Advertisement
  1. Consent for Promotions: By subscribing to Sage's emails, you agree to receive promotional materials, exclusive offers, and surveys directly from Sage.
  2. Privacy Policy Understanding: Make sure to read our Privacy Policy thoroughly to grasp how your data will be managed, ensuring transparency and security.
  3. Information Protection: Sage is committed to protecting your information. The Privacy Policy outlines the measures taken to safeguard your data and maintain confidentiality.

Unsubscribe Option Availability

If you wish to stop receiving updates from Sage's email subscription, the unsubscribe option is readily available for your convenience. Sage values your preferences and offers a hassle-free way to opt out of receiving promotions and surveys.

The unsubscribe link can be found in all Sage emails, ensuring that managing your email preferences is simple and straightforward. By clicking on the unsubscribe option in any communication from Sage, you can easily stop receiving updates and surveys.

Rest assured that Sage respects your decision to unsubscribe and will promptly action your request. Take control of your email preferences by utilizing the unsubscribe feature provided in every email from Sage.

Enjoy a seamless experience in managing your subscription with Sage's easy-to-use unsubscribe option.

Product Release Notifications

new product launch updates

Signing up for product release notifications guarantees you stay informed about new Breville coffee machine releases. By subscribing to these notifications, you can:

  1. Receive Timely Updates: Stay in the loop about upcoming Breville coffee machines, ensuring you never miss out on the latest releases to enhance your brewing experience.
  2. Access Exclusive Details: Get a sneak peek into the features and specifications of the newest Breville coffee machines before they're officially launched, giving you an edge in selecting the perfect machine for your needs.
  3. Stay Ahead of the Curve: Be the first to know about the innovative technology and design improvements integrated into Breville's new coffee machine releases. Stay at the forefront of the coffee brewing world by leveraging these notifications to learn about cutting-edge advancements in coffee machine technology.

Support and Registration Details

support and registration information

Accessing the Assistance Hub ensures you can register your Breville coffee machine for warranty coverage and troubleshooting aid. Registering your machine is essential to secure you receive proper aid and benefits like product information updates.

By registering, you also become eligible for the Breville Innovation Program, granting you access to exclusive perks. If you encounter any issues with your machine, the Assistance Hub provides troubleshooting aid to help you resolve them promptly.

Additionally, the FAQ section offers quick solutions to common queries you might have. Familiarize yourself with the warranty coverage and terms applicable to your Breville coffee machine to make the most of your ownership experience.

Advertisement

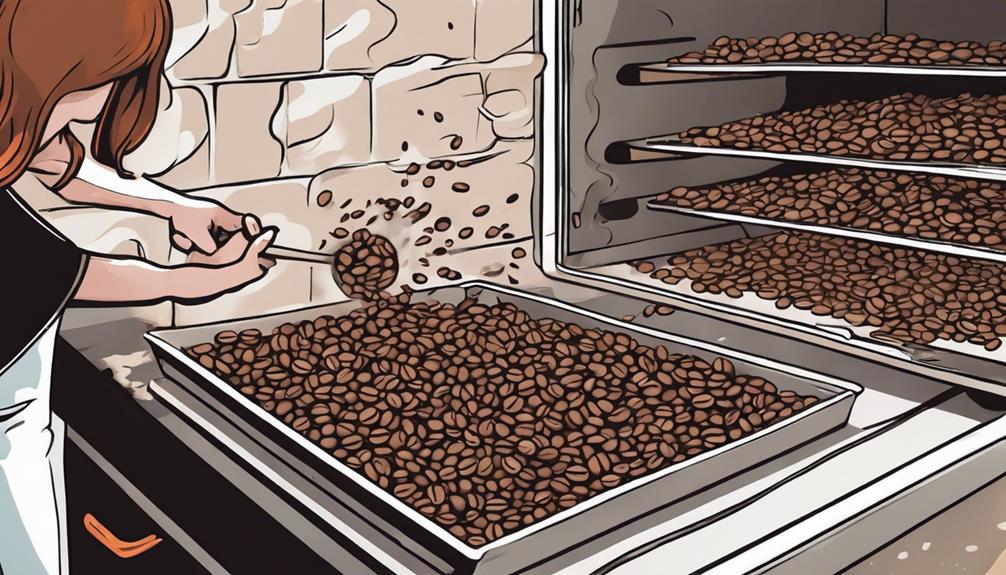
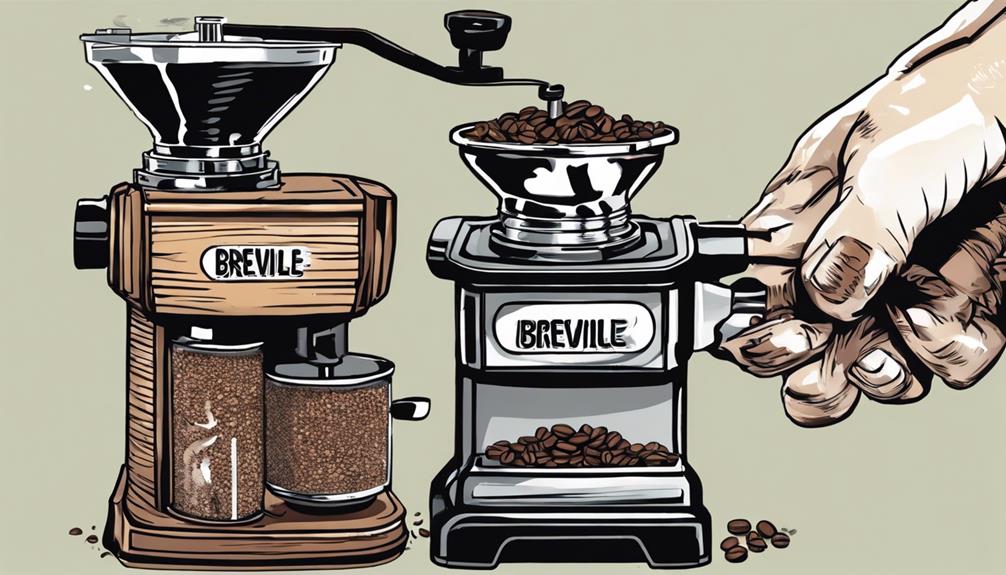
Adjusting Grind Size

grinding coffee for espresso

To enhance your coffee brewing experience with your Breville machine, mastering the art of adjusting the grind size is crucial. The Breville coffee machine offers a precise grind size adjustment feature that allows you to customize the extraction process to suit your preferences perfectly.

Here are three essential points to keep in mind when adjusting the grind size:

  1. Precision Control: Utilize the machine's intuitive interface to easily adjust the grind size, ensuring consistency and flavor in every cup of coffee.
  2. Optimal Extraction: Fine-tune the coffee grounds by adjusting the grind size, enabling you to achieve the ideal balance of flavors in your espresso shots or coffee brews.
  3. Flavorful Experience: By optimizing the extraction process through grind size adjustment, you can enjoy a delicious and satisfying coffee experience every time you brew.

Mastering the adjustment of the grind size on your Breville machine will without a doubt elevate the quality of your coffee and bring out the full potential of your beans.

Finding Your Ideal Cup

choosing the perfect coffee

Discover your perfect cup of coffee by exploring different brewing methods and flavor profiles to suit your taste preferences. When using The Barista Pro™, consider adjusting the shot volume to customize your coffee just the way you like it. By experimenting with shot volumes, you can find the optimal balance between strength and flavor intensity. Whether you prefer a bold espresso shot or a milder brew, customization is essential to achieving your ideal cup.

If you're uncertain about where to start, take advantage of the interactive quiz available to help pinpoint your coffee preferences. Additionally, browsing through the blog can offer valuable insights into improving your brewing skills.

Don't forget to check out retailers offering The Barista Pro™ for a personalized coffee experience. For those looking for a budget-friendly and sustainable option, remanufactured products may be worth considering.

Stay informed about product releases and promotions by signing up for Sage's email updates to make sure you never miss out on the latest coffee innovations.

Signing Up for Email Updates

email updates subscription process

Get exclusive updates on Sage product releases by signing up for their email notifications. By providing a valid email address, you can make certain you never miss out on promotions or surveys from Sage.

Here's how to get started:

Advertisement
  1. Visit Sage Website: Head to the official Sage website and look for the option to subscribe to their email list.
  2. Enter Your Email: Input your valid email address into the designated field to start receiving the latest information about Sage products and promotions.
  3. Confirmation: Once you've signed up to Sage, keep an eye on your inbox for a confirmation email. Click on the link provided to validate your subscription and start receiving updates.

Signing up for Sage's email updates is a great way to stay informed about new products and releases.

Support and Product Registration

register for product support

For warranty coverage and support services on your Breville coffee machine, make sure to register your product. Registering your Breville coffee machine not only guarantees that you can access support when needed but also helps you stay informed about any product updates or recalls.

By registering, you can easily reach out to the Support Center for troubleshooting assistance tailored to your specific machine. Additionally, joining the Breville Innovation Program through product registration will keep you in the loop about new features and enhancements that can further enhance your coffee brewing experience.

In the event that you encounter any issues or have questions about your Breville coffee machine, the Support Center is your go-to resource for reliable assistance. Moreover, by exploring the FAQ section, you may find answers to common queries without the need to reach out for support.

Understanding the warranty information and coverage provided for your Breville coffee machine is also essential, and registering your product guarantees you have access to all the necessary details.

Frequently Asked Questions

What Is the Best Grind Setting for Breville?

To find the best grind setting for your Breville machine, experiment with different settings based on your beans and desired extraction time. Adjusting the grind can enhance flavor and quality, so consult your manual for guidance.

How to Adjust a Breville Espresso Machine?

To adjust a Breville espresso machine, first, explore the menu for customization options. Fine-tune shot volume, temperature, and grind size for your perfect brew. Immerse into the settings, like a coffee connoisseur on a flavor quest.

Advertisement

Can You Adjust the Temperature on a Breville Coffee Maker?

Yes, you can adjust the temperature on a Breville coffee maker. Use specific button sequences to enter advanced temperature setting mode. Fine-tune water temperature in 1-2 degree increments to suit your coffee beans.

How Do I Reset My Breville Settings?

To reset your Breville settings, turn off your machine and press specific buttons to enter advanced mode. Adjust the water temperature as needed, listen for a beep, and reset to the default temp if desired. The machine will return to standby mode.

Conclusion

Just like a skilled artist fine-tunes their brush strokes to create a masterpiece, adjusting your Breville coffee machine allows you to craft the perfect cup of coffee tailored to your preferences.

By taking advantage of the various customization options and staying updated on product information, you can elevate your coffee experience to new heights.

So go ahead, reveal the full potential of your machine and savor every sip of your personalized brew.

Advertisement
Continue Reading
Advertisement

Tips and Tricks

Storage Solution: How to Build a Coffee Table With Storage!

Solve your storage struggles with a stylish coffee table that offers hidden compartments – discover how to build one with this guide!

Published

on

By

coffee table storage project

Craft a practical coffee table with hidden storage using knotty alder wood and pocket holes for a sleek look. Add drawer slides for functionality that maximizes space and enhances your living room decor.

Key Takeaways

  • Utilize knotty alder wood for a rustic look.
  • Incorporate drawers with pocket screws for storage.
  • Ensure structural integrity with pocket hole joinery.
  • Consider dimensions to fit your living space.
  • Finish with paint or stain for a personalized touch.

Materials and Preparation

Gather the 4/4 and 6/4 knotty alder wood for building your coffee table with storage and mill it to the required thickness and dimensions. Guarantee the wood is precisely milled to 3/4 thickness, allowing for a sturdy yet elegant finish for your table.

Cut the panel pieces slightly long to account for any adjustments needed during assembly, ensuring a perfect fit for the storage compartments.

To facilitate easy and secure assembly, drill pocket holes in the wood pieces. These pocket holes won't only simplify the construction process but also provide a clean and seamless look to your finished coffee table.

The use of pocket holes is essential for maintaining the structural integrity of your table while also adding a professional touch to the overall design.

Building Components

designing architectural structural elements

Now, let's talk about constructing the key components of your coffee table.

You'll be working with glued-up boards and pocket holes to build the side panels and shelf, ensuring sturdy assembly.

Advertisement

Securing the side panels to the frame posts and adding bottom supports will provide the necessary stability for your storage coffee table.

Construction Materials

What're the recommended construction materials for building components when constructing a coffee table with storage?

To guarantee a sturdy and functional coffee table, it's suggested to use 4/4 and 6/4 knotty alder wood for the construction materials.

When assembling the pieces, drilling pocket holes in the wood is essential for secure attachment.

To construct the side panels and shelf, make sure to join the pieces with glued edges and pocket screws for added strength.

Advertisement

Additionally, attaching the cross supports to the side panels using a combination of wood glue and pocket screws will enhance the table's durability.

Finally, for the drawers, it's recommended to install them with pocket screws and slides to ensure smooth functionality.

Assembly Techniques

To guarantee a sturdy and functional coffee table, employ proper assembly techniques when building components such as attaching the side panels using bonded edges for strong joints.

Here are some key steps to follow when assembling your coffee table base:

  1. Bond Edges of Side Panels: Apply wood glue along the edges of the boards before joining them together to ensure a reliable bond that will withstand daily use.
  2. Utilize Pocket Holes for Shelf Boards: Create pocket holes in the shelf boards to securely attach them to the coffee table base, providing stability and preventing movement over time.
  3. Secure Legs with Pocket Screws: Use both glue and pocket screws to attach the legs to the cross supports, reinforcing the structure and enhancing the table's overall strength.

Installation Process

ease of installation highlighted

To start the installation process, you'll need to drill pocket holes in the shelf ends to guarantee a secure fit.

Next, glue and clamp the shelf in place for added stability before attaching it securely with pocket screws for support.

Advertisement

Additionally, installing aprons at the base of the table will provide extra structure, while ripping plywood for drawer construction will help maximize storage space.

Assembly Steps Overview

Wondering how to effectively install the components of your coffee table with storage? Here's an overview of the assembly steps to guide you through the process:

  1. Attach the Table Top: Start by securing the table top to the base using brad nails as outlined in the free plans provided. This step forms the foundation of your coffee table.
  2. Construct and Install Storage Features: Drill pocket holes in the shelf ends, construct drawer boxes with pocket screws, and install drawer slides for convenient access to stored items. Glue and clamp the shelf in place and attach drawer fronts with screws to complete the storage components.
  3. Final Touches:

Mark positions for shelf installation, apply a protective finish to the coffee table for durability, and clean and polish the surface for a sleek appearance.

Secure all components together to guarantee a polished and functional coffee table with ample storage space.

Functional Storage Design

How can you effectively integrate the functional storage design into your coffee table with storage for best organization and accessibility?

To start, install shelf boards using pocket screws to create compartments within the coffee table, ensuring proper alignment for a sturdy frame.

Advertisement

Attach drawer slides and boxes to allow easy access to hidden storage spaces.

Consider incorporating a swivel top design for convenient access to the compartments.

Enhance the visual appeal by utilizing decorative pole wrap and achieving a smooth finish on your DIY coffee table.

These elements combine to not only offer practical storage solutions but also add a stylish touch to your living space.

Design and Materials

innovative architecture and construction

Consider the design and materials carefully when planning to build a coffee table with storage to guarantee that functionality and aesthetics are balanced effectively.

When constructing a Storage Coffee Table, keep the following key aspects in mind:

Advertisement
  1. Side Panels: Utilize sturdy side panels to provide structural support and enhance the overall design of the table.
  2. Using 1 1/4 pocket: Incorporate 1 1/4 pocket holes to join the various components securely, ensuring the coffee table's durability and longevity.
  3. Material Selection: Choose high-quality materials such as wood, metal, or glass to create a visually appealing and functional piece that complements your living room decor seamlessly.

Finishing and Maintenance

craftsmanship and attention to detail

To safeguard the longevity and aesthetic charm of your coffee table with storage, applying a protective finish is essential. A safeguarding finish acts as a barrier against daily wear and tear, spills, and scratches, preserving your table's pristine appearance for years to follow.

Furthermore, establish a routine of cleaning and polishing the surface regularly to uphold its shine and visual allure. This uncomplicated step not only enhances the overall appearance of your coffee table but also aids in preventing the accumulation of dirt.

When it comes to upkeep, employ a gentle sanding technique to keep the table's surface sleek and devoid of flaws. By smoothing any uneven areas or scratches, you'll guarantee a flawless and refined finish.

Keep in mind, a well-preserved coffee table not only enhances the functionality of your living area but also enhances its aesthetic appeal. Therefore, dedicate time to maintain your creation, and it will continue to impress for years to come.

Coffee Table Design With Storage

functional coffee table solution

Coffee tables with storage cleverly blend functionality and style, offering a practical solution for organizing items in your living space.

When designing a coffee table with storage, make sure to take into account the following:

  1. Concealed Compartments: Incorporate concealed compartments or drawers into the design to keep clutter out of sight and maintain a clean look in your living room.
  2. Easy Accessibility: Ensure that the design allows for easy access to frequently used items, making it convenient to store and retrieve belongings as needed.
  3. Customization: Personalize the coffee table with storage to fit your decor style and storage needs. You can choose different materials, colors, and sizes to match your existing furniture and enhance the overall aesthetic of the room.

Before starting the construction process, create a detailed cut list to accurately measure and cut the materials needed for your coffee table with storage.

Planning ahead will help you build a functional and stylish piece that enhances both the look and organization of your living space.

Advertisement

Frequently Asked Questions

How to Build a Storage Ottoman Coffee Table?

To build a storage ottoman coffee table, start by creating a sturdy frame, adding padding and upholstery, and incorporating a hinged or removable top. Customize with different fabrics, colors, and sizes to match your home decor and storage needs.

How Do I Keep My Coffee Table Organized?

Keep your coffee table organized by utilizing storage compartments for remote controls, coasters, and magazines. Incorporate drawers for pens and notepads. Use baskets or decorative boxes for loose items. Separate items with dividers or trays and regularly declutter.

What Should Your Coffee Table Match?

To create balance in your living space, your coffee table should match the style and color scheme of your decor. Consider the material and storage options that complement your existing furniture while adding functionality and flair.

How Do You Put a Coffee Table in a Large Room?

In a large room, place your coffee table strategically to anchor the space. Opt for a size that complements the room without overwhelming it. Create balance by using a larger table or multiples for a cohesive look.

Conclusion

To sum up, building a coffee table with storage is a practical and stylish solution for any living space. With the right materials and design, you can create a functional piece of furniture that adds both storage and style to your home.

Advertisement

So why settle for a regular coffee table when you can have one that does double duty? Start building your own storage coffee table today and elevate your living space to the next level!

Continue Reading

Tips and Tricks

Hidden Storage: How to Build a Concealment Coffee Table!

Kickstart your DIY journey with a coffee table that conceals hidden storage – discover how to build it step by step!

Published

on

By

diy hidden compartment furniture

Looking to craft a concealment coffee table with hidden storage? Start by prepping materials and making precise cuts for tabletop and components. Use pocket holes for secure assembly and apply paint and stain for a weathered finish, adding water-based urethane for protection. Install X braces with half lap joints and glue, ensuring stability. Anchor the bottom board securely and set up shelves for increased storage. To enhance security, consider a biometric lock. For a polished appearance, distress the wood before sanding. Position end boards with screws and test the lock's functionality. Ready to elevate your DIY skills with this project?

Key Takeaways

  • Incorporate a hidden compartment in the coffee table design for discreet storage.
  • Secure bottom board and shelf for easy access to the concealed storage area.
  • Utilize biometric lock for added security and convenience in accessing hidden compartment.
  • Follow precise assembly instructions including half lap joints and pocket holes for stability.
  • Ensure smooth tabletop operation with properly installed slides for the hidden compartment.

Material Preparation and Initial Cuts

How do you maintain a square and professional look for your concealment coffee table during material preparation and initial cuts?

To achieve this, ensuring excellent customer service starts with removing the rounded edges of the two by four and two by six materials. By doing so, you lay the foundation for a seamless construction process.

The two by six material is then ripped to a width of five and eight inches, crafting the tabletop, while the two by four material is cut to three inches wide for specific components of the table.

Additionally, square stock material is also prepared for use in constructing the coffee table.

These initial cuts are critical in guaranteeing precise measurements and a polished finish for your project. By prioritizing accuracy and attention to detail in the early stages, you set the stage for a successful build and a satisfied customer.

Advertisement

Assembly and Finishing Techniques

craftsmanship and attention to detail

To guarantee a strong and visually attractive end product, use pocket holes for secure joinery when assembling the front and back sections of the X-Frame farmhouse concealment coffee table.

Before staining, apply black spray paint to parts of the table for a weathered look. Once the paint dries, stain the tabletop with Minwax's early American stain.

For a long-lasting finish, coat the tabletop with a water-based urethane to protect against daily wear and tear.

When installing the X braces, incorporate half lap joints and glue for added stability and structural integrity. To make sure everything functions seamlessly, test all components before finalizing the assembly.

Finally, when installing the bottom board and bottom shelf of the concealment coffee table, make sure to secure them properly for easy access and maintenance.

Following these assembly and finishing techniques will result in a beautifully crafted concealment coffee table that meets both aesthetic and functional requirements.

Advertisement

Installation Techniques

detailed installation process discussed

Securely installing the bottom board is necessary to create a functional hidden compartment within the concealment coffee table. When securing the bottom board, you need to make sure it's firmly attached to provide a stable base for the hidden compartment.

To enhance the table's stability and visual appeal, use half lap joints and glue to install the X braces. This method not only reinforces the structure but also adds a touch of elegance to the design.

Proper installation of slides is vital to prevent friction and guarantee the smooth operation of the tabletop when accessing the hidden compartment. Additionally, incorporating a bottom shelf can offer extra storage space, maximizing the functionality of the concealment coffee table.

For added security and convenience, consider installing a biometric lock to safeguard the hidden compartment while allowing easy access. By following these installation techniques carefully, you can create a concealment coffee table that's both practical and stylish.

Final Assembly and Additional Features

finalizing the product s completion

Apply distressing techniques to the painted parts for a weathered appearance before proceeding with the final assembly and incorporation of additional features. Once the distressing is complete, sand the surfaces for a polished finish before moving on to staining the tabletop. Securely install the end boards using screws to ensure stability, and then position the bottom cleat and slide supports to provide adequate support for the tabletop. Test the lock functionality to guarantee proper operation and security for your concealed storage space.

To keep your project within budget and save money, consider repurposing materials or using cost-effective alternatives. Here's a simple cost-saving idea to help you along the way:

Cost-Saving Idea Description
Upcycle Old Drawer Repurpose an old drawer as a secret compartment to save money on material costs.

Building X-Frame Farmhouse Table

rustic farmhouse table design

Before starting the construction of the X-Frame Farmhouse Table, make sure you have all the necessary materials and tools ready for the project.

Let's talk about how to build this unique piece. Begin by preparing two by fours and two by sixes, ensuring the rounded edges are removed for a square look. Utilize pocket hole joinery for assembly, creating a sturdy frame for the table.

Advertisement

The video tutorial provides detailed instructions on constructing a regular coffee table with a farmhouse design, offering a twist on traditional style. Remember to refer to the cut list and plans available to guide you through the construction process effectively.

After assembly, consider adding distressing effects with black spray paint, staining the tabletop for a rustic touch, and applying a water-based urethane finish for protection.

Frequently Asked Questions

How to Build a Storage Ottoman Coffee Table?

To build a storage ottoman coffee table, cut plywood to size, attach foam padding and fabric, leaving one side open. Add a hinge for easy access to the storage compartment. Place it on a coffee table base for a functional piece.

How Do You Make a Suitcase Into a Coffee Table?

Turn that old suitcase into a coffee table oasis! Create a flat surface by removing hardware, add legs for stability, top it off with glass for a sleek finish. Customize with paint to match your style.

How to Make a Large Footstool Coffee Table?

To make a large footstool coffee table, secure the footstool to a sturdy base, then add a wood or glass tabletop. Customize it to match your style and incorporate hidden storage for a practical touch.

Advertisement

How Do I Keep My Coffee Table Clutter Free?

To keep your coffee table clutter-free, utilize hidden storage for remote controls and magazines. Incorporate removable trays to organize small items. Designate spots for coasters. Use trays for keys and pens. Regularly declutter to maintain a tidy living space.

Conclusion

Now that you've learned how to build a concealment coffee table, you may be thinking it sounds too complicated.

But don't worry! With the right materials and a little patience, you can easily create a stylish and functional piece of furniture that adds extra storage to your space.

So give it a try and impress your friends with your DIY skills!

Advertisement
Continue Reading

Tips and Tricks

Rustic Charm: How to Build a Farmhouse Coffee Table!

A rustic farmhouse coffee table awaits with step-by-step instructions for creating a charming centerpiece – discover the secrets to crafting your own!

Published

on

By

diy farmhouse coffee table

Gather tools like a saw, drill, and wood screws. Use pine or oak for lasting quality. Attach the table top to the legs with screws. Secure a shelf at the bottom. Add a drawer for storage. Distress the wood for a weathered appearance. Stain with various colors for aged appeal. Apply polyurethane for a shiny finish. Keep the table by cleaning regularly. Prolong its life by reapplying sealant. Master the art of building for an engaging farmhouse coffee table. Further details can enhance your crafting journey towards a rustic masterpiece.

Key Takeaways

  • Choose pine or oak for durability and use a Kreg Jig for strong joints.
  • Distress wood for a weathered look with sanding, denting, and scraping techniques.
  • Layer different stain colors for an authentic aged appearance.
  • Apply polyurethane sealant for a glossy finish and long-lasting protection.
  • Regularly maintain by cleaning, reapplying sealant, and avoiding direct sunlight and heat.

Tools and Supplies Required

Gather the necessary tools and materials needed for building a farmhouse coffee table, including a saw, drill, sandpaper, wood glue, wood screws, wood stain, and polyurethane sealant. To make assembly easier, consider using a Kreg Jig for creating strong joints without visible screws on the tabletop.

When selecting wood stain, opt for a color that complements your decor style and enhances the natural beauty of the wood.

For a farmhouse coffee table, the wood type plays an important role in achieving the desired rustic look. Pine or oak are popular choices due to their durability and aesthetic appeal. To ensure a strong construction, use wood screws of appropriate length and thickness.

When applying the wood stain, consider adding multiple coats for a richer color depth.

Step-by-Step Assembly Instructions

precise assembly guide provided

Consider starting the assembly process by sanding and distressing the wood to achieve a rustic appearance before moving on to staining and sealing for a farmhouse coffee table. To efficiently build a farmhouse coffee table with storage space, follow these step-by-step assembly instructions:

Step Instructions Tools Required
1 Attach table top to legs Drill, Screws
2 Secure shelf to bottom Drill, Screws
3 Join side aprons to legs Drill, Screws
4 Install drawer for storage Drill, Screws

Distressing and Staining Techniques

artistic distressing and staining

Start distressing and staining the wood to achieve a rustic appearance for your farmhouse coffee table by utilizing techniques such as sanding, denting, and scraping to create a weathered look. Distressing wood involves intentionally aging the surface to give it a worn-out character.

By using tools like sandpaper, chains, or even a hammer, you can add dents, scratches, and imperfections to mimic natural wear and tear. Once the distressing is complete, staining techniques come into play.

Advertisement

Staining wood not only adds color but also enhances the distressed areas, giving them depth and a richer hue. Consider layering different stain colors to create a more authentic aged look on your coffee table.

These techniques can be customized to suit your preferences and achieve the desired level of rustic charm. Remember, after distressing and staining, applying a matte finish sealant will protect the wood while preserving its natural appearance.

Applying Polyurethane Sealant

protecting wood with sealant

To protect your farmhouse coffee table and enhance its appearance, consider applying a durable polyurethane sealant that provides a glossy finish while safeguarding the wood surface from moisture damage, stains, and scratches.

Start by ensuring the surface is clean and dry before beginning the application process. Apply the polyurethane sealant using a high-quality brush, working in the direction of the wood grain for a smooth finish.

When applying multiple coats, make sure to lightly sand the surface between each coat to remove any imperfections and achieve an even finish. This step is essential for ensuring the polyurethane adheres properly and results in a durable protective layer.

Allow each coat to dry completely before applying the next one to avoid any tackiness or bubbling. The final coat should be left to dry thoroughly to maximize the effectiveness of the sealant and provide a long-lasting, glossy appearance for your farmhouse coffee table.

Advertisement

Maintenance Tips for Longevity

extend the life span

Regularly cleaning your Farmhouse Style Coffee table with a damp cloth is essential for preserving its longevity and charm. Removing dust and debris will help maintain its appearance and prevent premature wear. Remember to reapply a coat of polyurethane sealant every 1-2 years to protect the wood from spills and scratches, ensuring your DIY Farmhouse Coffee table stays in top condition.

When placing items on your new coffee table, be cautious not to place hot objects directly on its surface. Heat can damage the wood, causing unsightly marks. Keep an eye out for any signs of wear and tear, such as scratches or dents, and address them promptly to prevent further damage.

Additionally, it's vital to shield your table from direct sunlight to avoid fading and warping over time. By following these maintenance tips and giving your coffee table the care it deserves, you can enjoy its rustic charm for years to come.

Enjoying Your Finished Coffee Table

building a beautiful coffee table

Embrace the sense of accomplishment as you sit back and admire your newly finished farmhouse coffee table. Your hard work has paid off, and now it's time to enjoy the fruits of your labor.

Here are a few ways to fully appreciate your new table in your living room:

  • Share the Joy: Snap some photos of your masterpiece and share them on social media. Inspire others to take on DIY projects like this one.
  • Functional Design: Notice the holes on each end of the table where you can easily thread cables for a clean and organized look.
  • Rustic Charm: Take a moment to appreciate the rustic charm and craftsmanship of the table. Each imperfection adds character and uniqueness.
  • Sit Back and Relax: Kick back with a cup of coffee or a good book and revel in the satisfaction of creating something beautiful with your own hands. You'll LOVE to see how it enhances your living space.

Frequently Asked Questions

What Should Your Coffee Table Match?

Your coffee table should match the overall style and color scheme of your living space. When choosing the perfect coffee table that complements your home, it's crucial to take into account existing furniture, room proportions, and durability requirements.

How to Style a Two-Tier Coffee Table?

When styling a two-tier coffee table, mix textures and heights for a visually appealing look. Utilize the lower shelf for baskets, plants, or trays, and the top tier for coffee table books, candles, and personal touches.

What Shape Tray for Rectangular Coffee Table?

For a rectangular coffee table, opt for a rectangular tray to create a cohesive look. Consider the tray's size in relation to the table for balance. Choose a tray that complements the table's style and color for a harmonious design.

Advertisement

How to Make a Coffee Table With Wheels?

To make a coffee table with wheels, start by choosing sturdy wheels that match your table's style. Attach them securely to the legs for easy movement. Just like a trusty steed that carries you forward, let these wheels glide your table effortlessly.

Conclusion

Now that you've completed building your farmhouse coffee table, it's time to sit back, relax, and enjoy the rustic charm it brings to your space.

By following the easy step-by-step instructions and adding your own personal touches through distressing and staining, you've created a beautiful piece of furniture that will last for years to come.

So grab a cup of coffee, put your feet up, and bask in the satisfaction of a job well done!

Advertisement
Continue Reading
Advertisement

Affiliate disclaimer

As an affiliate, we may earn a commission from qualifying purchases. We get commissions for purchases made through links on this website from Amazon and other third parties.

Advertisement

Vetted

Tanpopo Konditorei Café Munich Tanpopo Konditorei Café Munich
Vetted2 months ago

Indulge in Delights at Tanpopo Konditorei Café Munich

Savor the exquisite pastries and serene ambiance at Tanpopo Konditorei Café Munich, your go-to spot for a sweet retreat in...

Vetted2 months ago

Here’s a new version of the review for “The Creative Spark: Unleashing Your Inner Artist”:

Book Review: “The Creative Spark: Unleashing Your Inner Artist” Illuminating the Path to Creative Awakening Manifestation Journal – Goal &...

top shower scrubbers 2024 top shower scrubbers 2024
Vetted3 months ago

15 Best Shower Scrubbers to Make Cleaning a Breeze in 2024

Discover the top 15 shower scrubbers of 2024 that promise effortless cleaning—find out which one will transform your scrubbing experience!

top storm doors 2024 top storm doors 2024
Vetted3 months ago

The 15 Best Storm Doors of 2024 – Enhance Your Home's Curb Appeal and Protection

Optimize your home's curb appeal and security with the 15 best storm doors of 2024—discover the unique features that could...

stylish outdoor dining sets stylish outdoor dining sets
Vetted3 months ago

15 Best Outdoor Dining Sets for Stylish Al Fresco Dining in 2024

Browse our curated list of the 15 best outdoor dining sets for stylish al fresco dining in 2024, and discover...

top cordless lawn mowers top cordless lawn mowers
Vetted3 months ago

15 Best Cordless Electric Lawn Mowers of 2024 – Power and Convenience Combined

Harness the power of convenience with the 15 best cordless electric lawn mowers of 2024—discover which one will revolutionize your...

top stackable washer dryers top stackable washer dryers
Vetted3 months ago

15 Best Stackable Washer Dryers of 2024 – Space-Saving Solutions for Your Laundry Room

Get ready to discover the 15 best stackable washer dryers of 2024 that will transform your laundry room into a...

ultimate comfort chair massagers ultimate comfort chair massagers
Vetted3 months ago

15 Best Back Massagers for Your Chair: Ultimate Comfort and Relief

Have you been searching for the perfect back massager to elevate your comfort? Discover the 15 best options that promise...

healthier caffeine free mushroom coffees healthier caffeine free mushroom coffees
Vetted3 months ago

14 Best Caffeine-Free Mushroom Coffees for a Healthier Brew

Mushroom coffees offer a healthier brew alternative—discover the 14 best caffeine-free options that might just transform your morning routine!

top bathroom fans 2024 top bathroom fans 2024
Vetted3 months ago

15 Best Bathroom Fans of 2024 – Quiet, Efficient, and Stylish Options

You won't believe the stylish and efficient bathroom fans of 2024 that promise quiet operation and enhanced ventilation—discover your perfect...

adaptogenic mushroom coffee benefits adaptogenic mushroom coffee benefits
Vetted3 months ago

15 Best Adaptogenic Mushroom Coffees to Boost Your Wellness Routine

The 15 best adaptogenic mushroom coffees promise to elevate your wellness routine—discover how these blends can transform your health and...

mushroom coffee pods selection mushroom coffee pods selection
Vetted3 months ago

15 Best Mushroom Coffee Pods to Boost Your Morning Brew

Uncover the top 15 mushroom coffee pods that can transform your morning routine and unleash a new level of energy...

Trending