Tips and Tricks
Pot Perfection: How to Assemble a Coffee Pot Step by Step!
Discover the secrets to assembling a coffee pot flawlessly for the perfect cup of coffee with a step-by-step guide.
To properly put together your coffee maker, begin by grinding the coffee to a consistency similar to table salt. Use 1 to 1.5 tablespoons for each shot and grind right before brewing. Remember to check important parts like the filter and O-ring for a secure fit. Then, keep the brewing temperature at 200°F and spread the grounds evenly. When the pressure is smoothly released, pour carefully. Select the correct pot size and filter, clean the parts after every use, and use mild cleaning products to maintain quality. Becoming proficient in this procedure will result in a delightful cup of coffee!
Key Takeaways
- Ensure silicone O-ring is in place for a tight seal.
- Fill water compartment appropriately for brewing pressure.
- Place coffee filter with pinholes securely in the brewing chamber.
- Tighten all components properly before brewing.
- Monitor safety valve for proper pressure release during brewing.
Understanding Moka Pot Basics
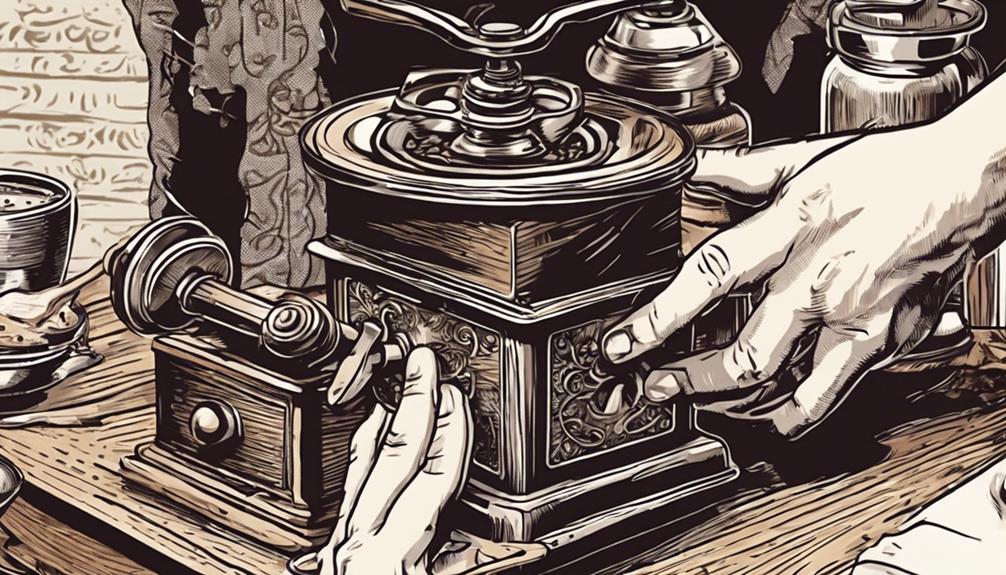
To make a great cup of coffee with a Moka pot, you must first grasp the fundamental basics of how this stovetop coffee maker operates. One key aspect to master is how to grind coffee.
The grind size for a Moka pot is essential; it should be finer than drip coffee but not as fine as espresso. The ideal grind consistency is similar to table salt. Using the correct grind size guarantees optimal extraction during the brewing process.
When grinding coffee for a Moka pot, a burr grinder is recommended for a more consistent grind size. Blade grinders can result in uneven grounds, affecting the flavor and extraction.
Measure out the coffee beans needed for your brew, typically around 1 to 1.5 tablespoons per espresso shot. Grind the coffee just before brewing to preserve its freshness and aroma.
Understanding the significance of grinding coffee to the right consistency sets the foundation for a delicious cup of Moka pot coffee.
Identifying Key Components
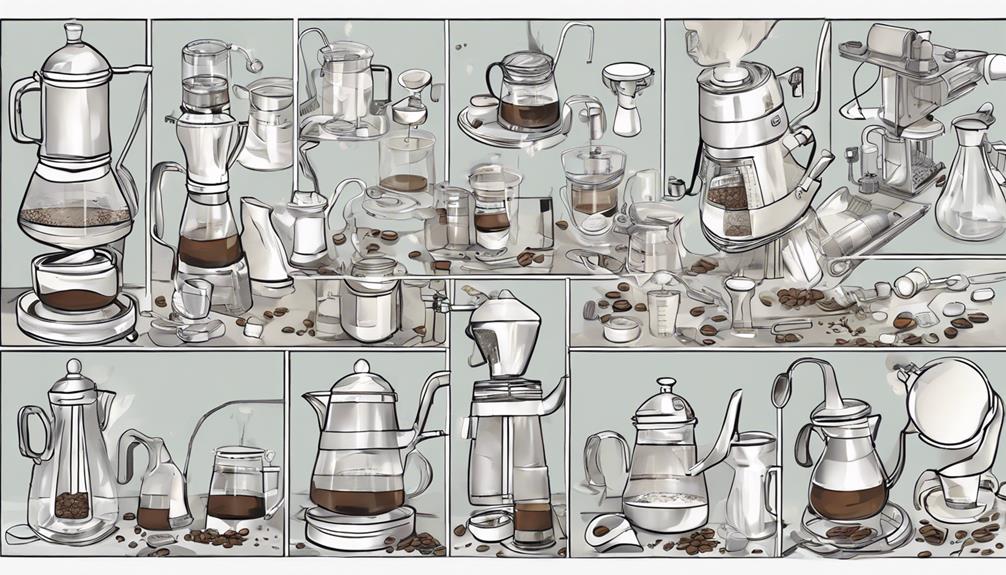
You need to understand the functions of each key component to successfully assemble a Moka pot.
The filter with pinholes, silicone O-ring, water compartment, brewing chamber, and safety valve all play essential roles in brewing your coffee.
Familiarizing yourself with these components will guide you through the assembly steps for a delicious cup of coffee.
Component Functions
Understanding the key components of a Moka pot is essential for assembling it correctly. The coffee filter is a crucial element of the Moka pot, designed with pinholes that allow the espresso powder to pass through during the brewing process. The silicone O-ring plays a vital role in creating a tight seal between the two main pieces of the Moka pot, ensuring proper pressurization. The water compartment is where you fill the water that will be heated to generate the pressure needed for brewing coffee. The brewing chamber is where the coffee grounds are placed, and it collects the brewed coffee as the process unfolds. Lastly, the safety valve is an important component that prevents any dangerous pressure build-up inside the Moka pot while brewing.
Component | Function |
---|---|
Coffee Filter | Allows espresso powder to pass through during brewing. |
Silicone O-ring | Creates a tight seal between main pot pieces for proper pressurization. |
Water Compartment | Holds water that is heated to create brewing pressure. |
Brewing Chamber | Where coffee grounds are placed and brewed coffee collects. |
Safety Valve | Prevents pressure build-up inside the Moka pot during brewing. |
Assembly Step Guide
Identifying the key components of a Moka pot is necessary before proceeding with the assembly process. Here are the key components you need to know:
- Filter with Pinholes:
This is where you place your coffee grinds. The filter allows water to pass through the coffee, extracting its flavors to brew your espresso.
- Silicone O-Ring:
The O-ring is essential for creating a tight seal between the top and bottom chambers of the Moka pot. It guarantees that no liquid leaks out during the brewing process.
- Water Compartment:
This is where you pour water into the Moka pot. It's recommended to fill it up to the bottom of the safety valve to secure proper brewing and prevent any accidents.
- Brewing Chamber:
The brewing chamber is where the magic happens. This is where the coffee grinds steep in the hot water and produce the delicious espresso that you crave.
Mastering the Brewing Technique
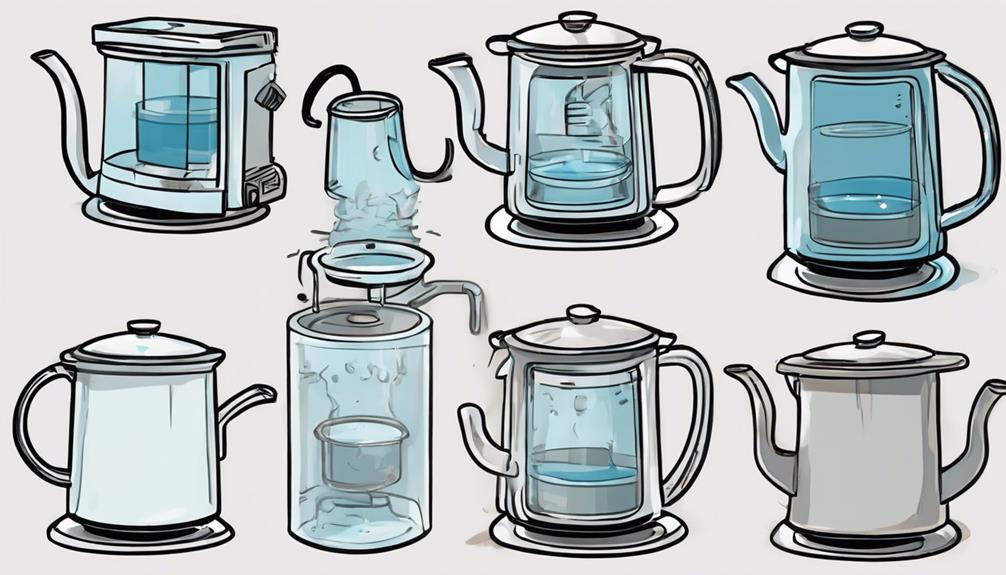
To master the brewing technique, you need to focus on controlling the temperature, distributing the coffee powder evenly, and monitoring the pressure release.
These three key points are essential in ensuring a perfect cup of coffee from your Moka pot.
Brewing Temperature Control
Maintain ideal brewing temperature in your Moka pot by slowly heating it on a low flame to prevent overheating and scorching the coffee. This careful supervision guarantees that your coffee extracts the best flavors from the grounds, resulting in a delicious and aromatic brew.
To master the brewing temperature control in your Moka pot, follow these tips:
- Gradual Heating: Start with a low flame to gradually bring the pot to the ideal temperature without risking overheating.
- Optimal Temperature: Aim for around 200°F (93°C) to achieve the perfect balance of flavors from your coffee grounds.
- Avoid High Heat: Steer clear of high heat settings that can scorch the coffee, impacting the taste and quality of your brew.
- Consistent Monitoring: Keep a close eye on the brewing temperature to control the extraction process effectively and guarantee a rich and balanced coffee flavor.
Coffee Powder Distribution
Properly spreading fine espresso powder in your Moka pot is vital for achieving a rich and flavorful coffee concentrate. When it comes to coffee powder distribution, using fine espresso powder is pivotal as it allows for proper extraction through the small holes in the filter.
To ensure ideal brewing, it's essential to distribute the coffee powder evenly and compactly. This even distribution helps create a tight 'puck,' which controls the flow of water during the brewing process and enhances the extraction of flavors from the coffee grounds.
Mastering the technique of distributing the coffee powder in your Moka pot is fundamental to brewing a perfect cup of coffee. By compacting the powder correctly, you set the stage for a well-balanced and delicious brew.
Pressure Release Monitoring
Monitoring the steam release during brewing in your Moka pot is critical for achieving the ideal pressure and temperature needed to extract the full flavors of your coffee. Proper pressure release guarantees a balanced and flavorful brew without the risk of accidents.
Here's how to effectively monitor the pressure release:
- Check the Valve: Confirm the pressure release valve is clean and free of any blockages that could impact its function.
- Listen for Consistent Steam Release: Pay attention to the sound of steam escaping from the valve. A steady release indicates proper pressure control.
- Observe Steam Intensity: The steam should be released gently and continuously throughout the brewing process, maintaining the right pressure level.
- Adjust Heat Source if Needed: If the steam release is too weak or too strong, adjust the heat source to regulate the pressure inside the Moka pot effectively.
Mastering the art of pressure release monitoring is crucial to brewing exceptional coffee with your Moka pot.
Perfecting the Serving Process
To perfect the serving process of your coffee brewed in a Moka pot, ensure the coffee oozes out smoothly resembling melted chocolate before pouring. This secures the best flavor extraction, enhancing your coffee experience. Here is a simple guide to help you serve your freshly brewed Moka pot coffee like a pro:
Serving Process Tips |
---|
Wait for coffee to ooze out smoothly like melted chocolate before pouring. |
Use a heat-resistant surface to prevent accidents when handling the hot Moka pot. |
Brew time is around 2 minutes for quick and efficient serving. |
Moka pots typically yield 3-4 cups of rich, aromatic coffee. |
Mastering the serving process is crucial for the perfect cup of Moka pot coffee. |
Determining Brew Quantity
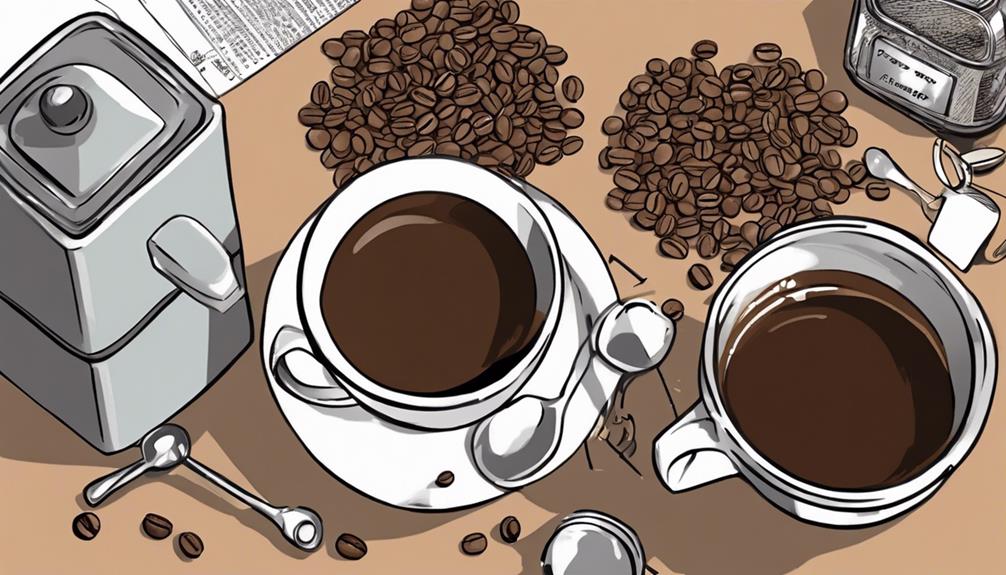
Determining the brew quantity of your Moka pot is vital for achieving consistent results with each brewing session. When figuring out how much coffee your Moka pot can produce, consider the following:
- Pot Sizes: Moka pots come in different sizes, typically ranging from 1 to 12 cups. Select a pot size based on your brewing needs to avoid wastage or the need for multiple brews.
- Maximum Fill Line: Most Moka pots have a clear indication of the maximum fill line inside the water compartment. Be sure not to surpass this line to prevent brewing issues.
- Cup Consideration: It's important to think about the number of cups you want to brew. Overfilling the water compartment can lead to uneven extraction and affect the quality of your coffee.
- Consistency: Each Moka pot size is crafted to deliver a specific amount of coffee. Understanding this guarantees that you consistently prepare the right quantity of coffee for yourself or guests.
Ensuring Proper Maintenance
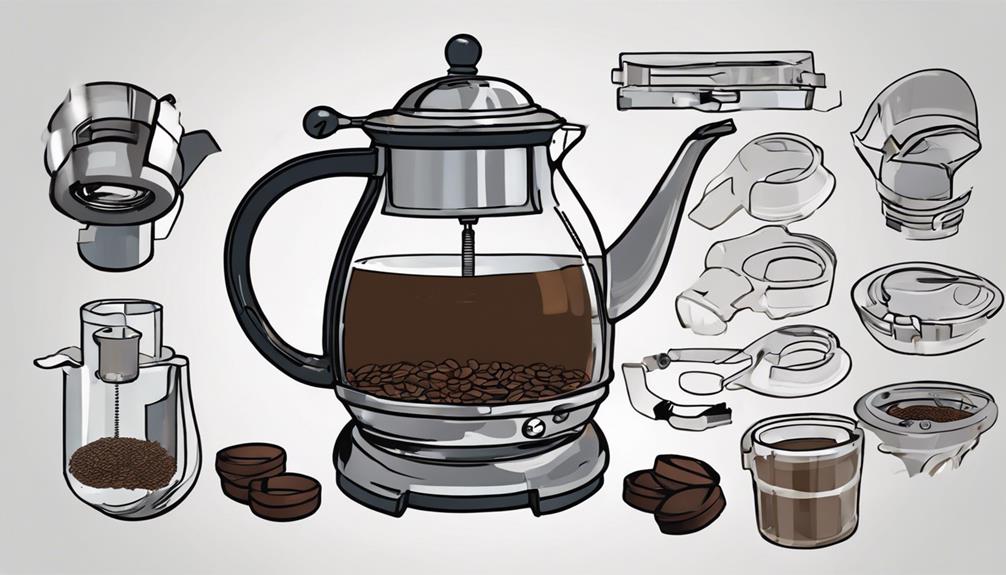
When maintaining your Moka pot, make sure you regularly inspect key components such as the safety valve and O-ring to prevent issues during brewing. Check the cleanliness of the safety valve to avoid blockages that can disrupt the brewing process. Additionally, inspect the O-ring and filter for any wear or damage that might compromise the seal necessary for proper brewing. It's important to use the correct size filter for the type of coffee you're making to ensure best extraction.
After brewing, assess the quality of your coffee by examining the compacted coffee grounds, known as the 'puck.' This can give you insights into your brewing technique and the grind size used.
To maintain your coffee maker effectively, wipe down the Moka pot after each use to remove any leftover water and coffee residue. Keeping your Moka pot clean and well-maintained will help you brew delicious coffee consistently.
Checking Safety Features
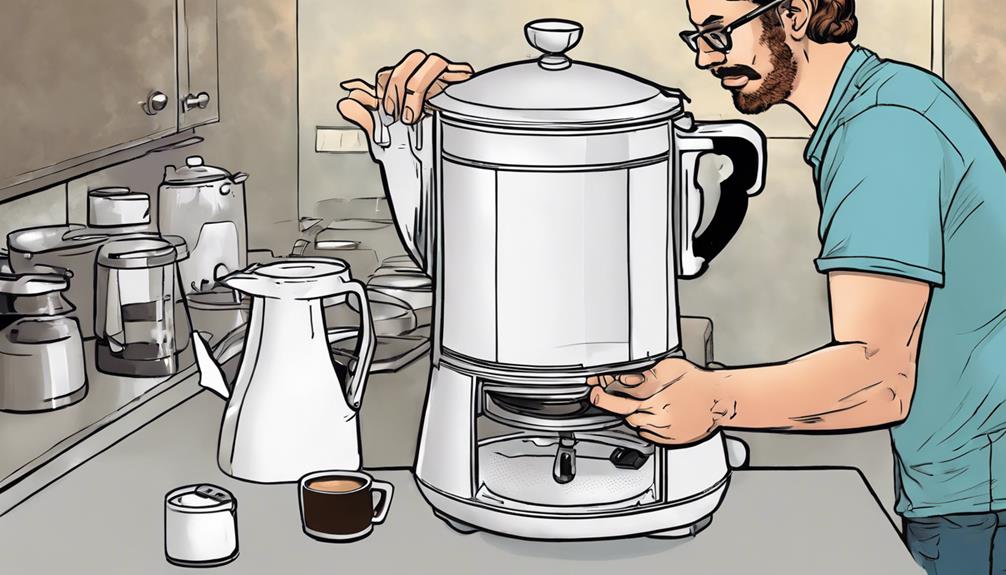
Regularly checking the cleanliness and functionality of the safety valve in your Moka pot is vital for guaranteeing a safe and efficient brewing experience. The safety valve plays an important role in preventing pressure build-up during the brewing process and releasing excess steam to maintain a secure environment while making your favorite coffee.
Here are some key points to keep in mind when inspecting the safety features of your coffee pot:
- Visual Inspection: Look for any signs of clogging or dirt buildup in the safety valve. Ensure it's clean and free from any obstructions that may impede its proper function.
- Testing Pressure Release: Conduct a pressure release test to verify that the safety valve is operating correctly. This ensures that steam can escape effectively during brewing, preventing any potential accidents.
- Regular Maintenance: Make it a habit to clean the safety valve after each use to avoid blockages and maintain its effectiveness in protecting your coffee-making process.
- Safety First: Remember, a well-maintained safety valve not only enhances the safety of your Moka pot but also contributes to the longevity and performance of your beloved coffee maker.
Selecting the Right Filter
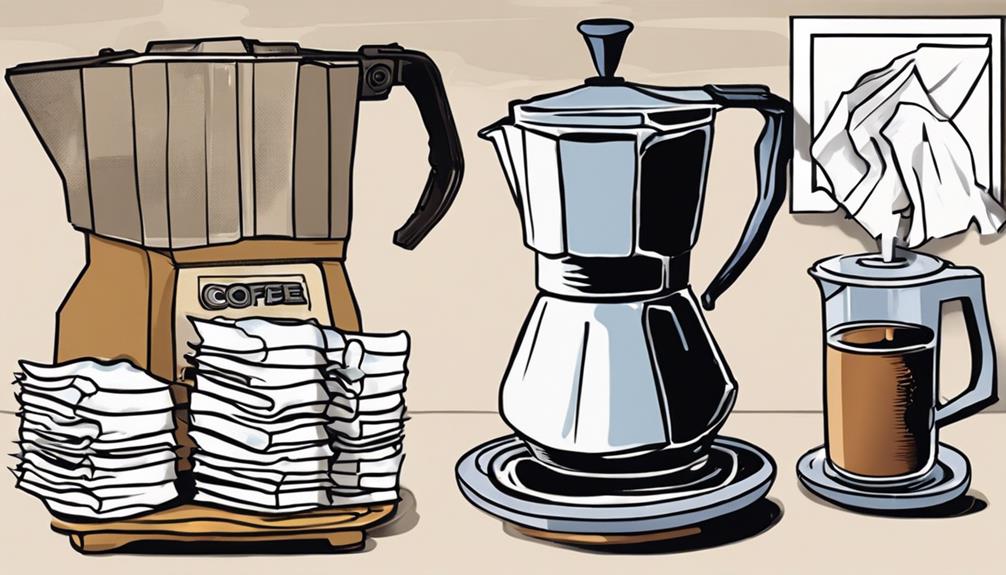
To ensure the best coffee extraction and a smooth brewing process, selecting the right filter for your Moka pot is necessary. The filter in a Moka pot has pinholes that allow water to pass through while brewing espresso powder. Choosing the correct filter size based on your coffee type is vital. Filters with larger holes are suitable for coarser coffee grounds, whereas filters with smaller holes are ideal for fine espresso powder. Ensuring your filter is well-maintained is key to a smooth brewing process and best coffee extraction. Regularly inspecting the filter for clogs or damages can help maintain the quality of your coffee.
Filter Type | Coffee Ground Size |
---|---|
Larger Holes | Coarser Grounds |
Smaller Holes | Fine Espresso Powder |
Cleaning and Storage Tips
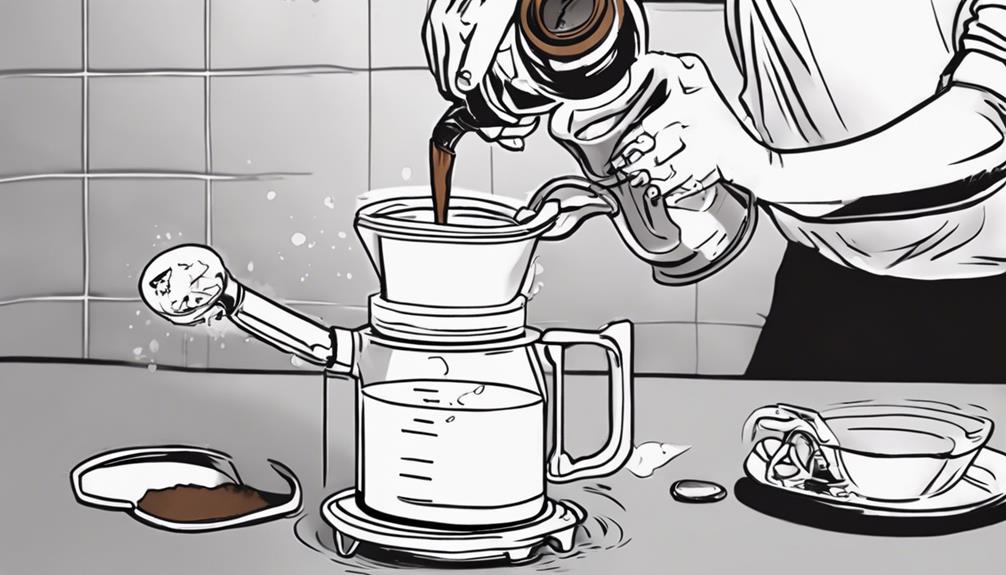
For maintaining the quality of your coffee and ensuring the longevity of your Moka pot, proper cleaning and storage are key aspects to consider. Follow these essential cleaning and storage tips to keep your coffee pot in top condition:
- Clean Thoroughly After Each Use: Disassemble the Moka pot and rinse all parts with warm water. Use a soft brush or cloth to scrub off any coffee residue from the filter and brewing chamber.
- Air Dry Completely: Allow all components to air dry completely before putting the Moka pot back together for storage. This helps prevent mold or mildew growth.
- Choose the Right Storage Spot: Store your Moka pot in a cool, dry place away from direct sunlight. Direct sunlight can cause damage or discoloration to the pot over time.
- Avoid Harsh Cleaning Agents: Refrain from using harsh chemicals or abrasive materials when cleaning the Moka pot. Opt for gentle cleaning methods to preserve its quality and longevity.
Frequently Asked Questions
How Do You Make a Pot of Coffee Step by Step?
To make a pot of coffee, start by filling the water compartment and adding fine espresso powder. Heat the pot slowly, letting the coffee ooze out smoothly. Once it flows like melted chocolate, pour and savor the rich brew. Enjoy!
How Much Coffee Do You Put in a Perfect Pot of Coffee?
To brew the perfect pot of coffee, you'll need 14-18 grams of finely ground coffee per cup of water. This golden ratio guarantees a flavorful and well-balanced brew. Experiment with different beans and grinds for your ideal cup.
How to Use a Coffee Maker Step by Step?
To use a coffee maker step by step, start by filling the water compartment to the pressure-release valve. Add fine espresso powder, heat on low, and brew for 2 minutes. When it oozes like melted chocolate, your coffee's ready to pour.
How to Make the Perfect Brewed Coffee?
Want to make the perfect brewed coffee? Use fine espresso powder, compact it into a 'puck,' heat the Moka pot slowly, brew for 2 minutes, and pour when it flows like melted chocolate. Enjoy!
Conclusion
Now that you've mastered the art of assembling a coffee pot step by step, you're ready to brew your way to pot perfection. Like a conductor leading an orchestra, you'll orchestrate the perfect cup of coffee every time. Next, why not try your hand at assembling a coffee plunger? With the same attention to detail and precision, you can create a once-in-a-lifetime cup of coffee that will satisfy even the most discerning palate. Just like with the coffee pot, follow the step-by-step instructions and soon you’ll be an expert at crafting the perfect cup of coffee using a plunger. Keep honing your skills and soon you’ll be regarded as a coffee connoisseur. Once you’ve perfected the art of assembling a coffee plunger, why not take your skills to the next level by assembling a coffee press? With the same level of precision and dedication, you can create a truly exceptional cup of coffee that will impress even the most discerning coffee connoisseurs. Follow the step-by-step instructions and soon you’ll be known for your ability to craft the perfect cup of coffee using a press. Keep exploring different coffee brewing methods and before you know it, you’ll be a master of all things coffee.
So grab your Moka pot, embrace the process with confidence, and savor each rich, flavorful sip. Your coffee journey is just beginning – enjoy the ride!
Tips and Tricks
Encore Excellence: How to Assemble an Encore Coffee Grinder!
Open up the world of perfect coffee grinding with Encore Excellence – learn how to assemble an Encore Coffee Grinder for the best brewing experience!
To put together an Encore coffee grinder, be sure that the bean hopper aligns correctly with the grinder body. Look for the red dash indicators on the outer burr for precise alignment. Make sure to align the bean hopper notch properly to prevent any issues during installation. Tighten the inner burr nut counterclockwise to secure it in place. Avoid any movements that could affect the consistency of the grind. Following these steps will improve your coffee brewing experience with Encore Excellence. For more guidelines and troubleshooting tips, please refer to the instructions provided for a smooth assembly process.
Key Takeaways
- Align bean hopper notch and red dash indicators for correct installation.
- Tighten inner burr nut counterclockwise to secure in place.
- Ensure hopper lid is securely placed before grinding.
- Set grind control to desired number setting for brewing method.
- Experiment with grind settings for optimal coffee flavor.
Installation Instructions
To maintain proper functionality of your Encore Coffee Grinder, follow these installation instructions carefully. Begin by making sure the bean hopper is correctly aligned with the grinder body. This alignment is important for the grinder to operate smoothly.
Next, when assembling the inner and outer burrs, pay close attention to aligning the red dash indicators on the outer burr to guarantee correct positioning. Make sure the bean hopper notch aligns properly to avoid any issues during installation.
Secure the inner burr assembly in place by tightening the nut counterclockwise. This step is essential to prevent any movement that could affect the grind size consistency.
Before Use Guidelines
Before using your Baratza Encore grinder, make certain the bean hopper and ground coffee bin are washed for cleanliness. Rust on the burrs is normal and will disappear after a few uses.
Place the grinder on a level surface and plug it into the correct voltage for best performance. To begin, pour roasted whole coffee beans into the hopper before adjusting the grind control settings. Confirm the hopper lid is securely in place before grinding.
Set the grind control to align with the desired number setting based on your brewing method. It's essential to avoid grinding flavored coffee beans, caramelized sugar, or anything containing oils, as this can clog the grinder.
Initial Operation Steps
After confirming the correct voltage connection and preparing the coffee beans, the next step in operating your Baratza Encore coffee grinder is to insert the ground coffee bin securely. Make sure the lid from the hopper is removed before adding the desired quantity of roasted whole coffee beans. Once the beans are in place, replace the lid to the hopper to avoid spillage during grinding. Below is a simple guide to help you with the initial operation steps of your coffee grinder:
Step | Instructions |
---|---|
1 | Validate correct voltage connection |
2 | Pour roasted whole coffee beans into the hopper |
3 | Insert the ground coffee bin securely |
4 | Remove the lid from the hopper before adding beans |
5 | Replace the lid after pouring the desired quantity of coffee beans |
Following these steps will guarantee that your coffee grinder is set up correctly and ready to grind the perfect amount of coffee for your brew.
Setting Grind Control
Have you ever wondered how to precisely set the grind control on your Baratza Encore coffee grinder for the perfect cup of coffee?
The Encore grinder offers 40 distinct grind settings, allowing you to customize your grind size for Espresso, Drip, or French Press brewing methods. To set the grind control, simply rotate the bean hopper to align the grind control with the desired number setting that corresponds to your preferred grind size. This flexibility enables you to adjust the grind size based on factors such as the roast level and bean type, ensuring best flavor extraction for your coffee.
Experimenting with different settings is key to finding the perfect grind for your taste and brewing preferences. Use the front-mounted pulse button to control the grinding process with precision and consistency, making adjustments as needed until you achieve the ideal grind size for your desired cup of coffee.
Gasket Installation Troubleshooting
Facing challenges with installing the black silicone seal on your Baratza Encore coffee grinder is a common issue reported by users. Many users find it tricky to properly fit the seal into place, which can lead to concerns about its effectiveness over time.
During the seal installation process, worries may also arise about the potential impact on the durability of other grinder components. If you encounter persistent difficulties with the seal on your Baratza Encore, you might start looking into alternative grinders that don't require a silicone seal.
Exploring options for comparable grinders without this specific installation requirement could be a viable solution for those facing ongoing issues with the seal on the Baratza Encore grinder.
Resource Suggestions
Explore helpful resources such as instructional videos and detailed recommendations provided by Baratza for assembling your Encore coffee grinder effectively. You can also find troubleshooting tips and maintenance advice on Baratza’s website to ensure that your Encore coffee grinder continues to function optimally. In addition, Baratza offers support for unique coffee brewing methods, helping you to get the most out of your grinder regardless of your preferred brewing style. Whether you enjoy pour-over, French press, or espresso, Baratza’s resources can help you perfect your coffee grinding techniques.
Baratza offers step-by-step guidance on assembling the grinder, including aligning the outer and inner burrs correctly. By following their assembly instructions, you can optimize the proper installation of components like the bean hopper using the notch alignment technique.
It's important to pay attention to the alignment and tightness of all parts during assembly to guarantee ideal functionality post-assembly. After completing the assembly process, verify that all components are correctly installed and make final adjustments if necessary.
Utilizing Baratza's resources will help you navigate the assembly of your Encore coffee grinder with ease and precision, ensuring that your grinder operates at its peak capacity.
User Experience Insights
Considering your personal involvement with a Vario grinder and the acknowledgment of helpful instructional videos, let's now explore user experience insights regarding the assembly process of the Encore coffee grinder.
When it comes to assembly, the grind experience with a Vario grinder can provide general insights into the process, even though it's not specific to the Encore model. The availability of a second instructional video can enhance the assembly guidance, making the process smoother for users. Over time, assembling the Encore grinder may become easier with practice as users become more familiar with the components and steps involved.
Positive feedback on Baratza's customer service highlights their support for troubleshooting any assembly issues that may arise. If you encounter difficulties during assembly, reaching out directly to Baratza for assistance is recommended. This personalized support can help address specific concerns and guarantee a successful assembly experience for users.
Community Engagement & Product Comparisons
Engage with the Baratza Encore user community to share experiences and compare product features for informed decision-making. By actively participating in community discussions, you can gain valuable insights into grinder comparisons, maintenance tips, and user feedback. User forums provide a platform to explore installation methods, troubleshoot gasket issues, and assess the durability of the Baratza Encore against other grinder options.
When seeking guidance on alternative grinder choices, consider the necessity of the silicone gasket, as highlighted in community discussions. Evaluating the pros and cons of returning the Baratza Encore based on user experiences and frustrations shared within the community can aid in making well-informed decisions. Additionally, user recommendations regarding gasket installation, customer support, and potential grinder replacements can offer valuable assistance in navigating through product comparisons.
Utilize the wealth of knowledge and experiences within the Baratza Encore user community to enhance your understanding of grinder features and functionalities, ultimately guiding you towards selecting the best option for your coffee grinding needs.
Frequently Asked Questions
How to Take Apart and Clean Baratza Encore?
To take apart and clean your Baratza Encore, remove the bean hopper, unsnap the rubber gasket, clean the burrs, and reassemble by placing the gasket and hopper back. Confirm everything is secure before using again.
How Long Do Baratza Encore Grinders Last?
Baratza Encore grinders typically last for several years with proper maintenance. With routine cleaning, burr replacements, and proper care, your grinder can provide consistent performance for 5-10 years or more.
How Do You Turn on Baratza Encore?
To turn on your Baratza Encore grinder, simply plug it into a correct voltage AC outlet. Confirm the ground coffee bin is fully inserted and place the grinder on a level surface for best performance.
How Often Should I Clean Baratza Encore?
You should clean your Baratza Encore grinder every 3-6 months to maintain its performance. Adjust cleaning frequency based on usage; heavy users may need more frequent cleaning. Proper cleaning involves removing burrs, hopper, and grounds bin for thorough maintenance.
Conclusion
Now that you've successfully assembled your Encore Coffee Grinder, it's time to enjoy the perfect cup of coffee every time! If you haven’t already, make sure to read the instructions on how to assemble your coffee grinder properly to ensure it functions correctly. Once assembled, you can adjust the grind settings to your preference, whether you prefer a coarse or fine grind. With your Encore Coffee Grinder, you can now have the freshest, most flavorful coffee at your fingertips every morning.
Remember, the journey to a great cup of coffee is just as important as the destination. So savor each step, from installation to operation, and relish in the wonderful world of freshly ground coffee.
Happy brewing!
Tips and Tricks
DIY Brewing: How to Brew Coffee Without a Machine!
Uncover the secrets to brewing coffee without a machine and enjoy the art of homemade coffee with unique methods and techniques.
Brew coffee at home without a machine with ease. Experiment with different methods like stovetop cup brewing – simply boil water with coffee and let it steep. For a stronger brew, try the Turkish Coffee Method by simmering finely ground beans in a cezve. You can also opt for a Faux French Press – pour boiling water over grounds, let it steep, and press for a rich coffee. Create a DIY Coffee Bag by tying coffee grounds in a filter to steep. Try out these techniques to enjoy a freshly brewed cup. Perfect your homemade coffee with a variety of brewing methods every time.
Key Takeaways
- Use stovetop cup brewing or Turkish coffee method for machine-free brewing.
- Try faux French press technique or DIY coffee bag creation for unique flavors.
- Join a diverse coffee club for a world tour of coffee at under $.30 per cup.
- Gather ingredients, tools, and experiment with different straining techniques.
- Make espresso-like coffee at home using a Moka Pot or stovetop devices for bold flavors.
Stovetop Cup Brewing
To brew coffee without a machine, start by using the stovetop cup brewing method. Begin with six ounces of cold water in a small saucepan and add one tablespoon of coffee. Place the saucepan on medium-high heat and bring the mixture to a boil. Once it boils, let it sit for about four minutes to allow the coffee grounds to steep.
After the steeping time, carefully pour the brewed coffee from the pan into a mug. This stovetop coffee brewing technique is a simple yet efficient way to make a flavorful cup of coffee without the need for a machine. The process is quick and yields a rich, aromatic brew that you can enjoy anytime you crave a caffeine fix.
Stovetop cup brewing is a convenient method that provides a delightful coffee experience, perfect for those moments when you want a quality cup of joe without the hassle of a machine.
Turkish Coffee Method
Let's talk about the Turkish Coffee Method. You'll learn about the unique preparation process, the traditional way of serving Turkish coffee, and the intriguing cultural traditions associated with this brewing method.
Get ready to savor a rich, flavorful cup of coffee with a touch of cultural significance.
Turkish Coffee Preparation
Experience the traditional method of brewing Turkish coffee by simmering finely ground coffee beans in a cezve to create a strong, flavorful brew. Turkish coffee is renowned for its rich taste and thick, sludgy texture, achieved by using very finely ground coffee beans. This brewing method involves the use of a cezve, a small pot specially designed for making Turkish coffee. To enhance the flavor, sugar and spices like cardamom are often added during the brewing process. Once the coffee is ready, it is typically poured into small cups without filtering out the grounds, allowing them to settle at the bottom. This unique way of preparing Turkish coffee ensures a robust and intense flavor that is best enjoyed in small sips.
Turkish Coffee Preparation | |
---|---|
Ingredients | Tools |
Finely ground coffee beans | Cezve |
Sugar | Small cups |
Spices | |
Serving Turkish Coffee
When serving Turkish coffee using the traditional method, make sure that the coffee is unfiltered to allow the grounds to settle at the bottom of the cup.
To begin, boil water in a cezve, a special pot used in Turkish coffee preparation. Add finely ground Turkish coffee and sugar to the boiling water, and let it simmer until it froths. Once frothed, pour the coffee into small cups, ensuring that the grounds remain in the cezve.
The unfiltered coffee will settle at the bottom of the cup, creating a strong and flavorful experience. Remember, Turkish coffee is meant to be enjoyed slowly to appreciate its rich taste and aroma fully. As you sip, you can taste the complexity of the coffee, a hallmark of this traditional method.
To cleanse your palate between sips, consider having a glass of water handy.
Turkish coffee served this way embodies centuries of cultural significance, symbolizing hospitality and social interactions in Turkey and beyond.
Turkish Coffee Tradition
Brewing Turkish coffee in the traditional method involves using finely ground coffee beans, water, and sometimes sugar in a cezve or ibrik, resulting in a strong and bold flavor with a thick, sludgy texture. This Turkish coffee tradition dates back to its origins in Turkey, where the preparation process is considered an art form.
The finely ground coffee beans are combined with water and sugar in the cezve or ibrik, then slowly heated until it starts to foam. The coffee is brewed without filtering out the grounds, giving it that unique sludgy texture and intense flavor. This method of brewing creates a rich and aromatic cup of coffee that's typically served in small cups.
To complement the strong brew, it's often enjoyed with a piece of Turkish delight or another sweet treat on the side, enhancing the overall experience of savoring this traditional Turkish coffee.
Faux French Press Technique
To brew coffee using the faux French press technique, start by boiling water in a saucepan before pouring it over the coffee grounds in a deep bowl. This method mimics the French press by allowing the coffee grounds to steep in the water.
After letting the grounds sit for a few minutes, press them to the bottom of the bowl using a spoon or spatula to extract the flavor. This process results in a rich and robust coffee that closely resembles the French press brew without the need for a French press device.
The faux French press method offers a convenient alternative for those looking to enjoy a quality cup of coffee without a traditional coffee maker. Its simplicity and efficiency make it a great option for brewing coffee on the go or when you want to try something new.
DIY Coffee Bag Creation
Create your own DIY coffee bag by filling a filter with 2 tablespoons of coffee grounds and tying the ends with twine. Once you have your coffee bag ready, it's time to saturate it with water to make sure the grounds are thoroughly soaked. Let the bag steep in the water for about 30 seconds to allow the flavors to develop before removing it. This simple method results in a freshly brewed cup of coffee without the need for a machine.
To visualize the process better, here's a table highlighting the steps for creating your DIY coffee bag:
Step | Instructions |
---|---|
Fill the filter | Put 2 tablespoons of coffee grounds into a filter |
Tie the ends | Secure the coffee grounds by tying the filter with twine |
Saturate the bag | Pour water over the coffee bag to saturate the grounds |
Steep and remove | Let the bag steep for 30 seconds before taking it out |
With this DIY coffee bag method, you can enjoy a convenient and mess-free way to make a delicious cup of coffee at home.
World Tour of Coffee
Embark on a worldwide coffee journey with our distinctive coffee experience. Indulge in the flavors of specialty coffee from around the globe. Customize your coffee expedition by joining a diverse coffee club that delivers freshly roasted beans to your doorstep.
Immerse yourself in the abundant and varied world of coffee, all for under $.30 per cup.
Unique Coffee Experience
Discover a world of unique coffee experiences through a curated global tour of coffee flavors with a specialized coffee club membership. By joining a coffee club subscription, you can immerse yourself in a premium coffee experience, sampling specialty coffees from around the world that are not typically found in stores. With a curated selection of freshly roasted beans delivered to your doorstep, you can explore different coffee origins and brewing methods right from the comfort of your home.
Unique Coffee Flavors | Membership Benefits |
---|---|
Ethiopian Yirgacheffe | Customized deliveries based on preferences |
Colombian Supremo | Cost-effective coffee at under $.30 per cup |
Sumatran Mandheling | Exclusive access to limited edition blends |
Kenyan AA | Educational resources on coffee origins |
Brazilian Santos | Community forums for sharing brewing tips |
Indulge in a diverse array of tastes and aromas with each cup, elevating your DIY brewing experience to new heights.
Specialty Coffee Delivery
Experience a global tour of unique and freshly roasted specialty coffees delivered right to your doorstep, offering a premium and convenient coffee experience. Specialty coffee delivery brings you the finest beans that aren't commonly found in stores, ensuring a fresh and distinct flavor profile with each cup. With customized options available, you can tailor your coffee delivery to suit your preferences, making each shipment a delightful surprise.
Joining a coffee club for this world tour of coffee is an affordable choice, typically costing under $.30 per cup, making it a cost-effective option for premium coffee lovers. The convenience of having freshly roasted coffee arrive at your door eliminates the need to rush to the store or coffee shop, saving you time and ensuring you always have a high-quality brew on hand.
Indulge in the luxury of specialty coffee delivery and elevate your coffee experience to new heights with this convenient and customizable option.
Diverse Coffee Club
Join a diverse coffee club for a global journey through unique and freshly roasted specialty coffees, bringing a premium and convenient coffee experience right to your doorstep.
By becoming a member, you can indulge in cost-effective coffee at under $.30 per cup while exploring a variety of flavors and origins tailored to your customized preferences.
With curated selections not typically found in stores, a diverse coffee club offers a world tour of coffee that immerses you in the rich tapestry of coffee culture.
Whether you prefer light roasts from Ethiopia or dark roasts from Colombia, joining a coffee club opens the door to a whole new coffee experience without the need for a machine.
With each delivery, you can savor the freshness of just-roasted beans and expand your palate with each cup, making every morning a delightful adventure in the world of coffee.
Top Drip Machines
When selecting a drip machine for your coffee brewing needs, consider the top models that consistently deliver great-tasting coffee with ease. Drip machines are known for their convenience in preparing quality coffee without the bother. These coffee machines offer a trouble-free way to enjoy a delicious cup of drip coffee every time you brew.
Discover the convenience of drip machines for your daily coffee rituals. With top-rated drip machines, you can experience a consistent and efficient coffee-making process that guarantees a flavorful outcome. Highly recommended for those seeking a convenient and reliable way to brew coffee at home, these drip machines make the task of coffee preparation a breeze.
Explore the world of drip machines and find out which models are highly rated for their ability to provide a problem-free coffee experience. With minimal effort, you can enjoy a delicious cup of coffee brewed to perfection, thanks to the convenience and consistency offered by top drip machines.
Ingredients & Tools
To brew coffee without a machine, gather 3 tablespoons of medium coarse ground coffee, a pinch of salt, a method for boiling water, a canning jar or small pot, and a strainer or other straining method. Once you have gathered your supplies, bring the water to a boil using your chosen method. While the water is heating up, place the ground coffee and pinch of salt in the canning jar or pot. Once the water is boiling, carefully pour it over the coffee grounds and let it steep for a few minutes. When the brewing is done, strain the coffee into a cup or mug using the strainer or other method. These homemade coffee brewing tips can help you enjoy a delicious cup of coffee without the need for a machine.
When brewing coffee without a coffee maker, it's crucial to keep in mind the following:
- Use the right ratio: Measure 3 tablespoons of ground coffee for each cup of water.
- Add a pinch of salt: Enhance flavor and reduce bitterness in your coffee.
- Experiment with different methods: Try cold brew for iced coffee or French Press for a rich flavor.
- Explore alternative tools: Consider options like a Moka Pot or Aeropress for espresso-like coffee.
Coffee Straining Methods
For the best results in removing grounds when brewing coffee without a machine, consider straining the coffee directly into a mug. When it comes to straining your coffee, different methods can be employed to ensure a smooth and grit-free cup. Pouring cold water on top of brewed coffee can help the grounds sink to the bottom for easier straining. Using a fine mesh strainer or cheesecloth is an efficient way to remove coffee grounds from the brew. Allowing the coffee grounds to naturally settle at the bottom before pouring can also aid in straining. Experimenting with various straining techniques is key to finding the most effective method for your brewing process.
Straining Method | Description |
---|---|
French Press | Press down the plunger slowly to separate the grounds |
Cowboy Coffee | Let the coffee sit for a few minutes before pouring |
Cold Brew Coffee | Requires a longer straining time for a smoother cup |
Pour a Little | Pour a small amount first to check for grounds |
Use a Ladle | Skim the top of the coffee to remove any remaining grounds |
Making Espresso at Home
Consider using a Moka Pot or other alternative methods to create espresso-like coffee at home, offering a rich and intense flavor profile without the need for a traditional espresso machine.
When making espresso at home, you have various options to achieve that intense coffee experience:
- Moka Pot: Utilize this stovetop brewing device to craft a bold espresso-like coffee with a distinctive taste.
- French Press: Experiment with this immersion method to extract flavors similar to espresso, though not as concentrated.
- Aeropress: Use this versatile tool to produce a smooth and full-bodied espresso-like coffee at home.
- Manual Espresso Makers: These portable devices allow you to enjoy on-the-go espresso brewing without a machine's constraints.
To enhance your espresso experience, play around with different coffee-to-water ratios and grind sizes to tailor the strength and flavor to your liking.
Embrace the convenience and creativity of making espresso at home without the need for specialized equipment.
Frequently Asked Questions
How to Brew Coffee at Home Without a Machine?
To brew coffee at home without a machine, you can try various methods like Cowboy Coffee or Turkish Coffee. Experiment with creating a coffee bag or using the Bag It Method for a unique and flavorful experience. To enhance your at-home brewing experience, consider investing in a quality coffee grinder to ensure a consistent grind size. This will help to extract the most flavor from your coffee grounds. Additionally, practicing your pour-over technique or perfecting your milk frothing skills can elevate your coffee to a café-level quality. These home barista tips can help you achieve a professional and delicious cup of coffee in the comfort of your own home.
What Is the Simplest Way to Brew Coffee at Home?
The simplest way to brew coffee at home is by using the boiling method. Boil water, add coffee grounds, steep, then strain. This method is quick and easy, resulting in a flavorful cup of coffee without the need for a machine.
What Can I Use as a Substitute for a Coffee Machine?
You can use alternative methods like stovetop brewing, Turkish coffee, coffee bags, or cowboy coffee as substitutes for a coffee machine. Each method offers a unique experience and can be efficient for a quick cup on the go.
How to Make Coffee From Ground Coffee?
To make coffee from ground coffee, just boil water, add your favorite grounds, let them steep, then strain for a delicious cup. It's an easy and satisfying way to enjoy a fresh brew.
Conclusion
Now that you've learned how to brew coffee without a machine, why not put your newfound skills to the test and impress your friends with a fresh cup of DIY coffee?
Experiment with different brewing methods and explore the world of coffee from the comfort of your own home.
Who knows, you might just discover your new favorite way to enjoy a delicious cup of java!
Tips and Tricks
Easy Furniture: How to Assemble a Coffee Table Without Stress!
Harness the power of precision and the right tools to effortlessly assemble a stunning coffee table – discover the stress-free steps here!
Put together a coffee table effortlessly by following these steps: Begin with leg lamination and accurate stretcher alignment. Cut notches, drill pocket holes for hidden assembly, and add edge banding for a sleek finish. Construct a strong drawer box, install soft close slides, and attach a false front. Finish off with Danish oil, varnish, and secure top fasteners. By following these steps, along with using the appropriate tools such as a track saw and table saw, you can achieve a polished appearance. Prepare your plywood and two by fours; you are on your way to creating a beautifully crafted coffee table! For those looking to enhance their carpentry skills, consider assembling a noguchi coffee table. This iconic furniture piece requires precise measurements and expert craftsmanship to achieve its unique design. By following the same steps as standard coffee table assembly, while paying attention to the distinct curves and angles of the noguchi table, you can produce a striking and practical piece for your home. Invest in high-quality materials and tools, and take your time to ensure each step is carried out with precision and care. With dedication and patience, you can have a beautifully crafted noguchi coffee table that will stand out in your living space.
Key Takeaways
- Utilize pocket hole screws for strong and simple assembly.
- Incorporate edge banding for a clean and professional look.
- Follow step-by-step instructions for stress-free construction.
- Ensure precise measurements and accurate alignment.
- Use quality materials and tools for a smooth assembly process.
Materials and Components Used
To put together a coffee table, you'll need a single sheet of plywood, two by fours, adhesive, pocket hole screws, iron-on Edge banding, and various tools like a track saw, table saw, and thickness planer.
To start building the coffee table, begin by applying a thin layer of adhesive along the edges of the plywood pieces. Next, use pocket hole screws to securely fasten the two by fours to the plywood, forming the tabletop. Once the main structure is constructed, carefully apply the iron-on Edge banding to give the edges a polished finish.
The adhesive ensures a strong bond between the wood pieces, while the pocket hole screws provide structural support. The iron-on Edge banding not only adds a professional touch but also protects the edges from wear and tear over time.
These components, along with the precision of the tools used, contribute to creating a sturdy and aesthetically pleasing coffee table.
Leg and Stretcher Assembly
You can learn about the leg lamination technique used to create sturdy supports for your coffee table.
Additionally, discover the stretcher alignment method that guarantees a stable and balanced structure.
These points will guide you through the process of assembling the legs and stretchers of your coffee table efficiently.
Leg Lamination Technique
Consider reinforcing the coffee table's structure by laminating the legs using two by fours for added stability and strength. To achieve this, follow these steps:
- Remove Rounded Edges: Begin by removing the rounded edges from the two by fours to create a sleek and modern leg design.
- Utilize Pocket Holes: Use pocket holes for easy and secure assembly of the laminated legs, ensuring a strong connection.
- Align and Rip Stretchers: Align and rip the stretchers to the appropriate size for attaching to the legs, ensuring a perfect fit.
- Glue and Clamp: Apply glue to the laminated legs and clamp the stretchers in place, creating a sturdy and durable base for the coffee table.
Stretcher Alignment Method
When aligning the stretchers to the legs of the coffee table, utilize pocket holes for precise and secure attachment. This alignment method ensures that the stretchers are positioned accurately, contributing to the overall stability of the table. By using pocket holes, you can easily fasten the stretchers to the legs without the risk of misalignment or instability.
After aligning the stretchers, the next step involves gluing and clamping them to the panels. This process is essential for securely fastening the base of the coffee table and guaranteeing that the joints are strong and durable. Proper gluing and clamping techniques will enhance the overall structural integrity of the table, making it sturdy and long-lasting.
To achieve a seamless finish on the leg and stretcher assembly, consider adding filler to joints. Filler joints help conceal any gaps or imperfections, giving the coffee table a polished and professional look. By paying attention to these details during the assembly process, you can create a high-quality piece of furniture that will complement your living space beautifully.
Base and Shelf Construction
How are the base and shelf of the coffee table constructed for optimal stability and support?
To secure a sturdy foundation for your coffee table, follow these steps:
- Cut Notches: Create notches in the panels for attaching the base and shelf securely, providing a snug fit.
- Drill Pocket Holes: Utilize drilled pocket holes in the base and shelf to guarantee strong and hidden assembly, enhancing the overall stability.
- Add Edge Banding: Incorporate iron-on edge banding to give a clean and finished look to the edges, adding a little bit of finesse to the design.
- Secure Attachment: Attach the base and shelf to the coffee table using a combination of glue and screws, ensuring a secure and durable connection.
Drawer Construction and Installation
Construct the drawer box with precise fit rebates to guarantee a snug and functional assembly.
Using pocket holes for drawer assembly will provide a strong and secure connection for every single drawer component.
For smooth and quiet operation, install soft close ball bearing drawer slides.
To maintain the coffee table's aesthetic balance, create a false front for the drawer.
Attach the false front securely using pocket holes and screws for a visually appealing finish.
Finishing and Final Touches
For a long-lasting and appealing finish on your coffee table, consider using Danish oil and varnish. Once the assembly is complete, it's time to add those finishing touches that will truly enhance the look of your furniture piece.
Here are some important steps to take:
- Attach the top using table top fasteners for a secure and professional appearance.
- Measure and drill handles for the drawers to make sure they're both functional and aesthetically pleasing.
- Test the soft close drawers to verify they move smoothly and quietly.
- Complete the coffee table by morticing slots using a biscuit jointer for Z-clips, caulking seams, applying knotting solution, and trimming the top to final size with a tracksaw before staining and varnishing.
Tools Needed for Assembly
You'll need various tools for assembling a coffee table, including a track saw for cutting plywood, a table saw for final cuts, and a thickness planer for shaping legs.
Additionally, gather wood filler putty for imperfections, biscuits for alignment, and soft close ball bearing drawer slides for smooth operation.
To join pieces securely, have glue and pocket hole screws ready, and use iron-on Edge banding for a polished edge finish.
When working on the legs and stretcher, utilize laminated two by fours, remove rounded edges, and make use of pocket holes for assembly.
Remember to cut notches for attachment, drill pocket holes for the base and shelf, and finally, test the coffee table for functionality and stability.
Techniques for Joinery
You can elevate your coffee table assembly by mastering various joinery techniques.
Pocket hole screws offer both strength and discretion for your joints.
Biscuits aid in alignment, while glue guarantees a sturdy bond between components.
Joinery Techniques Overview
An overview of joinery techniques commonly used in furniture assembly includes pocket holes, biscuits, and dowels. These techniques are crucial for creating strong and well-constructed furniture pieces like coffee tables.
Here are some key points about each technique:
- Pocket Holes: Provide strong and concealed connections between wooden pieces, guaranteeing a clean finish and robust structure.
- Biscuits: Small, oval-shaped wooden inserts that aid in aligning and reinforcing joints, resulting in improved stability and durability.
- Dowels: Cylindrical rods inserted into corresponding holes to create secure joints, enhancing the overall strength and longevity of the furniture piece.
- Importance of Joinery Techniques: Understanding and employing these various joinery techniques can greatly enhance both the structural integrity and visual appeal of furniture items, such as coffee tables. By utilizing the right technique for the job, you can significantly enhance a well-crafted and long-lasting piece of furniture for your space.
Joinery Tips and Tricks
Understanding various joinery tips and tricks can greatly enhance the quality and strength of your furniture construction projects. By incorporating techniques such as pocket hole screws, biscuits, mortise and tenon joints, dovetail joints, and dowels, you can elevate the durability and aesthetics of your woodworking endeavors.
To help you grasp these concepts better, here's a breakdown of some joinery tips and tricks:
Joinery Technique | Description |
---|---|
Pocket Hole Screws | Ideal for strong and concealed joints in furniture assembly. |
Biscuits | Aid in creating precise and stable joints by providing alignment during glue-ups. |
Mortise and Tenon Joints | Offer added strength to furniture constructions through a traditional woodworking method. |
Dovetail Joints | Known for their decorative appeal and durability, perfect for showcasing craftsmanship in projects. |
Dowels | Provide simple yet effective joinery solutions for various furniture-making needs. |
Drawer Box Construction
For a seamless and sturdy assembly, construct the drawer box with perfect fit rebates. This guarantees that the drawer fits snugly and functions smoothly within your coffee table.
To enhance the strength and stability of the drawer box, consider utilizing pocket holes during assembly. These holes provide an additional layer of reinforcement, making your drawer more durable in the long run.
When it comes to the operation of your drawer, opt for soft close ball bearing drawer slides. These slides not only allow for effortless opening and closing but also ensure a quiet and smooth user experience.
To maintain the aesthetic balance of your coffee table design, create a false front for the drawer. This false front can be attached securely using pocket holes and screws, giving your coffee table a cohesive and professionally finished look.
Top Attachment and Trimming
To securely fasten the top of your coffee table, utilize table top fasteners for an easy and stable attachment. These fasteners will guarantee that your table's top stays in place, providing a reliable surface for everyday use.
Once the top is attached, it's time to trim it to its final size. A track saw is the perfect tool for this task, allowing you to make precise cuts with ease and achieve a clean finish.
After trimming the top, consider enhancing the wood's natural beauty by applying a coat of Oak stain. This won't only bring out the richness of the wood but also add a touch of elegance to your coffee table.
To protect the stained top from daily wear and tear, seal it with varnish. This step will prolong the life of your coffee table and maintain its lustrous appearance.
Frequently Asked Questions
How to Attach Legs to a Table Without an Apron?
To attach legs to a table without an apron, start by using pocket holes for hidden and secure attachment. Guarantee stability by aligning and ripping stretchers to size, then glue and clamp them to the panels. Fill imperfections with wood filler for a polished finish.
How to Stop a Wood Table Top From Splitting?
To stop a wood table top from splitting, seal or finish it to prevent moisture damage. Apply wood conditioner before staining. Maintain steady humidity levels. Avoid placing hot/wet items directly on it. Regularly check for cracks and act promptly.
How Can I Make My Cheap Table More Stable?
To make your cheap table more stable, add a second set of legs or strengthen the base with thicker support beams. Attach adjustable leveling feet for uneven floors, use corner braces, and apply adhesive rubber pads to prevent slipping.
How to Attach a Table Top Without Screws?
To attach a table top without screws, use table top fasteners like Z-clips or figure-eight fasteners. They slide into mortice slots in the aprons for a secure hold. It's a breeze, giving your coffee table a sleek finish!
Conclusion
To sum up, assembling this coffee table is a breeze with the right tools and techniques. By following the step-by-step instructions provided, you can easily put together a stylish and functional piece of furniture for your home. The functional lift top coffee table not only provides ample storage space for your living room essentials, but it also adds a contemporary touch to your decor. With its durable construction and versatile design, this coffee table is sure to become a staple in your home. Whether you’re enjoying a morning cup of coffee or hosting a gathering with friends, this piece will serve as the perfect centerpiece for your living space.
From leg and stretcher assembly to drawer construction and finishing touches, each step builds upon the last to create a cohesive and sturdy coffee table.
So grab your tools and get started on creating the perfect addition to your living space!
-
Ryze Coffee1 day ago
Ryze Mushroom Coffee Vs Other Brands – How Does It Compare?
-
Vetted5 days ago
15 Best Lavazza for Espresso
-
Industry News1 week ago
Does Jacobs Coffee Support Israel?
-
Ryze Coffee2 days ago
Ryze Mushroom Coffee Vs Everyday Dose – Which Is Better for You?
-
Vetted6 days ago
15 Best Instant Espressos for Drinking Anytime, Anywhere – Taste Test Results & Reviews
-
Industry News1 week ago
Does Coffee Bean Support Israel?
-
French Press1 week ago
Understanding How French Press Coffee Makers Work
-
Brewing Guides1 week ago
Brew Perfectly: How to Make Coffee with Coffee Maker