Tips and Tricks
Varied Tastes: How to Brew Different Types of Coffee!
Wander through the world of coffee brewing and uncover the secrets to crafting unique and delicious cups of coffee!
Discover the world of coffee brewing by experimenting with different types of beans, roasts, and methods. From Arabica's sweetness to Robusta's boldness, each variety offers a unique flavor profile. Try various coffee roasts like extra dark or light to enhance taste and aroma. Experiment with brewing methods such as Espresso or Cold Brew to adjust strength and intensity. Whether you prefer black coffee, milk-based options, iced, or specialty choices, there's a perfect cup waiting for you. Release a spectrum of flavors by delving into diverse coffee experiences. For those interested in exploring the world of Arabic coffee brewing tips, consider experimenting with traditional methods such as Turkish coffee or Dallah brewing. These methods often involve using finely ground coffee beans and specific brewing techniques to highlight the unique flavors of Arabica beans. By incorporating these tips into your coffee brewing routine, you can elevate your coffee experience and discover a whole new world of rich, aromatic flavors.
Key Takeaways
- Brew Arabica beans for sweetness and acidity, Robusta for boldness, Liberica for fruity notes, and Excelsa for a tart taste.
- Adjust roast levels (dark, medium, light) to influence taste, aroma, acidity, and bitterness.
- Use specific brewing methods (Espresso, Drip, Cold Brew, Pour-over) for different flavor intensities.
- Experiment with water temperature variations to enhance or reduce flavors in different coffee types.
- Explore diverse coffee maker options (French Press, Aeropress, Espresso Machine, etc.) for unique brewing experiences.
Types of Coffee Beans
When brewing different types of coffee, the choice of coffee beans plays a pivotal role in determining the flavor profile of your brew. Arabica beans are favored for their sweet taste and higher acidity, commonly used in specialty and black coffee.
On the other hand, Robusta beans are known for their strong flavor and higher caffeine content, making them a popular choice for espresso blends and instant coffee.
Liberica beans offer unique fruity and floral flavors, adding diversity to coffee profiles, while Excelsa beans provide a tart, fruit-like taste that contributes to complex and rich coffee blends.
Coffee Roast Varieties
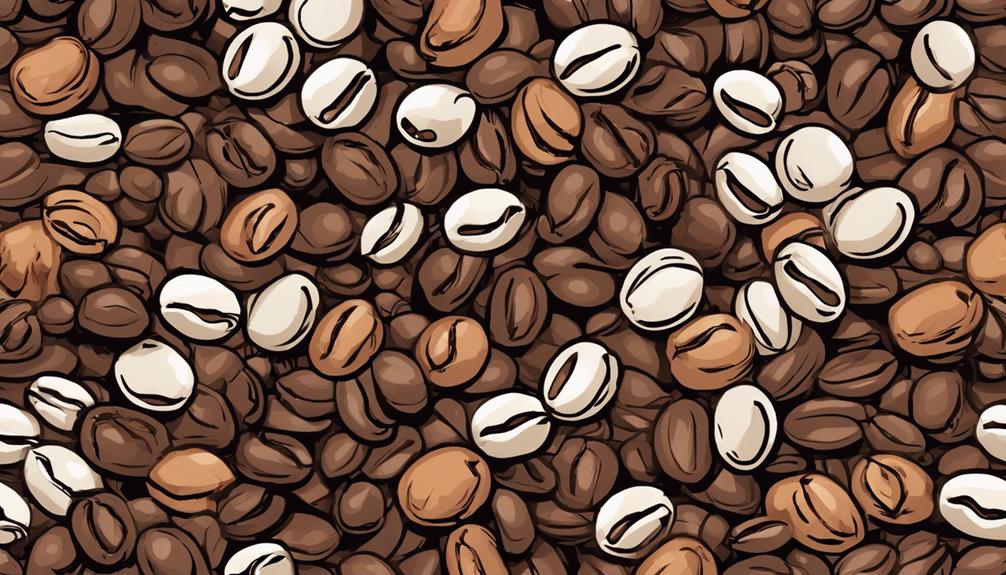
Exploring the world of coffee roast varieties reveals a spectrum of flavors that cater to different preferences and palates. Coffee comes in various roast types, including extra dark, dark, medium, and light roasts, each offering unique flavor profiles. For example, extra dark roasts are characterized by bold and robust flavors, while light roasts showcase more delicate and acidic notes. As you explore the world of coffee roasts, you’ll develop a deeper understanding of the nuances in flavor and aroma. With dedication and practice, you can become an expert coffee taster, able to discern the subtleties in different roast varieties and appreciate the full spectrum of coffee flavors.
The roast level significantly impacts the taste, aroma, acidity, and bitterness of the coffee beans. Extra dark roasts are known for their intense, bold flavor with a pronounced bitterness, making them ideal for those who enjoy a robust cup of coffee.
On the other end of the spectrum, light roasts maintain the original flavors of the beans, showcasing higher acidity and brightness, appealing to those who prefer a more delicate and fruity taste.
Medium roasts strike a balance between the boldness of dark roasts and the acidity of light roasts, making them a popular choice for many coffee enthusiasts looking for a harmonious blend of flavors.
Choose your roast wisely to savor the diverse aromas and tastes that coffee has to offer.
Coffee Brewing Methods
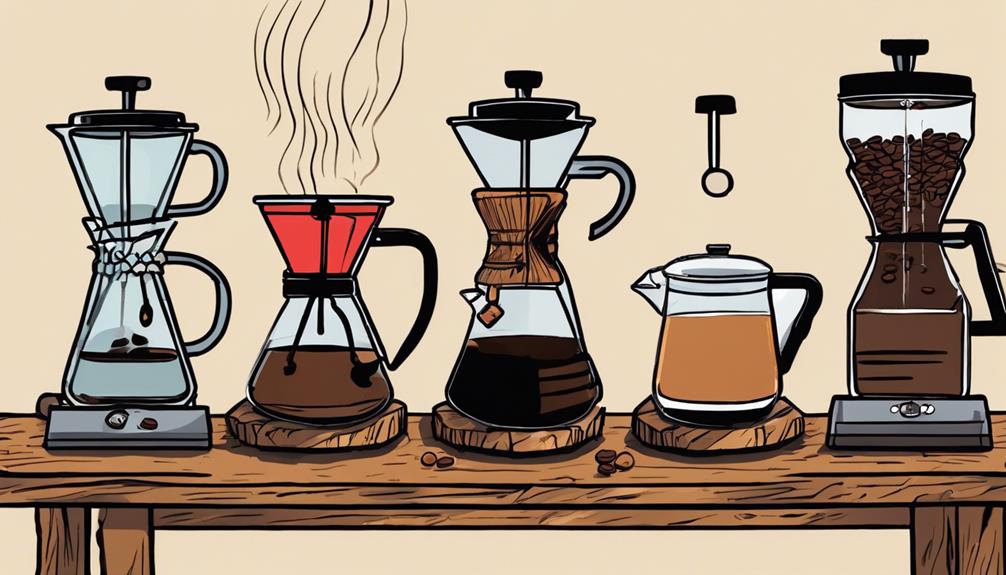
Let's talk about brew ratios and water temperature in different coffee brewing methods. Understanding the right balance between coffee grounds and water is essential to achieving your desired strength and flavor.
Temperature plays a vital role in extracting the best flavors from your coffee beans.
Brew Ratios
Understanding the brew ratios is essential for achieving the desired strength and flavor in various coffee brewing methods.
When it comes to espresso, a common brew ratio is 1:2, meaning 1 part coffee to 2 parts water, resulting in a concentrated and bold flavor.
Drip coffee makers, on the other hand, typically use a brew ratio of 1:15, where 1 gram of coffee is used for every 15 grams of water, providing a milder taste.
Cold brew coffee requires a higher brew ratio of around 1:8 to 1:10 due to its extended steeping process, resulting in a smooth and less acidic brew.
Pour-over coffee enthusiasts often follow a brew ratio of 1:16, which helps achieve a balanced and nuanced flavor profile.
Adjusting the brew ratio can significantly impact the strength, body, and flavor intensity of your coffee, allowing you to tailor your brew to your preferences.
Water Temperature
Maintaining the perfect water temperature is vital for extracting the finest flavor in various coffee brewing methods. The ideal brewing temperature for coffee falls within the range of 195-205°F. This specific range is pivotal as water temperature plays a significant role in determining the balance between acidity and bitterness in your cup.
If the water temperature is too low, below 195°F, it can result in under-extraction, leading to a weak and underdeveloped flavor profile. Conversely, if the water is too hot, above 205°F, over-extraction may occur, causing a bitter and harsh taste in your coffee.
To brew a delicious and well-balanced cup, consistency in controlling the water temperature is key. By maintaining the recommended brewing temperature, you can guarantee that your coffee achieves peak flavor without leaning towards excessive bitterness or acidity. Remember, the right water temperature is fundamental in optimizing the full potential of your coffee beans.
Black Coffee Options

Exploring black coffee options uncovers a range of bold and pure brews, perfect for those seeking a straightforward coffee experience without added milk or sugar. When delving into the world of black coffee, you'll encounter:
- Espresso: This classic black coffee is renowned for its intense flavor and rich crema.
- Long Black: By adding hot water to a double shot of espresso, the long black coffee offers a slightly different take on the boldness of espresso.
- Pure Coffee Experience: Both espresso and long black are favored by those looking for a strong coffee that showcases the natural flavors and aromas of the beans.
- Simplicity: Black coffee varieties provide a simple yet satisfying coffee experience, free from any added ingredients.
- Boldness: Black coffee drinkers appreciate the robust and uncomplicated taste profiles that these brews offer.
Espresso Brewing Techniques
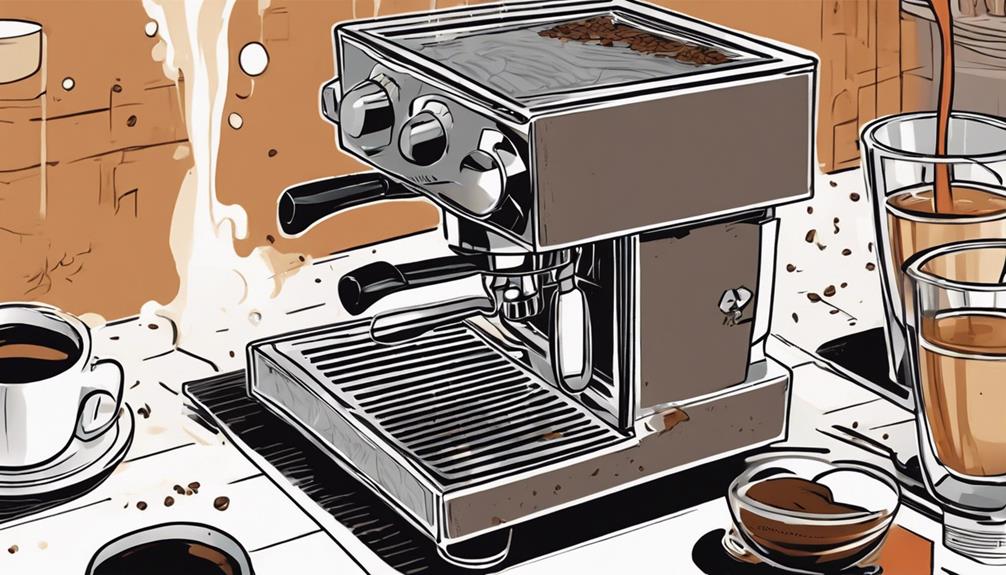
To achieve a perfect espresso shot, start by selecting a fine grind setting for best flavor extraction. The grind size is essential in brewing espresso as it allows for ideal extraction of flavors.
When using an espresso maker, make sure the grind is fine and consistent to prevent under or over-extraction. Additionally, pay attention to the brew time and shot times. Shot times should ideally be under 35 seconds to avoid bitterness, but this can vary based on personal preference and the coffee beans used.
Dosing is another key factor in espresso brewing techniques. It's important to follow the recommended dosing for your espresso basket to achieve a well-balanced shot. The best brewing ratio for espresso is typically 2:1, but experienced baristas may experiment with different ratios to customize the flavor profile of their espresso shots.
Milk-Based Coffee Varieties
Let's chat about milk frothing techniques and flavor pairings in milk-based coffee varieties. Learning how to froth milk properly can elevate the texture and taste of your coffee drinks.
Experimenting with different flavor combinations can help you discover your favorite milk-based coffee creation.
Milk Frothing Techniques
Achieve a smooth microfoam for lattes by steaming milk with a swirling motion to enhance the creamy texture of your milk-based coffee beverages.
When it comes to milk frothing techniques, mastering the art is vital for creating the perfect creamy texture in your favorite milk-based coffee drinks.
To elevate your coffee experience, consider the following:
- Experiment with different milk types like whole, skim, or alternative milks to discover varied flavors and textures.
- For a velvety texture in cappuccinos, aim for frothing milk with a higher proportion of foam to milk.
- Understand that proper milk frothing is necessary for achieving the desired consistency and taste in your beverages.
- Remember that the way you steam milk can greatly impact the final result, so practice the swirling motion technique for best microfoam.
Enhance both the taste and presentation of your coffee by perfecting the art of milk frothing.
Flavor Pairings
Exploring the harmonious blend of flavors between milk and espresso enhances the experience of milk-based coffee varieties like lattes and cappuccinos. The creamy and balanced flavor resulting from the combination of milk and espresso creates a rich aroma that appeals to many coffee enthusiasts. When it comes to milk-based coffee, the choice of milk can significantly impact the overall taste and texture of the drink. From whole milk providing a velvety texture to alternative options like almond or oat milk adding unique notes, there are various ways to personalize your coffee based on your preferences.
To help you navigate the world of milk-based coffee flavor pairings, here's a handy table outlining some key points:
Milk Type | Flavor Profile |
---|---|
Whole Milk | Rich and velvety |
Skim Milk | Light and mild |
Alternative Milk | Nutty or creamy notes |
Iced and Cold Coffee Choices
Iced and cold coffee offer a rejuvenating alternative to traditional hot brews, providing a cool and invigorating way to enjoy your favorite caffeinated beverage.
When it comes to iced and cold coffee choices, you have a range of options to explore:
- Iced coffee: Brewed hot and then chilled, offering a classic and revitalizing option.
- Cold brew coffee: Made by steeping coarsely ground coffee beans in cold water, resulting in a smoother and less acidic taste.
- Frappuccinos: Blended iced coffee drinks mixed with flavored syrups, milk, and ice for a creamy and indulgent treat.
- Nitro coffee: Cold brew infused with nitrogen gas, creating a velvety texture and a unique cascading effect.
- Unique flavor profiles: Different types of iced coffee provide diverse tastes and textures, catering to a variety of preferences for those seeking revitalizing coffee beverages.
These choices allow you to enjoy a cool and flavorful coffee experience, perfect for hot days or whenever you crave a chilled pick-me-up.
Specialty Coffee Selections
When it comes to specialty coffee selections, you can elevate your coffee experience with unique and indulgent options that cater to a variety of tastes and preferences.
From the rich and luxurious Vienna to the decadent Double shot with whipped cream, there are plenty of options to explore.
If you prefer a concentrated flavor, the Ristretto, with half the water quantity of a regular espresso, might be just what you're looking for.
For a lighter alternative, the Americano blends coffee with water, offering a milder taste profile.
The Lungo and Café Noisette variations provide different intensities and flavor notes, perfect for those seeking diverse espresso experiences.
And let's not forget the Café au lait, where warm milk plays a pivotal role in enhancing the overall taste of the coffee.
With these specialty coffee selections, there's something to satisfy every coffee lover's palate.
Coffee Maker Options
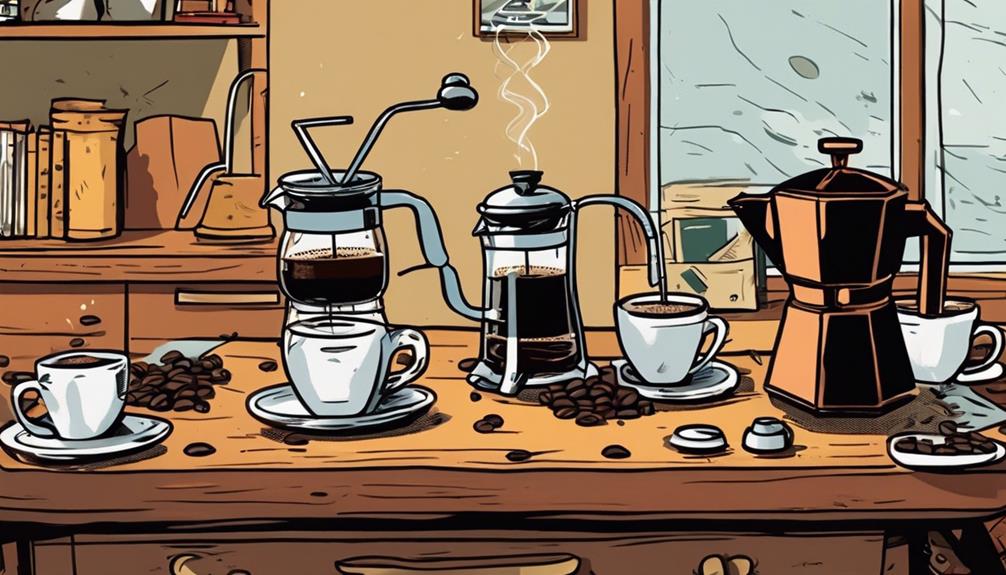
Consider the diverse range of coffee maker options available to suit your brewing preferences and taste preferences. Some people prefer the convenience of single-serve coffee makers, while others enjoy the ritual of pour-over or French press brewing methods. No matter your preference, there is a coffee maker out there to suit your needs. Additionally, the benefits of black coffee, such as its low calorie content and potential antioxidant properties, make it a popular choice for many health-conscious individuals. Whether you enjoy your coffee black or with added flavorings, finding the right coffee maker can enhance your overall coffee-drinking experience.
Here are some popular choices:
- French Press: Utilizing a coarse grind and immersion brewing method, French Press coffee makers create a rich and full-bodied coffee experience.
- Aeropress: With its portability and quick brewing process, Aeropress delivers a smooth and clean cup of coffee, perfect for on-the-go brewing.
- Pour Over: Offering control over brewing variables, Pour Over coffee makers produce a balanced and nuanced flavor profile through a slower extraction process.
- Espresso Machine: Using high pressure to extract intense coffee flavors and a creamy crema layer, Espresso Machines are ideal for espresso lovers and espresso-based drinks.
- Cold Brew Maker: By steeping coffee grounds in cold water for an extended period, Cold Brew Makers produce a smooth, low-acid coffee concentrate that's perfect for invigorating iced beverages.
Frequently Asked Questions
How to Make Coffee With Different Flavours?
To make coffee with different flavors, experiment with spices, syrups, milk alternatives, cocoa, and sweeteners. Enhance your brew with cinnamon, vanilla, almond milk, cocoa powder, or honey for a unique and personalized coffee experience.
Can You Mix Different Types of Coffee?
You can mix different types of coffee to create a flavor symphony in your cup. It's like blending notes in music; combining various beans brings harmony and complexity to your brew. Try it out!
What Are the Different Types of Coffee You Can Make?
You can make various types of coffee, from black coffee to espresso, each offering a unique flavor. Experiment with different beans like Arabica or Robusta and explore diverse brewing methods like drip or cold brew for a personalized coffee experience.
What Are the Four Types of Coffee?
Imagine a coffee journey where Arabica whispers sweetness, Robusta roars with strength, Liberica sings fruity melodies, and Excelsa dances with a tart twist. Each bean, a flavor tale waiting for you to brew and savor.
Conclusion
Just like a skilled artist uses a variety of brushes to create a masterpiece, mastering the art of brewing coffee involves exploring different beans, roasts, and brewing methods.
By experimenting with black coffee, espresso, milk-based drinks, iced options, and specialty selections, you can discover the perfect cup that suits your taste.
So grab your favorite coffee maker and let your creativity flow as you brew up a delicious cup of java that will awaken your senses and delight your taste buds.
Cheers to endless coffee possibilities!
Tips and Tricks
Latte Art: How to Create Beautiful Art on Your Coffee!
Journey into the world of latte art and discover how to craft stunning designs on your coffee with precision and skill.
To achieve stunning latte art on your coffee, begin by perfecting milk steaming and precise pouring techniques. Concentrate on the stages of pouring and the specific hand movements required for creating designs. Utilize methods such as cup tilting and a gentle wiggling motion to craft intricate patterns. Develop your muscle memory to enhance your pouring skills. Focus on maintaining consistency, symmetry, and contrast to achieve the desired final outcome. Continually practice and hone your abilities to elevate the visual appeal of your latte art. Enhance your latte art by honing muscle memory and mastering precise pouring. Prepare to enhance both flavor and aesthetics with your latte masterpieces!
Key Takeaways
- Master milk steaming for smooth texture.
- Practice pouring phases and hand movements.
- Develop muscle memory for precise pours.
- Focus on contrast, symmetry, and consistency.
- Enhance visual appeal with glossy finish.
Importance of Milk Steaming
To create captivating latte art, mastering the technique of milk steaming is vital. Steamed milk plays a pivotal role in the overall appearance and quality of your latte art designs.
The first step in achieving perfectly steamed milk is to make sure that it has a velvety texture without any large bubbles. These bubbles can disrupt the pouring process and affect the final look of your design. Steaming the milk creates a stable surface in the cup, allowing you to execute intricate designs with precision.
The contrast between the steamed milk and espresso is also heightened when the milk is properly textured, resulting in visually appealing latte art. Remember, steamed milk behaves differently than unsteamed milk, so mastering the art of milk steaming is essential to achieving the desired look and feel in your latte art creations.
Pouring Phases Overview
Mastering the pouring stages is pivotal to bringing your latte art designs to life. When creating latte art, the pouring process consists of two main phases. To start, mixing the milk with espresso forms a stable base for your design.
To guarantee precision in your art, specific hand movements are essential in the second phase. Techniques such as tilting the cup and pouring along the vertical axis help in achieving the desired outcome.
Before pouring, swirling the milk and espresso mixture aids in creating contrast within your design. Remember to tilt the cup at a specific angle during pouring to add depth and dimension to your artwork.
Maintaining a controlled and steady pour, combined with a subtle wiggling motion, is vital for crafting intricate and detailed latte art designs. By mastering these pouring stages, you'll be on your way to creating stunning and visually appealing latte art on your coffee.
Design Execution Techniques
For best depth and control in your latte art creations, tilt the cup at a 45-degree angle while executing your design.
To enhance your design execution techniques, consider the following:
- Firmly hold the pitcher to maintain control over the flow of milk and create intricate designs.
- Use a wiggling motion to manipulate the milk stream and form detailed patterns in the latte art.
- Maintain a thin, steady stream of milk to guarantee precision and consistency in the design execution.
- Cut through the design at the right height to finish with a polished and visually appealing latte art creation.
Tips for Training Latte Art
Consider incorporating cold water and detergent into your training routine for latte art to conserve milk and minimize waste. This practice allows you to refine your skills without using up excess milk.
Additionally, using diluted cacao powder can be a cost-effective alternative for honing your latte art designs. Focus on building muscle memory and perfecting your hand movements to enhance your pouring technique.
Practicing slowly and deliberately will help you improve the precision of your latte art creations over time. If you find it challenging to create a stable base for pouring, don't hesitate to use a spoon for mixing.
Final Result Characteristics
To attain visually stunning latte art, make certain that your design exhibits a unified texture and symmetrical appearance. When creating latte art, aspire for a final result that isn't only visually appealing but also reflects the care and precision put into it. Here are some characteristics to aim for in your latte art creations:
- Guarantee the design has a consistent and smooth texture throughout.
- Strive for symmetry in your design, creating a balanced and harmonious look.
- A glossy surface that reflects light can enhance the overall appearance of your latte art.
- High contrast between the milk and espresso will make your design pop.
- Be attentive to any visible bubbles in the design, as they can detract from the final look.
Steamed Milk: Key Element
Achieving elaborate latte art designs hinges on mastering the steaming of milk, a vital element in creating visually enchanting patterns on your coffee. The key to achieving the perfect microfoam for latte art lies in properly steaming the milk to create a smooth and velvety texture. This process involves carefully heating and texturing the milk, creating the ideal foundation for creating intricate designs. If you want to learn how to create coffee art, mastering the art of steaming milk is an essential first step. With the right techniques and practice, you can elevate your coffee experience and impress your friends and customers with stunning latte art designs.
Perfectly steamed milk is essential as large bubbles can disrupt the pouring process and affect the final design.
Steamed milk acts as a stable canvas for creating contrast and depth in latte art, enhancing the overall aesthetic appeal.
The texture of the steamed milk plays a significant role in the visual outcome of your latte art, adding dimension and finesse to your creations.
Understanding how steamed milk behaves compared to unsteamed milk is necessary for successful latte art, as it allows you to control the flow and complexity of your designs.
Hand Movements in Pouring
Mastering hand movements in pouring is crucial for creating intricate and engaging latte art designs. To achieve stunning results, remember the following key techniques:
- Tilt the Cup: Start by tilting the cup at a 45-degree angle to help create depth in your design.
- Controlled Movements: Make sure your hand movements are precise and controlled when pouring the milk onto the espresso.
- Wiggling Motion: Incorporate a gentle wiggling motion while pouring to assist in forming intricate patterns within your artwork.
- Steady Stream: Maintain a thin, steady stream of milk to guarantee accuracy in your design and prevent any unintended splatters.
- Cutting Through: To add the final touch to your masterpiece, remember to cut through the design at the right height, creating a clean finish to your latte art creation.
Creating Depth in Designs
Tilt your cup at a 45-degree angle to add depth to your latte art designs.
Adjust the height of your pour to create layers and dimension in your artwork.
Use a wiggling motion while pouring for intricate details and added depth.
Angle for Depth
To enhance the visual charm of your latte art designs, consider adjusting the angle of your cup for creating depth in your artwork. Tilt the cup at a 45-degree angle to allow different layers of milk and espresso to be visible in the design.
Angling the cup not only helps in controlling the flow of milk but also contributes to creating a three-dimensional effect. Furthermore, the angle of the cup plays a significant role in determining the placement of the design on the surface of the coffee.
Experimenting with various angles can lead to the development of unique and visually appealing latte art creations.
- Tilt the cup at a 45-degree angle for enhanced depth.
- Different layers of milk and espresso become visible with the angled cup.
- Control milk flow and achieve a three-dimensional effect by angling the cup.
- The cup's angle influences where the design appears on the coffee's surface.
- Experiment with varied angles to create distinctive and enchanting latte art designs.
Controlled Pouring Technique
Enhancing the depth of your latte art designs involves mastering a controlled pouring technique. By tilting the cup at a specific angle, you can create layers of milk and espresso, adding dimension to your artwork.
To maintain consistency and precision in your design, practice controlled pouring along the vertical axis. Swirl the milk and espresso mixture as you pour to enhance contrast and depth in your creation.
Incorporate a wiggling motion with the pitcher to craft intricate details and shapes within your design. Remember to keep a thin, steady stream of milk flowing during pouring to guarantee a smooth and controlled execution of your art.
With practice and attention to these techniques, you can elevate the visual appeal of your latte art by adding depth and complexity to your designs.
Muscle Memory Development
Developing muscle memory is essential for consistently pouring intricate latte art designs. Repetition is your best friend in this journey, as it helps train your muscles to remember the precise movements required for different patterns.
Consistent practice is the key to building muscle memory, enabling you to have precise control over the pouring process. As your muscle memory develops, you'll notice your pours becoming smoother and more controlled, resulting in better execution of your design ideas.
Over time, this muscle memory will allow you to pour latte art effortlessly and with greater accuracy.
- Repetition trains your muscles for intricate movements.
- Consistent practice builds precise control.
- Muscle memory leads to smoother, more controlled pours.
- Better design execution with developed muscle memory.
- Effortless and accurate latte art pouring over time.
Achieving Taste and Visual Appeal
To achieve both taste and visual appeal in your latte art, focus on creating a design with high contrast between the milk and espresso.
Smooth and shiny textures indicate a well-poured design, while visible bubbles should be avoided for a professional look.
Visual Appeal Techniques
Achieving a visually appealing latte art design involves creating a symmetric pattern with a shiny surface. To enhance the visual appeal of your latte art, consider the following techniques:
- Contrast is Key: The stark contrast between the creamy milk and rich espresso is essential for creating visually striking latte art.
- Unified Texture: A well-poured latte art heart should boast a smooth and unified texture without any visible bubbles, adding to its aesthetic appeal.
- Attention to Detail: Paying close attention to the details while pouring your latte art guarantees a polished and visually pleasing final result.
- Precision Pouring: Mastering the art of pouring the milk into the espresso with precision is essential for achieving intricate and attractive designs.
- Shine Bright: A glossy and shiny surface on your latte art can elevate its visual appeal, making it look even more enticing and professional.
Taste Enhancement Tips
For a truly satisfying experience with your latte art, focusing on taste enhancement is key alongside the visual appeal techniques previously discussed.
Achieving the perfect texture in steamed milk is vital as it enhances the overall taste of the latte art design. The proper contrast between the milk and espresso not only contributes to visual appeal but also plays a significant role in taste satisfaction.
A shiny surface on the design indicates a well-prepared latte art with a delicious taste, making it even more enjoyable. Additionally, ensuring a unified texture in the latte art design not only looks appealing but also promises a harmonious flavor experience.
Contrast and Texture
Creating latte art that excels in both taste and visual appeal relies heavily on achieving a perfect balance of contrast and texture between the milk and espresso.
To achieve this balance effectively, consider the following:
- High contrast between the white milk and dark espresso enhances the visual appeal of the latte art, making the design pop.
- The texture of perfectly steamed milk creates a smooth and creamy canvas for intricate designs to stand out, adding a luxurious feel to your coffee.
- A well-executed pour results in a balanced combination of taste and visual aesthetics in latte art, ensuring a harmonious experience.
- Proper contrast and texture in latte art are achieved through precise steaming and pouring techniques, requiring attention to detail.
The visual appeal of latte art is enhanced by the smooth texture of the milk and the contrast between the design and the coffee base, elevating both the taste and appearance of your beverage.
Achieving the perfect contrast and texture can take your latte art to the next level, delighting both your eyes and taste buds.
Frequently Asked Questions
Can You Make Latte Art With Coffee?
Yes, you can make latte art with coffee. The contrast between espresso and steamed milk is essential for intricate designs. Mastering pouring techniques and hand movements, along with practice, will help you create beautiful art on your coffee!
What Is the Secret to Latte Art?
The secret to latte art lies in perfectly steamed milk, creating a stable surface for designs and enhancing contrast. Steamed milk behaves differently, essential for smooth designs. Tilt the cup, hold the pitcher securely, and wiggle for intricate designs.
How to Make Latte Art in Coffee Talk?
To make latte art in coffee talk, start by mastering milk steaming and pouring phases. Focus on specific hand movements, cup tilting, and controlled pouring. Practice with cold water, cacao powder, and build muscle memory for improved technique.
How to Make Design on Coffee?
To make a design on coffee, tilt your cup, pour steamed milk in a thin stream, wiggle as you pour for shapes, and finish with a precise cut. Guarantee no bubbles for a professional look.
Conclusion
Now that you've mastered the basics of latte art, it's time to get creative and experiment with different designs.
Remember, practice makes perfect, so keep honing your skills and don't be afraid to try new techniques.
With dedication and patience, you'll soon be impressing your friends and customers with beautiful and delicious latte art creations.
So go ahead, let your creativity flow and pour your heart into every cup!
Tips and Tricks
Kitchen Techniques: How to Blend Coffee Beans at Home!
Intrigued about blending coffee beans at home? Discover expert tips and techniques for the perfect brew in this comprehensive guide.
Home blending coffee beans can be achieved by pulsing them in a food processor or blender. Make sure to tilt for uniform grinding and utilize specific settings if available. Store any extra grounds in airtight containers. If you prefer a coarser grind, consider using a rolling pin or a mortar and pestle for manual grinding. Customize the grind based on your preferred level of fineness to keep the fresh aroma intact. To enhance your blending skills, focus on even pulsing, stirring for consistency, and experimenting with different timings. Avoid overfilling to maintain a smooth texture. Mastering these techniques will ensure a flawless brew every time. With practice, you’ll become adept at creating the perfect coffee blend that caters to your taste preferences. Experiment with various coffee bean varieties to uncover new flavor profiles and achieve the ideal balance of richness and acidity. By perfecting your blending skills, you’ll consistently savor a cup of coffee that is exactly to your liking, with each and every brew.
Key Takeaways
- Pulse beans in short intervals for consistent texture.
- Tilt blender for even grinding results.
- Experiment with blending times for desired coarseness.
- Avoid overfilling blender for a smooth blend.
- Shake or stir coffee during blending for uniformity.
Types of Coffee Grounds
When choosing coffee grounds for your home brewing, consider the specific grind size needed for your preferred brewing method.
The grind of your coffee plays a pivotal role in the final flavor of your cup. For espresso machines, a superfine or pulverized grind is ideal, as it allows for the quick extraction needed for a rich and intense shot.
On the other hand, French press coffee requires a coarse grind to prevent over-extraction and produce a full-bodied brew.
For drip coffee makers, a fine grind is recommended to guarantee proper extraction during the brewing process.
If you enjoy pour-over methods, a medium grind works best, allowing for a balanced extraction and a clean, vibrant taste in your coffee.
Remember that experimenting with different grind sizes is key to finding the perfect match for your preferred brewing style.
Consistency in grind size is vital for achieving a harmonious and flavorful cup of coffee, as it guarantees even extraction and a well-balanced taste profile.
Food Processor Method
You can easily grind coffee beans using a food processor by pulsing them for short intervals.
Remember that food processors need a larger quantity of beans for effective grinding.
To achieve a consistent texture, tilt the food processor while blending the coffee beans.
Grinding With Food Processor
For best outcomes when grinding coffee beans with a food processor, utilize the pulse setting for 3-5 seconds at a time.
Due to their wider size, food processors require a larger quantity of coffee beans compared to blenders.
To guarantee an even blend, tilt the food processor during grinding.
After grinding, store any unused ground coffee in airtight bags to maintain freshness and flavor.
The food processor method is recognized for its quick and effective results when it comes to grinding coffee beans at home.
By using short bursts of the pulse setting, you can achieve the desired consistency without overheating or over-processing the beans.
Remember to monitor the coarseness of the grind to suit your brewing method, whether it's for drip coffee, French press, or espresso.
With these simple steps, you can enjoy freshly ground coffee at home without the need for specialized equipment.
Tips for Blending
To optimize the blending process when using a food processor, consider adjusting the grind consistency based on your preferred brewing method. Here are some tips to help you achieve the perfect cup of coffee:
- Grind Size: Experiment with different grind sizes to find the right one for your brewing method. Coarser grinds work well for French press, while finer grinds are better for espresso.
- Bean Quantity: As food processors are larger than blenders, make sure you use enough beans to cover the blades adequately. Start with a larger quantity and adjust as needed.
- Pulsing Technique: Use short pulses of 3-5 seconds each to grind the beans evenly. Avoid continuous grinding, which can lead to overheating and affect the flavor.
- Tilting Method: Tilt the food processor slightly while grinding to guarantee all beans are processed uniformly. This technique helps prevent clumping and ensures a consistent grind size for a delicious cup of coffee.
Using a Blender
Ever wondered how a blender can simplify the process of grinding coffee beans at home?
Blenders offer a convenient way to grind coffee beans, especially for drip coffee enthusiasts. Some blenders come with specific grind settings designed to achieve the perfect consistency for your preferred brewing method.
When using a blender to grind coffee beans, remember to tilt the blender to make sure an even grind. It's essential to limit the blending time to 20-30 seconds to prevent overheating the beans, which can alter the flavor.
Additionally, store any excess ground coffee in an airtight container to preserve its freshness and flavor profile.
Rolling Pin Technique
If you lack a blender or grinder, consider employing the rolling pin technique to grind coffee beans at home effectively. This method is particularly useful for achieving coarse grounds, which are perfect for French press coffee.
Follow these steps to master the rolling pin technique:
- Place your coffee beans in a Ziplock bag to contain the mess and prevent beans from flying around.
- Using a rolling pin, crush the coffee beans inside the bag with firm pressure.
- Repeat the rolling process until you reach the desired consistency of the coffee grounds.
- Be patient during this process, as it may take some time to achieve the right grind for your preferred coffee brewing method.
The rolling pin technique offers a straightforward and efficient way to grind your coffee beans at home without the need for specialized equipment.
Enjoy the process and the fresh aroma of your homemade coffee grounds!
Mortar and Pestle Grinding
Consider utilizing the labor-intensive mortar and pestle grinding method as an alternative way to manually grind your coffee beans at home. To make certain efficient grinding, fill the mortar with only 1/3 to 1/4 of its capacity to prevent overflow.
The results of this method can vary, producing grounds suitable for finer coffee like those needed for a Chemex or coarser grounds perfect for a French press. The consistency of the grind depends greatly on your technique and the duration of grinding with the mortar and pestle.
For a more uniform blend, try grinding fewer beans at a time, as this can lead to a more consistent texture in your coffee grounds. Embrace the hands-on approach of mortar and pestle grinding for a unique coffee experience that allows you to customize the grind to your preferred level of fineness.
Necessary Equipment
To successfully blend coffee beans at home, make certain you have a blender, canning jar, locally roasted coffee beans, and a measuring scale on hand as necessary equipment. When blending different coffee beans, having the right tools guarantees a consistent and delicious result.
Here is what you need:
- Blender: A standard blender works well for most coffee blending needs. However, you can also use a Nutribullet or single-serve blender for smaller batches or specific grind preferences.
- Canning Jar: Opt for airtight containers like canning jars to store your freshly blended coffee. This helps in preserving the flavors and aromas of the different coffee beans you have mixed.
- Locally Roasted Coffee Beans: Choose high-quality, locally roasted coffee beans for the best flavor profile in your blend.
- Measuring Scale: Precision is key when blending coffee beans. Use a measuring scale to guarantee accurate proportions of the different coffee beans you're combining.
Grinding Process Tips
Adjust the grinding duration based on your preferred coarseness to achieve the ideal texture for your chosen brewing technique. For a coarser grind suitable for a percolator, grind for a shorter period, while a finer grind perfect for drip coffee necessitates a longer grinding duration. Make sure to consistently monitor the grind throughout the process to confirm you attain the intended texture. Avoid grinding excessively fine for a percolator, as it may lead to a bitter or over-extracted coffee. Experiment with various blending durations to discover the appropriate consistency. Remember to thoroughly clean your blender after every use to uphold the excellence of your ground coffee.
Grinding Process Tips | |
---|---|
Adjust grinding duration based on preferred coarseness | Monitor grind consistency during process |
Coarser grind for percolator, finer for drip coffee | Avoid grinding excessively fine for percolator use |
Experiment with blending durations | Clean blender after every use |
Storage Recommendations
To maintain the freshness of your ground coffee, store it in airtight containers such as canning jars or ziplock bags.
Keeping your ground coffee in a cool, dark place can help extend its shelf life for several weeks.
Proper storage practices are essential in preserving the aroma and flavor of your freshly ground coffee.
Airtight Storage Containers
How can you ensure the freshness and flavor of your ground coffee beans at home?
To guarantee your coffee stays flavorful, invest in airtight storage containers. Here's why they're important:
- Prevention of Flavor Contamination: Airtight containers like canning jars or ziplock bags help in preserving the original taste of ground coffee by preventing exposure to external odors.
- Protection Against Moisture: Airtight seals keep moisture at bay, safeguarding the coffee from losing its freshness and becoming stale.
- Extension of Shelf Life: Properly sealed containers can help ground coffee last for several weeks without compromising its quality, allowing you to enjoy fresh coffee for a longer period.
- Preservation of Aroma: Airtight storage containers are essential for retaining the delightful aroma of freshly ground coffee beans, ensuring a rich and satisfying cup every time.
Cool, Dark Preservation
For best freshness, store your ground coffee in a cool, dark place to preserve its flavor.
Keeping your coffee in an environment that's free from light and heat is essential to maintaining its quality over time.
Airtight containers, such as canning jars, are a good choice for storing ground coffee at home. These containers help seal in the aroma and flavor, preventing exposure to external elements that could compromise the coffee's taste.
When you need to take your coffee on the go, opt for Ziplock bags as they're convenient for transport while still preserving freshness.
Blending Techniques
For best blending results when preparing your coffee beans at home, remember to pulse your blender evenly to achieve a consistent texture in your ground coffee.
Here are some good blending techniques to help you master the art of blending coffee beans at home:
- Pulse Evenly: Pulse the blender for even grinding to guarantee a consistent texture in your ground coffee.
- Shake or Stir: Shake or stir the coffee during blending to secure uniformity in the grind.
- Experiment with Times: Try different blending times to manage the coarseness of the ground coffee based on your preferences.
- Avoid Overfilling: Prevent uneven grinding by refraining from overfilling the blender, which will help secure a smooth blend.
Frequently Asked Questions
How to Blend Coffee Beans at Home?
To blend coffee beans at home, grind them using a food processor, blender, or mortar and pestle. Adjust the grind size based on your brewing method. Store excess coffee in airtight containers. Experiment with techniques for unique flavors.
Can You Blend Coffee Beans in Regular Blender?
Yes, you can blend coffee beans in a regular blender. Guarantee consistent results by pulsing manually and limiting blending time. Tilt the blender for even grinding. Store excess grounds in airtight containers for freshness. Enjoy your homemade blend!
What Is the Easiest Way to Grind Coffee Beans?
The easiest way to grind coffee beans at home is by using a food processor or blender. It offers quick and consistent results. Remember, manual pulsing and careful monitoring are key to avoid overheating the beans.
How Do You Ground Coffee Beans Without a Blender?
To ground coffee beans without a blender, use a food processor for quick results. Pulse for 3-5 seconds until you reach the desired consistency. Alternatively, try the rolling pin method by crushing beans in a Ziplock bag with firm pressure for coarse grounds.
Conclusion
So there you have it – blending your own coffee beans at home is easier than you think!
Don't worry if you don't have a fancy grinder, there are plenty of alternative methods you can use.
Get creative and experiment with different blends to find your perfect cup of coffee.
Remember, the key is to have fun and enjoy the process of creating your own unique coffee blend at home.
Tips and Tricks
Custom Creations: How to Apply Vinyl to Coffee Mugs!
Bring new life to your coffee mugs by learning how to apply vinyl in this step-by-step guide that will transform your morning routine.
Enhance your coffee mugs with vinyl to give them a unique touch. Begin by wiping the mug with rubbing alcohol for a smooth application. Make sure to measure accurately for a perfect fit. Experiment with various fonts and designs for a personalized look. When applying the vinyl, start from the center and work outward to prevent wrinkles. To maintain the vibrancy of the vinyl, hand wash your mug. By following these steps, you can create beautifully decorated mugs that last long. For an extra special touch, consider adding a pop of color with contrasting vinyl or a metallic finish. Another fun idea is to create a set of mugs with different quotes or images for a statement-making display. And as you enjoy your morning coffee from your newly decorated mug, why not pair it with some unique coffee brewing tips to enhance your daily routine?
Key Takeaways
- Use high-quality adhesive vinyl brands like Tech wrap for durability.
- Clean mug surface with rubbing alcohol before applying vinyl.
- Apply vinyl from center outward and secure for a professional finish.
- Hand wash only to preserve vinyl design on mugs.
- Share vinyl designs on social media for increased engagement.
Vinyl Selection and Preparation
When selecting vinyl for applying to coffee mugs, opt for high-quality adhesive permanent vinyl brands like Tech wrap craft vinyl, Starcraft, or Oracal 651 for best results. These brands offer durability and long-lasting adherence to surfaces.
Before starting the application process, double check that the surface of the mug is thoroughly cleaned with rubbing alcohol. This step is vital to guarantee proper adhesion of the vinyl.
Additionally, make sure to measure the width of the mug accurately. This measurement will help you adjust the design space accordingly, ensuring that the vinyl fits perfectly and looks professional.
If you desire a unique touch for your mugs, consider using metallic satin Chrome Tech wrap vinyl, a popular choice among crafters.
Designing and Cutting Vinyl
When designing vinyl for your coffee mugs, choose fonts from platforms like Dafont for a wide selection.
Combine different fonts to create unique designs that stand out on your mugs.
Remember to adjust the sizing and use precise cutting machine settings for accurate results.
Font Selection Tips
To create visually attractive designs on your coffee mugs with vinyl, consider sourcing fonts from platforms like Dafont, Creative Market, or Google Fonts for a diverse selection.
When selecting fonts for your custom mug designs, keep in mind the following tips:
- Mix Font Styles: Combine script, serif, and sans serif fonts to create interesting and dynamic designs that stand out.
- Adjust Font Sizes: Experiment with different font sizes to make sure that the text fits well on the mug and remains easily readable.
- Stay on Theme: Choose fonts that align with the message or theme of your design to convey your intended sentiment effectively.
Cutting Machine Settings
Set your cutting machine to the vinyl setting for accurate and clean cuts on adhesive vinyl. Adjust the pressure and blade depth according to the thickness of the vinyl to guarantee clean cuts. Make sure your blade is sharp to handle intricate designs flawlessly. Before cutting the full design, conduct a test cut on a small piece of vinyl to confirm the settings. It's also recommended to use a light grip mat specifically designed for vinyl to prevent tearing or misalignment during cutting.
Cutting Machine Settings | Tips |
---|---|
Vinyl Setting | For accurate cuts on adhesive vinyl |
Pressure and Blade Depth | Adjust based on vinyl thickness |
Sharp Blade | Essential for intricate designs |
Test Cuts | Conduct a test cut before cutting the full design |
Vinyl Application and Transfer
You need to guarantee you use Caesar brand transfer tape for a smooth vinyl transfer onto mugs.
Remember to scrape down the vinyl onto the transfer tape firmly to prevent lifting during application.
To avoid wrinkles, start applying the vinyl from the center of the mug outward.
Proper Vinyl Application
For a smooth and successful vinyl application on your coffee mug, make certain to use Caesar brand transfer tape. This high-quality transfer tape guarantees easy and precise placement of the vinyl on your mug.
To achieve a professional finish, follow these tips:
- Securely press down the vinyl onto the mug in one piece, starting from the center to avoid wrinkles or bubbles.
- For curved surfaces, make small slits in the transfer tape to help it conform better to the mug's shape.
- Applying firm pressure while attaching the vinyl to the mug guarantees a strong and long-lasting bond.
Transfer Tape Techniques
To achieve seamless vinyl application on your coffee mug, consider utilizing effective transfer tape techniques. When using Caesar brand transfer tape, you ensure a smooth and easy application process. Remember to scrape down the vinyl onto the transfer tape firmly to guarantee proper adhesion and transfer onto the mug surface. Start applying the vinyl in one piece, beginning from the center and working your way outwards to prevent air bubbles from forming. Press down the vinyl onto the mug surface firmly to secure attachment and avoid peeling issues later on. For curved surfaces on the mug, cut slits in the transfer tape to allow for better adhesion and application around these areas.
Transfer Tape Techniques | Benefits |
---|---|
Caesar brand tape | Smooth and easy application |
Scrape down firmly | Ensures proper adhesion |
Cut slits for curved surfaces | Better adhesion on curves |
Washing Instructions and Longevity
Proper care of vinyl-decorated coffee mugs involves hand washing to maintain the design's longevity and prevent damage.
When it comes to washing instructions and maintaining the longevity of your vinyl-decorated mugs, here are some important tips to keep in mind:
- Hand Wash Only: To preserve the adhesive and vibrant colors of the vinyl design, hand washing is the way to go.
- Avoid Dishwashers: Harsh chemicals and high heat in dishwashers can cause the vinyl to peel or fade over time.
- Allow Proper Adhesion Time: Let the vinyl cure on the mug for 24-48 hours before washing to enhance its durability and guarantee a longer lifespan.
Design, Appearance, and Engagement
Enhancing the visual appeal of your coffee mug can be achieved through a well-designed vinyl application. When applied properly, vinyl can give your mug a professional and polished look, making it stand out and catch the eye of those around you.
Sharing your finished vinyl designs on social media platforms can also lead to increased engagement from the crafting community. By inviting feedback, questions, and comments on your designs, you can foster a sense of community among fellow crafters and Cricut users.
This interaction not only allows for valuable input and suggestions but also helps to create a supportive and inspiring environment for all involved.
Building a community of like-minded individuals who share a passion for crafting and Cricut projects can further enhance your crafting experience, providing opportunities for learning, sharing, and connecting with others who share your interests.
Community Building and Interaction
Boost your crafting experience by fostering connections and engagement within the crafting community through interactive social media posts and collaborations.
Engage your audience by asking questions about the vinyl application process in your posts, sparking discussions and sharing knowledge. Share behind-the-scenes photos or videos of your mug vinyl projects to provide insight into your creative process and encourage interaction. Additionally, hosting live Q&A sessions or tutorials on vinyl application can help you connect with your audience on a more personal level, offering valuable information and fostering a sense of community.
Collaborate with other crafters or vinyl enthusiasts to exchange tips, ideas, and inspiration for mug designs. Respond promptly to comments, messages, and inquiries from your followers to build relationships and create a supportive community. Use social media as a platform to showcase your work, share experiences, and connect with like-minded individuals who share your passion for crafting.
Frequently Asked Questions
How Do You Get Vinyl to Stick to Coffee Mugs?
To get vinyl to stick to coffee mugs, clean the mug with rubbing alcohol, choose adhesive permanent vinyl, apply it in one piece from the center outward, press firmly, cut slits in transfer tape for curves, and wait 24-48 hours before washing for durability.
Do You Seal Vinyl on Coffee Mugs?
You don't need to seal vinyl on coffee mugs. The durable adhesive can withstand hand washing. Sealing might change the design's look and feel. Correctly applied vinyl can last years without sealing if cared for properly.
How to Get Vinyl Straight on a Cup?
Want your vinyl straight on a cup? Find the center, use masking tape for guidance, start from the middle, and work outward. Check alignment with a level on curved mugs. Adjust before firmly pressing for perfection.
How to Apply Vinyl to Plastic Cups?
To apply vinyl to plastic cups, clean the cup with alcohol. Center the vinyl design and press firmly. Use Caesar transfer tape for easy transfer. Hand wash gently for longevity. Avoid dishwashers.
Conclusion
Now that you've mastered the art of applying vinyl to coffee mugs, let your creativity shine!
The possibilities are endless for creating personalized gifts, promoting your business, or simply adding a touch of flair to your daily routine.
Remember, a well-decorated mug is like a warm hug in the morning – it brings comfort and joy with every sip.
Keep exploring, experimenting, and spreading the love through your custom creations!
-
Ryze Coffee9 hours ago
Ryze Mushroom Coffee Vs Other Brands – How Does It Compare?
-
Vetted5 days ago
15 Best Lavazza for Espresso
-
Industry News7 days ago
Does Jacobs Coffee Support Israel?
-
Ryze Coffee23 hours ago
Ryze Mushroom Coffee Vs Everyday Dose – Which Is Better for You?
-
Vetted5 days ago
15 Best Instant Espressos for Drinking Anytime, Anywhere – Taste Test Results & Reviews
-
Industry News7 days ago
Does Coffee Bean Support Israel?
-
French Press1 week ago
Understanding How French Press Coffee Makers Work
-
Brewing Guides1 week ago
Brew Perfectly: How to Make Coffee with Coffee Maker