Connect with us

Tips and Tricks

Savor the Flavor: How to Best Drink Coffee!

Open up a world of coffee flavors with expert tasting tips and brewing insights.

Published

on

coffee drinking techniques explained

To fully enjoy your coffee's flavors, focus on mastering tasting techniques, improving skills, and understanding brewing factors. Immerse yourself in espresso techniques, cold-brew recipes, and various brewing methods. For a culinary adventure, pair your coffee with foods like chocolate, vanilla, or cinnamon. Explore different roasts and global coffee recipes to elevate your coffee experience.

Key Takeaways

  • Identify coffee flavors: sweet, bitter, acidic, fruity, nutty.
  • Experiment with different brewing methods for diverse tastes.
  • Pair coffee with complementary flavors like chocolate or cinnamon.
  • Adjust brewing variables for optimal flavor extraction.
  • Use fresh, quality beans for the best coffee experience.

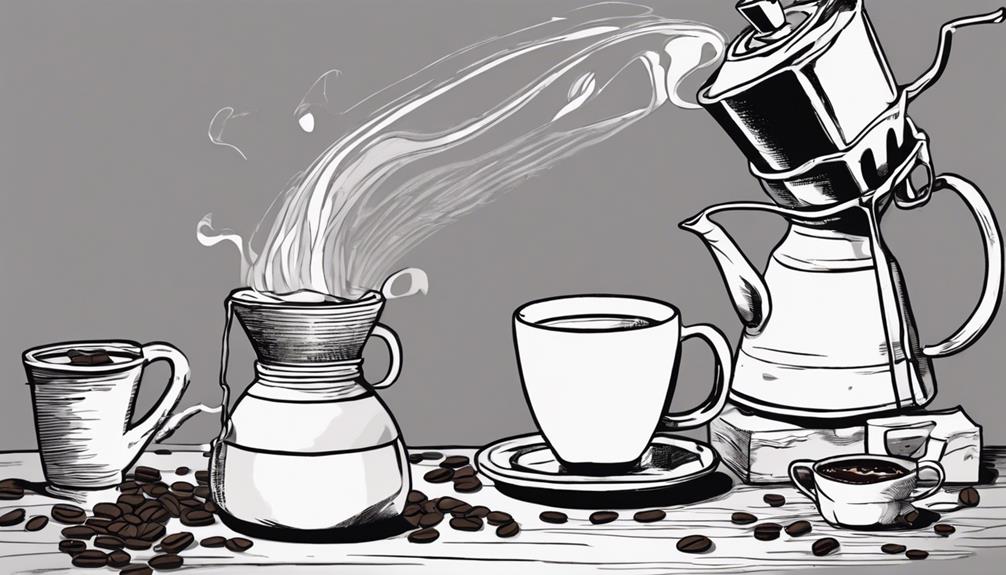
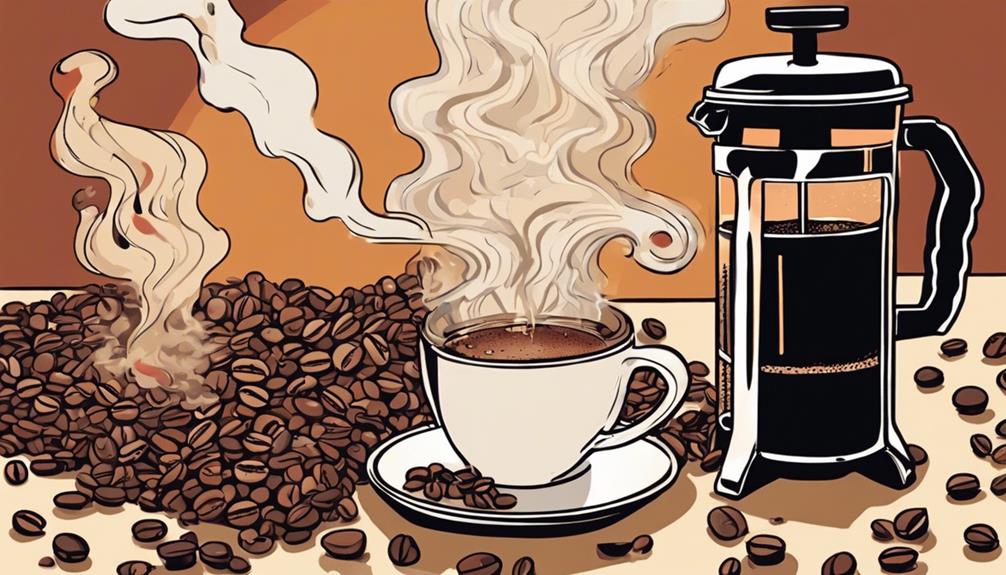
Coffee Tasting Essentials

To fully appreciate the nuances of coffee, you must first master the basics of coffee tasting. Start by ensuring you have a freshly brewed cup to experience the full range of rich flavors. Better coffee beans, such as Coffea arabica, often result in a sweeter taste compared to Coffea canephora. As you sip, identify different types of sweetness like fresh fruit, honey, caramel, or molasses to enhance your sensory experience.

Additionally, pay attention to the body of the coffee, which refers to its weight and feel on your tongue. The dose of coffee and the brewing method used can greatly impact the body. Acidity is another important aspect to take into account, as it adds brightness and dimension to your cup. Measure the quality of acidity by noting the perceived tartness and tanginess.

Developing a flavor vocabulary by associating coffee flavors with familiar foods can also help improve your tasting skills.

Practice and Improvement

consistent effort yields growth

To enhance your coffee tasting skills, engage in regular practice and aim for continual improvement through various methods.

Daily consumption of coffee can help build your taste vocabulary and enhance your tasting skills over time.

Brewing different types of coffee for comparison is a great way to improve your ability to distinguish flavors and nuances in different brews.

Advertisement

Additionally, sharing a coffee tasting experience with a friend can be beneficial as it allows you to exchange tasting observations and broaden your coffee palate.

Remember that there are no wrong answers in coffee tasting; every experience is valuable for your growth.

By actively practicing and gaining more experience, you'll gradually improve your palate and develop a better understanding of your coffee preferences.

Utilizing the five taste categories to guide your impressions into words can also aid you in articulating the flavors you enjoy most.

Keep practicing, keep tasting, and enjoy the journey of continual improvement in your coffee tasting skills.

Advertisement

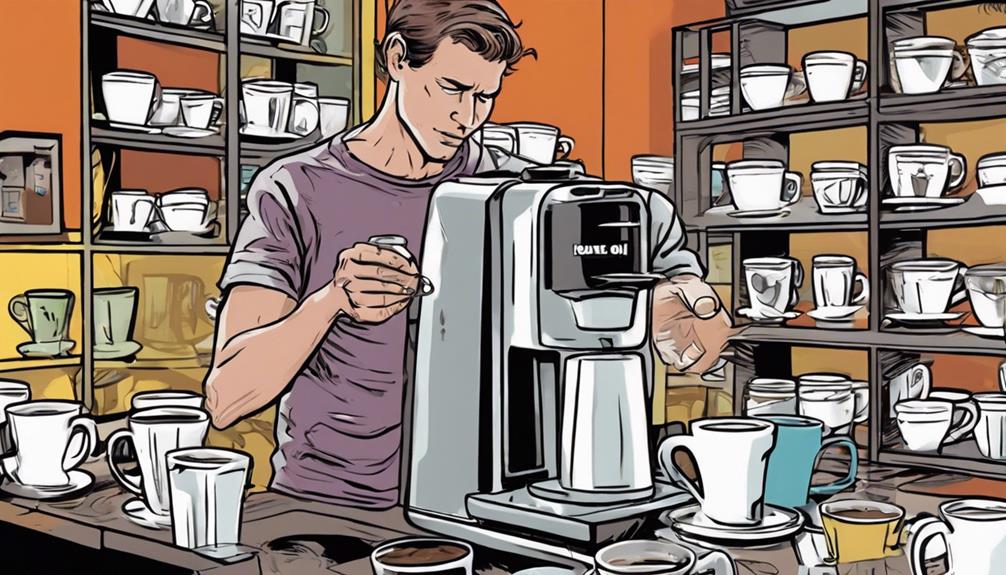
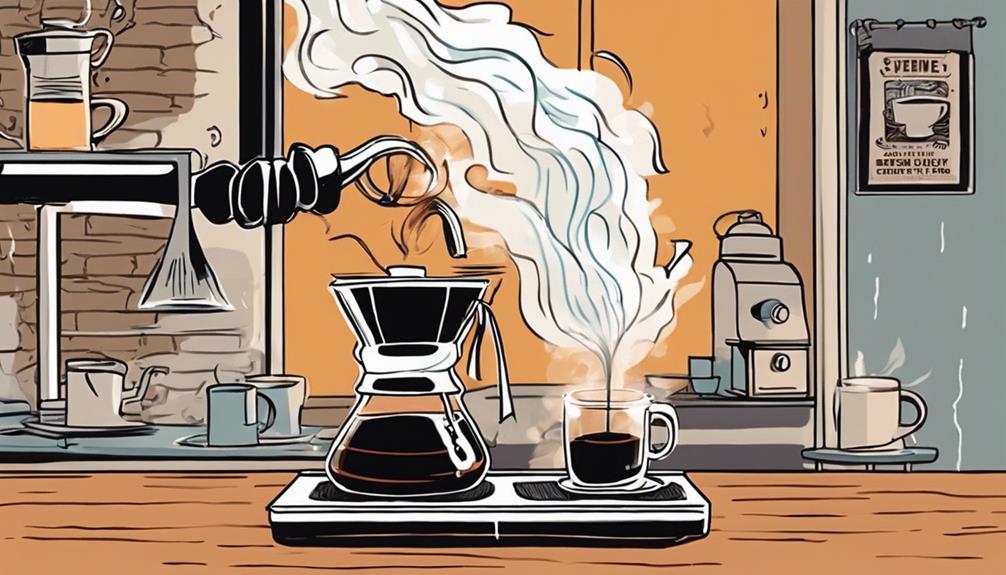
Factors in Coffee Brewing

key elements of brewing

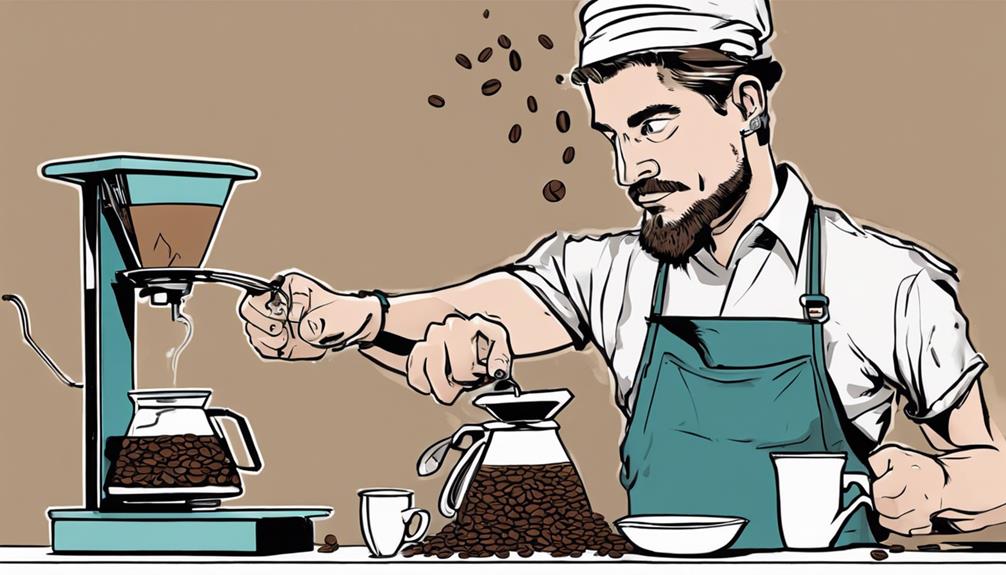
How do different factors in coffee brewing impact the taste and quality of your brew?

When it comes to brewed coffee, the brewing method and various factors such as ground particle size, temperature, extraction time, and pressure play a vital role in determining the final flavor profile of your cup.

The size of the ground particles affects the extraction process, with smaller particles allowing for more surface area to be exposed to water, resulting in a more robust flavor.

Temperature is another pivotal aspect, with the ideal brewing temperature being just below boiling to extract the best flavors from the coffee grounds.

Extraction time also varies depending on the brewing method used; longer extraction times typically lead to a more intense flavor profile.

For espresso brewing, pressure manipulation is key, with around 9 atm of pressure needed to produce a good shot.

Advertisement

If you prefer cold-brewed coffee, be prepared for a longer brewing process, as it requires at least 72 hours in the fridge to achieve a smoother and less acidic flavor profile.

Espresso Brewing Techniques

perfecting espresso flavor profiles

When brewing espresso, controlling the pressure at approximately 9 atm is essential for a perfect extraction.

Adjusting the size of the coffee grounds finely impacts the flavor and texture of your espresso shot.

Let's explore these key points to master the art of making a rich and creamy espresso.

Pressure Control in Espresso

Mastering pressure management in espresso brewing is essential for achieving the desired mouthfeel and texture of your shot. Espresso brewing typically requires around 9 atm of pressure to extract the flavors efficiently. The level of pressure used during extraction significantly influences the final shot.

By manipulating pressure, you can customize your espresso brewing process to suit your preferences. Higher pressure settings result in a creamier texture as they facilitate increased oil extraction from the coffee grounds.

Advertisement

It's vital to understand that pressure control isn't the sole factor influencing the quality of your espresso. Alongside pressure, variables like grind size, temperature, and extraction time also play pivotal roles in shaping the flavor profile of your shot.

Experimenting with different pressure levels, in conjunction with adjusting these other variables, allows you to fine-tune your espresso to perfection. Remember, the interplay between these factors is what ultimately creates that perfect cup of espresso you desire.

Ground Size Adjustment

Optimizing espresso extraction and flavor involves adjusting the ground size to enhance the taste profile of your shot. The grind size plays a significant role in the extraction process; finer grounds increase the surface area, allowing for more flavor extraction, while coarser grounds can result in under-extraction. Finding the perfect balance is pivotal as a coarse grind may lead to a weak and sour shot, whereas a fine grind might bring out bitterness.

Your espresso's taste profile is directly impacted by the grind size, influencing the overall flavor experience.

To achieve the best results, experiment with different grind sizes until you discover the ideal one for your preferred espresso flavor. Remember, just like with a French press, where the coarseness of the grind affects the brew time and taste, adjusting the grind size for espresso can refine the nuances of your shot.

Advertisement

Take the time to fine-tune this aspect of your brewing process for a truly exceptional espresso experience.

Cold-Brewed Coffee Recipe

satisfying step by step guide

To make a delicious cold-brewed coffee, you'll need a few simple ingredients and follow easy brewing steps.

Cold brew typically involves coarsely ground coffee beans steeped in cold water for an extended period, resulting in a smooth and less acidic coffee concentrate.

Experiment with different coffee-to-water ratios and steeping times to find your perfect cold-brewed coffee strength and flavor profile.

Ingredients for Cold Brew

For cold brew coffee, you'll need coarsely ground coffee beans and cold water to start the brewing process.

To make the perfect cold brew, follow these ingredients and steps:

Advertisement
  • Coarsely Ground Coffee Beans: Opt for a medium roast for a balanced flavor profile.
  • Cold Water: Make sure to use cold or room temperature water for the brewing process.
  • Brewing Ratio: Aim for a 1:4 coffee to water ratio for a concentrated flavor.
  • Steeping Time: Allow the coffee to steep in the fridge for 12-24 hours for best extraction.
  • Storage: Store the cold-brewed coffee in the fridge for up to two weeks for convenient daily consumption.

Brewing Process Steps

When preparing cold-brewed coffee, begin by combining coarsely ground coffee beans and cold water in a container. Let the mixture steep in the refrigerator for about 12-24 hours, depending on your preferred strength. Once brewed, strain the coffee using a fine-mesh sieve or a cheesecloth to remove the grounds.

Unlike hot-brewed coffee, cold-brewed coffee is known for its smooth, less acidic flavor profile. It can be served over ice or mixed with milk for a revitalizing drink. Cold brewing extracts the coffee's flavor compounds differently, resulting in a unique taste that many coffee lovers enjoy.

To enjoy a Vietnamese iced coffee, start by layering sweetened condensed milk at the bottom of a glass. Then add coffee grounds into a Vietnamese drip filter and pour hot water over them. Let the coffee drip over the condensed milk, creating a strong and slightly bitter brew.

Stir well, pour over ice, and savor the sweet, robust flavors of this delightful beverage.

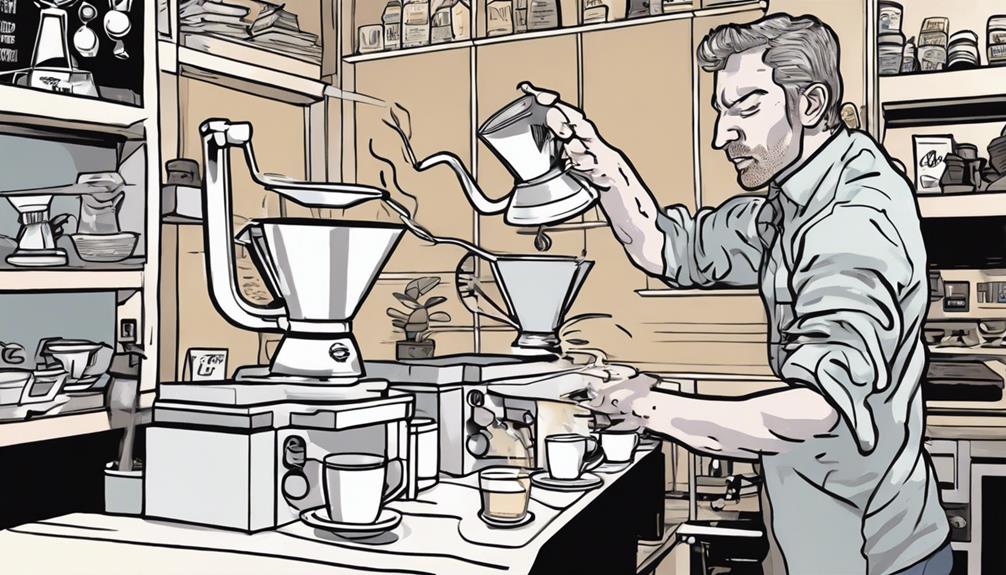
Brewing Techniques for Coffee

perfecting your coffee craft

Ground particle size greatly impacts the extraction process when brewing coffee, influencing the final flavor profile of your brew.

To enhance your coffee experience, consider the following brewing techniques:

  • Adjustable Grind Size: Experiment with different grind sizes to control the extraction process and tailor the strength and flavor of your coffee.
  • Temperature Control: Keep the brewing temperature slightly below boiling point to achieve ideal extraction without introducing bitterness.
  • Extraction Time: Longer extraction times can intensify flavors, so adjust based on your brewing method and the type of coffee beans you're using.
  • Pressure for Espresso: Achieve the perfect espresso by ensuring a pressure of around 9 atm during the brewing process for a creamy texture and rich flavor.
  • Cold-Brew Method: Enjoy a smoother flavor profile by cold brewing your coffee, allowing for a longer extraction period in cold water.

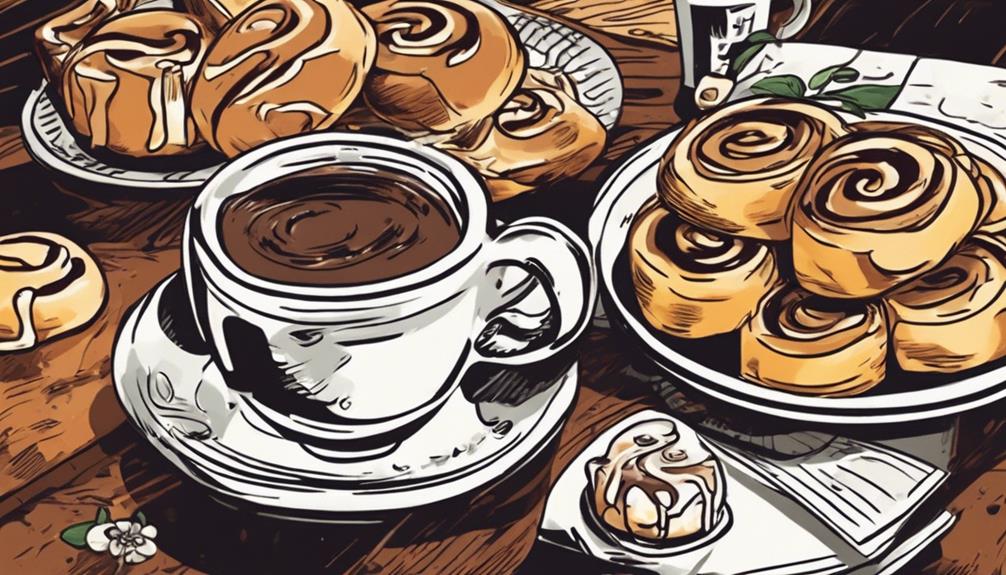
Food and Coffee Pairings

perfect food and drink

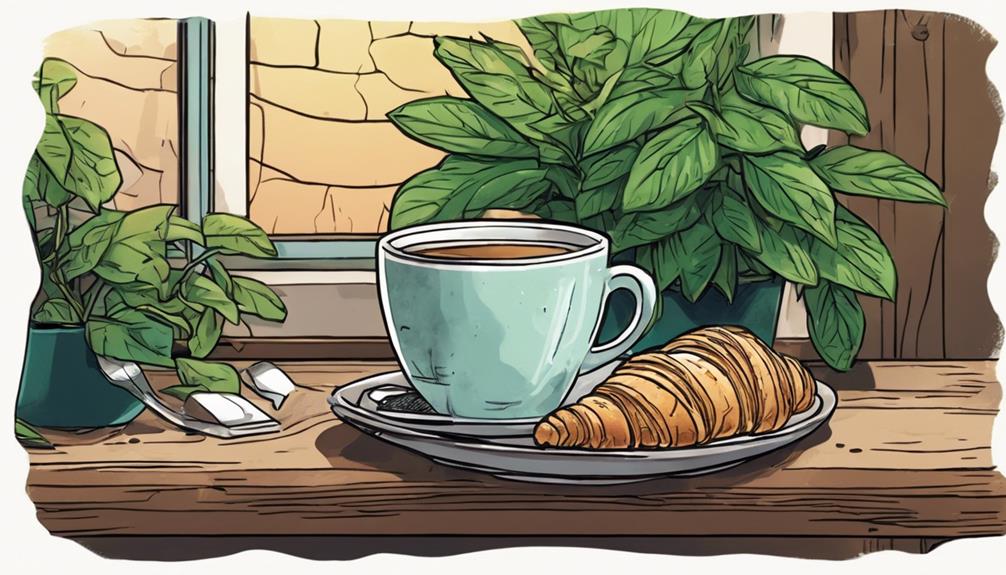
To elevate your coffee experience, explore the art of pairing food with different coffee flavors. Pairing complementary flavors can enhance the rich flavor profiles of your favorite coffee. Certain foods have the ability to balance the acidity, bitterness, or sweetness of your brew, creating a more enjoyable taste experience.

By experimenting with various pairings, you can expand your palate and deepen your appreciation for the intricate flavors of coffee.

Advertisement

Popular flavors like chocolate, vanilla, cinnamon, ginger, and caramel are excellent choices to pair with your coffee. These ingredients can add depth and complexity to your coffee-drinking experience, making each sip more satisfying.

Additionally, different types of coffee such as light, medium, and dark roasts each have their ideal food pairings. Matching specific foods with the right coffee roast can create a delightful and harmonious blend of flavors that will enhance your overall enjoyment of the beverage.

Best Flavors for Coffee Pairings

sweet and savory options

Exploring the best flavors for coffee pairings can greatly enhance your overall coffee-drinking experience. When selecting the perfect accompaniment for your cup of coffee, consider a blend of sweet and complementary flavors.

Here are some excellent options to elevate your coffee experience:

  • Chocolate: Rich and decadent, chocolate pairs beautifully with most coffee varieties, adding a luscious depth to each sip.
  • Vanilla: A classic choice, vanilla's creamy and sweet notes can enhance the natural flavors of your coffee, creating a harmonious blend.
  • Cinnamon: Warm and aromatic, cinnamon adds a cozy touch to your cup of coffee, perfect for a comforting drink.
  • Ginger: For a zesty kick, ginger can provide a unique flavor profile when paired with your favorite coffee, adding a hint of spice.
  • Caramel: Sweet and buttery, caramel brings a delightful sweetness that complements the bitterness of coffee, creating a balanced and enjoyable combination.

Experiment with these flavors to discover your perfect coffee pairing and indulge in a delightful sensory experience.

Coffee Recipes Worldwide

coffee love around globe

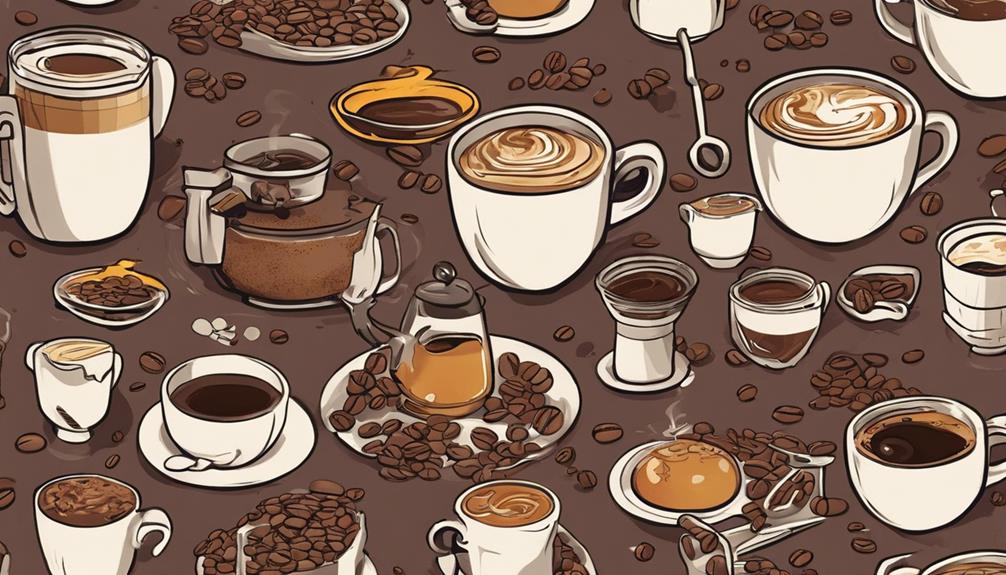
Explore the diverse world of coffee recipes worldwide to expand your palate and discover new and exciting flavors. From the bold and creamy Vietnamese iced coffee to the frothy Turkish coffee brewed with sugar, each recipe offers a unique twist to the traditional coffee experience.

In Italy, indulge in the delightful contrast of flavors with a coffee affogato – hot espresso poured over rich, creamy vanilla ice cream for a decadent treat.

These coffee recipes showcase the creativity and diversity of cultures around the globe, bringing a touch of innovation to your daily coffee routine. Whether you prefer the sweet and creamy notes of Vietnamese coffee or the intense flavors of Turkish coffee, there's something for every coffee lover to enjoy.

Advertisement

Frequently Asked Questions

How Do You Get the Best Flavor Out of Coffee?

To get the best flavor out of coffee, start by using freshly ground beans and experiment with brewing methods. Adjust the water-to-coffee ratio for strength, consider roast level, and pair with foods for enhanced taste.

What Is the Best Way to Flavor Coffee?

To get the best flavor in your coffee, experiment with syrups, spices, or extracts. Mix it up until you find your perfect combo – vanilla, caramel, hazelnut, or cinnamon. Add natural twists like cinnamon sticks or orange peels for a unique taste.

How to Drink Coffee Like a Pro?

To drink coffee like a pro, focus on sweetness, body, acidity, flavors, and finish. Practice daily to enhance your taste skills. Experiment with brewing factors like grind size, temperature, and time. Master espresso nuances for a unique experience.

How to Properly Drink Coffee?

When you savor coffee, hold the cup by the handle, take small sips, and avoid stirring vigorously. Inhale the aroma first, then enjoy slowly. By following these steps, you can fully appreciate the rich flavors and aromas. For an even more authentic experience, enjoy black coffee and savor the natural flavors without diluting them with milk or sugar. This will allow you to taste the intricate notes of the coffee beans and fully appreciate the complexity of the brew. By taking the time to savor and enjoy black coffee, you can enhance your overall coffee-drinking experience.

Conclusion

Now that you've mastered the art of coffee brewing and tasting, you can truly savor the flavor with every sip. By understanding the intricacies of different coffee beans and brewing methods, you have unlocked a whole new level of appreciation for this beloved beverage. You may even want to consider becoming a coffee taster, with your newfound expertise allowing you to discern subtle notes and flavors that others may overlook. Embracing this passion for coffee tasting can open up new opportunities for you to share your knowledge and love for a good cup of coffee with others.

Advertisement

Like a symphony of flavors dancing on your taste buds, coffee is a delightful experience that can be enjoyed in so many different ways.

Keep experimenting, keep exploring, and keep indulging in the rich and complex world of coffee – you'll never run out of new and exciting ways to enjoy this beloved beverage.

Cheers to endless coffee adventures!

Continue Reading
Advertisement

Tips and Tricks

Pallet Project: How to Build a Coffee Table From Pallet Wood!

Want to transform pallet wood into a stunning coffee table?

Published

on

By

diy coffee table project

Create a charming coffee table from pallet wood by disassembling pallets and salvaging top boards. Construct a sturdy base with scrap 2x4s and secure them using a brad nailer. Trim for your desired size. Finish by torching the wood for a rustic feel, sanding, and applying a protective finish. Craft sturdy legs using 4×4 pieces and fasten securely. Enhance aesthetics with metal accents. Remember safety gear and ventilation when torching wood. Follow our step-by-step guide for a unique and personalized furniture piece.

Key Takeaways

  • Disassemble pallets, salvage wood, and construct a sturdy base.
  • Torch wood for a rustic look and sand for a smooth finish.
  • Select and attach 18-20 inch 4×4 legs securely.
  • Apply protective finish, metal accents, and experiment with designs.
  • Prioritize safety gear, ventilation for torching, and fire extinguisher readiness.

Disassembling the Pallets

To begin constructing your coffee table from pallet wood, make certain to carefully disassemble the pallets by separating the top boards from the rest of the structure. The first step involves prying the pallets apart to salvage the usable wood. Using a hammer, pry bar, or nail puller, remove any nails from the top pieces to guarantee a clean surface for your coffee table project.

After separating the top boards, gather scrap 2×4 pieces to create a sturdy base for the table. This base will provide the necessary stability and support for your coffee table. When assembling, use a brad nailer to securely attach the top boards to the base, creating a solid foundation for the table.

As you progress with the project, remember to trim any excess wood from the pallets using a circular saw. This step will allow you to achieve the desired size and shape for your coffee table.

Finishing the Top

completing the roof installation

Skirt the edges of the pallet wood coffee table top with remaining pieces to add a polished finishing touch. This step will give your table a clean and cohesive appearance.

Consider torching the wood surface for a rustic look that adds character. By lightly burning the wood, you can enhance the depth and texture of the grain, creating a unique and artistic finish.

After torching, make sure to sand the pallet wood surface thoroughly. This step is essential to achieving a smooth and visually appealing finish. Utilize an orbital sander to darken the wood, enhancing the overall aesthetic appeal of the coffee table.

Advertisement

The dark finish won't only look great but also provide a protective layer. By following these steps, you can transform your pallet wood into a stunning coffee table that will be a focal point in any room.

Creating the Legs

building prosthetic legs carefully

To create the legs for your coffee table, you'll need to carefully select sturdy 4×4 pieces of wood for stability.

Adjust the legs to your desired height, typically between 18-20 inches, for comfort and functionality.

When attaching the legs to the table base, consider various techniques to securely support the weight of the table and any items placed on top.

Leg Material Selection

Consider using robust 4×4 pieces of wood for the legs when crafting your coffee table from pallet wood to ensure stability and resilience. This choice of material guarantees that the legs can support the weight of the table and endure regular use without wobbling or breaking.

Trimming the legs to a height between 18 to 20 inches will offer the ideal proportions for your coffee table, allowing for comfortable use while seated on a standard couch or chair.

Advertisement

To enhance the visual appeal of your coffee table, you may want to torch the legs to create a textured and rustic look that complements the pallet wood top.

Once you have selected and prepared the legs, firmly attach them to the table frame to establish a sturdy and dependable foundation. For an added touch of industrial style, consider incorporating metal fasteners or brackets, which can both enhance the overall aesthetic and provide additional structural support to your coffee table.

Leg Height Adjustment

Crafting the legs for your coffee table involves cutting 4×4 wood pieces to a height between 18 to 20 inches for best comfort and stability. This height range guarantees that your table isn't too low or too high, making it ideal for both lounging and working purposes.

Once you have decided on the height, consider torching the legs to give them a textured and rustic appearance that complements the pallet wood top of the table beautifully.

To make sure that the legs can adequately support the weight of the table, it's important to securely attach them to the table base. You can explore using industrial-style fasteners or accents to add a unique and personalized touch to the legs, enhancing the overall aesthetic appeal of your coffee table.

Advertisement

Leg Attachment Techniques

Fasten the legs securely to the coffee table base using appropriate hardware to guarantee stability and support for the tabletop. Opt for 4×4 pieces of wood to maintain a sturdy foundation. Cut the legs to a height between 18-20 inches for balanced proportions. To enhance the rustic aesthetic, torch the legs for a textured finish that complements the pallet wood tabletop.

When securing the legs, choose hardware that can withstand the weight of the tabletop. Consider industrial-style fasteners or brackets to not only reinforce the attachment but also add a unique design element to the coffee table. Verify that the attachment is secure to prevent any wobbling or instability.

Final Assembly

final product assembly process

Securely attaching the legs to the table is essential for providing stability and durability in the final assembly of your pallet wood coffee table. Once the legs are firmly fixed, you can move on to the finishing touches that will make your creation stand out.

Here are some steps to contemplate for the final assembly:

  1. Protective Coat: Apply a clear coat to your coffee table to safeguard it from everyday wear and tear while also giving it a sleek, glossy appearance.
  2. Enhance Wood Grain: Bring out the natural beauty of the wood by treating it with a suitable finishing product that enriches the grain patterns.
  3. Metal Accents: For an industrial and rustic look, ponder incorporating metal accents or fasteners into the design, adding an extra touch of character to your table.
  4. Share Your Creation: Be proud of your unique pallet wood coffee table and share your DIY journey with others to inspire creativity and showcase your skills.

Additional Tips

text details and tips

For additional tips to enhance the appearance and resilience of your pallet wood coffee table, consider experimenting with different finishes such as stains, paints, or varnishes. These finishes not only safeguard the wood but also allow you to achieve the desired aesthetic for your table. Personalizing the design is another way to make your coffee table stand out.

Add unique touches like metal accents, decorative hardware, or a custom inlay to give it a personalized touch that reflects your style.

When it comes to assembly, consider using alternative methods like wood glue, dowels, or screws to guarantee your coffee table is sturdy and long-lasting.

Advertisement

Enjoy the process of creating furniture from pallet wood as a rewarding DIY project that showcases your creativity and woodworking skills.

Share your results and experiences with others on social media, DIY forums, or at home gatherings to inspire fellow DIY enthusiasts to engage in their own pallet wood projects.

Tools and Materials Needed

preparing for a project

Gather the necessary tools and materials to begin constructing your pallet wood coffee table. Here's what you'll need:

  1. Tools:
  • Circular saw
  • Brad nailer
  • Torch
  • Orbital sander
  • Clear coat
  1. Materials:
  • Pallet wood
  • Scrap 2×4 pieces
  • 4×4 pieces for legs
  • Industrial-style fasteners

To trim the excess wood from the pallet pieces, you'll use the circular saw. The brad nailer will come in handy for securing the different parts together.

If you want to add a rustic texture to the legs and top of the table, the torch will be your go-to tool.

Once the construction is complete, applying the clear coat won't only protect your coffee table but also give it a glossy finish.

With these tools and materials at your disposal, you'll be all set to start creating your own unique pallet wood coffee table.

Advertisement

Safety Precautions

safety during pandemic period

Make sure to always wear safety goggles and gloves when using power tools to keep your eyes and hands protected.

It's essential to use a dust mask during sanding and cutting to safeguard against inhaling harmful particles.

Remember to maintain proper ventilation when working with torches or finishes to steer clear of fume exposure.

Safety Gear Importance

Prioritize your safety by ensuring you have the necessary gear when working with pallet wood, including gloves, safety glasses, and a dust mask. Here are some key safety gear items to keep in mind:

  1. Gloves: Protect your hands from splinters, cuts, and rough surfaces while handling pallet wood.
  2. Safety Glasses: Shield your eyes from flying debris, dust, and potential eye injuries caused by tools or wood particles.
  3. Dust Mask: Prevent inhalation of wood dust, which can irritate your respiratory system and cause health issues.
  4. Closed-Toe Shoes: Wear sturdy footwear to safeguard your feet from falling objects, sharp nails, or tools.

Hazard Identification Tips

Inspect pallets thoroughly before starting your project to identify any potential hazards such as nails, splinters, or damage that could lead to accidents during the woodworking process.

Wear gloves, goggles, and a mask to protect yourself from splinters, dust, and eye injuries.

Before dismantling the pallets, check for nails, splinters, and damage to avoid accidents.

Advertisement

Use a sturdy work surface and clamps to secure wood pieces while cutting, torching, or assembling to prevent slipping or injuries.

Verify tools like saws, nailers, and torches are in good working condition to minimize the risk of accidents or malfunctions during the project.

When torching wood, work in a well-ventilated area to prevent harmful fumes, and keep a fire extinguisher nearby as a precaution.

Inspiration and Ideas

encouraging creativity and innovation

Explore a variety of design inspirations for your pallet wood coffee table, from rustic to modern styles, to kickstart your creative process. Here are some ideas to get you inspired:

  1. Rustic Charm: Embrace the natural look of pallet wood by keeping the design simple with a distressed finish and visible wood grains.
  2. Industrial Edge: Incorporate metal accents, such as hairpin legs or industrial piping, to give your coffee table a modern industrial vibe.
  3. Hidden Gems: Consider adding hidden compartments or built-in storage solutions to maximize functionality without compromising style.
  4. Personal Touch: Infuse your personality into the design by customizing the table with engravings, a splash of color, or other unique details.

Frequently Asked Questions

Can You Make a Table From Pallets?

Yes, you can create a table from pallets by disassembling them, using scrap wood for the base, and brad nailing the top. Customize the legs with torched 4x4s, secure them well, and add industrial-style fasteners for flair.

Can You Make Furniture Out of Pallet Wood?

Yes, you can make furniture from pallet wood. It's a popular choice for DIY projects due to its charm, affordability, and sustainability. Repurpose pallets to create unique pieces that match your style and decor perfectly.

How Do You Make a Pallet Bed Step by Step?

To make a pallet bed, gather pallets, disassemble them, cut wood, sand for smoothness, assemble with screws or nails, and finish with a clear coat or paint. Confirm dimensions fit your mattress for a sturdy frame.

Advertisement

How Do You Prepare Pallet Wood for Projects?

When prepping pallet wood for projects, start by gently separating the pallets and removing nails to salvage usable wood. Secure scrap 2x4s for stability, use a brad nailer for assembly, and trim with a circular saw for the perfect piece.

Conclusion

Now that you've tackled this pallet project and built your own unique coffee table, sit back and enjoy the fruits of your labor.

Remember, every piece of wood has a story to tell, just like the memories you'll create around your new table.

Let your creativity flow as you continue to repurpose and craft with pallet wood.

The possibilities are endless, just like the grains in the wood itself.

Advertisement

Happy building!

Continue Reading

Tips and Tricks

Leg Day: How to Build Coffee Table Legs for a Sturdy Base!

Prepare to transform your coffee table with sturdy legs and expert finishing techniques in this comprehensive guide.

Published

on

By

building sturdy coffee table

To craft sturdy coffee table legs, start by sanding pine for a smooth surface. Opt for gel stain to achieve a sleek, professional finish. Smooth tabletops with coarse, then fine sandpaper before sealing. Use foam brush for even sealant application. Strengthen legs with biscuit joinery and apply polyurethane coats. Employ pocket screws strategically for a strong base. Add decorative hardware to personalize your table. Mastering these steps guarantees a robust base for your coffee table.

Key Takeaways

  • Use biscuit joinery with beech wood biscuits for strength.
  • Incorporate pocket screws strategically for sturdy leg attachment.
  • Sand legs for smooth finish before assembly.
  • Secure legs with clamps for precise screwing.
  • Ensure proper alignment for a stable coffee table base.

Pine Leg Preparation

Prepare the pine legs by sanding them to create a smooth surface for applying the gel stain. Since we've got repurposed pine for the coffee table legs, sanding is important to make sure the stain adheres well and the finish looks professional.

Once the legs are sanded, it's time to move on to the gel staining process.

The repurposed pine provides a sturdy and cost-effective base for the coffee table legs. By sanding them down, you'll create a clean canvas for the gel stain application. This step is necessary to achieve a sleek black finish that enhances the overall look of the legs.

After sanding, the gel stain should be evenly applied using a brush or rag. Make sure to coat the legs thoroughly to maintain a consistent color. Allow the stain to sit for 5-10 minutes before wiping off any excess for a smooth and flawless finish.

These prepared pine legs are designed to complement the tabletop, adding a modern touch to your coffee table project.

Advertisement

Gel Staining Technique

wood furniture makeover method

For achieving a rich and uniform color on your wooden coffee table legs, gel staining is a highly effective technique. Gel staining allows for a more even finish compared to traditional liquid stains as it sits on the wood's surface. By using a brush or rag to apply the gel stain, you gain better control and coverage over the legs. To achieve the desired color intensity, let the gel stain sit for a few minutes before wiping off the excess. This technique can result in a professional-looking black finish that enhances the overall appearance of your coffee table.

Gel Staining Technique
Advantages Application Tips
– Provides even color finish – Use a brush or rag for control
– Sits on wood surface – Let stain sit for a few minutes
– Enhances overall appearance – Wipe off excess for intensity

Tabletop Sanding Process

refining wood surfaces smoothly

To ensure a smooth and even surface for staining and sealing, start the tabletop sanding process with coarse sandpaper to eliminate any existing finish or imperfections. Begin by sanding the tabletop thoroughly, paying close attention to the edges and corners to make sure they're free of rough spots.

As you progress, switch to finer grit sandpaper to achieve the desired smoothness for the final finish. Remember that proper sanding is essential for achieving a professional and polished look on the tabletop of your coffee table.

After sanding, make sure to eliminate any dust or debris from the tabletop before proceeding to apply a sealant to protect the wood. This step is vital to ensure the sealant adheres properly and provides long-lasting protection for your tabletop.

Sealant Application Method

precise sealant application process

Using a foam brush, evenly apply the sealant on the bottom surface of the tabletop to guarantee complete protection against moisture and stains. Ensure that every inch of the wood is covered to create a barrier that shields it from potential damage.

Let the sealant dry thoroughly before proceeding with the next steps to ensure its effectiveness. If you feel like an extra layer of protection is needed, don't hesitate to apply a second coat of sealant for added durability.

Markdown List to Evoke Emotion:

  1. Feel the satisfaction of knowing your hard work is safeguarded against spills and wear.
  2. Embrace the peace of mind that comes with protecting your coffee table from moisture damage.
  3. Experience the sense of accomplishment as you see the beautiful finish that the sealant provides.

Leg Joinery With Biscuits

strong precise biscuit joinery

How can biscuit joinery enhance the strength and alignment of your coffee table legs?

Biscuit joinery is a fantastic technique that can greatly improve the durability and stability of your woodworking projects, including your coffee table legs. By using small, oval-shaped wooden biscuits and corresponding slots, you can ensure that the legs aren't only aligned correctly but also reinforced with additional strength when glued together.

Advertisement

The specialized tool known as a biscuit joiner, or plate joiner, is essential for cutting precise slots to accommodate the biscuits in the wood pieces. These biscuits, typically made of compressed beech wood, expand when they come into contact with glue, forming a tight and secure bond in the joint.

This method is widely employed in furniture making due to its ability to create robust and nearly invisible joints in tabletops, cabinets, and various woodworking projects.

Polyurethane Coating Steps

applying protective coating process

Now, it's time to focus on the essential steps of sanding between coats and buffing with paste wax for a flawless polyurethane finish on your coffee table.

Sanding will guarantee a smooth application, while buffing with paste wax will enhance the protective shine.

Remember to follow these steps diligently for a durable and attractive tabletop coating.

Sanding Between Coats

To achieve a smooth and even finish on your coffee table legs, sanding between coats of polyurethane is necessary for removing imperfections and guaranteeing better adhesion of subsequent layers. Here's why this step is vital:

Advertisement
  1. Smooth Perfection: Sanding between coats using a fine-grit sandpaper, like 220 grit, helps eliminate any rough spots or imperfections, resulting in a flawless surface for your coffee table legs.
  2. Enhanced Durability: By sanding between coats, you allow the subsequent layers of polyurethane to adhere better to the surface. This enhances the durability and longevity of the finish, making your coffee table legs more resistant to wear and tear.
  3. Professional Finish: The sanding process not only removes any dust particles or drips but also guarantees a consistent sheen and texture across the legs. This attention to detail translates into a professional-looking final product that you can be proud to showcase in your home.

Buffing With Paste Wax

After applying three coats of polyurethane, enhance the finish of your coffee table legs by buffing with paste wax for added shine and protection. Using a clean, soft cloth, apply a thin layer of paste wax in a circular motion over the polyurethane-coated surface.

Let the paste wax dry for a few minutes before buffing with another clean cloth to achieve a smooth, lustrous finish. Buffing with paste wax not only provides an extra layer of protection but also helps to highlight the natural beauty of the wood grain.

This final step adds a professional touch to your coffee table legs, ensuring a durable and attractive finish that will stand the test of time. By incorporating paste wax into your finishing process, you aren't only protecting your hard work but also elevating the overall aesthetic appeal of your DIY coffee table.

Pocket Screw Assembly

compact fastening method used

You can enjoy the benefits of using pocket screws for assembling your coffee table legs. These fasteners provide a strong and secure connection, ensuring your table is sturdy and durable.

Follow some key assembly tips to make sure your pocket screw joints are effectively created.

Pocket Screw Benefits

Pocket screws offer a reliable and discreet method for creating strong joints when securing coffee table legs to the tabletop. The benefits of using pocket screws for building your coffee table legs are numerous:

  1. Strength: Pocket screws provide excellent holding power and stability, ensuring that your coffee table has a sturdy base that can withstand daily use without wobbling or loosening joints.
  2. Convenience: The easy disassembly and reassembly facilitated by pocket screws make it convenient to transport or move your coffee table when needed, allowing for hassle-free maintenance.
  3. Professional Finish: The angled design of pocket screws enables you to secure the legs at precise angles, resulting in a polished and professional appearance without visible fasteners detracting from the overall aesthetic.

Assembly Tips

For a strong and stable coffee table base, ensure strategic placement of the pocket screws when attaching the legs to the tabletop.

To achieve this, pre-drill pilot holes to prevent splitting and verify accurate screw placement. Use clamps to secure the legs in position while driving in the pocket screws, ensuring a precise and snug fit that enhances stability.

Advertisement

When tightening the pocket screws, be thorough to prevent any potential wobbling or instability in the coffee table structure.

Final Coffee Table Touches

adding decorative items carefully

The final touches on the coffee table included adding decorative hardware to enhance its overall appearance. This step not only adds a touch of elegance but also provides a functional element to the piece.

Here are three key elements that will elevate the look and feel of your coffee table:

  1. Choose eye-catching knobs or pulls: Opt for hardware that complements the style of your coffee table. Whether you prefer sleek modern handles or vintage-inspired knobs, the right choice can tie the whole look together.
  2. Consider metal accents: Adding metal corner brackets or decorative accents can give your coffee table an industrial edge or a touch of glamour, depending on the finish you choose.
  3. Personalize with a custom engraving: Make your coffee table truly unique by adding a custom engraving or plaque. Whether it's a meaningful quote, your family name, or a special date, this personal touch will make your table one of a kind.

Frequently Asked Questions

How Do You Stabilize Coffee Table Legs?

To stabilize coffee table legs, make sure they're cut evenly and have a flat surface. Add cross bracing or corner brackets for support. Use hardwood for durability. Install adjustable feet for uneven floors. Reinforce with blocks or stretchers between legs.

How to Make Stable Table Legs?

To make stable table legs, choose sturdy wood like pine or oak. Use joinery techniques like biscuits or mortise and tenon joints. Apply plenty of wood glue for solid adhesion. Guarantee precise alignment when attaching legs for a sturdy base.

What Table Legs Are Most Stable?

Looking for stability in table legs? Tapered legs offer a modern flair and sturdiness. Chunky legs are your go-to for heavy tabletops. Metal hairpin legs scream stability with a sleek look. X-shaped legs distribute weight evenly.

How to Secure Legs to Tabletop?

Align and space the legs correctly before using a drill to create pilot holes for pocket screws. Tighten the screws firmly to prevent wobbling and guarantee stability. Confirm the legs are securely attached to the tabletop.

Advertisement

Conclusion

Now that you've built sturdy coffee table legs, you're one step closer to enjoying a beautiful piece of furniture in your home.

Did you know that on average, Americans spend over 4 hours a day sitting at a table?

With your new coffee table, you'll have a strong and stylish place to gather with family and friends for years to come.

Keep up the great work and enjoy your handcrafted creation!

Advertisement
Continue Reading

Tips and Tricks

Creative Reuse: How to Build a Coffee Table Out of Pallets!

Craft a stunning coffee table from pallets in this guide, starting with disassembly and assembly tips – a must-read for DIY enthusiasts!

Published

on

By

repurposing pallets for furniture

To build a coffee table out of pallets, start by carefully disassembling and preparing the wood. Trim and gather pieces for a sturdy base, then assemble using a brad nailer for efficiency. Finish the table top by skirting edges and experimenting with different treatments for a personalized touch. Create and attach sturdy legs using 4×4 wood pieces and secure them to prevent wobbling. For the final assembly, evaluate balance and apply a clear coat for protection. You can further customize with metal components for an industrial-rustic look. Discover more ways to enhance your coffee table creation!

Key Takeaways

  • Disassemble pallets carefully, trim wood, and gather sturdy pieces for the base.
  • Skirt edges for a polished look, sand thoroughly, and apply desired finishes.
  • Use 4×4 wood for stable legs, torch for rustic look, and secure attachment.
  • Secure legs with industrial-style connectors, evaluate balance, and apply clear coat.
  • Experiment with staining, painting, or waxing finishes for personalization.

Disassembling the Pallets

To start building your coffee table out of pallets, make sure to take the first step of carefully separating the pallets from the top boards by prying them apart. This process requires precision to avoid damaging the wood.

Once you have successfully disassembled the pallets, the next step is to remove any nails from the top pieces. Using a hammer or nail puller will help prevent any wood damage during this step.

After separating the pallets and removing the nails, gather some scrap 2×4 pieces to create a sturdy base for your coffee table. Utilizing a brad nailer will make the assembly of the disassembled pallet pieces more efficient.

Remember to trim any excess wood from the pallets using a circular saw to achieve the desired dimensions for your table.

Finishing the Top

completing the final touches

Skirt the edges of the pallet top with remaining pieces to give it a polished and finished appearance. This step adds a touch of refinement to your coffee table project. Once the edges are neatly covered, you can consider torching the wood to achieve a rustic look and enhance the texture.

Sand the surface of the pallet top thoroughly to guarantee a smooth finish before moving on to any additional treatments. For those aiming for a deeper wood grain effect, burning the wood with a torch can enhance its visual appeal. Conversely, if you prefer a darker, more polished finish, using an orbital sander on the pallet top can help achieve this look.

Advertisement

These techniques provide different aesthetic options, allowing you to customize your coffee table to fit your style preferences. Experiment with these finishing touches to create a unique and personalized piece that will be a conversation starter in your living space.

Creating the Legs

building sturdy table legs

Consider using sturdy 4×4 pieces of wood to create the legs for your pallet coffee table, providing essential stability and support. Cut the legs to your desired height, typically ranging from 18 to 20 inches, ensuring the table is at a comfortable level. To add a textured and rustic look that complements the design, you might want to torch the legs. Securely attach the legs to the table structure, making sure they are level and won't wobble or shift. For an industrial flair, think about incorporating industrial-style fasteners into the leg design to enhance the overall aesthetic of the coffee table.

Creating the Legs Tips Description
Use 4×4 wood pieces Provides stability and support for the table.
Cut legs to 18-20 inches Ensures the table is at a comfortable height.
Torch the legs for a rustic look Adds texture and complements the table's design.

Final Assembly

innovative manufacturing techniques

Fasten the firmly attached 4×4 legs to the table structure with industrial-style connectors to secure stability and balance in the final assembly of your pallet coffee table. Make certain the legs are securely attached to prevent any wobbling or instability. Once the legs are in place, step back and evaluate the overall balance of your creation to verify it sits level on the floor.

After fixing the legs, apply a clear coat to the coffee table. This not only shields the wood from wear and tear but also provides a shiny finish that enhances the natural wood grain. Take your time to evenly cover the entire surface, allowing the wood's beauty to radiate.

To achieve an industrial and rustic look, the pairing of pallet wood with metal components is essential. Embrace the difference between the rough-hewn wood and the smooth metal to add character to your piece. Appreciate the unique and handmade aspect of your coffee table design by showcasing it proudly in your home decor.

Additional Tips

useful travel advice tips

Experiment with various finishes such as staining, painting, or waxing to achieve the desired appearance for your pallet coffee table. These finishes not only enhance the look but also provide protection against wear and tear.

Personalize your design by including unique elements like metal accents, glass inserts, or custom engravings to add character and make the table uniquely yours.

When putting together your coffee table, consider alternative methods like using wood glue, screws, or brackets for added stability and durability. These choices guarantee that your table can withstand daily use and remain in excellent condition for years to come.

Advertisement

Embrace the creativity and satisfaction that come with crafting furniture from pallets; it's a rewarding DIY project that showcases your skills and style. Share your progress and insights with others, either online or in person, to inspire fellow DIY enthusiasts to explore the world of pallet furniture. Your experiences can ignite creativity and motivate others to engage in their own upcycling adventures.

Tools and Materials Needed

tools and materials list

Gather the necessary tools and materials to begin constructing your pallet coffee table. You will need a circular saw, brad nailer, orbital sander, and torch. For materials, gather pallets, scrap 2×4 wood pieces, 4×4 wood for the legs, clear coat finish, and industrial-style fasteners.

Tools:

  • Circular Saw: Essential for cutting and shaping the pallet wood.
  • Brad Nailer: Perfect for securely fastening the pieces together.
  • Orbital Sander: Ideal for smoothing out rough edges and surfaces.
  • Torch: Used to add a textured finish to the 4×4 leg pieces.

Materials:

  • Pallets
  • Scrap 2×4 wood pieces
  • 4×4 wood for the legs
  • Clear coat finish
  • Industrial-style fasteners

These tools and materials will help you repurpose pallets into a stylish coffee table that combines an industrial look with rustic charm. Prepare your workspace with these items to begin the creative process.

Safety Precautions

safety first always prepared

Make sure to wear safety goggles and gloves when handling tools and materials for your pallet coffee table project.

Confirm your workspace is well-ventilated, especially when using heat sources like torches.

Keeping your work area clean and organized is vital to prevent accidents and injuries.

Safety Gear Essentials

Make sure proper safety gear essentials like goggles, ear protection, dust mask, first aid kit, and gloves are worn to safeguard yourself during the construction of the pallet coffee table.

Advertisement
  • Safety Goggles: Protect your eyes from flying debris while using tools.
  • Ear Protection: Prevent damage to your hearing from loud power tools.
  • Dust Mask: Avoid inhaling sawdust and wood particles that can irritate your respiratory system.
  • First Aid Kit: Keep it handy in case of minor injuries or accidents during the building process.
  • Gloves: Protect your hands from splinters, cuts, and blisters while handling rough materials.

When working on your pallet coffee table project, make sure you have these safety essentials on hand and properly worn. Safety gear is essential to prevent accidents and injuries, making your DIY experience safer and more enjoyable.

Workspace Preparations

Before starting work on your pallet coffee table project, ensure your workspace is prepared with necessary safety precautions to prevent accidents and promote a safe DIY experience.

Clear the area of clutter and debris to avoid tripping hazards, especially when using power tools.

Adequate ventilation is essential to disperse any fumes that may arise during the torching process.

Don the appropriate safety gear, including safety goggles, gloves, and a mask, to shield yourself from splinters, dust, and fumes.

Have a fire extinguisher within reach in case of emergencies during torching.

Advertisement

Take time to familiarize yourself with the operation and safety guidelines of all tools and equipment you'll be using in the workspace.

Frequently Asked Questions

Can You Make a Table From Pallets?

You can definitely make a table from pallets. By disassembling them and using the wood for the top and base, along with 4×4 pieces for legs, you can create a cost-effective and eco-friendly DIY project.

How Do You Make Wooden Pallets Usable?

To make wooden pallets usable, separate them, remove nails, and gather wood for repurposing. Use a brad nailer for assembly, a circular saw for trimming, and finish by sanding. Torch for a rustic look, secure legs, level them, and add a clear coat.

Can You Reuse Pallet Wood?

Sure, you can totally reuse pallet wood! Just grab those overlooked pallets and get creative. Clean, sand, treat them for safety, and voila! Transform them into unique furniture pieces. Embrace the DIY spirit!

How Do You Make Stuff Out of Old Pallets?

To make stuff out of old pallets, disassemble them, gather materials, finish the top and create legs, assemble securely, and add protective coat. Experiment with finishes, personalize the design, enjoy the process, and share your results for a unique creation.

Advertisement

Conclusion

Now that you've taken the time to repurpose those old pallets into a stylish coffee table, you've truly turned trash into treasure. By thinking creatively and putting in a little effort, you've transformed something ordinary into something extraordinary.

Keep up the good work and continue to see the potential in everyday items – you never know what masterpiece you might create next!

Continue Reading
Advertisement

Affiliate disclaimer

As an affiliate, we may earn a commission from qualifying purchases. We get commissions for purchases made through links on this website from Amazon and other third parties.

Advertisement

Vetted

Tanpopo Konditorei Café Munich Tanpopo Konditorei Café Munich
Vetted3 weeks ago

Indulge in Delights at Tanpopo Konditorei Café Munich

Savor the exquisite pastries and serene ambiance at Tanpopo Konditorei Café Munich, your go-to spot for a sweet retreat in...

Vetted4 weeks ago

Here’s a new version of the review for “The Creative Spark: Unleashing Your Inner Artist”:

Book Review: “The Creative Spark: Unleashing Your Inner Artist” Illuminating the Path to Creative Awakening Manifestation Journal – Goal &...

top shower scrubbers 2024 top shower scrubbers 2024
Vetted2 months ago

15 Best Shower Scrubbers to Make Cleaning a Breeze in 2024

Discover the top 15 shower scrubbers of 2024 that promise effortless cleaning—find out which one will transform your scrubbing experience!

top storm doors 2024 top storm doors 2024
Vetted2 months ago

The 15 Best Storm Doors of 2024 – Enhance Your Home's Curb Appeal and Protection

Optimize your home's curb appeal and security with the 15 best storm doors of 2024—discover the unique features that could...

stylish outdoor dining sets stylish outdoor dining sets
Vetted2 months ago

15 Best Outdoor Dining Sets for Stylish Al Fresco Dining in 2024

Browse our curated list of the 15 best outdoor dining sets for stylish al fresco dining in 2024, and discover...

top cordless lawn mowers top cordless lawn mowers
Vetted2 months ago

15 Best Cordless Electric Lawn Mowers of 2024 – Power and Convenience Combined

Harness the power of convenience with the 15 best cordless electric lawn mowers of 2024—discover which one will revolutionize your...

top stackable washer dryers top stackable washer dryers
Vetted2 months ago

15 Best Stackable Washer Dryers of 2024 – Space-Saving Solutions for Your Laundry Room

Get ready to discover the 15 best stackable washer dryers of 2024 that will transform your laundry room into a...

ultimate comfort chair massagers ultimate comfort chair massagers
Vetted2 months ago

15 Best Back Massagers for Your Chair: Ultimate Comfort and Relief

Have you been searching for the perfect back massager to elevate your comfort? Discover the 15 best options that promise...

healthier caffeine free mushroom coffees healthier caffeine free mushroom coffees
Vetted2 months ago

14 Best Caffeine-Free Mushroom Coffees for a Healthier Brew

Mushroom coffees offer a healthier brew alternative—discover the 14 best caffeine-free options that might just transform your morning routine!

top bathroom fans 2024 top bathroom fans 2024
Vetted2 months ago

15 Best Bathroom Fans of 2024 – Quiet, Efficient, and Stylish Options

You won't believe the stylish and efficient bathroom fans of 2024 that promise quiet operation and enhanced ventilation—discover your perfect...

adaptogenic mushroom coffee benefits adaptogenic mushroom coffee benefits
Vetted2 months ago

15 Best Adaptogenic Mushroom Coffees to Boost Your Wellness Routine

The 15 best adaptogenic mushroom coffees promise to elevate your wellness routine—discover how these blends can transform your health and...

mushroom coffee pods selection mushroom coffee pods selection
Vetted2 months ago

15 Best Mushroom Coffee Pods to Boost Your Morning Brew

Uncover the top 15 mushroom coffee pods that can transform your morning routine and unleash a new level of energy...

Advertisement

Trending