Tips and Tricks
Bun Bliss: How to Bake Coffee Buns at Home!
Want to create the perfect coffee bun at home?
To bake coffee buns at home, choose bread flour for better structure. Its high protein creates more gluten for chewy, airy buns. Freeze butter before shaping for ideal texture. Refrigerate the coffee topping for consistency. Indulge in freshly baked buns for the best taste. Reheat leftovers for crispy goodness. Download the recipe for quick reference, preheat the oven, shape the dough into fluffy buns, then enjoy with coffee. Store leftovers in an airtight container for freshness. For a rich topping, dissolve coffee in water, mix with butter and sugar, then pipe it on top for a flavorful finish.
Key Takeaways
- Use bread flour for chewier texture and better structure.
- Freeze butter to maintain shape during filling.
- Refrigerate coffee topping for ideal consistency.
- Space buns properly on tray for even baking.
- Indulge in freshly baked buns for prime enjoyment.
Flour Selection for Coffee Buns
When making Coffee Buns at home, opt for bread flour over all-purpose flour for the best results. The high protein content in bread flour is essential for producing more gluten, which gives the buns their desired structure. This gluten formation is vital, especially when dealing with a dough that contains a high butter content, as it allows the buns to rise higher and have a better texture.
The bread flour's ability to absorb more liquid ensures that the dough achieves the right consistency for the Coffee Buns. The gluten content in bread flour also contributes to a chewier texture and airy crumbs, enhancing the overall mouthfeel of the buns.
It's this perfect balance of ingredients like bread flour that sets these buns apart and makes them a delightful treat for any coffee lover. So, when baking these buns, remember that the choice of flour directly impacts the dough's elasticity, rise, and ability to hold its shape during baking.
All-Purpose Vs. Bread Flour
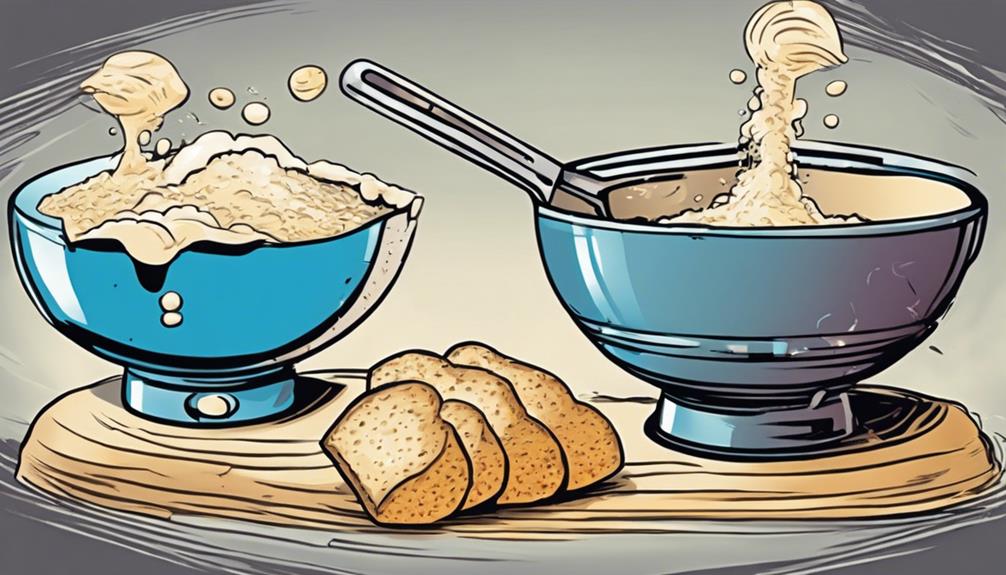
For Coffee Buns, understanding the differences between all-purpose and bread flour is essential to achieving the desired texture and structure in your baked goods. Bread flour contains a higher protein content than all-purpose flour, resulting in a chewier texture and better dough structure for your coffee buns. The increased gluten content in bread flour allows the dough to rise higher and maintain its shape, which is vital when dealing with the rich butter content in the recipe.
The increased gluten content in bread flour allows the dough to rise higher and maintain its shape, which is vital when dealing with the rich butter content in the recipe.
While all-purpose flour can be a more budget-friendly option, it can also be used as a substitute for bread flour in your coffee bun recipe. However, be aware that this substitution may slightly alter the texture of your buns. Bread flour excels in producing more gluten and absorbing more liquid, making it ideal for recipes like coffee buns that require a robust dough structure.
In essence, while swapping bread flour for all-purpose flour or vice versa may not drastically affect the end product, using bread flour typically yields coffee buns with a chewier and more airy crumb.
Tips for Perfect Kopi Roti

To achieve ideal Kopi Roti, freeze the butter for the filling to prevent melting during shaping.
When making these delightful coffee buns, remember to refrigerate the coffee topping to maintain its optimal consistency.
For the best experience, indulge in your coffee buns freshly baked to enjoy their prime texture.
If you have leftover buns or want to restore their crispiness, simply reheat them for 10 minutes.
Additionally, ensure proper spacing between the buns on the baking sheet to allow for expansion during rising and baking.
These tips will help you master the art of creating delicious Kopi Roti at home.
Printable Coffee Buns Recipe
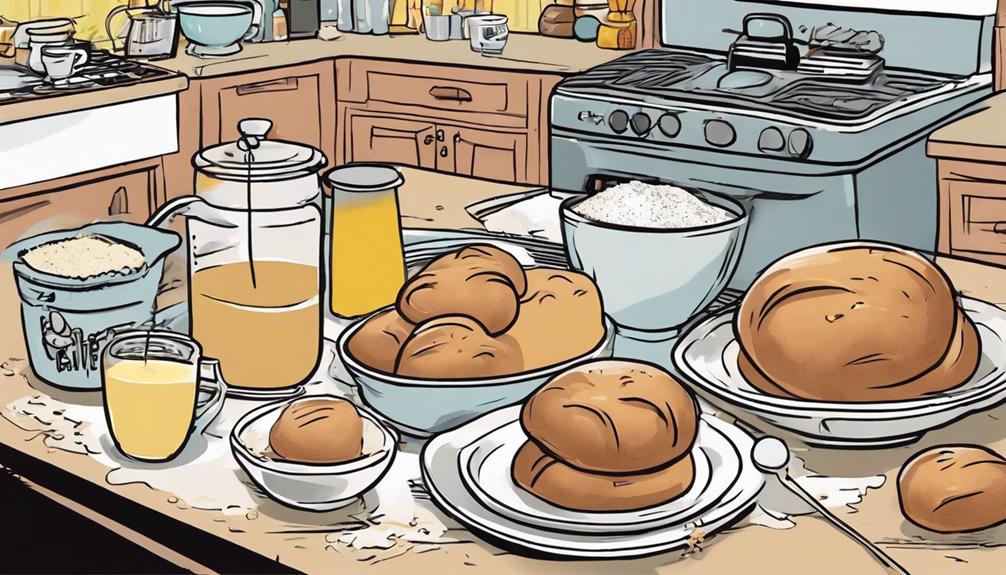
Consider utilizing the downloadable version of the coffee buns recipe for convenient reference during the baking process. This printable recipe simplifies the steps into manageable tasks, ensuring you have all the necessary ingredients and instructions at your fingertips.
Start by preheating your oven and preparing a baking tray lined with parchment. The recipe will guide you through combining butter and sugar until it's light and fluffy, forming the base for the buns' buttery goodness.
Divide the dough into equal pieces, shaping them into soft and fluffy buns that will fill your kitchen with a delightful aroma as they bake. Once out of the oven, let the buns cool before enjoying them with a cup of coffee.
Store any leftovers in an airtight container at room temperature to maintain their freshness. With this printable recipe, baking delicious coffee buns at home has never been easier!
How to Make Coffee Buttercream
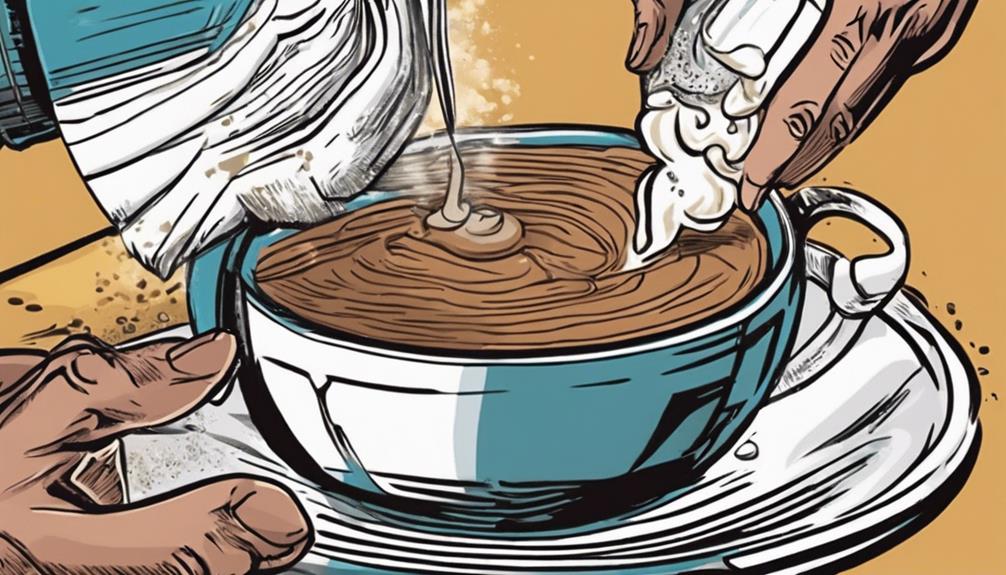
Enhance the flavor of your coffee buns by preparing a rich and creamy coffee buttercream topping.
To make the perfect coffee buttercream topping for your roti buns, follow these simple steps:
- Dissolve the coffee powder: Start by dissolving coffee powder in hot water to infuse the buttercream with a rich coffee flavor.
- Cream the butter: Add the softened butter to the mixture and cream it together with sugar until smooth.
- Incorporate coffee and flour: Make sure to incorporate the dissolved coffee and sifted cake flour into the mixture for a flavorful and creamy consistency.
- Transfer to a piping bag: Once your coffee buttercream topping is ready, transfer it into a piping bag for easy and precise application on top of your buns before baking.
Frequently Asked Questions
How Do You Reheat Coffee Buns?
To reheat coffee buns, pop them in a toaster or airfryer for a few minutes. This way, you'll restore the crispiness without making them soggy. Avoid microwaving to keep the texture just right. Enjoy within days for the best taste!
Can You Freeze Roti Boy?
Yes, you can freeze Roti Boy to extend its shelf life and preserve its freshness. Wrap it in plastic or foil before freezing. Thaw at room temperature or reheat in the oven for a crispy texture.
Where Did Kopi Roti Originate?
You should know where kopi roti originated. In 2003, Malaysia birthed this delight by PappaRoti. It's a taste journey with caramelized coffee cream and a hidden butter pocket. Let's cherish its heritage!
How Many Calories Are in a Coffee Bun?
A coffee bun typically ranges from 250-300 calories, varying by size and ingredients. Enjoy them in moderation as an occasional treat due to their calorie density. Keep an eye on your overall calorie intake for balance.
Conclusion
To sum up, baking coffee buns at home is like creating a warm hug in the form of a delicious treat. With the right flour selection, a perfect kopitiam flavor, and a creamy coffee buttercream, you can easily recreate this beloved snack in your own kitchen.
So grab your apron, preheat your oven, and get ready to indulge in the blissful aroma of freshly baked coffee buns. The sweet and savory combination of rich coffee and buttery dough is truly irresistible. As you knead the dough, the tantalizing scent of warm coffee beans infuses the entire kitchen, creating a cozy and inviting atmosphere. Baking coffee beans for flavor adds an extra depth and complexity to these delectable treats, making them a perfect indulgence for any time of day. Get ready to savor every bite of these delicious coffee buns, and be prepared to share the recipe with anyone who tries them!
Happy baking!
Tips and Tricks
Lightweight Solutions: How to Bring Coffee Creamer Backpacking!
Simplify your backpacking coffee routine with lightweight powdered creamer options – find out how to enjoy a creamy cup without the added weight!
For a light backpacking trip, pack powdered creamer in pre-measured portions. Opt for small containers or single-serve packets. Powdered creamer is light and fits well. Try non-dairy options like coconut or almond milk powder for a creamy coffee. Look into liquid half-and-half or powdered milk packets too. Don't compromise taste for convenience. Enjoy a delicious cup without the extra weight.
Key Takeaways
- Pre-portion powdered creamer into small packets.
- Opt for non-dairy options like coconut or almond milk powder.
- Consider individual serving packets for convenience.
- Choose lightweight and compact creamer solutions.
- Explore innovative creamer options for outdoor adventures.
Creamer Portioning for Lightweight Packing
When preparing for backpacking trips, carefully portioning your coffee creamer is essential for lightweight packing. The key to enjoying a good cup of instant coffee on the trail is having the right amount of creamer for each serving.
By pre-measuring individual portions of powdered creamer into small containers or packets, you guarantee that you carry just enough for your needs without adding unnecessary weight to your pack. Powdered creamer is a popular choice among backpackers due to its lightweight and compact nature, making it easy to pack for extended trips.
For those who prefer liquid creamer, portioning it into small, leak-proof containers is a practical solution to minimize spillage and save space. Consider using single-serve creamer packets to simplify your packing process and eliminate the need for measuring while ensuring convenience on the trail.
With careful planning and portioning, you can enjoy a delicious cup of coffee without compromising the weight of your backpack.
Non-Dairy Creamer Options for Backpacking
Consider exploring non-dairy creamer options for your backpacking trips, such as powdered coconut creamer or almond milk powder. These lightweight and powdered non-dairy creamers are perfect companions for your outdoor adventures. They offer convenience, portability, and a long shelf life, making them ideal for backpacking.
Simply add them to your instant coffee or any beverage to enjoy a creamy and rich texture without the need for refrigeration. Some options even come in individual serving packets, ensuring easy portion control and minimal mess while you're on the go.
With these powdered non-dairy creamer choices, you can enhance the flavor of your drinks without compromising on weight or space in your backpack. Next time you head out on a backpacking trip, don't forget to pack these versatile and lightweight non-dairy creamer options to elevate your coffee experience amidst nature.
Pre-Packaged Creamer Solutions for Hikers
Pre-packaged creamer options for hikers provide convenient and quick choices for enhancing your coffee on the trail. These individual servings come in various forms such as liquid half-and-half, powdered milk, and single-serve packets of non-dairy creamers. Below is a comparison table displaying the different pre-packaged creamer options available for hikers:
Creamer Type | Convenience Level |
---|---|
Liquid Half-and-Half | High |
Powdered Milk | Moderate |
Single-Use Packets | Very High |
Shelf-Stable Half-and-Half | High |
Mixed Powdered Creamers | Moderate |
When selecting a pre-packaged creamer option for your hiking trips, consider factors like convenience, taste preference, and ease of transport. Whether you choose the richness of liquid half-and-half or the practicality of single-serve packets, these pre-packaged options guarantee you can enjoy a delicious cup of coffee while exploring the great outdoors.
Powdered Creamer Benefits on the Trail
Powdered creamer offers hikers a lightweight and convenient solution for enhancing their coffee on the trail. When you're backpacking, the last thing you want is to carry heavy, bulky containers of liquid creamer. Opting for powdered creamer not only saves you space and weight in your pack but also eliminates the need for refrigeration, making it shelf-stable and perfect for outdoor adventures. Simply add a spoonful of powdered creamer to your instant coffee, pour in some hot water, and enjoy a creamy and flavorful cup of joe.
The beauty of powdered creamer lies in its quick and easy dissolvability in hot liquids, ensuring a smooth and creamy texture without any clumps or residue. Additionally, if you have dietary restrictions, many powdered creamer brands offer dairy-free and vegan options to cater to your needs.
Creamer Innovations for Outdoor Enthusiasts
For outdoor enthusiasts seeking innovative creamer options, exploring individual serving packets of liquid creamer can enhance your coffee experience on the trail. These individual packets are lightweight, convenient, and mess-free, making them ideal for backpacking adventures.
When preparing your instant coffee on the go, these creamer packets offer a quick and easy way to add creaminess to your brew without the need for measuring or carrying bulky containers of creamer.
To further elevate your trail coffee experience, consider opting for non-dairy creamer alternatives like coconut or almond milk powder. These options not only provide a longer shelf life but also cater to individuals with dietary restrictions or preferences.
Additionally, experimenting with flavored creamer packets can add a touch of variety to your coffee, making each cup a unique and enjoyable experience amidst the wilderness.
If you prefer a richer and creamier cup of coffee, shelf-stable half-and-half packets are a great choice for backpacking. These alternatives offer a decadent creaminess that complements the bold flavors of instant coffee and coffee grounds, ensuring a satisfying coffee break during your outdoor escapades.
Frequently Asked Questions
How Do You Travel With Liquid Coffee Creamer?
When backpacking, pack liquid coffee creamer in leak-proof containers or opt for individual packets for convenience. Consider using powdered creamer or non-dairy alternatives like coconut milk. To simplify, try flavored instant coffee with creamer included.
Can You Bring Coffee Creamer on a Plane?
You can bring powdered coffee creamer on a plane as it's not subject to liquid restrictions. Consider individual packets for backpacking. Options like powdered coconut creamer or almond milk powder are handy for dietary needs.
How to Brew Coffee While Backpacking?
To brew coffee while backpacking, use instant coffee packets for convenience. Experiment with shelf-stable half-and-half or non-dairy alternatives like coconut creamer. Pack individual servings or pre-measured packets for a lightweight and creamy coffee experience on the trail.
How Do You Liquify Powdered Coffee Creamer?
Want a smooth sip? To liquify powdered coffee creamer, gradually add hot liquid while stirring vigorously. With a whisk or spoon, achieve a creamy consistency. Customize by experimenting with different creamer-to-liquid ratios for your perfect cup.
Conclusion
So next time you hit the trail, don't forget to pack your favorite coffee creamer in a lightweight and convenient way.
Just like a warm cup of coffee on a chilly morning, having your creamer ready to go will be like a comforting hug from home in the great outdoors.
Happy hiking and happy sipping!
Tips and Tricks
School Fuel: How to Bring Coffee to School!
Caffeinate your school mornings with coffee for improved engagement, punctuality, and student well-being—discover the benefits in 'School Fuel'!
Transform your mornings at school by bringing coffee for a boost in student engagement and well-being. Enhance punctuality and nutritional choices with dairy-free and sugar-free options while aligning with USDA guidelines. Future plans include expanding the program to all high schools to improve attendance and focus. Access multimedia resources showcasing the impact of coffee initiatives and find student-friendly recipes meeting nutritional guidelines. Discover the benefits coffee can bring to your school routine.
Key Takeaways
- Introduce local coffee to enhance student engagement and participation.
- Offer nutritious, 12-ounce coffee drinks within 60 calories.
- Gather student feedback to tailor coffee offerings to preferences.
- Ensure coffee choices align with USDA guidelines for healthy options.
- Expand coffee programs to all district high schools for broader impact.
Benefits of Introducing Coffee Programs
By introducing coffee programs in high schools, you can improve student participation in breakfast programs. High school students often rush in the morning, skipping breakfast due to time constraints. Offering coffee as an incentive can encourage them to arrive on time and kickstart their day with a nutritious meal.
By providing dairy-free and sugar-free alternatives, schools can cater to diverse student preferences, ensuring that more students partake in the breakfast program. In addition, aligning coffee programs with USDA guidelines by regulating drink sizes and calorie content promotes healthy choices among students.
Implementing coffee programs not only boosts student punctuality and attendance but also enhances their overall nutrition. High schools can create a positive environment by embracing coffee programs, fostering a culture of well-being and academic success among students.
Student Engagement and Coffee Incentives
Introducing coffee incentives at school can greatly improve student engagement and participation in breakfast programs. By offering students their preferred local coffee, schools can create a welcoming atmosphere that promotes attendance and healthy habits.
Here are four ways coffee incentives can enhance student involvement:
- Increased Attendance: Students are more likely to arrive promptly when they know they can savor a delicious cup of their preferred local coffee.
- Enhanced Focus: The scent and flavor of coffee can help students remain attentive and engaged during morning classes.
- Social Interaction: Gathering at the cafe for coffee fosters a sense of community among students, nurturing relationships and enhancing the school environment.
- Healthy Options: Providing various coffee concoctions, including dairy-free and sugar-free alternatives, guarantees that students can enjoy their preferred beverages while following nutritional guidelines.
Nutritional Guidelines for Coffee Drinks
Adhering to nutritional guidelines, schools must limit coffee drinks to 12 ounces and 60 calories to promote healthier beverage options for students. Following these standards guarantees that coffee offerings align with USDA guidelines, contributing positively to student health and well-being. To control flavor and calorie content while staying within the set limits, sugar-free syrups are commonly used in coffee drinks served at schools.
Nutritional Guidelines for Coffee Drinks | Amount |
---|---|
Maximum Drink Size | 12 oz |
Calorie Limit | 60 |
Use of Sugar-Free Syrups | Yes |
Feedback Survey Planned | Yes |
Additionally, a survey will be conducted to gather feedback on student preferences for coffee flavors and ingredients, ensuring that the coffee options provided are both nutritious and appealing to the student body. By focusing on these nutritional guidelines, schools can offer coffee as a beverage choice that not only energizes students but also supports their overall well-being.
Future Plans for Coffee Initiatives
Our upcoming focus on coffee initiatives will center on expanding the program to all seven high schools in the district come fall.
The following key points highlight our future plans for the coffee program:
- Widespread Implementation: Bringing the coffee initiative to all high schools in the district will guarantee that every student has access to a cup of coffee in the morning.
- Enhancing Student Experience: The expansion aims to improve student punctuality, attendance, and overall morning routines by providing a convenient and nutritious option like One Java Stop coffee.
- Nutritionally Compliant Recipes: Student-friendly coffee recipes have been developed to meet strict nutritional guidelines, limiting the drinks to 12 ounces and 60 calories per serving, ensuring both taste and health benefits.
- Anticipated Long-Term Benefits: Positive results observed within days at Eau Claire High School have spurred the anticipation of long-term benefits on student performance and behavior through the widespread implementation of the coffee program.
Website and Multimedia Resources
Explore the multimedia resources available on Website Primetime for insights into Richland One's coffee program at Eau Claire High School.
It can be hard to find information about specific school programs, but with Website Primetime, you can access a variety of resources related to the coffee initiative.
By visiting the provided URL, you can view an image of the coffee cart at Eau Claire High School, giving you a glimpse into how the program operates on a day-to-day basis.
Additionally, there's a video available at the given video URL that showcases how Richland One uses coffee to combat student tardiness, providing a unique perspective on the impact of the program.
If you're looking for promotional material, you can find a related image at the provided promotional image URL.
The taxonomy and tags associated with the multimedia content include live events, breaking news video, video updates, live video, and press conference, making it easier to navigate through the available resources.
Frequently Asked Questions
How Do You Take Coffee to School?
To take coffee to school, grab your favorite thermos for a portable option. Check school policies for permission. Explore nearby cafes or use an electric kettle. Enjoy your coffee responsibly, considering caffeine and nutrition.
Can Schools Serve Coffee to Students?
You can serve coffee to students in moderation. Limiting to 1 cup (8 ounces) guarantees safe intake. Choose milk and reduced sugar options for healthier benefits. Remember to adhere to recommended caffeine guidelines for teens.
What Drinks Can You Bring to School?
You can bring water, juice, or milk to school. Make sure they adhere to school guidelines. Consider choosing healthy options to fuel your day. Remember to stay hydrated and energized for best focus and performance.
Why Is Caffeine Not Allowed in School?
"Kicking the habit of caffeine in school isn't just about rules; it's about your well-being. Schools avoid caffeine's impact on health and behavior, opting for a healthier atmosphere to help you thrive."
Conclusion
To wrap up, bringing coffee to school can enhance student engagement, boost morale, and provide a much-needed energy boost.
By implementing coffee programs, schools can create a more dynamic learning environment and foster a sense of community.
With careful attention to nutritional guidelines and future plans for coffee initiatives, students can enjoy this tasty treat while staying focused and energized throughout the school day.
Explore the possibilities of school fuel and watch your student body thrive!
Tips and Tricks
Clean Brew: How to Avoid Coffee Grounds in Your Cup!
Curate the perfect cup of coffee by mastering the art of avoiding pesky grounds with these expert tips – discover the secret to a clean brew!
To keep coffee grounds out of your cup, first settle them before plunging. Breaking the crust guarantees a smoother brew. Double filtering enhances purity, while pouring slowly helps maintain clean cups. Leave a water shield to protect from stray grounds. For added tips, try using paper filters or sealing the portafilter. Cleaning the group gasket is essential. Experiment with different baskets for better management. Remember, avoiding grounds guarantees a delicious cup every time.
Key Takeaways
- Settle grounds before plunging for a cleaner drink.
- Break crust to release gases and oils.
- Double filter for a pure brew.
- Pour slowly to avoid sediment.
- Leave a water pool to shield against grounds.
Settle Coffee Grounds Before Plunging
Before plunging, always allow your coffee grounds to settle for a cleaner and smoother drinking experience. This step is vital to prevent unwanted grounds in your cup. By patiently letting the grounds settle, you make sure that the heavier particles sink to the bottom, leaving you with a sediment-free brew.
To further enhance the purity of your coffee, consider using a metal filter. Doubling up on metal filters can act as a dependable barrier against any stray grounds trying to sneak into your cup. This extra layer of filtration helps secure a cleaner and more enjoyable coffee-drinking experience.
Break Crust for Smooth Brewing
When brewing your coffee, remember to break the crust for a smoother experience. This simple step helps release gases, enhance flavor extraction, and prevent grounds from erupting during plunging.
Crust Breaking Technique
To achieve a smoother and cleaner cup of coffee, breaking the crust post-brewing is vital for releasing trapped gases and oils. When the coffee grounds form a crust on the surface post-brewing, gently breaking it by giving a quick stir helps prevent clumping and guarantees a more even extraction. This technique is particularly important in methods like the French press, where the flavor and aroma of the coffee can be notably enhanced.
By breaking the crust, you take control of the extraction process, leading to a more balanced and nuanced flavor profile in your cup.
Moreover, breaking the crust before plunging the French press guarantees a consistent and enjoyable coffee-drinking experience every time. This simple yet effective step allows you to release the full potential of the brewed coffee, resulting in a rich and satisfying brew that's free from unwanted bitterness or uneven flavors.
Smooth Brewing Process
Breaking the crust post-brewing is vital to achieving a smooth brewing process and enhancing the overall flavor profile of your coffee. When you gently stir your coffee after brewing, you effectively break the crust, allowing for a more balanced brew.
This step releases trapped gases, enhances the aroma, and sets the stage for a delightful coffee experience. By breaking the crust, you not only improve the overall taste but also make it easier to evaluate the coffee's aroma and flavor notes.
This technique plays an essential role in ensuring that your coffee is free from unpleasant surprises like coffee grounds in your cup. It's a necessary step in the brewing process that can elevate the quality of your coffee, making each sip a delightful experience.
Sediment-Free Finish
Achieve a sediment-free finish in your cup by gently stirring and breaking the crust post-brewing to guarantee a smooth brewing process. When using a coffee maker with finely ground coffee, this step is essential to prevent unwanted grounds from ending up in your cup. By breaking the crust, you disrupt the surface tension that can trap grounds, allowing them to settle at the bottom of the coffee maker instead of in your drink.
Securing a clean brew involves attention to detail. After breaking the crust, consider adopting the halfway plunge technique during plunging. This method can enhance the flavor profile of your coffee while minimizing the risk of grounds making their way into your cup.
For added protection against errant grounds, doubling up on metal filters is a practical solution. This extra barrier ensures that only the purest brew flows through, leaving behind any unwanted sediment.
Additionally, leaving a small pool of water at the bottom of your cafetiere creates a protective barrier against lingering grounds, further contributing to a sediment-free finish in your cup.
Enhance Purity With Double Filters
By incorporating two metal filters in your French press, you can greatly enhance the purity of your coffee by creating a barrier against errant coffee grounds. Double filtering not only guarantees a cleaner brew but also provides a smoother and sediment-free coffee drinking experience. This method prevents grounds from reaching your cup, maintaining the integrity of your brew intact.
Upgrading your French press game with two metal filters allows you to enjoy a more refined and unadulterated coffee result. The double filtration system effectively keeps grounds at bay, enhancing the quality of your French press coffee.
Pour Slowly for Clean Cups
When serving from your French press, remember to pour slowly to keep your cup clean.
By mastering precise pouring techniques, you minimize disturbance to settled grounds, ensuring a smoother coffee experience.
This method not only enhances visual appeal but also prevents unwanted grounds from ending up in your final brew.
Precise Pouring Technique
To secure a clean and sediment-free cup of coffee, pour your brew slowly and steadily into your cup. By mastering the precise pouring technique, you can make certain that no grounds reach the bottom of your cup, providing a smooth and enjoyable coffee experience.
Slow pouring helps maintain the integrity of your brew, minimizing disturbance to settled grounds and creating a visually appealing coffee without any floating sediment.
When you pour slowly, you safeguard against grounds ending up in your cup, elevating the purity and taste of your cafetiere coffee. This method not only prevents unwanted grounds in your drink but also enhances the overall presentation of your coffee.
Minimize Ground Disturbance
Pouring your coffee slowly is key to achieving a clean and sediment-free cup every time. Here are some essential tips to help you minimize ground disturbance:
- Preservation of Purity: Pouring slowly helps preserve the purity of your coffee by minimizing disturbance to settled grounds.
- Visual Appeal Enhancement: Precise pouring techniques enhance the visual appeal of your brew while safeguarding against grounds in your cup.
- Settling Heavier Grounds: Slow pouring allows the heavier grounds to settle at the bottom, ensuring a smoother and sediment-free coffee experience.
- Protective Barrier: By pouring slowly, you create a protective barrier to shield your cup from any lingering grounds in the cafetiere.
Visual Appeal Enhancement
For an aesthetically pleasing coffee experience, ensure a clean cup by pouring slowly to enhance visual appeal.
When using Keurig® brewers, the way you pour can greatly impact the final presentation of your Keurig® coffee.
Slow, deliberate pouring helps maintain the purity and integrity of your brew by minimizing disturbance to settled grounds.
This precision helps to make sure that your cup remains free of any unwanted coffee grounds, enhancing both the taste and appearance of your drink.
Leave Water Pool for Protection
Creating a small pool of water at the bottom of your cafetiere serves as a protective shield against coffee grounds ending up in your cup.
Here's why this simple trick can make a significant difference in your coffee experience:
- No More Grounds: Keep unwanted coffee grounds at bay by leaving a bit of water in the beaker post-pour.
- Flavour Preservation: Safeguard the flavour of your brew by creating a barrier that prevents grounds from infiltrating your cup.
- Sediment-Free Enjoyment: Enjoy a clean and sediment-free cup of coffee by using this protective technique.
- Enhanced Coffee Quality: Elevate your cafetiere coffee experience with a clean brew that's free of any grounds that might've slipped through.
Prevent Coffee Grounds in Cup
To prevent coffee grounds from ending up in your cup, adjust your grinder settings to produce coarser grounds that won't pass through. This simple tweak can make a significant difference in the quality of your brew by ensuring that only the desired coffee flavors make it into your cup.
Additionally, using a paper filter post-brewing can help catch any stray grounds that may have slipped through, providing you with a smoother drinking experience.
Properly sealing the portafilter is another vital step in preventing grounds from compromising your espresso extraction. By maintaining a tight seal, you can minimize the risk of grounds infiltrating your cup and affecting the taste of your coffee.
Regularly cleaning the group gasket of your espresso machine is essential for upholding this seal and reducing the presence of grounds in your beverage.
Experimenting with different style baskets and techniques can also help you find the best combination for keeping coffee grounds at bay. By following these tips, you can enjoy a clean and delicious cup of coffee every time.
Remember to review our Terms of Service and Privacy Policy for more information on coffee brewing practices.
Frequently Asked Questions
How to Prevent Coffee Grounds in Your Coffee?
To prevent coffee grounds in your cup, adjust grinder settings for coarser grounds, utilize a paper filter, guarantee proper sealing, try different brewing methods, and regularly clean equipment. Enjoy a smooth, ground-free coffee experience every time.
Why Am I Getting Coffee Grounds in My Cup?
You might find coffee grounds in your cup due to fine grounds passing through basket holes or a compromised seal. Over-extraction can also lead to bitterness. Check your machine, like Silvia, and confirm spouts are clean to prevent this issue.
Why Are There Coffee Grounds in My Brewed Coffee?
You're getting coffee grounds in your brewed coffee due to fine grounds passing through holes, causing bitterness. Check your machine settings, grinder, and seal for accumulated grounds. Using non-pressurized baskets can help reduce grounds in your cup.
How Do You Get Coffee Grounds Out of a Cup?
You tilt the cup slowly, letting gravity pull the grounds to one side. Then, sip from the opposite edge, avoiding the gritty residue. This simple technique guarantees a smooth coffee experience, free from unwanted grounds.
Conclusion
So there you have it, folks! Say goodbye to gritty coffee and hello to smooth sips with these easy tips.
Just remember to:
- Settle those grounds
- Break that crust
- Double up on filters
- Pour with finesse
- Leave that water pool alone
With these simple steps, you'll be enjoying a clean brew every time.
Cheers to coffee without the crunch!
-
Espresso4 weeks ago
Martini Espresso – The Cocktail You Need to Try!
-
Espresso4 weeks ago
Iced Toasted Vanilla Oatmilk Shaken Espresso – A Refreshing Twist!
-
Espresso3 weeks ago
Espresso Recipe – How to Brew the Perfect Shot!
-
Ryze Coffee2 weeks ago
Reviews on Mushroom Coffee – Honest Opinions
-
Tips and Tricks3 weeks ago
Secure Storage: How to Build a Gun Concealment Coffee Table!
-
Espresso3 weeks ago
Pumpkin Espresso Martini – The Fall Cocktail You’ll Love!
-
Espresso2 weeks ago
Decent Espresso Machines – Are They Worth the Investment?
-
Tips and Tricks4 weeks ago
Functional Furniture: How to Build a Lift Top Coffee Table!