Espresso
How Much Caffeine Is in One Shot of Espresso? Get the Facts!
Precise amounts of caffeine in espresso can vary greatly, but one thing's certain: the answer will change your daily coffee routine forever.
You are about to receive a precise answer to a question that has been driving your daily routines: a standard 1-ounce shot of espresso contains approximately 63 milligrams of caffeine. This is more caffeine than what you will find in an 8-ounce cup of brewed coffee, which averages around 96 milligrams. However, did you know that factors such as the type of coffee beans, roast type, and grind size can affect the caffeine content? As you delve into the world of espresso, you will uncover more surprising facts that can help you maximize your energy boost and discover the best brewing methods to get the most out of your daily shot.
Key Takeaways
- A standard 1-ounce shot of espresso contains approximately 63 mg of caffeine.
- Espresso has higher caffeine content than an 8-ounce cup of brewed coffee, which averages around 96 mg.
- The type of coffee beans, roast type, grind size, brewing method, and amount of coffee used affect caffeine levels in espresso.
- A double shot of espresso yields around 125 mg of caffeine in 2 ounces, exceeding the caffeine content of a typical brewed coffee serving.
Caffeine Content in Espresso
When you order a shot of espresso, you can expect to get a concentrated dose of caffeine, with a standard 1-ounce serving packing approximately 63 milligrams of this stimulant. This amount of caffeine is considerably higher than what you'd find in a regular cup of coffee. The rich flavor and bold aroma of espresso is a result of the high pressure and quick extraction process used to brew it. This also means that the caffeine content in espresso is more concentrated, leading to a stronger and more immediate jolt of energy compared to a regular coffee. It’s important to be mindful of the caffeine content in espresso, especially if you are sensitive to or trying to limit your intake of this stimulant.
In fact, espresso has more caffeine than an 8-ounce cup of brewed coffee, which averages around 96 milligrams. If you opt for a double shot, also known as a doppio, you'll get around 125 milligrams of caffeine in just two ounces.
The caffeine content in espresso is largely due to the unique brewing methods used to make it. These methods result in a more concentrated beverage, which in turn leads to higher caffeine levels.
Whether you're looking for a quick energy boost or just need a pick-me-up, a shot of espresso is sure to deliver. With its high caffeine content, it's no wonder this beverage has become a staple in many people's daily routines.
Factors Affecting Caffeine Levels
You might expect a standard dose of caffeine in every shot of espresso, but the reality is that several factors can considerably impact the caffeine levels in your morning pick-me-up.
The type of coffee beans you use, for instance, plays a significant role in determining the caffeine content of your espresso.
- The type of coffee beans you use can greatly impact caffeine levels, with some varieties containing more caffeine than others.
- The roast type also affects caffeine concentration, with lighter roasts generally having slightly higher caffeine content than darker roasts.
These factors, along with the brewing method and the amount of coffee used, all work together to influence the final caffeine content of your espresso.
The brewing method, for example, can greatly impact the caffeine output, with espresso yielding a higher caffeine concentration per ounce compared to other methods.
Espresso Vs. Regular Coffee
As you compare espresso to regular coffee, you'll notice a significant difference in caffeine content.
You might assume that a larger cup of coffee would have more caffeine, but it's actually the concentration that matters – espresso packs a punch with around 63 mg of caffeine per ounce, while regular coffee has about 12 mg per ounce.
Now, let's take a closer look at how these numbers break down and what it means for your daily caffeine intake.
Espresso Caffeine Content
A standard shot of espresso packs a more intense caffeine punch than its brewed coffee counterpart, with approximately 63 milligrams of caffeine per ounce. You might be wondering why espresso has such a high concentration of caffeine. It all comes down to the brewing method and grind size of the coffee beans.
When you opt for a shot of espresso, you're getting a more concentrated amount of coffee in a smaller serving size. In comparison, an average 8-ounce cup of brewed coffee contains about 96 mg to 128 mg of caffeine.
Here are some key points to keep in mind:
- A double shot of espresso yields approximately 125 mg of caffeine, potentially exceeding the caffeine content of a typical brewed coffee serving.
- The brewing method greatly influences the caffeine content, with espresso extraction maximizing caffeine transfer in a shorter time.
Caffeine Per Ounce
When comparing espresso to regular coffee, the difference in caffeine concentration per ounce becomes strikingly apparent. Espresso boasts approximately 63 milligrams of caffeine per ounce versus regular coffee's 12-16 milligrams. This significant disparity is vital to understanding the amount of caffeine you're getting in each serving.
As you savor an espresso shot, you're consuming a more concentrated dose of caffeine, with about 40 milligrams per ounce, compared to regular brewed coffee's 10 milligrams per ounce. To put this into perspective, a double shot of espresso (2 ounces) packs around 125 milligrams of caffeine, surpassing the amount found in an 8-ounce cup of brewed coffee.
However, it's important to remember that the smaller serving size of espresso ultimately results in lower total caffeine intake compared to a standard cup of coffee. So, the next time you opt for an espresso or a cup of coffee, consider the amount of caffeine you're getting per ounce to make an informed choice about your daily caffeine intake.
Caffeine Perception and Health
As you savor your espresso, you might wonder why its caffeine kick affects you differently than others.
It's because your body's sensitivity to caffeine, how quickly it absorbs into your system, and your individual tolerance level all play a role in how you experience its effects.
Caffeine Sensitivity Factors
Your sensitivity to caffeine plays a notable role in determining how you perceive its effects, with some people feeling energized after a single shot of espresso while others need multiple servings to experience a similar boost.
This individual tolerance is influenced by various factors, including psychological factors such as expectations and past experiences with caffeine.
Your individual tolerance to caffeine can notably influence how you perceive its effects, leading to variations in how you react to the same amount of caffeine.
Psychological factors, such as expectations and past experiences with caffeine, can also affect your sensitivity and perception, making it a highly personalized experience.
The rapid consumption of espresso, compared to slower sipping of brewed coffee, can alter your perceived energy levels, further highlighting the complexity of caffeine sensitivity.
Caffeine Absorption Rate
The rapid absorption rate of caffeine in espresso, thanks to its high concentration and quick consumption, triggers a swift stimulant effect on your central nervous system. This is because espresso contains approximately 63 mg of caffeine per 1-ounce shot, which is notably higher than the 12-16 mg found in brewed coffee.
When you drink espresso, the caffeine is absorbed quickly into your bloodstream, causing a rapid increase in alertness and energy. In contrast, brewed coffee is sipped slowly, leading to a slower caffeine absorption rate. This difference in absorption rate affects how you experience the stimulant effects of caffeine.
As a result, you may feel more alert and focused after drinking espresso compared to brewed coffee. According to health recommendations, moderate caffeine consumption, including espresso, can be beneficial, with the FDA stating that up to 400 mg of caffeine daily is safe for healthy adults.
Individual Tolerance Levels
Individual factors, including genetics, lifestyle, and habitual consumption, considerably influence how you respond to caffeine from espresso, making your experience unique compared to others. Your individual tolerance to caffeine is shaped by these factors, affecting how you perceive the effects of a shot of espresso.
You may be more sensitive to caffeine, feeling a stronger caffeine jolt from a single shot, or you may need multiple shots to feel the same effects.
Your mindset and expectations can also influence your perception of caffeine's effects, making it feel stronger or weaker based on your prior experiences and expectations.
Additionally, if you're a regular coffee drinker, you may have developed a tolerance to caffeine, requiring higher doses to feel the same stimulant effects. This is important to take into account when determining your personal limits based on health recommendations.
Brewing Espresso for Optimal Caffeine
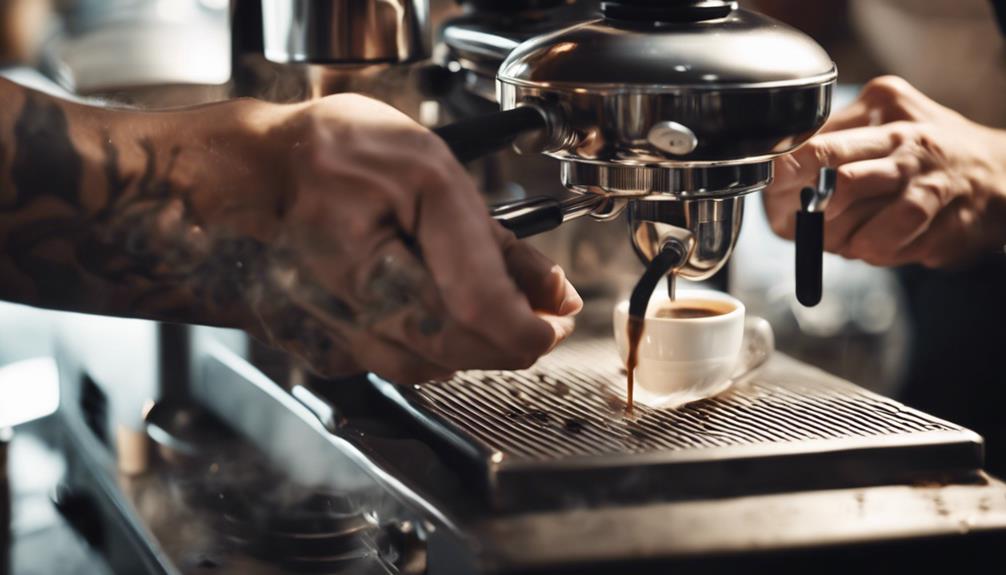
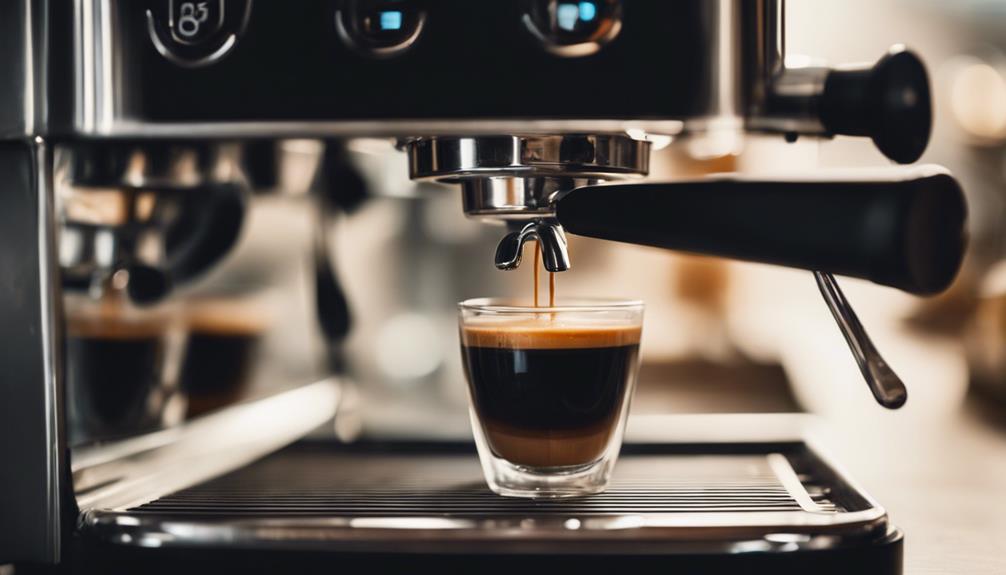
To brew espresso for ideal caffeine, you'll need to dial in the perfect combination of grind size, water temperature, and brewing time. The best grind size is fine, similar to table salt, which enhances caffeine extraction during the brewing process.
You'll want to use pressurized hot water at temperatures between 190°F to 205°F for the best results. Aim for an extraction time of 25 to 30 seconds to achieve ideal flavor and caffeine content.
The amount of coffee grounds you use directly influences caffeine levels, so don't be shy – use more coffee to increase the amount of caffeine extracted in each shot.
Consistency is key when it comes to brewing espresso for optimal caffeine. Make sure to maintain a uniform grind size and appropriate brewing time to maximize caffeine extraction.
Espresso Drinks and Caffeine Content
You're likely familiar with the caffeine kick from a single shot of espresso, but what about the caffeine content in popular espresso-based drinks? When you order a cappuccino, latte, or mocha, you're getting a boost of caffeine from the espresso shots used to make them.
Here's how the caffeine content breaks down in some popular espresso drinks:
- A cappuccino or latte typically contains 75 mg of caffeine for short/tall sizes and 150 mg for grande/venti sizes.
- A mocha can have varying caffeine levels, with 90 mg for short/tall sizes and up to 180 mg for venti sizes due to the addition of chocolate.
Keep in mind that these values are based on Starbucks' standard recipes, but caffeine content may vary depending on the coffee shop or barista.
Now that you know the caffeine content of your favorite espresso drinks, you can make informed choices to get the energy boost you need.
Caffeine Comparison by Brand
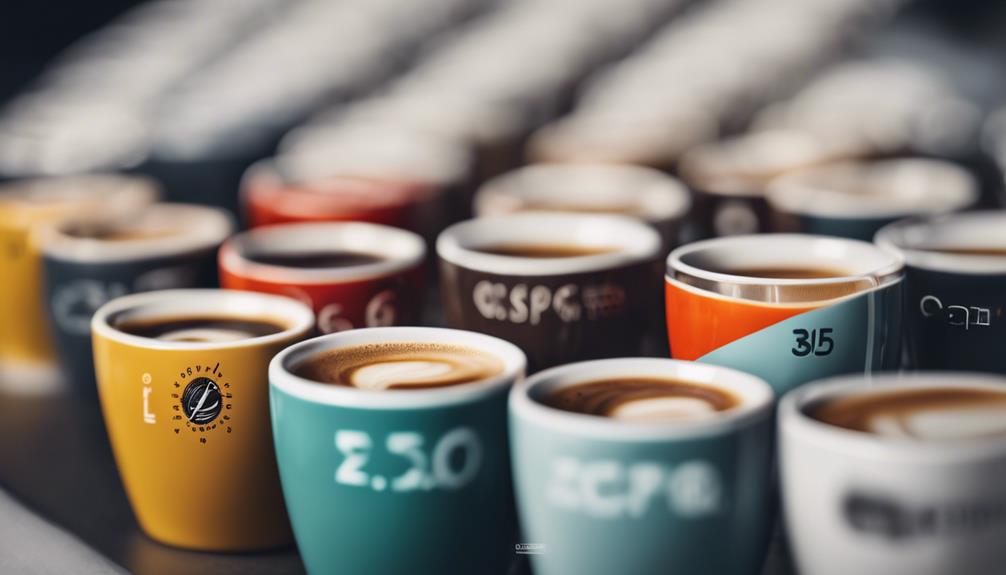
When comparing espresso shots from different brands, you'll find that the caffeine content can vary considerably, with some brands packing a stronger or weaker punch than others.
For instance, a standard 1-ounce shot of espresso typically contains around 63 mg of caffeine, but Starbucks serves a shot with about 75 mg of caffeine. This difference is largely due to the type of beans and roast levels used by each brand. On the other hand, a double shot of espresso, which is 2 ounces, will generally contain around 125 mg of caffeine. However, this can vary depending on the specific coffee beans and the brewing method. If you’re wondering how much caffeine in espresso double shot, it’s important to consider that it can range from 80 to 150 mg, again depending on factors such as roast level and bean type.
Specialty brands, in particular, can offer a wide range of caffeine levels in their espresso shots. Some artisan roasters might produce shots with as little as 50 mg of caffeine per ounce, while others might pack as much as 80 mg per ounce. This variance is vital to grasp, especially if you're trying to manage your caffeine intake.
When ordering a cup of espresso, it's important to keep in mind the brand and brewing methods used. A double shot of espresso at Starbucks, for example, provides around 150 mg of caffeine, demonstrating how serving size affects overall caffeine intake.
Health Benefits and Nutritional Value
Espresso's rich antioxidant profile and moderate caffeine content make it a surprising ally in your pursuit of better health and cognitive function. You might be surprised to learn that espresso is more than just a quick energy boost – it also offers several health benefits and a decent nutritional value.
Here are some of the ways espresso can benefit your health:
Antioxidant powerhouse: Espresso contains antioxidants that may help reduce inflammation and contribute to overall health benefits.
Cognitive function and physical performance: Moderate caffeine consumption, including from espresso, is linked to improved cognitive function and mental alertness, and may even enhance physical performance by increasing adrenaline levels and mobilizing body fat.
Essential nutrients: Espresso contains essential nutrients such as B vitamins and potassium, supporting various bodily functions and overall wellness.
As you enjoy your daily shot of espresso, remember that you're not only getting a caffeine kick but also reaping some amazing health benefits.
Coffee Consumption Trends and Insights
As you navigate the world of coffee, it's fascinating to explore the trends and insights that shape your daily habit. You're not alone in your coffee obsession – approximately 70% of Americans drink coffee weekly, with 62% consuming it daily.
Curiously, younger coffee drinkers aged 18-24 often pair coffee with breakfast, while older drinkers make it a staple for their morning routine. Regional preferences also influence espresso consumption habits, which in turn affect how people perceive caffeine's effects and develop their taste preferences.
What's more, there's a growing interest in specialty coffee among younger demographics, which might explain the varying consumption patterns based on caffeine needs. For instance, an 8-ounce cup of brewed coffee contains around 95 mg of caffeine, while a shot of espresso packs about 63 mg.
This disparity in serving size and caffeine content contributes to diverse consumption trends. As you brew your next cup or order a shot of espresso, consider how these trends and insights shape your coffee experience.
Frequently Asked Questions
How Much Caffeine Is in a Single Shot of Espresso?
You're wondering how much caffeine is in a single shot of espresso? Well, you'll typically get around 63 mg, but it can vary depending on the type of coffee bean and brewing method used. The caffeine content in espresso can also be influenced by the size of the shot and the brewing time. Generally, a double shot of espresso will have around 125 mg of caffeine. However, it’s important to note that espresso is more concentrated than regular coffee, so even though it has a higher caffeine content per ounce, you typically consume less volume of espresso compared to a regular cup of coffee.
Is 2 Shots of Espresso a Lot of Caffeine?
Are you ready for a caffeine boost like no other? Two shots of espresso pack a punch, delivering around 126 mg of caffeine – more than an average cup of brewed coffee!
Is 1 Shot of Espresso Equal to 1 Cup of Coffee?
You're wondering if one shot of espresso is equal to one cup of coffee. Not exactly – while a shot has 63mg of caffeine, a cup of coffee has 96mg, but the espresso's concentrated dose hits you faster.
What Is Considered 1 Shot of Espresso?
As you step into a cozy coffee shop, the aroma of freshly brewed espresso envelops you. You wonder, what is considered 1 shot of espresso? Typically, it's a 1-ounce serving, but some places, like Starbucks, measure it at 0.75 ounces.
Conclusion
You've reached the end of this caffeine-packed journey, but the real question remains: are you ready to take on the day with your newfound espresso knowledge?
With the facts in hand, you can now navigate the complex world of espresso like a pro.
But, be warned, there's still more to uncover – the perfect shot is just the beginning.
As you venture forth, remember, the next cup is always just around the corner, waiting to reveal its secrets…
Espresso
Espresso Recipe – How to Brew the Perfect Shot!
Master the art of brewing the perfect shot of espresso by unlocking the secrets of dose, yield, and time in this expert guide.
Get ready to uncover the magic tricks to making the perfect shot of espresso by mastering dose, yield, and time. Shoot for a standard brew ratio of 1:1.5 to 1:2, using about 18 grams for a double shot. Fine-tune your brewing time to 25-30 seconds, and keep the water temperature between 188-205°F. By consistently measuring your dose and yield, you’ll achieve a well-rounded flavor profile. Once you nail down these crucial components, you’ll be on the path to brewing a shot that’s flavorful, full-bodied, and rich – and there’s a whole world of espresso exploration waiting for you to take it up a notch. So, get ready to elevate your espresso game!
Key Takeaways
- Use a consistent dose of 16-18 grams of coffee for a double shot, with a brew ratio of 1:1.5 to 1:2 for optimal flavor.
- Aim for a brewing time of 25-30 seconds, adjusting grind size to achieve the ideal flow rate of 1-1.5 grams per second.
- Ensure even coffee distribution and tamping with 30 lbs of pressure at a 90-degree angle to prevent channeling and under-extraction.
- Preheat the espresso machine, group head, and cups to achieve thermal stability, and flush the group head with water before brewing.
Essential Espresso Recipe Components
When crafting an espresso recipe, you'll need to focus on three key components: dose, yield, and time, as they work together to produce a perfectly balanced shot. These vital elements will help you achieve the perfect blend of flavors in your espresso. The dose refers to the amount of coffee used, while the yield is the amount of liquid espresso produced. The time, of course, is the duration of extraction.
A standard brew ratio for espresso is important, typically ranging from 1:1.5 to 1:2. This means for every gram of coffee used, you should aim to produce between 1.5 to 2 grams of liquid espresso. To guarantee peak extraction, aim for a brewing time of 25 to 30 seconds. This will help you achieve a balanced flavor profile in your espresso.
When it comes to dosing, consider common amounts like 18 grams for a double shot to maintain consistency and quality in your espresso preparation. By mastering these vital components, you'll be well on your way to brewing the perfect shot of espresso.
Understanding Dose and Yield Ratios
Now that you've got your essential espresso recipe components in place, it's time to fine-tune your dose and yield ratios.
You'll want to strike the perfect balance between the amount of coffee you use and the liquid espresso you produce, as this will greatly impact the flavor profile of your shot.
Dose Ratios Explained
Get familiar with the concept of dose ratios, as they play an essential role in perfecting your espresso shots. The dose refers to the amount of ground coffee used, ranging from 7-10g for a single shot to 20-22g for a triple shot. Yield, on the other hand, is the total weight of the espresso shot, aiming for a brew ratio between 1:1 to 1:3. Clive's signature recipe suggests a 1:1.5 ratio (20g coffee to 30g liquid espresso).
Here's a breakdown of the ideal dose and yield ratios for different espresso shots:
Shot Type | Dose (g) | Yield (g) | Brew Ratio |
---|---|---|---|
Single | 7-10 | 14-20 | 1:1.4 to 1:2 |
Double | 16-18 | 24-36 | 1:1.5 to 1:2 |
Triple | 20-22 | 30-44 | 1:1.5 to 1:2 |
Clive's Recipe | 20 | 30 | 1:1.5 |
Coffee to Liquid Balance
To perfect your espresso shots, you need to strike a delicate balance between the dose of ground coffee and the yield of liquid espresso, as this ratio greatly impacts the flavor profile of your brew.
The dose, or weight of ground coffee, typically ranges from 7-10g for a single shot, 16-18g for a double, and 20-22g for a triple shot.
The yield, or total weight of the espresso shot, usually ranges from 30g to 40g for a double shot, based on a common brew ratio of 1:2. However, Clive's signature recipe features a 1:1.5 brew ratio, using 20g of coffee to yield 30g of liquid espresso, vital for achieving a balanced flavor.
Adjusting the grind size can help you achieve the ideal extraction time of 25-30 seconds, which is essential for a perfect espresso shot.
Understanding the relationship between dose and yield ratios is key to optimizing espresso quality, as higher ratios produce stronger flavors while lower ratios yield milder profiles.
Optimizing Brewing Time and Technique
When you're perfecting your espresso recipe, you know that timing is everything.
You're about to learn how to optimize your brewing time and technique to extract the perfect shot.
Shot Timing Essentials
Mastering shot timing is essential in espresso brewing, as it directly impacts the flavor profile of your final product. Achieving the perfect shot time requires attention to detail and a clear understanding of the brewing process. Typically, the ideal shot time falls between 25 to 30 seconds, allowing for optimal extraction of flavors from the coffee grounds.
Shot Time | Grind Size | Flavor Profile |
---|---|---|
< 25 seconds | Coarse | Under-extracted, sour |
25-30 seconds | Best | Balanced, optimal extraction |
> 30 seconds | Fine | Over-extracted, bitter |
Varies | Varies | Inconsistent brewing |
To fine-tune your shot timing, adjust your grind size accordingly. A coarser grind will accelerate extraction, while a finer grind will slow it down. Consistent brewing is key, so use a scale to measure both the yield and dose of coffee to achieve repeatable results. By monitoring your shot time and making adjustments as needed, you'll be well on your way to crafting the perfect espresso recipe.
Ideal Water Flow
Achieving ideal water flow is critical to enhancing brewing time and technique, as it directly impacts the flavor profile of your espresso shot. You want to aim for a flow rate of 1 to 1.5 grams of espresso per second during extraction, which will give you balanced and consistent results.
The key to achieving this is adjusting your grind size. A finer grind will slow down the water flow, while a coarser grind will speed it up, so you'll need to make adjustments based on your shot timing.
When you're tamping, make sure to maintain a level coffee bed to enhance water flow and prevent channeling, which can lead to uneven extraction. If your shots are pulling too quickly, you'll need a coarser grind, while shots that are pulling too slowly require a finer grind.
Consistent Grind Size
To optimize brewing time and technique, you need to maintain a consistent grind size, which is essential for ensuring uniform water flow through the coffee bed and preventing channeling. A consistent grind size, similar to confectionary sugar, allows for even pressure and prevents water from passing through the puck unevenly.
As you brew espresso, you'll find that fine adjustments to the grind setting may be necessary as coffee ages. A coarser grind can lead to faster extraction times, while a finer grind slows down the flow. If your shot is pulling too quickly, try a finer grind, and if it's pulling too slowly, try a coarser grind. The ideal shot time is between 25-30 seconds, and a consistent grind size helps you achieve this.
Perfecting Distribution and Tamping
You'll get the best out of your espresso by first leveling the coffee bed, an essential step that prevents channeling and guarantees even extraction. To achieve this, use a distribution tool or tap the portafilter to distribute the coffee grounds evenly and break up any clumps. This makes sure that the coffee is evenly saturated during brewing, resulting in a perfect shot of espresso.
Distribution Technique | Tamping Pressure | Puck Preparation |
---|---|---|
Weiss Distribution Technique (WDT) | 30 lbs | Uniform puck for ideal extraction |
Tap portafilter gently | Consistent pressure | Even distribution of coffee grounds |
Use a distribution tool | 90-degree angle | Prevents channeling and clumping |
When tamping, apply consistent pressure, ideally around 30 lbs, at a 90-degree angle to create a uniform puck. Consistency in tamping pressure and technique is key, as variations can lead to significant differences in extraction quality. By mastering distribution and tamping, you'll be well on your way to brewing a perfect shot of espresso with even extraction and rich flavor. Remember, it's not about the force you apply, but rather the consistency and technique you use.
Mastering the Art of Shot Pulling
By the time you're ready to pull a shot, your espresso machine should be fully warmed up and clean, with water flushed through the group head to achieve ideal temperature.
Now, it's time to master the art of shot pulling. As you prepare to pull a shot, make certain you've got the right grind size to achieve the perfect extraction. Aim for a shot time of 25-30 seconds, adjusting the grind size accordingly if it pulls too quickly or slowly.
You're aiming for a double shot of espresso with a yield of 36-40 grams. Remember to maintain a consistent tamping technique, applying around 30 lbs of pressure to create a level coffee bed for even extraction.
As you pull the shot, observe the crema color and flow rate. A pale crema suggests under-extraction, while dark crema indicates over-extraction.
With practice, you'll develop a sense of what works best for your espresso brewing. By nailing these details, you'll be well on your way to pulling the perfect shot, complete with a rich crema on top.
Key Equipment and Preparation Tools
Now that you've mastered the art of shot pulling, it's time to focus on the essential tools of the trade.
You'll need a reliable espresso machine that can deliver consistent results, and a high-quality grinder that can produce a precise grind.
In this section, we'll explore the must-haves for your espresso setup, from machine essentials to grinder selection tips.
Espresso Machine Essentials
Equip yourself with the right gear, and you'll be well on your way to crafting exceptional espresso shots. A quality espresso machine is vital for achieving ideal extraction. For under $500, the Breville Infuser is a great beginner-friendly option.
Equipment | Purpose | Recommendation |
---|---|---|
Espresso Machine | Achieve ideal extraction | Breville Infuser |
Coffee Grinder | Fine and consistent grind size | Baratza Encore |
Portafilter | Hold coffee grounds | Included with machine |
A burr coffee grinder is essential for fresh, high-quality coffee. The Baratza Encore is the best value grinder since 2015. You'll also need a scale to measure coffee doses accurately – a typical double shot requires 13-18 grams of coffee. Necessary tools include a tamper for compressing coffee grounds evenly into the portafilter and a distribution tool to prevent channeling during extraction. Don't forget to maintain a clean machine and regular equipment care to guarantee consistent espresso quality and prevent off-flavors from old coffee oils. With these essentials, you'll be well-equipped to brew the perfect shot!
Grinder Selection Guide
You'll want to invest in a high-quality grinder that can produce a fine, consistent grind size, as it's an essential factor in achieving ideal espresso extraction. A good espresso machine can only do so much if the coffee grinders aren't up to par.
Look for grinders with flat burrs of at least 55mm and stepless grind settings to allow for precise adjustments based on the coffee's age and characteristics. If you're just starting out, manual grinders like the 1Zpresso J-Max provide excellent control and value.
Remember to regularly clean and maintain your grinder to prevent stale coffee oils from affecting the flavor and quality of your espresso shots.
When it comes to measuring coffee doses, invest in a scale to verify you're using the best 16-18 grams of coffee for a double shot.
With a good grinder and the right amount of coffee, you'll be well on your way to brewing good espresso. It just takes practice and patience to get the grind just right. Ground correctly, your coffee will be clean and dry, and you'll be enjoying perfect shots in no time.
Crucial Factors for Brewing Success
Frequently, a perfect shot of espresso hinges on attention to a few essential factors that can make all the difference between a mediocre brew and a sublime one.
To brew the perfect shot, you'll want to focus on getting the grind size just right – think confectionary sugar. This fine grind guarantees peak extraction and flavor transfer during brewing.
Next, maintain a consistent tamping pressure of around 30 lbs to prevent under-extraction or over-extraction, which can affect the flavor profile of your shot.
You'll also want to monitor the shot time, aiming for 25-30 seconds to achieve a balanced and flavorful espresso.
The brew ratio is another vital factor, with a common range of 1:1.5 to 1:2, allowing you to adjust based on personal taste preferences.
Finally, regularly check and maintain the water temperature between 188-205°F, depending on the roast type, to maximize extraction and enhance the overall flavor of your espresso.
Espresso Puck Preparation Techniques
As you prepare the espresso puck, measuring and grinding 18 grams of coffee to a fine consistency, similar to confectionary sugar, is vital for ideal extraction during brewing. This guarantees you're working with the perfect amount of coffee for peak extraction.
Next, use a distribution tool or gently tap the portafilter to evenly distribute the coffee grounds in the basket. This prevents channeling and promotes uniform extraction.
Before brewing, flush the group head with water to guarantee cleanliness and peak brewing temperature, essential for achieving the best flavor extraction.
Consider using the Weiss Distribution Technique (WDT) to break up clumps in the coffee grounds, guaranteeing even distribution and enhancing the flow of water through the puck during extraction.
Tamping Process and Techniques Explained
By mastering the tamping process, you're guaranteeing that the coffee grounds are evenly compressed, which is essential for achieving ideal extraction and preventing channeling during brewing.
To achieve this, you need to apply consistent tamping pressure of around 30 lbs. Anything more doesn't improve the flavor, and under-tamping can lead to under-extraction.
Before tamping, make sure you've distributed the coffee grounds evenly in the portafilter to create a level coffee bed. This prevents channeling and guarantees even extraction.
Hold the tamper at a 90-degree angle, gripping it like a doorknob, and apply gentle, consistent pressure throughout the process.
Consider using a distribution tool or the Weiss Distribution Technique (WDT) to eliminate clumps and promote uniformity in the coffee puck.
Remember, practice is key to mastering tamping techniques. Developing a steady hand and repeatable motions will lead to more consistent espresso shots over time.
With consistent tamping, you'll be well on your way to brewing perfect espresso shots.
Brewing and Serving the Perfect Espresso
With your coffee grounds expertly tamped, you're ready to brew the perfect espresso shot, aiming for a total yield of 36-40 grams with a brew time of 25-30 seconds. To achieve this, guarantee your coffee dose is around 18 grams for a double shot, utilizing a brew ratio of 1:2 to balance strength and flavor.
Here's a quick reference guide to help you brew the perfect espresso:
Variable | Ideal Range | Impact on Flavor |
---|---|---|
Brew Time | 25-30 seconds | Balances acidity and body |
Coffee Dose | 18 grams | Affects strength and flavor |
Crema Color | Light brown to reddish | Indicates ideal extraction |
Thermal Stability | Preheat cups and group head | Guarantees consistent extraction |
Brewing Variables | Document and refine | Maintains flavor quality |
Frequently Asked Questions
How to Make a Perfect Shot of Espresso?
To make a perfect shot of espresso, you'll need to focus on precise measurements, grinding, and tamping. You're aiming for a smooth, balanced flavor, so don't skip the details – it's worth the extra effort!
How to Perfectly Brew Espresso?
You're on a quest to perfectly brew espresso! To achieve this, you'll need to nail the coffee-to-water ratio, grind size, and tamping pressure, then monitor the shot's flow and crema color to guarantee ideal extraction.
What Are the 4 Qualities of a Perfect Espresso Shot?
You're looking for the perfect espresso shot, and it's all about four key qualities: a rich, golden crema; a balanced flavor profile; a smooth, consistent flow; and an inviting aroma that complements the taste.
What Is the Best Ratio for Espresso Shots?
"A million ratios to choose from, but which one's the magic number for you? The best ratio for espresso shots is subjective, but generally, a 1:1 to 1:3 range is ideal, with 1:2 being a popular starting point for a balanced flavor."
Conclusion
You've reached the crescendo of espresso mastery! With each shot, you're now a conductor, harmonizing dose and yield, brewing time and technique, distribution and tamping.
The puck's preparation is a waltz, the tamping process a gentle press. As you brew and serve, the aromas swirl, a symphony of flavors.
Your perfect shot is a work of art, a masterpiece born from precision and practice. Savor the silence, for in this moment, you're the maestro of espresso.
Espresso
Brown Sugar Oat Milk Shaken Espresso – A Sweet and Creamy Treat!
Savor the rich flavors of brown sugar, cinnamon, and oat milk in this decadent espresso drink that will leave you craving more.
Get ready to indulge in the delectable Brown Sugar Oat Milk Shaken Espresso, a delicious drink that is sure to become your new go-to coffee favorite. This delightful beverage combines a strong espresso base with brown sugar syrup and a hint of warm cinnamon, perfectly complemented by the creamy texture of oat milk. To prepare it, simply mix espresso, syrup, and ice in a shaker, then strain into a glass and add a generous serving of oat milk on top. With endless customization options available, including various flavored syrups and alternative milk choices, you can personalize this drink to suit your palate. As you experiment with different variations, you’ll unlock even more ways to enjoy this delightful and creamy treat.
Key Takeaways
- This drink combines bold espresso, brown sugar syrup, and creamy oat milk for a rich, sweet, and harmonious flavor profile.
- Brown sugar syrup is made by boiling brown sugar, water, and cinnamon, adding a deep sweetness and warm spice flavor.
- To prepare, combine espresso, ice, and brown sugar syrup in a shaker, shake vigorously, and strain into a glass topped with oat milk.
- Customization options include flavored syrups, spices, and milk alternatives to tailor the drink to individual tastes and dietary needs.
Rich Flavor Profile Explained
With each sip, you're greeted by a rich flavor profile that masterfully balances the boldness of espresso with the deep, velvety sweetness of brown sugar syrup and a hint of warm cinnamon.
This harmonious blend is what makes the Iced Brown Sugar Oat Milk Shaken Espresso a standout drink. The brown sugar syrup, made by boiling brown sugar with water, cinnamon, and a pinch of salt, adds a complex sweetness that enhances the overall flavor experience.
Meanwhile, the creamy oat milk contributes a smooth texture and a subtle nutty flavor, perfectly complementing the boldness of the espresso. As you sip, the sweetness from the syrup and the bitterness from the espresso meld together in perfect harmony, creating a revitalizing and invigorating drink.
You'll find that the Oat Milk Shaken Espresso is more than just a drink – it's an experience that will leave you wanting more. With its unique flavor profile and creamy texture, it's no wonder this drink has become a favorite among coffee lovers.
Easy Preparation Steps Uncovered
Now that you've got a handle on the rich flavor profile of this drink, it's time to get hands-on!
You'll start by combining the essential ingredients – Brown Sugar Syrup, ice, and espresso – in a way that sets the tone for the entire drink.
Brown Sugar Syrup
Making brown sugar syrup from scratch is a breeze, and you'll be rewarded with a rich, velvety sweetener that elevates your Iced Brown Sugar Oat Milk Shaken Espresso to new heights.
To make it, combine 1 cup of brown sugar, 1/2 cup of water, and a pinch of cinnamon in a saucepan and bring it to a boil. Then reduce to a simmer for 5-10 minutes until it thickens.
Alternatively, you can mix 1 tablespoon of brown sugar with 1 tablespoon of water and microwave for 10 seconds to dissolve the sugar for a quick fix.
This homemade syrup not only enhances the flavor of your Iced Brown Sugar Oat Milk Shaken Espresso but can also be used in other beverages for added sweetness.
You can store it in a sealed jar in the refrigerator for up to 4 weeks, making it convenient for multiple servings of iced drinks.
Plus, you can adjust the quantity of brown sugar in the syrup to customize the sweetness level to your preference, ensuring a tailored flavor experience.
Ice and Espresso Mix
By combining your freshly brewed espresso with brown sugar syrup and ice in a shaker or mason jar, you'll set the stage for a perfectly chilled and flavorful Iced Brown Sugar Oat Milk Shaken Espresso.
Start by adding 1-2 tablespoons of brown sugar syrup to the shaker or jar, depending on your desired level of sweetness. Then, fill the container with ice to achieve the desired chilling effect.
Next, shake the mixture vigorously for 15-20 seconds to create a frothy texture and mix the ingredients thoroughly. This step is essential in combining the rich flavors of the espresso and brown sugar syrup.
Once you've shaken the mixture, strain it into a glass filled with ice, allowing the ice to chill the drink as it's poured.
Your Iced Brown Sugar Oat Milk Shaken Espresso is now ready for the final touch – topping it with 4-6 oz of oat milk. Adjust the amount of oat milk to suit your taste preferences for creaminess.
With these easy steps, you'll be enjoying a deliciously sweet and creamy Shaken Espresso in no time!
Customization Options Galore
As you explore the world of Brown Sugar Oat Milk Shaken Espresso, you'll discover a plethora of customization options to make your drink truly unique.
You can experiment with flavorful twist options, such as adding vanilla or hazelnut syrups, to create a taste experience that's all your own.
Flavorful Twist Options
You can open up a world of flavors by experimenting with various customization options that take your Brown Sugar Oat Milk Shaken Espresso to the next level. One way to do this is by incorporating flavored syrups into your drink. Try adding a drizzle of vanilla or hazelnut syrup to give your espresso a unique twist.
Here are a few ideas to get you started:
- Add a splash of pumpkin spice syrup during fall for a festive touch to your beverage.
- Substitute oat milk with other plant-based options like almond or soy milk for different flavor profiles and creaminess levels.
Milk Alternatives Available
With a plethora of plant-based milk alternatives at your disposal, the Brown Sugar Oat Milk Shaken Espresso can be tailored to suit your unique taste buds and dietary needs.
Oat milk is a popular choice, providing a creamy, dairy-free alternative that complements the drink's flavor profile. You can opt for Califia oat milk for its rich taste or try Chobani Extra Creamy and Oatly Barista Style for excellent texture.
However, if you prefer a different flavor, you can substitute oat milk with almond or soy milk, offering a variety of taste experiences.
Customization of the drink extends to the type of milk used, allowing you to experiment with different brands and types to find your preferred combination.
Whether you're vegan, lactose intolerant, or simply prefer plant-based options, the Brown Sugar Oat Milk Shaken Espresso can cater to your dietary requirements.
With plant-based milk alternatives, you can enjoy a delicious and creamy drink that suits your lifestyle.
Nutritional Information Revealed
Typically, a serving of the Iced Brown Sugar Oat Milk Shaken Espresso packs a caloric punch of approximately 162 calories.
As you savor this sweet treat, you'll be consuming a total of 37g of carbohydrates, with 33g coming from sugars.
On the plus side, each serving provides 2g of protein to help keep you going throughout the day.
Here's a snapshot of what you can expect from this drink:
- A creamy blend of oat milk, which is lower in calories compared to whole milk, making it a healthier dairy-free alternative
- A boost of essential minerals, including 199mg of calcium and 1mg of iron per serving
Syrup Storage and Handling
One essential step in enjoying the Brown Sugar Oat Milk Shaken Espresso is properly storing and handling the brown sugar syrup, ensuring its flavor and quality remain intact for future use.
You'll be happy to know that you can store the brown sugar syrup in a sealed jar or container in the refrigerator for up to 4 weeks. This allows you to make multiple batches of the espresso drink without having to prepare the syrup each time.
When you store the syrup correctly, you'll maintain its rich flavor and quality, which is vital for a delicious Brown Sugar Oat Milk Shaken Espresso. Remember, the syrup is a key component of this drink, so it's worth taking the time to store it properly.
Essential Ingredients and Tools
You'll need a few key ingredients and tools to whip up a delicious Brown Sugar Oat Milk Shaken Espresso. First, let's talk about the essentials: a double shot of espresso, homemade or store-bought brown sugar syrup, oat milk, and ice.
You can also add a pinch of cinnamon to the brown sugar syrup or use it as a topping for extra flavor. When it comes to oat milk, Chobani Extra Creamy and Oatly Barista Style are great options for a creamy texture.
Here are the must-haves for preparation:
- A coffee maker or espresso machine to brew the perfect shot
- A cocktail shaker or mason jar to mix and shake the ingredients
With these ingredients and tools, you'll be well on your way to creating a Brown Sugar Oat Milk Shaken Espresso that's sure to impress.
You can always customize the drink further with flavored syrups to suit your taste preferences. Now that you have the essentials covered, it's time to move on to the next step!
Shaking Technique Mastered
Combine ice, espresso, and brown sugar syrup in a cocktail shaker or mason jar, then shake vigorously for 15-20 seconds to create a frothy layer and infuse the ingredients with air. You'll know it's done when the container feels cold to the touch. This step is essential to achieve the perfect balance of flavors in your brown sugar oat milk shaken espresso.
Shaking Technique | Benefits | Tips |
---|---|---|
Shake vigorously | Creates frothy layer, infuses air | Use generous ice to minimize dilution |
Shake for 15-20 seconds | Achieves perfect balance of flavors | Feel the container for coldness |
Strain over fresh ice | Smooth pour, ideal presentation | Top with oat milk for creamy texture |
After mastering the shaking technique, you're one step closer to enjoying your delicious coffee drink. Remember to strain the mixture over fresh ice and top it with oat milk to maintain the creamy texture and enhance the overall appeal of your brown sugar oat milk shaken espresso.
Serving and Enjoyment Tips
With your shaken espresso mixture ready, it's time to focus on serving and enjoying your brown sugar oat milk shaken espresso to its fullest potential. Now, it's all about creating an unforgettable experience. Here are some serving and enjoyment tips to elevate your Iced Brown Sugar Oat Milk Shaken Espresso:
- Pour the mixture over a generous amount of ice to maintain its invigorating chilled effect.
- Sprinkle ground cinnamon on top before serving to enhance both the aroma and taste, if you desire an added flavor boost.
As you sip your Brown Sugar Oat Milk Shaken Espresso, savor the balance of flavors, enjoying the creamy oat milk combined with the rich espresso and sweet brown sugar notes.
Experiment with different oat milk brands, like Chobani Extra Creamy or Oatly Barista Style, to find the texture and creaminess that suits your palate.
Frequently Asked Questions
What to Add to Brown Sugar Oatmilk Shaken Espresso?
When wondering what to add to your drink, consider a sprinkle of cinnamon for a warm touch, or flavored syrups like vanilla or hazelnut to introduce new flavors, and don't forget about rich chocolate or cocoa powder for a decadent twist.
Is the Shaken Brown Sugar Espresso Sweet?
You're wondering if your shaken espresso is a sweet indulgence? Let's just say it's got a "generous" amount of sugar, courtesy of the brown sugar syrup, but you can always adjust to your taste!
How Many Calories Are in a Brown Sugar Shaken Espresso With Oat Milk?
You're wondering how many calories are in a brown sugar shaken espresso with oat milk? Well, a serving of this drink contains approximately 162 calories, making it a relatively low-calorie pick-me-up option for your daily routine.
Does the Brown Sugar Oatmilk Shaken Espresso Have Dairy?
You might be surprised that 65% of the global population has some degree of lactose intolerance! To answer your question, no, the Brown Sugar Oat Milk Shaken Espresso doesn't have dairy since it uses oat milk as a creamy alternative.
Conclusion
As you savor the last drop of your brown sugar oat milk shaken espresso, you're left with a sense of satisfaction, like finding the missing piece to a puzzle.
Just as a perfectly crafted melody harmonizes disparate notes, this drink combines rich flavors to create a symphony of sweetness and creaminess.
With every sip, you'll be hooked, just like the 75% of coffee lovers who crave a daily dose of caffeine – and for good reason!
Espresso
Pumpkin Espresso Martini – The Fall Cocktail You’ll Love!
Indulge in the Pumpkin Espresso Martini, a decadent fall cocktail that will leave you craving its rich, velvety flavors long after the last sip.
You will absolutely love the Pumpkin Espresso Martini, a uniquely delicious fall cocktail that combines espresso, pumpkin puree, and coffee liqueur. With just 5 minutes of preparation and approximately 250-300 calories per serving, this autumn-inspired drink is ideal for Thanksgiving gatherings and festive celebrations. You can easily increase the recipe for larger groups, and also customize it with non-alcoholic, vegan, or low-calorie options. From the delightful flavors of pumpkin and espresso to the velvety texture of the creamer, each sip will transport you to the cozy embrace of fall – and there’s so much more to discover in this seasonal delight.
Key Takeaways
- This Pumpkin Espresso Martini combines espresso, pumpkin puree, and coffee liqueur for a delicious fall cocktail perfect for autumn festivities.
- With approximately 250-300 calories per serving, it's a relatively low-calorie indulgence for the season.
- Preparation is quick and easy, taking only about 5 minutes to make, and can be scaled up for larger gatherings.
- The flavor profile is rich and smooth, with the pumpkin puree adding autumnal warmth and creaminess to the strong espresso base.
Fall Cocktail Essentials
As you start planning your fall festivities, consider stocking up on these essential ingredients to create a seasonal cocktail menu that will impress your guests.
To craft the perfect Pumpkin Espresso Martini, you'll need a few key items. First, grab a cocktail shaker to mix and chill your ingredients. Next, pick up some pumpkin puree to add a rich, velvety texture to your drink. You'll also need a coffee liqueur, like Kahlua, to give your martini a deep, espresso flavor.
Don't forget to sprinkle a pinch of pumpkin pie spice on top for an extra burst of autumn flavor. With these ingredients in hand, you'll be well on your way to creating a fall-inspired cocktail menu that's sure to delight.
And the best part? This Pumpkin Espresso Martini is quick to whip up, taking only 5 minutes to prepare. So go ahead, get creative, and shake up a batch of these delicious drinks to serve at your next fall gathering!
Pumpkin Martini Recipe Details
You'll need to combine a few key ingredients to create the perfect Pumpkin Espresso Martini, with a unique blend of flavors and textures that will leave your guests wanting more.
To start, you'll need 2 oz of vodka, 3 oz of Kahlua, 3 oz of freshly brewed espresso, 2 oz of creamer, and 1 tbsp of pumpkin puree. This classic espresso martini gets a fall twist with the addition of pumpkin flavor, which pairs perfectly with the rich coffee flavor.
You can enhance the pumpkin flavor by adding a sprinkle of pumpkin pie spice during preparation or as a garnish. With these simple ingredients, you can create a delicious fall cocktail that's sure to impress.
The best part? It only takes about 5 minutes to prepare and serves approximately 250-300 calories per serving. Plus, the recipe is easily scalable, so you can double or triple the ingredients to serve multiple guests at your autumn gatherings.
With the right equipment, including a cocktail shaker, measuring tools, a strainer, and chilled martini glasses, you'll be well on your way to crafting the perfect Pumpkin Espresso Martini.
Autumn-Inspired Flavor Profile
With the ingredients combined, you're left with a rich, velvety cocktail that embodies the warmth and coziness of autumn, thanks to the perfect balance of espresso, pumpkin puree, and pumpkin pie spice.
The Pumpkin Espresso Martini is a true reflection of the fall season, with its inviting aroma and flavors that evoke feelings of comfort and nostalgia. The addition of Kahlua deepens the coffee flavor, making it a perfect choice for coffee lovers during the fall season.
Flavor Component | Description | Impact |
---|---|---|
Espresso | Rich, bold, and smooth | Provides a strong coffee base |
Pumpkin Puree | Sweet, creamy, and velvety | Adds autumnal warmth and coziness |
Pumpkin Pie Spice | Warm, aromatic, and inviting | Evokes feelings of nostalgia and comfort |
The result is a cocktail that's not only delicious but also Instagram-worthy. With its creamy espresso texture and autumn-inspired flavors, the Pumpkin Espresso Martini is the perfect choice for your fall gatherings and Thanksgiving celebrations.
Easy Preparation Steps Guide
Now that you're ready to create your Pumpkin Espresso Martini, it's time to walk through the easy preparation steps.
You'll need to focus on a few key elements, including proper ice preparation, essential mixing techniques, and martini glass essentials, to guarantee a smooth and delicious drink.
Ice Preparation Tips
Chilling your Pumpkin Espresso Martini to perfection starts with preparing the right kind of ice, an essential step that can make or break the flavor and texture of your cocktail. To get it right, fill an ice cube tray with water and freeze it for several hours, ensuring you have enough ice to chill your cocktail shaker adequately.
For a more premium experience, use larger ice cubes or spheres to slow down dilution, allowing your cocktail to remain cold without watering it down quickly. If you want to elevate the visual appeal, consider freezing coffee or espresso in ice cube trays to create coffee-flavored ice cubes for serving.
Don't forget to chill your martini glasses by placing them in the freezer for about 10-15 minutes before serving to keep the cocktail cold longer. With these ice preparation tips, you'll be well on your way to crafting a chilled martini that's sure to impress.
Essential Mixing Techniques
To craft a perfectly balanced Pumpkin Espresso Martini, you'll need to master a few essential mixing techniques that will elevate your cocktail game.
Start by filling a cocktail shaker with a generous amount of ice to chill the ingredients effectively before shaking. Next, combine 2 oz of vodka, 3 oz of Kahlua, 3 oz of brewed espresso, 2 oz of creamer, and 1 tbsp of pumpkin puree directly into the shaker for a balanced flavor profile.
Shake the mixture vigorously for about 30 seconds to guarantee all ingredients are well combined and chilled while creating a frothy texture. This will help to emulsify the cream and vodka, giving your martini a silky smooth consistency.
After shaking, use a strainer to pour the mixture into chilled martini glasses, guaranteeing a smooth pour without any ice shards. Finally, for an extra touch, garnish the cocktail with a sprinkle of pumpkin pie spice or a few espresso beans on top to enhance presentation and flavor.
With these essential mixing techniques, you'll be well on your way to creating a delicious Pumpkin Espresso Martini that's sure to impress.
Martini Glass Essentials
You'll want to prepare your martini glasses in advance by storing them in the freezer or filling them with ice water, guaranteeing they're chilled to perfection when it's time to serve your Pumpkin Espresso Martini. This step may seem minor, but it makes a significant difference in the overall presentation and temperature of your cocktail.
When you're ready to serve, use a strainer to pour the mixed ingredients from the shaker into the chilled martini glass. This will prevent any ice shards from getting into your drink and guarantee a smooth, velvety texture.
To elevate your cocktail experience, consider using chilled stemmed glasses, which add an air of elegance and complement the seasonal theme of your pumpkin espresso martini.
Seasonal Garnish Ideas
Five seasonal garnish ideas can elevate your Pumpkin Espresso Martini from ordinary to extraordinary. You can choose one or combine a few to create a unique look and flavor profile.
Here are some ideas to get you started:
Garnish | Description |
---|---|
Pumpkin Pie Spice | Sprinkle a pinch to enhance autumn flavors and add visual appeal |
Whipped Cream | Top with a dollop for a creamy texture and festive look |
Espresso Beans | Add a few for a classic, elegant touch and to emphasize the coffee flavor |
Caramel Sauce | Drizzle over whipped cream or around the rim of the glass for sweetness and decadence |
Chocolate Shavings | Use for a rich, chocolatey finish that pairs well with pumpkin flavor |
These garnish ideas will take your Pumpkin Espresso Martini to the next level. You can experiment with different combinations to find your favorite. Remember, the key is to have fun and be creative!
Variations and Dietary Options
Now that you've mastered the art of garnishing your Pumpkin Espresso Martini, it's time to explore the many ways you can adapt this recipe to suit various tastes and dietary needs.
One of the best things about this cocktail is its versatility, offering plenty of variations to cater to different preferences.
If you're hosting a gathering with non-drinkers, you can easily transform the recipe into a non-alcoholic mocktail by substituting the vodka and Kahlua with coffee, flavored syrups, or espresso.
For those with dietary restrictions, rest assured that this recipe is gluten-free and can be made dairy-free with non-dairy creamers.
You can also make it refined sugar-free by using natural sweeteners instead of simple syrup.
Feel free to experiment with flavored vodkas, like vanilla or caramel, to enhance the richness of the cocktail without adding extra calories.
And, with a few tweaks, you can even make it vegan by using plant-based creamers and dairy-free toppings.
With these variations, you can enjoy your Pumpkin Spice Espresso Martini while catering to all your guests' needs.
Frequently Asked Questions
Can I Make a Virgin Version of the Pumpkin Espresso Martini?
You're wondering if you can make a virgin version of a certain fall-inspired drink. Absolutely, you can! Simply substitute the vodka with a non-alcoholic alternative, like cream soda or sparkling water, and keep the rest of the ingredients the same.
How Long Does It Take to Prepare This Fall Cocktail?
You're wondering how long it takes to prepare this fall cocktail? It'll take you around 10-15 minutes to mix and shake the ingredients, and that's including the time it takes to chill the martini glasses!
Can I Use Fresh Pumpkin Instead of Canned Puree?
"Oh, you think you're a rebel, don't you, wanting to use fresh pumpkin? Go ahead, waste your time roasting and pureeing, but honestly, canned is fine, and you'll get the same flavor with way less hassle."
Is the Pumpkin Espresso Martini Suitable for a Halloween Party?
You're wondering if this drink fits a Halloween party vibe, and the answer is yes! The pumpkin flavor and espresso kick will be a hit with your spooky celebration crowd, so go ahead and serve it up!
Can I Store the Martini Mixture in the Refrigerator Overnight?
"As you prep for the spookiest night of the year, you're wondering if your martini mixture can chill overnight. Yes, you can store it in the refrigerator, but give it a good stir before serving to revive the flavors and textures."
Conclusion
You've just conjured up the most divine, life-changing, and Instagram-worthy fall cocktail of the season – the pumpkin espresso martini!
With every sip, the warm, spiced flavors will transport you to a cozy autumn evening, surrounded by golden leaves and crackling fireplaces.
Your taste buds will do the happy dance, and your friends will beg for the recipe.
Trust us, this martini is the epitome of fall in a glass – you'll be obsessed!
-
Espresso4 weeks ago
Espresso Lyrics by Sabrina Carpenter – The Song and Its Meaning!
-
Espresso2 days ago
Espresso Recipe – How to Brew the Perfect Shot!
-
Espresso2 weeks ago
Caffeine in Espresso Vs Coffee – What’S the Difference?
-
Espresso3 weeks ago
Espresso With Milk – Classic Coffee Drinks to Try!
-
Tips and Tricks3 weeks ago
Cafe Construction: How to Build a Coffee Shop From the Ground Up!
-
Espresso3 weeks ago
What Color Is Espresso? The Trendy Shade Explained!
-
Tips and Tricks2 weeks ago
DIY Bar: How to Build a Coffee Bar for Your Home!
-
Tips and Tricks4 weeks ago
Counter Design: How to Build a Coffee Shop Counter for Efficient Service!