
Use this guide to brew coffee with a French press, pour-over dripper, AeroPress, or automatic drip machine. It is for beginners who want a repeatable cup without needing specialized skills. Set aside 10-20 minutes, including preparation and cleanup; the exact time depends on the brewer.

Get coffee and tea gear delivered free with Prime
- Fast, free delivery on millions of items
- Prime Video, Amazon Music and more included
- Member-only deals all year

AeroPress Original Coffee Press – French Press, Pour-Over & Espresso Style
- ✔ Capacity: 10 ounces
- ✔ Dimensions: 1.87 × 1.87 × 4.63 inches
- ✔ Weight: 6.4 ounces

FinalPress Original Coffee & Tea Maker Portable Stainless Steel Micro French Press
- ✔ Capacity: 1 liter (listed)
- ✔ Dimensions: 1.3 × 1.3 × 6.5 inches
- ✔ Weight: 8.16 ounces

Pour Over Coffee Dripper Stainless Steel Reusable Filter 600 Mesh Ultra-Fine 1-2 Cup Portable
- ✔ Brand and model: Trekbrew KFD-02
- ✔ Capacity: 1–2 cups
- ✔ Dimensions: 4.53-inch top diameter × 3.94-inch base × 3.35-inch height
Difficulty: Beginner | Time: 10-20 minutes
What You’ll Need
Tools & Materials:
- A coffee brewer: French press, pour-over dripper, AeroPress, or automatic drip machine
- Fresh coffee beans or ground coffee
- A burr grinder if using whole beans
- A kettle or the brewer’s water reservoir
- A kitchen scale or measuring spoon
- Clean, drinkable water
- A mug or serving carafe
- A timer
- A filter, if required by the brewer
Knowledge:
- Basic familiarity with pouring hot water and handling a coffee brewer
- No prior brewing experience required
Check your brewer’s instructions for its assembly, filter type, and any model-specific directions. Use a heat-safe surface, and take care around hot water and freshly brewed coffee. If you have no scale, start with about 2 level tablespoons of ground coffee per 6 ounces (180 milliliters) of water, then adjust to taste.
AeroPress Original Coffee Press – French Press, Pour-Over & Espresso Style
The AeroPress Original earns our top position because it gives a small manual brewer more range than the other two picks. Its air-pressure method can produce French press, pour-over, and espresso-style drinks, so we can adapt the recipe instead of committing to a single brew format. The listed 10-ounce capacity still centers it on one serving, but for solo brewing that is a useful balance between portability and flexibility.Its paper micro-filters distinguish it from the reusable steel filters in FinalPress and Trekbrew. Paper filtration is appealing when we want a cleaner cup and an easy grounds-and-filter disposal routine; it also means keeping filters on hand. FinalPress avoids that ongoing supply need, while Trekbrew offers a simpler pour-over process, but neither offers the same range of brew styles. The AeroPress is described as brewing in about two minutes and cleaning by ejecting the grounds, though newcomers may need practice to apply consistent pressure. It is the most adaptable choice here, not the right one if we want a large batch or a fully hands-off brewer.
Pros:
- Supports French press, pour-over, and espresso-style brewing.
- Compact and lightweight at 6.4 ounces.
- Paper micro-filters support a cleaner cup and are included to get started.
- The described brew time is about two minutes, with grounds ejected for cleanup.
Cons:
- The 10-ounce capacity may mean brewing multiple rounds for more than one person.
- Paper filters are consumables that need replenishing.
- Getting a consistent press can take practice.
Best for: Solo drinkers and travelers who want to experiment with several coffee styles using one compact manual gadget.
Not ideal for: Buyers who regularly serve a group, want to avoid paper filters, or prefer a brewing process that does not require pressing by hand.
Bottom line: We recommend the AeroPress as the most versatile gadget here, provided a small manual brew and paper filters fit our routine.
“We recommend the AeroPress as the most versatile gadget here, provided a small manual brew and paper filters fit our routine.”
FinalPress Original Coffee & Tea Maker Portable Stainless Steel Micro French Press
The FinalPress Original makes the most sense when we want to brew straight into a mug and keep the kit compact. Its collapsible format is described as pocket-sized, and the 304 stainless steel construction offers a sturdy reusable alternative to the AeroPress’s paper filters. It also brews tea as well as hot, iced, or cold coffee, giving it useful range across drinks even though its coffee method is less flexible than the AeroPress’s three-style approach.The patented plunger system with steel springs is designed for fast extraction, with brewing described as taking about two minutes. That can suit an office desk or a travel setup where bringing a separate dripper or press is inconvenient. Compared with Trekbrew, FinalPress puts brewing in the mug rather than asking us to pour water through a dripper; compared with AeroPress, it avoids paper but still depends on hand pressure. Its stated one-liter capacity may sound generous beside the AeroPress’s 10 ounces, but the product is described as a micro press for brewing directly in a mug, so buyers should confirm the practical serving setup they need. Manual plunging and its compact format make it less suitable for repeated servings for a group.
Pros:
- Reusable stainless steel filter avoids paper filters, pods, and capsules.
- Collapsible design is intended to fit easily in a pocket or travel kit.
- Can brew coffee and tea, including hot, iced, or cold coffee.
- 304 stainless steel is described as resistant to rust, bending, and warping.
Cons:
- Manual plunger operation requires effort.
- The micro-press format is not suited to serving a group in one go.
- Its listed one-liter capacity may not clearly represent a typical mug-side serving; check the intended brewing setup.
Best for: Travelers, campers, and office coffee drinkers who value a compact, reusable brewer for coffee or tea made in a mug.
Not ideal for: Households that want to brew several servings at once or anyone who prefers a hands-off method without manual plunging.
Bottom line: We favor FinalPress when a reusable, portable mug-side brewer matters more than the AeroPress’s broader recipe range.
“We favor FinalPress when a reusable, portable mug-side brewer matters more than the AeroPress’s broader recipe range.”
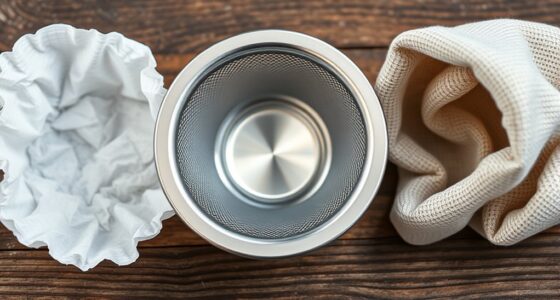
Pour Over Coffee Dripper Stainless Steel Reusable Filter 600 Mesh Ultra-Fine 1-2 Cup Portable
The Trekbrew stainless steel dripper is the most focused option in this group. It is designed for pour-over, with a double-layer 600-mesh filter and spiral ribs intended to guide water through the grounds. That makes it a fit for buyers who enjoy controlling the pour and want a reusable filter; it is less of an all-purpose gadget than AeroPress, which offers several brew styles, and it does not share FinalPress’s direct-plunger approach.Its one-piece washable construction keeps the setup straightforward, and compatibility with standard #02 equipment gives us flexibility to place it over many mugs, carafes, and named pour-over systems. At 3.04 ounces, it is the lightest option listed, though the dripper shape still needs a cup or vessel to sit on. The key compromise is the mesh itself: unlike AeroPress paper, a reusable screen may let more oils through, and the supplied description warns that overly fine grounds can clog it and require extra rinsing. Its one-to-two-cup capacity makes it a poor fit for batch brewing, but a practical choice when we want a compact pour-over tool without disposable filters.
Pros:
- Reusable stainless steel mesh avoids disposable paper filters.
- Lightweight at 3.04 ounces and built as a washable one-piece dripper.
- Listed compatibility includes standard #02 setups, mugs, carafes, Chemex, Kalita Wave, and V60.
- The fine 600-mesh filter is designed to limit sediment.
Cons:
- Capacity is limited to one or two cups.
- Fine mesh can clog when grounds are too fine and needs extra rinsing.
- Pour-over requires a separate vessel and a hands-on pour.
Best for: Pour-over drinkers who want a lightweight, reusable dripper for one or two cups at home, work, or while traveling.
Not ideal for: Buyers who want different brewing styles, make larger batches, or prefer paper filtration and minimal rinsing.
Bottom line: We choose Trekbrew for a dedicated reusable pour-over setup, while buyers seeking broader brewing options should start with AeroPress.
“We choose Trekbrew for a dedicated reusable pour-over setup, while buyers seeking broader brewing options should start with AeroPress.”
As an Amazon Associate we earn from qualifying purchases.
Before You Start
Pick one brewer and follow its method below; brewing steps vary, so do not combine methods. A useful starting ratio is 1 gram of coffee for every 16 grams of water. For example, weigh 20 grams of coffee and 320 grams of water. If measuring by volume, use the package directions as a starting point, since scoop sizes and coffee density vary. Grind just before brewing when possible. Use a medium grind for most pour-over and drip brewers, coarse grounds for a French press, and a fine-to-medium grind for an AeroPress. If the coffee package gives a grind recommendation for your gadget, start there.
Step-by-Step Instructions
Step 1: Choose and set up your brewer
Place the brewer on a stable, heat-safe surface and check that it is clean and fully assembled. Set out a mug or carafe. Add the correct filter if your brewer uses one. For pour-over, set the dripper over the mug or carafe. For an automatic machine, fit the basket and carafe in place. For a French press or AeroPress, check that the plunger and seals are seated correctly.
Tip:Some brewers use paper filters while others use a metal or reusable filter. Use the type intended for your model so water flows at the expected rate.
Check: The brewer sits securely, the filter is correctly fitted where needed, and the receiving mug or carafe is in place.
Step 2: Measure coffee and water
Weigh your coffee and water using a ratio of about 1:16 by weight. For one large mug, try 20 grams of coffee and 320 grams of water. If your machine has a marked reservoir, use the same ratio as closely as you can. Note your amounts so you can repeat or adjust the result.
Tip:Use the brewer’s markings consistently. A “cup” on a machine may be smaller than a standard 8-ounce cup.
Check: You have enough water for the intended servings and a measured amount of coffee to match it.
Step 3: Grind the beans to suit the brewer
If using whole beans, grind them immediately before brewing. Choose coarse grounds for a French press, medium grounds for pour-over or automatic drip, and fine-to-medium grounds for an AeroPress. If using pre-ground coffee, choose the closest available grind and keep the amount consistent.
Tip:Very fine grounds can make a French press muddy or slow a pour-over. Very coarse grounds can make coffee taste weak. Adjust one step at a time after tasting.
Check: The grounds look reasonably even, without a large amount of powder or oversized pieces for the chosen brewer.
Step 4: Heat fresh water
Fill the kettle or machine reservoir with fresh water. Heat kettle water until just off the boil, then let it rest briefly before pouring. Many automatic machines heat water internally, so use their regular brew cycle. Avoid using water that has been sitting in the kettle for several boils.
Tip:If your coffee tastes harsh or bitter, try water that is slightly cooler. If it tastes sour or thin, hotter water may help, provided the grind and brew time are also suitable.
Check: The water is hot and ready, and you can add it steadily without splashing or overflowing the brewer.
Step 5: Brew using your gadget
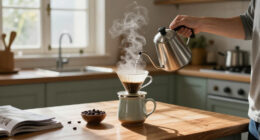
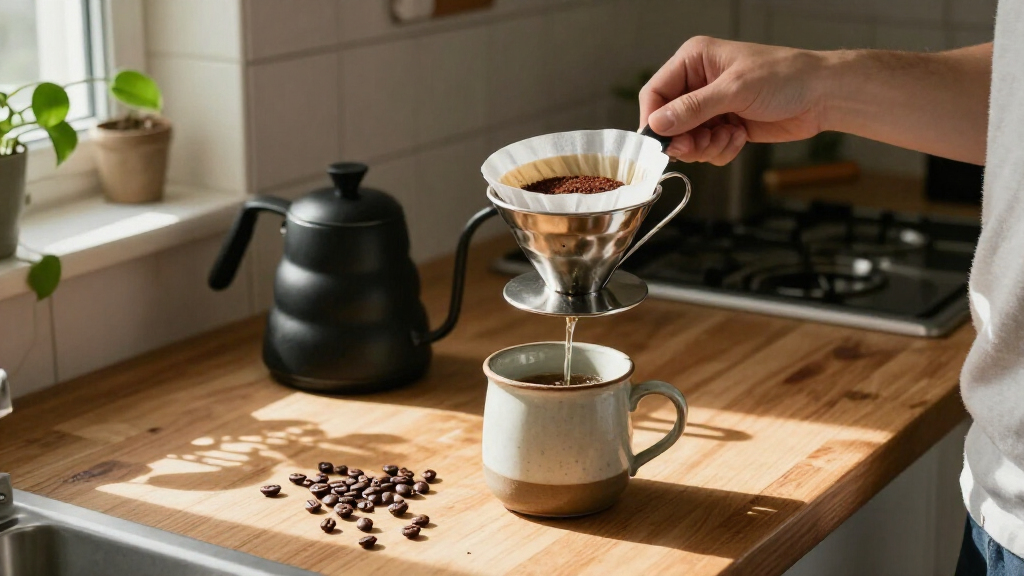
For pour-over: Rinse the paper filter with hot water if the filter instructions allow it, then discard the rinse water. Add the grounds. Pour just enough water to wet them evenly, wait about 30 seconds, then pour the remaining water slowly in small circles. Aim to finish pouring in about 2-3 minutes.
For a French press: Add the grounds, pour in the water, and stir gently once so all grounds are wet. Place the lid on without pressing the plunger. Wait about 4 minutes, then press down slowly and steadily.
For an AeroPress: Assemble it according to the manufacturer’s instructions and fit the filter. Add the grounds and hot water, stir as directed, then press gently into a mug. Use the standard method supplied with your model as your timing and setup guide.
For an automatic drip machine: Add the grounds to the filter basket, close the lid, and start the brew cycle. Let the cycle finish before removing the carafe.
Tip:Keep the brewer on a level surface and follow the marked fill line. Pour slowly enough to prevent grounds or water from spilling over the filter.
Check: The brew completes without overflowing. Pour-over water drains through the grounds, a French press plunger moves down with steady resistance, and a machine finishes its cycle.
Step 6: Taste and adjust one variable
Pour a serving and taste it once it is cool enough. If it tastes weak or sour, use a slightly finer grind or add a little more coffee next time. If it tastes bitter or overly strong, try a coarser grind or reduce the coffee slightly. Change only one variable per brew, such as grind size, dose, or brew time, so you can tell what helped.
Tip:Let the coffee cool for a minute before judging it; very hot coffee can hide some flavors.
Check: You can describe the cup as balanced enough to drink, and you have a clear single adjustment to try if you want a different result.
Step 7: Empty and clean the equipment
Discard the grounds and paper filter, or empty reusable grounds into the compost or waste. Rinse the brewer, filter holder, carafe, and any removable parts soon after brewing. Wash parts with dish soap as directed by the manufacturer, then let them dry fully before reassembling. Wipe spills from the counter and unplug an electric machine before cleaning its exterior.
Tip:Do not submerge an electric brewer or grinder unless its instructions specifically allow it. Coffee oils build up over time, so wash parts that contact coffee rather than only rinsing them.
Check: No wet grounds or visible coffee residue remain, and the equipment is dry or drying in a clean, ventilated place.
Common Mistakes to Avoid
- Using the same grind size for every brewer. — Match the grind to the method: coarse for French press, medium for most drip and pour-over brewers, and fine-to-medium for AeroPress.
- Changing the grind, coffee amount, and brew time all at once. — Keep a simple note of the dose and method, then change one factor per brew so you can identify what affects the taste.
- Filling past the brewer’s capacity or pouring too quickly. — Check the fill line and pour in a controlled stream, especially with small drippers and AeroPress chambers.
- Leaving coffee grounds and oils in the brewer. — Empty and wash the parts that touch coffee after each use; residue can make later cups taste stale or bitter.
Troubleshooting
Problem: The coffee tastes weak or watery.
Solution: Use a little more coffee or grind slightly finer next time. Confirm that you measured the water accurately and that the brewing cycle completed.
Problem: The coffee tastes bitter, harsh, or dry.
Solution: Try a slightly coarser grind, a shorter brew time, or a smaller dose. Check that the brewer and filter are clean.
Problem: A pour-over drains very slowly or stalls.
Solution: Use a coarser grind, avoid pouring too much water at once, and check that the filter is seated properly and the dripper outlet is clear.
Problem: A French press plunger is difficult to push down.
Solution: Press slowly and do not force it. The grind may be too fine, the press may be overfilled, or grounds may be caught near the filter; use a coarser grind and check assembly before the next brew.
What Success Looks Like
The finished coffee drains or pours without an overflow, has a taste you find balanced enough to drink, and the brewer is free of used grounds and visible residue after cleanup. A repeatable result comes from recording the coffee amount, water amount, grind, and timing, then keeping them steady when you brew again.
Next Steps
Write down the recipe that worked, including the brewer, coffee dose, water amount, grind setting, and brew time. Use it as your starting point for the next batch. Clean reusable filters and carafes regularly, and follow the manufacturer’s schedule for descaling an automatic machine. If you change beans, adjust the recipe in small steps because roast level and freshness can affect extraction.
Frequently Asked Questions
Which coffee gadget should a beginner use?
Choose the gadget that fits your routine. An automatic drip machine handles most of the work; a French press needs no paper filter and offers a fuller cup; a pour-over gives you control of the water flow; and an AeroPress is compact and quick. Start with equipment you already own if it is clean and working.
Do I need a coffee grinder?
No. Pre-ground coffee works, especially when you match its grind to the brewer. A grinder lets you adjust freshness and grind size, which can make it easier to improve the taste.
Can I use tap water?
Use tap water if it tastes clean and is safe to drink. Strong mineral or chlorine flavors can carry into the coffee. Filtered water is an option if your tap water affects the taste, but follow your machine’s water guidance.
How much coffee should I use for one mug?
Start with about 20 grams of coffee for 320 grams (roughly 11 fluid ounces) of water. If you do not have a scale, use about 2 level tablespoons per 6 ounces (180 milliliters) of water, then adjust to your taste.
How often should I clean my coffee gadget?
Empty and rinse the parts that touch coffee after every brew, then wash them according to the manufacturer’s directions. Descale automatic machines at the interval specified in their instructions, since water hardness and machine design affect the schedule.