To elevate your coffee with simple latte art, start by mastering basic milk frothing techniques to create smooth, velvety microfoam. Practice pouring steadily into your espresso, beginning with simple shapes like hearts and rosettes, by controlling your flow and hand movements. Keep experimenting with different designs and focus on the texture of your milk. With patience and consistent practice, you’ll soon craft beautiful patterns that impress everyone. Keep going to discover even more impressive designs.
Key Takeaways
- Master milk frothing techniques to create smooth microfoam suitable for simple latte art designs.
- Start with basic patterns like hearts and rosettes for easy practice and quick success.
- Use high-quality, fresh espresso shots with thick crema as your canvas for better results.
- Pour microfoam steadily into the center of the cup, gradually lowering height for clear patterns.
- Practice hand control and flow rate consistently to improve pattern clarity and confidence.

If you’re new to coffee art, don’t worry—getting started with latte art is easier than you might think. The key is mastering a few basic skills, especially milk frothing techniques, which transform plain steamed milk into the velvety microfoam needed for beautiful designs. To begin, pay attention to your coffee bean selection. Opt for high-quality, fresh beans roasted for espresso. Fresh beans produce richer flavors and better crema, which forms the perfect canvas for your art. When brewing your espresso, aim for a balanced shot with a thick, glossy crema that will hold the milk design.
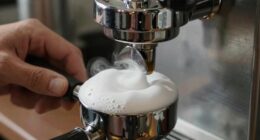
Once your espresso is ready, focus on milk frothing techniques. Use cold milk straight from the fridge, and pour it into a stainless steel pitcher. Submerge the tip of your steam wand just below the milk surface and turn on the steam. As the milk heats, tilt the pitcher slightly and create a whirlpool motion—this helps break down larger bubbles and produces a smooth, shiny microfoam. Keep the wand just below the surface to incorporate air early on, then submerge deeper to heat the milk evenly. The goal is to achieve a silky, paint-like texture, not frothy or bubbly. When the pitcher becomes too hot to hold comfortably, turn off the steam. Swirl the milk gently to eliminate any larger bubbles and achieve a glossy finish. Incorporating textured fabrics into your practice space can also help you visualize the smoothness and consistency needed for microfoam. Additionally, understanding the importance of texture and consistency can significantly improve your latte art results.
With your microfoam ready, pour it into your espresso. Start by tilting the cup slightly and pouring from a higher distance to integrate the milk with the coffee. As the cup fills, bring the pitcher closer and pour more slowly. To make simple designs like a heart or a rosette, begin pouring steadily into the center, then wiggle the pitcher back and forth or lift it slightly to create the desired shape. Practice your hand movements—small, controlled motions work best. The more you practice, the more confident you’ll become at controlling the flow and creating clean, crisp patterns.
Frequently Asked Questions
What Tools Are Essential for Beginner Latte Art?
To start with latte art, you need a few essential tools. Focus on milk frothing equipment like a good steaming pitcher, which helps you control milk consistency and pouring. Choose a pitcher that fits your hand comfortably and has a narrow spout for precision. Also, a thermometer can help monitor milk temperature. With these tools, you’ll improve your milk frothing technique and create beautiful, simple designs to impress everyone.
How Can I Fix Mistakes in My Latte Art?
Ever poured a heart only to see it turn into a muddle? Fix mistakes in your latte art by adjusting milk temperature and foam consistency. If your design smudges, gently swirl the cup or use a toothpick to correct small errors. Remember, practice helps you recognize when your milk steams perfectly, giving you better control. Keep experimenting with different techniques, and you’ll improve your skills over time.
How Long Does It Take to Master Basic Designs?
Mastering basic latte art designs takes consistent practice and patience. You might see small improvements in a few weeks, but true development can take several months. Stay dedicated, practice daily, and focus on perfecting your technique. Over time, your skills will develop naturally, and you’ll create beautiful designs with confidence. Remember, persistence and patience are key to transforming your initial attempts into polished latte art masterpieces.
Can I Do Latte Art With Non-Dairy Milk?
Think of making latte art with non-dairy milk like painting with new colors—you just need to know how they behave. Many baristas successfully create beautiful designs using plant-based milks, as they can froth well when warmed properly. Dairy alternatives like almond, soy, or oat milk work great, provided you choose the right type and steam it correctly. Don’t be discouraged; with practice, you’ll master stunning latte art using plant-based milks.
What Are Common Errors to Avoid When Starting Out?
When starting out, avoid common beginner mistakes like rushing the pour or not controlling the milk texture. Focus on practicing techniques regularly, such as steady wrist movements and consistent milk steaming. Keep your pitcher at the right height and temperature, and don’t get discouraged by initial imperfections. With patience and attention to these details, you’ll improve your skills and create beautiful latte art more confidently over time.
Conclusion
Now that you’ve learned the basics, latte art becomes more than just a skill—it’s an expression of creativity and patience. While the simple designs may seem modest, they hold the potential to transform an ordinary coffee into an extraordinary experience. Embrace the contrast between your beginner’s hands and your growing confidence; in this dance of practice and art, every pour captures the beauty of progress and possibility. Your journey has just begun.


