Connect with us

Brewing Guides

Brew Perfectly: How to Make Coffee with Coffee Maker

Discover the art of brewing with our guide on how to make coffee with a coffee maker. Perfect your morning cup with ease and precision.

Published

on

how to make coffee with coffee maker

Want to know the secret to brewing the perfect cup of coffee? It’s simpler than you think. Forget about expensive gadgets and complicated techniques. All you need is a trusty coffee maker and the right knowledge. So, are you ready to discover the art of making coffee with a coffee maker?

Imagine waking up to the aroma of freshly brewed coffee, crafted just the way you like it. No more rushing to the coffee shop or settling for mediocre instant coffee. With a coffee maker at hand, you can have the perfect cup of joe, brewed to perfection, in the comfort of your own home.

In this comprehensive guide, we will walk you through the entire brewing process using a drip coffee maker. From choosing the right equipment to adjusting the brew strength and exploring different coffee types, we’ve got you covered.

So, whether you’re a coffee aficionado looking to improve your brewing skills or a coffee lover who wants to master the art of making coffee at home, this guide is for you. Get ready to unlock the secrets of brewing coffee with a coffee maker and elevate your coffee experience to new heights.

Key Takeaways:

  • Using a coffee maker is a convenient and easy way to enjoy a delicious cup of coffee at home.
  • With the right steps and techniques, you can brew the perfect cup of coffee every time.
  • Choose the right equipment and understand how to adjust the brew strength for optimal results.
  • Grinding fresh coffee and experimenting with different coffee types can enhance your coffee experience.
  • Cleaning your coffee maker regularly is essential for maintaining the quality of your brew.

The Equipment You Need

To make coffee with a coffee maker, you will need a few essential items. These include:

  • A coffee maker: This is the main equipment that will brew your coffee. Choose a reliable and user-friendly coffee maker for the best results.
  • A coffee filter: Some coffee makers require a filter to separate the coffee grounds from the brewed coffee. Check the specifications of your coffee maker to determine if a filter is necessary.
  • A mug: This is where you will pour and enjoy your freshly brewed coffee. Select a mug that suits your preferred coffee serving size.
  • Water: Water is an essential ingredient for brewing coffee. Ensure that you have clean and fresh water available.
  • A tablespoon: Use a tablespoon to measure the appropriate amount of ground coffee for your desired coffee strength.
  • Your favorite ground coffee: Choose a high-quality ground coffee that matches your taste preferences. Experiment with different brands and flavors to find your perfect cup of coffee.

Having all these items ready before starting the brewing process will ensure a smooth and enjoyable coffee-making experience.

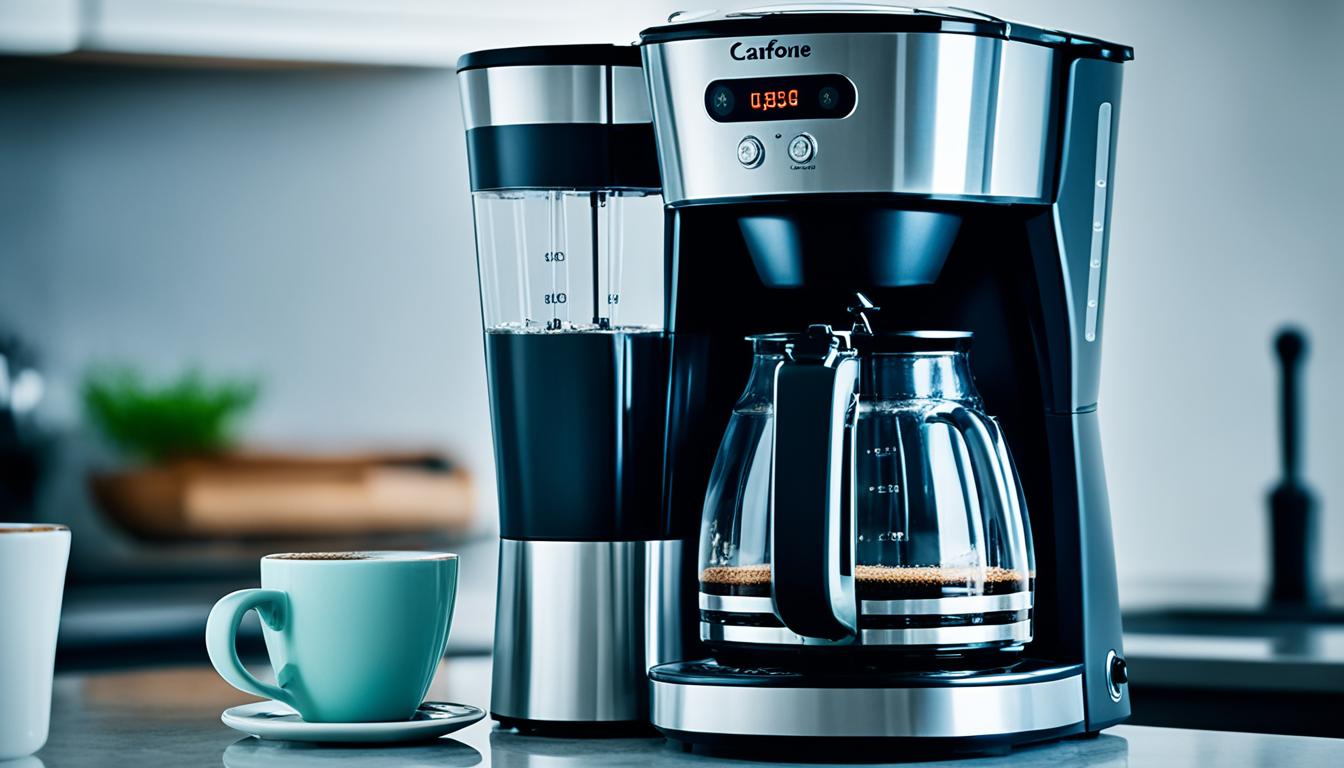
Brewing with a Drip Coffee Maker

The process of brewing coffee with a drip coffee maker is straightforward and convenient. By following these simple steps, you can enjoy a freshly brewed cup of coffee in no time.

Advertisement

Step 1: Add Water to the Reservoir

The first step is to add water to the reservoir of your coffee maker. Make sure to measure the correct amount using the markers on the machine. The reservoir is located at the back or side of the coffee maker, and it’s usually easy to access. Pour the water into the reservoir, ensuring that you add enough for the desired number of cups of coffee.

Step 2: Prepare the Coffee Filter

Next, it’s time to prepare the coffee filter. Place a coffee filter into the basket of the coffee maker. Ensure that the coffee filter fits properly and covers the entirety of the basket. The coffee filter helps to trap the ground coffee, ensuring a smooth and flavorful cup of coffee.

Step 3: Add Ground Coffee to the Filter

Now, add the appropriate amount of medium ground coffee to the coffee filter. The amount of ground coffee needed may vary depending on your personal taste preferences and the strength of the coffee you desire. It is generally recommended to use 1 to 2 tablespoons of ground coffee per 6 fl oz (180 ml) of water. Adjust the amount of coffee accordingly to achieve your preferred taste.

Step 4: Brew Your Coffee

With the water and coffee in place, it’s time to start the brewing process. Power on your coffee maker and wait for it to brew the coffee. The brewing time will vary depending on the coffee maker model and settings. Typically, it takes around 4 to 6 minutes for the brewing process to complete. During this time, the coffee maker heats the water and pours it over the ground coffee, extracting the flavors and oils to create a delicious cup of coffee.

Step 5: Pour and Enjoy

Once the brewing process is complete, carefully remove the carafe or mug from the coffee maker. Pour yourself a cup of the freshly brewed coffee and enjoy it while it’s still hot. Take a moment to savor the aroma and flavor of your homemade coffee. Sit back, relax, and let the rich taste of a perfectly brewed cup of coffee rejuvenate your senses.

Advertisement
brewing with a drip coffee maker

With these simple steps, brewing coffee with a drip coffee maker becomes a breeze. The convenience and efficiency of a coffee maker allow you to enjoy a delicious cup of coffee without the hassle of manual brewing methods. Experiment with different ground coffee varieties and adjust the water-to-coffee ratio to find the perfect balance for your taste buds. So why wait? Start brewing your favorite coffee today using your trusty drip coffee maker!

Tips for Brewing with a Coffee Maker

To ensure the best-tasting coffee, follow these helpful tips when brewing with a coffee maker. Always start with fresh water and use the appropriate amount according to your coffee maker’s instructions. It is recommended to use filtered water for the best taste.

When storing ground coffee, keep it in an airtight container away from sunlight, heat, and moisture to maintain its freshness. Proper storage ensures that the coffee retains its flavor and aroma.

Serve your coffee within 20 minutes of brewing for optimal flavor. If you’re not able to consume it right away, it’s best to transfer it to an insulated container to keep it hot. This prevents the coffee from becoming over-extracted or losing its heat.

Avoid reheating coffee as it can dull the flavor. Instead, brew a fresh cup when you’re ready for another serving. This ensures that you always enjoy the full richness of your coffee.

Advertisement

Why Fresh Water Matters

Using fresh water is crucial for brewing high-quality coffee. Water that has been sitting for too long may contain impurities or stale flavors that can affect the taste of your coffee. By starting with fresh water, you ensure that only clean, pure water comes into contact with your coffee grounds, allowing the natural flavors to shine through.
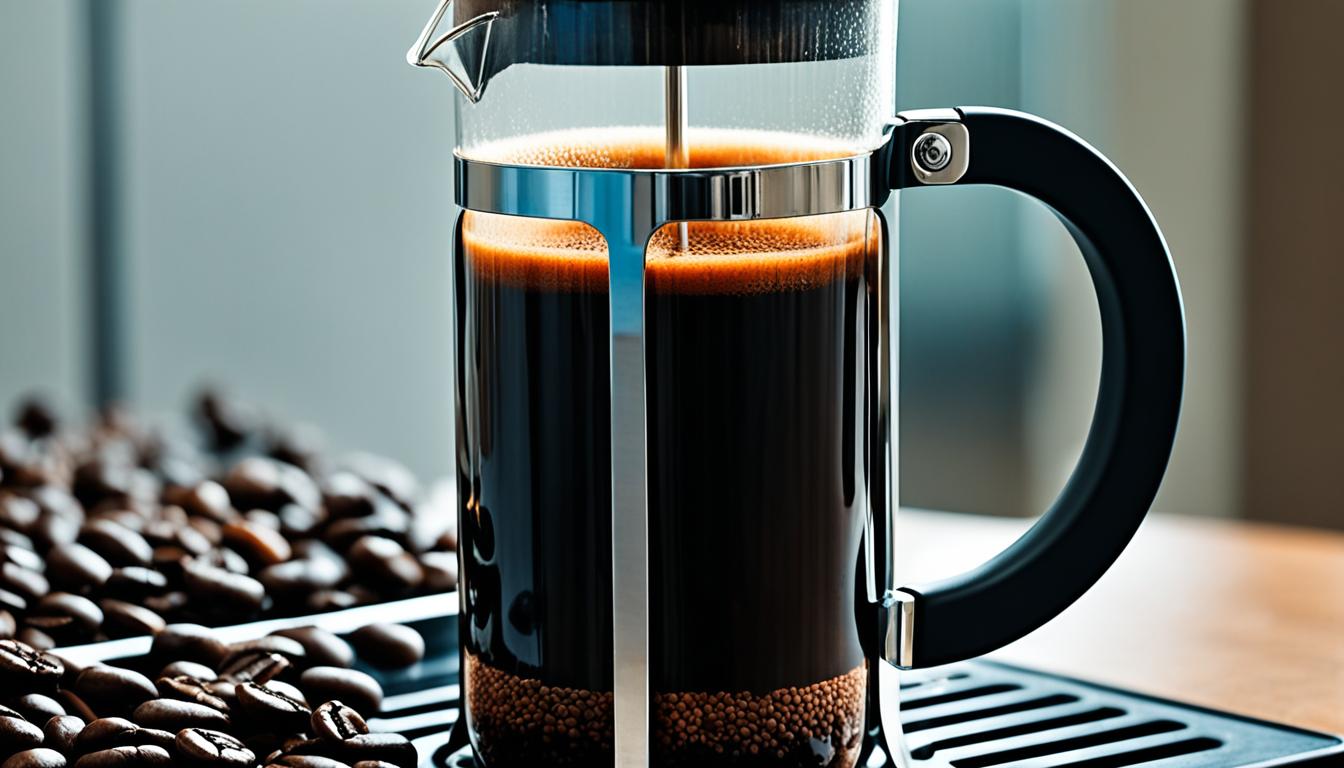
fresh water

Adjusting the Brew Strength

Different coffee makers can have varying cup sizes, so it’s essential to understand how your specific coffee maker measures a “cup.” If you’re unsure, a simple method to determine the cup size is by measuring and pouring 12 fl oz (350 ml) of water into the reservoir. This will give you an accurate idea of the cup size measurement used by your coffee maker. Adjust the water and coffee measurements accordingly to achieve the desired strength and flavor.

Some coffee makers also feature a strength selector that allows you to customize the brew to your preference. This feature is particularly useful if you enjoy a stronger or milder cup of coffee. However, for most coffee makers, it is generally recommended to use the default setting for the best results.

Adjusting the Water and Coffee Measurements

To adjust the brew strength, you’ll need to modify both the water measurement and the coffee ground measurement. Here’s a simple guide to help you:

Strength LevelWaterCoffee Grounds
RegularStandard cup size according to your coffee maker1 tablespoon per cup
StrongUse slightly less water than the standard cup size1-2 tablespoons per cup
MildUse slightly more water than the standard cup size3/4 tablespoon per cup

Keep in mind that these measurements are just guidelines, and you can adjust them further based on your personal preference. Be sure to experiment with different ratios until you find the perfect brew strength for your taste buds.

Adjusting the Brew Strength

“Finding the ideal brew strength requires a delicate balance between water and coffee measurements. By making slight adjustments to these variables, you can create a cup of coffee that perfectly suits your taste.”Justin, seasoned author, coffee and tea enthusiast, and an essential member of the Cappuccino Oracle team
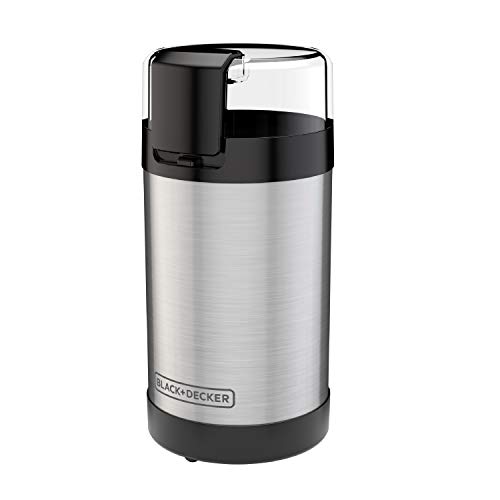
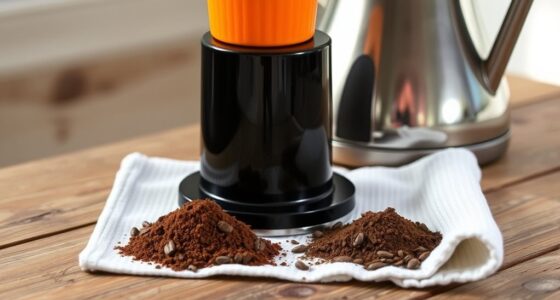
Grinding Coffee for Your Coffee Maker

One of the essential steps in brewing a perfect cup of coffee with your coffee maker is grinding the coffee beans to the right size. This process greatly influences the flavor and aroma of your coffee.

Advertisement

For most drip coffee makers, a medium grind size is recommended. It strikes a balance between the coarser grind for French press and the finer grind for espresso. The medium grind allows the water to interact with the coffee grounds sufficiently, extracting the desired flavors without over-extraction.

If you own a coffee grinder, look for a specific “drip” setting. This setting is specifically tailored for drip coffee makers, ensuring that you achieve the optimal grind size. Alternatively, you can grind the coffee beans until most particles resemble the size of sand. This sand-like consistency allows for even extraction and a smooth cup of coffee.

If you prefer the convenience of pre-ground coffee, ensure that it is fresh and of high quality. Freshly ground coffee beans retain more of their flavors, resulting in a more flavorful brew. Look for whole bean coffee from reputable brands or local roasters and grind it just before brewing for the best results.

Remember, proper grinding and using fresh coffee are essential for unlocking the full potential of your coffee maker and enjoying a truly satisfying cup of coffee.

coffee grinder

The Impact of Grind Size

The size of the coffee grounds plays a crucial role in the extraction process. Different grind sizes extract flavors at different rates, affecting the taste of your brewed coffee. Here’s a breakdown of how grind size impacts your coffee:

Advertisement

Coarse Grind: Coarse grind is recommended for methods like French press, where the coffee grounds are immersed in water for a longer time. The larger particles result in a slower extraction, producing a rich and bold cup of coffee.

Medium Grind: Medium grind is ideal for drip coffee makers. It allows for a balanced extraction, yielding a well-rounded and flavorful cup of coffee.

Fine Grind: Fine grind is commonly used for espresso machines or Moka pots. The fine particles increase the surface area for extraction, resulting in a concentrated and robust coffee flavor.

By adjusting the grind size based on your brewing method, you can optimize the flavor profile to match your preferences.

Cleaning Your Coffee Maker

Regular cleaning of your coffee maker is essential to maintain the quality of your brew and ensure a great tasting cup of coffee every time. Over time, oils and residue can accumulate, impacting the flavor of your coffee. By following a proper cleaning routine, you can keep your coffee maker in optimal condition and ensure a fresh and flavorful brew.

Refer to the Manual

When it comes to cleaning your coffee maker, it’s always best to consult the manufacturer’s manual for specific instructions. The manual will provide guidance on the recommended cleaning frequency and procedures for your particular coffee maker model. It may include step-by-step instructions, tips, and even cleaning solutions that are safe to use.

Advertisement

Regular Cleaning

To keep your coffee maker clean, start by removing any leftover coffee grounds or filters. Dispose of them properly. Then, use a mild dish soap or a coffee maker cleaning solution recommended by the manufacturer. Dilute the solution with water as instructed. Take care to clean all accessible parts of the coffee maker, such as the water reservoir, filter basket, and carafe.

Regular cleaning of your coffee maker is essential to remove any built-up oils and residue that can affect the taste of your coffee.

Pay special attention to any areas prone to oil or residue buildup, such as the spout, where oils can accumulate and impact the taste of your brewed coffee. Scrub gently using a soft brush or sponge, ensuring that you reach all the nooks and crannies of your coffee maker.

Descale Your Coffee Maker

In addition to regular cleaning, descaling your coffee maker is important to remove mineral deposits that can affect its performance and the taste of your coffee. Mineral buildup can occur over time, especially if you live in an area with hard water. Refer to your coffee maker’s manual for instructions on how to descale it properly using a descaling solution or a homemade vinegar solution.

Maintain the Taste of Your Coffee

Regular cleaning not only helps remove oils and residue but also ensures that your coffee maker continues to produce delicious-tasting coffee. By keeping your coffee maker clean, you can prevent the buildup of stale flavors and maintain the true taste of your coffee beans. It’s recommended to clean your coffee maker at least once a month, but more frequent cleaning might be necessary based on usage and water quality.

Remember, a clean coffee maker not only enhances the taste of your brewed coffee but also prolongs the lifespan and performance of your machine. So, make sure to incorporate regular cleaning into your coffee brewing routine for the best results.

Advertisement
regular cleaning

Using Different Coffee Types

Coffee makers are designed to work with various types of coffee, including whole beans and pre-ground coffee. However, for the best results, using freshly ground coffee beans is recommended to maximize flavor and aroma. Experiment with different types and flavors of coffee to find what suits your taste preferences best.

Whole beans are the preferred choice for coffee enthusiasts who value freshness and the ability to customize their grind size. When using whole beans, you have control over the grind, allowing you to adjust the coarseness to match your brewing method and personal preference. Grinding coffee beans just before brewing ensures that the flavors and aromas are at their peak.

Pre-ground coffee, on the other hand, offers convenience and simplicity. It is an excellent option for those who want a quick and hassle-free brewing experience. Pre-ground coffee is available in various grind sizes, catering to different brewing methods such as drip coffee makers.

Whether you choose whole beans or pre-ground coffee, the flavor and aroma of your coffee will depend on factors such as the coffee bean variety, roast level, and brewing technique. Try experimenting with different types of coffee to discover new flavors and aromas that excite your taste buds.

The Difference Between Drip Coffee and Pour-Over Coffee

Drip coffee and pour-over coffee are two different brewing methods that offer unique experiences for coffee enthusiasts. While both methods can produce delicious coffee, they differ in terms of the brewing process and the level of control over various variables.

Advertisement

Drip Coffee

In drip coffee brewing, a coffee maker with automatic brewing functionality is used to heat and dispense water over the coffee grounds. This method is convenient and requires minimal effort, making it a popular choice for many coffee lovers. The machine takes care of tasks such as heating the water to the appropriate temperature and regulating the flow rate.

With drip coffee, you can enjoy the simplicity of automatic brewing. It’s perfect for those who appreciate convenience and want a hands-off approach to making their morning cup of coffee. The automatic brewing process ensures consistency in water temperature, flow rate, and extraction.

Pour-Over Coffee

Pour-over coffee, on the other hand, involves manual pouring of hot water over the coffee grounds in a controlled manner. This method offers a more hands-on and interactive coffee brewing experience.

When making pour-over coffee, you have the freedom to control variables such as water temperature, flow rate, and coffee-to-water ratio. This level of control allows you to create a customized brewing process tailored to your taste preferences. You can experiment with different water temperatures and pours to bring out specific flavor notes in each coffee batch.

Pour-over brewing allows coffee enthusiasts to elevate their coffee experience by having greater control over water temperature and flow rate, resulting in a more nuanced and personalized cup of coffee.

Choosing Between Drip and Pour-Over

The choice between drip coffee and pour-over coffee ultimately depends on personal preference. If you value convenience and consistency, drip coffee brewing with its automatic brewing capabilities might be the ideal choice for you. On the other hand, if you enjoy having control over variables such as water temperature and flow rate to unlock unique flavor profiles, the pour-over method may be more appealing.

Advertisement

Both brewing methods offer their own advantages and can lead to exceptional coffee. Regardless of your choice, the most important factors in brewing a delicious cup of coffee are using high-quality beans and paying attention to the overall brewing process.

Pouring water over coffee beans

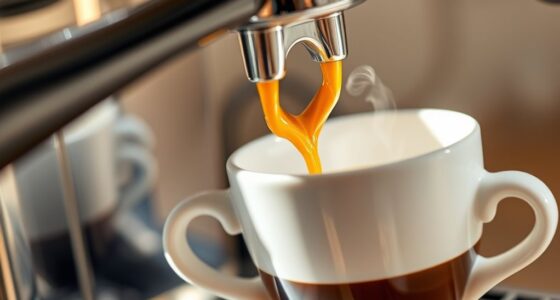
Explore the graphic showcasing the process of pouring water over coffee beans for a pour-over brewing method. The image depicts the manual pouring aspect of this brewing technique and reinforces the emphasis on control over water temperature and flow rate to achieve a personalized coffee experience.

Elevate Your Coffee Experience with Trade Coffee

If you’re looking to elevate your at-home coffee brewing routine, consider subscribing to Trade Coffee. With Trade, you can discover a curated selection of specialty coffees from top roasters across the country. Simply visit their website, take a quick quiz to indicate your flavor preferences and brewing equipment, and receive personalized coffee recommendations. Enjoy a world of delicious, freshly-roasted coffees delivered straight to your door.

Trade Coffee offers a convenient coffee subscription service that caters to your specific taste preferences. Whether you enjoy bold and full-bodied flavors or prefer a lighter and more nuanced cup, Trade has a wide range of options to satisfy every coffee lover.

With Trade, you have the opportunity to explore a variety of specialty coffees that you may not find at your local grocery store. Their network of roasters includes renowned names in the industry, ensuring that you’re getting the highest quality beans.

Advertisement

When you sign up for a coffee subscription with Trade, you’ll have the chance to select your preferred brewing method. Whether you use a drip coffee maker, a French press, or a pour-over method, Trade will recommend coffees that are best suited for your chosen brewing technique.

Trade Coffee takes the guesswork out of finding the perfect cup. Their coffee experts curate a selection of beans based on your flavor preferences, ensuring that you’ll always have an exceptional coffee experience. This personalized approach allows you to discover new flavors, expand your coffee palate, and truly savor every sip.

Don’t settle for mediocre coffee. Elevate your morning routine with Trade Coffee and indulge in the rich flavors and aromas of specialty coffees. Start your coffee subscription today and experience the joy of brewing exceptional coffee in the comfort of your own home.

Benefits of Trade Coffee Subscription

BenefitsDetails
Curated Specialty CoffeesDiscover a selection of specialty coffees from top roasters across the country.
Personalized Flavor PreferencesTake a quiz to indicate your flavor preferences and receive personalized coffee recommendations.
Options for Every Brewing MethodSelect your preferred brewing method and receive coffees best suited for your chosen technique.
Exceptional Coffee ExperienceExpertly curated beans ensure that you’ll always have a high-quality and flavorful cup of coffee.
Expand Your Coffee PalateExplore new flavors and expand your coffee horizons with an ever-changing selection of coffees.

Get Started with Trade Coffee

  1. Visit Trade Coffee’s website.
  2. Take a quick flavor quiz to indicate your coffee preferences and brewing equipment.
  3. Choose a subscription plan that suits your needs and frequency of delivery.
  4. Select your preferred brewing method to receive coffees best suited for your technique.
  5. Sit back, relax, and await the arrival of your custom-curated specialty coffees.

Trade Coffee has revolutionized my morning routine. Their curated selection of specialty coffees has introduced me to flavors I never knew existed. I look forward to my monthly deliveries and savoring each cup.” – Charles, Trade Coffee subscriber & Strategic Editor in Chief

coffee subscription

Conclusion

Making coffee with a coffee maker is a simple and enjoyable process. By following the steps outlined in this guide and implementing the tips from reputable sources like Starbucks, you can brew the perfect cup of coffee at home. Experiment with different coffee types, grind sizes, and brewing techniques to find the flavor profile that suits your taste preferences.

With practice and attention to detail, you can become a master of coffee brewing with a coffee maker. Whether you prefer a strong and bold brew or a smooth and aromatic cup, the possibilities are endless. Enjoy the satisfaction of creating your favorite coffee beverages right in your own kitchen.

Advertisement

Now that you have the knowledge and tools, it’s time to embark on your coffee brewing journey. Remember, each cup is an opportunity to explore and refine your skills. So grab your coffee maker, choose your favorite coffee, and start brewing the perfect cup of joe for yourself and your loved ones. Cheers!

FAQ

What do I need to make coffee with a coffee maker?

To make coffee with a coffee maker, you will need a drip coffee brewer, a coffee filter (if necessary), a mug, water, a tablespoon for measuring coffee grounds, and your favorite ground coffee.

How do I brew coffee with a drip coffee maker?

To brew coffee with a drip coffee maker, add water to the reservoir, place the coffee filter into the basket, add the appropriate amount of ground coffee to the filter, start the brew, and wait until the coffee is no longer dripping. Finally, pour a cup of the freshly brewed coffee and enjoy.

How can I ensure the best-tasting coffee when brewing with a coffee maker?

To ensure the best-tasting coffee, start with fresh, cold water, use the appropriate amount according to your coffee maker’s instructions, and consider using filtered water. Store ground coffee in an airtight container away from sunlight, heat, and moisture. Serve your coffee within 20 minutes of brewing or transfer it to an insulated container. Avoid reheating coffee as it can dull the flavor.Advertisement

How do I adjust the brew strength on my coffee maker?

Different coffee makers may have varying cup sizes, so it’s important to understand how yours measures a “cup.” If unsure, measure and pour 12 fl oz (350 ml) of water into the reservoir to determine the cup size. Adjust the water and coffee measurements accordingly. Some coffee makers have a strength selector that allows you to customize the brew, but it’s generally recommended to use the default setting for the best results.

What grind size should I use for drip coffee makers?

For most drip coffee makers, a medium grind size is recommended. If using a grinder, look for a specific “drip” setting or grind until most particles resemble the size of sand. If using pre-ground coffee, ensure that it is fresh and of high quality. Proper grinding and using fresh coffee are essential for a flavorful cup of coffee.

How often should I clean my coffee maker?

It’s important to clean your coffee maker regularly to remove built-up oils and residue that can affect the taste of your coffee. Refer to your coffee maker’s manual for specific cleaning instructions. Regular cleaning ensures that your coffee maker is in optimal condition and helps maintain the quality of your brew.

Can I use different types of coffee with a coffee maker?

Yes, coffee makers are designed to work with various types of coffee, including whole beans and pre-ground coffee. However, for the best results, using freshly ground coffee beans is recommended to maximize flavor and aroma. Experiment with different types and flavors of coffee to find what suits your taste preferences best.

What’s the difference between drip coffee and pour-over coffee?

Drip coffee is brewed using a coffee maker that automatically heats and dispenses water over the coffee grounds. Pour-over coffee, on the other hand, involves manually pouring hot water over the coffee grounds in a controlled manner. Both methods can produce delicious coffee, but pour-over brewing allows for more control over variables such as water temperature and flow rate.Advertisement

How can I elevate my at-home coffee brewing routine?

Consider subscribing to Trade Coffee. With Trade, you can discover a curated selection of specialty coffees from top roasters across the country. Simply visit their website, take a quick quiz to indicate your flavor preferences and brewing equipment, and receive personalized coffee recommendations. Enjoy a world of delicious, freshly-roasted coffees delivered straight to your door.

French Press

How Does a Coffee Press Work in 10 Steps

You won't believe how easy it is to master a coffee press with these 10 simple steps—discover the secrets to perfect coffee now!

Published

on

By

brewing coffee with precision

To use a coffee press effectively, gather your materials: coffee beans, water, press, beaker, and plunger with a filter. Measure 51g of coarsely ground coffee beans. Boil water to 195-200°F and preheat the press by rinsing it with hot water. Add coffee grounds to the press, then pour hot water over them slowly, ensuring even coverage. Stir the mixture immediately to distribute the grounds uniformly. Let the coffee steep for about 4 minutes, then gently press the plunger down to separate the grounds. Serve the freshly brewed coffee promptly for best flavor. For more detailed steps, stay engaged.

Key Takeaways

  • Measure ½ cup of coarse coffee grounds for optimal extraction.
  • Heat water to 195-200°F to avoid bitterness and enhance flavor.
  • Preheat the coffee press to maintain stable brewing temperature.
  • Pour hot water slowly over the coffee grounds, then stir for even saturation.
  • Steep for 4 minutes, then gently press the plunger to separate grounds and serve immediately.

Gather Your Materials

To start, gather your coffee beans, water, and the coffee press. These materials are essential for making a delicious cup of coffee using a press.

The coffee press, also known as a French press, relies on immersing coarsely ground coffee beans in hot water to extract the rich flavors and oils from the beans.

Begin by ensuring you have high-quality coffee beans. The flavor of your coffee greatly depends on the beans you choose.

Next, prepare your water. The ideal temperature for brewing coffee in a press is just below boiling, around 200 degrees Fahrenheit. This temperature helps extract the best flavors without burning the coffee.

The coffee press itself is a straightforward device. It consists of a cylindrical beaker, a plunger with a metal or plastic mesh filter, and a lid.

Advertisement

The coarse grind of the coffee is crucial because finer grinds can clog the filter and result in a gritty, over-extracted brew. When you immerse the coarsely ground coffee in hot water, the flavors and oils are extracted efficiently, and the plunger helps separate the grounds from the brewed coffee, giving you a smooth and flavorful cup.

Follow these steps, and you'll be on your way to enjoying a perfect coffee press experience.

Measure Coffee Grounds

brewing the perfect cup

Once you've gathered your materials, the next step is to measure ½ cup (51 g) of coffee beans accurately. Accurate measurement of coffee grounds is important to guarantee the right strength and flavor in your coffee. Use a kitchen scale for precision, as it provides a more reliable measurement than using a standard measuring cup.

After you've measured the coffee beans, it's important to grind them to a coarse grind. A coarse grind is essential for a French press because it allows for proper extraction and prevents the grounds from slipping through the mesh filter.

Next, consider the coffee-to-water ratio, which is typically 1:8 for a standard French press. This ratio means for every one part of coffee, you should use eight parts of water. By adhering to this ratio, you can control the coffee's strength and flavor, ensuring a consistently delicious cup each time you brew.

Here's a quick reference table for measuring coffee grounds:

Advertisement
Coffee BeansCoarse GrindCoffee-to-Water Ratio
½ cup (51 g)Essential1:8
Accurate MeasurementProper ExtractionConsistent Flavor
Use Kitchen ScalePrevents Grounds in CoffeeControl Strength
Precision MattersMesh Filter CompatibilityDelicious Brew

Boil Water

prevent burns while cooking

Heating your water to the correct temperature is essential for brewing a perfect cup of coffee with a French press. When boiling water for your coffee press, aim for a temperature between 195°F and 200°F. This range ensures ideal brewing, as water that's too hot, such as a rolling boil at 212°F, can result in a burnt taste in your coffee. Utilizing a kettle with a temperature setting can help you achieve the precise water temperature needed.

Preheating water before adding it to your coffee press can greatly enhance the extraction process. Preheating ensures that the hot water you pour over the coffee grounds maintains a consistent temperature, which is important for even saturation and flavor extraction.

Gradually adding hot water to the coffee grounds helps to evenly saturate them, allowing for a balanced and rich flavor profile.

Preheat the Press

prepare for ironing clothes

Preheating the coffee press is essential for maintaining the ideal water temperature, which guarantees consistent heat exposure during brewing.

By rinsing the press with hot water before adding the coffee grounds and water, you prevent rapid cooling that can adversely affect flavor extraction.

Skipping this step may result in temperature fluctuations, impacting the quality and taste of your coffee.

Importance of Preheating

To get the best flavor from your coffee, it's important to preheat the press to maintain the ideal brewing temperature. Preheating is vital because it helps achieve the perfect brewing temperature, ensuring that the coffee grounds extract their full range of flavors.

Advertisement

When you preheat the press, you reduce heat loss that can occur during the brewing process. This stability in temperature results in a more consistent and flavorful cup of coffee.

Skipping this step can lead to unexpected temperature fluctuations, which negatively affect the final taste of your coffee. The initial contact between the hot water and the cold press can cause the water temperature to drop quickly, undermining the flavor extraction process.

Preheating the press is a simple yet essential step that can greatly enhance your overall coffee experience by maintaining the right conditions for brewing.

Optimal Water Temperature

Maintaining an ideal water temperature of around 200°F is crucial for extracting the best flavors from your coffee grounds. Preheating your coffee press is a critical step in achieving this ideal temperature. When you preheat the press, you minimize heat loss that can occur once you add the hot water to the coffee grounds. This practice guarantees that the water temperature remains stable throughout the brewing process, leading to better flavor extraction.

To preheat your coffee press, simply fill it with hot water and let it sit for a few moments before discarding the water. Doing so warms the press, reducing the likelihood of significant temperature drops when you introduce the brewing water.

Advertisement

It's noteworthy that using boiling water, which is typically around 212°F, should be avoided as it can result in a burnt taste, detracting from the coffee's natural flavors.

Retaining Coffee Flavors

Warming up your coffee press is a simple yet effective step to guarantee you get the most flavorful cup of coffee. Preheating the press ensures that the coffee grounds experience a stable brewing temperature, which is essential for retaining coffee flavors. When you pour hot water into the press before adding coffee grounds, you prevent significant heat loss that could otherwise impact the extraction process.

Here's a quick overview of the benefits:

BenefitExplanation
Retaining Coffee FlavorsMaintains ideal brewing temperature
Preventing Heat LossSecures steady temperature during brewing
Avoiding Temperature ShockWarms the glass to prevent flavor disruption
Consistent ExtractionGuarantees a uniform and flavorful extraction
Enhanced TasteCreates a perfect brewing environment

Preheating also prevents temperature shock, which can negatively affect the taste of your coffee. By warming up the glass, you create a consistent environment that contributes to a more flavorful extraction. This simple step helps to ensure that all the nuanced flavors within the coffee grounds are fully developed and carried through into your cup.

Add Coffee Grounds

brewing coffee with grounds

Add coarse ground coffee to the coffee press chamber to kickstart your brewing process. Using a French press requires precision in selecting the coffee grounds; coarse grounds are best for extracting rich flavors without over-extraction. The coffee-to-water ratio is important for achieving the perfect cup, with a standard recommendation of 1:16. This means for every gram of coffee, you should use 16 grams of water. Making sure that your coffee grounds are evenly distributed in the press is essential for a consistent brew.

Freshly ground coffee beans greatly enhance the flavor profile of your French press brew. When coffee beans are ground just before brewing, they retain more of their essential oils and aromatic compounds, leading to a more flavorful and aromatic cup. The amount of coffee grounds you use will directly affect the strength of your brew; more grounds will yield a stronger, more robust flavor, while fewer grounds will result in a milder taste.

Advertisement

Distribute the coffee grounds evenly across the bottom of the press chamber. This even distribution helps to make sure that the water can saturate all the coffee grounds equally, providing a balanced extraction and a well-rounded flavor profile in your final brew.

Pour Hot Water

add boiling water carefully

Begin by heating your water to the ideal brewing temperature of 195°F (91°C). Achieving this critical temperature is essential for proper flavor extraction from your coffee grounds. Use a kettle or another reliable heat source to reach this temperature accurately. Once the water is ready, carefully pour the hot water over the coffee grounds in the press. This initial pour should be slow and deliberate to make sure that all the grounds are evenly saturated.

When the hot water meets the coffee grounds, it initiates the release of essential flavors and oils, contributing greatly to the brew's richness and aroma. Making sure that all grounds are evenly covered promotes thorough extraction, which is crucial for achieving a balanced and flavorful cup of coffee. The table below summarizes the key points of this step:

StepAction
1Heat water to 195°F (91°C)
2Use a kettle or heat source
3Pour hot water over coffee grounds
4Ensure even coverage for excellent flavor

Stir the Mixture

mixing ingredients in bowl

To guarantee an even extraction and full flavor, you should stir the mixture right after adding hot water.

Stirring helps distribute the coffee grounds uniformly, preventing clumps and allowing all grounds to saturate fully.

Be cautious not to over-stir, as excessive agitation can introduce bitterness to your brew.

Proper Stirring Technique

Vigorously stirring the coffee press mixture guarantees the grounds are evenly distributed and fully saturated, enhancing the overall flavor and aroma. Proper stirring is essential to break up clumps and make certain every particle of coffee makes contact with the water. Using a spoon or paddle, immerse it into the coffee press and start stirring the mixture thoroughly. This process releases aromatic compounds, contributing to a more flavorful coffee.

Advertisement

When employing the proper technique, aim to stir with enough vigor to mix the grounds uniformly but avoid splashing. A circular motion is often most effective, ensuring the grounds aren't just floating on the surface but fully submerged. By doing this, you promote consistent extraction, which is essential for achieving a balanced taste profile.

Proper stirring also helps optimize the brewing intensity according to your personal taste preferences. The act of stirring ensures that the coffee grounds are fully immersed, which is crucial for extracting the desired flavors.

Optimal Stirring Timing

Immediately after pouring hot water over the coffee grounds, stir the mixture to break up clumps and guarantee even extraction. This initial stirring is essential for ensuring that all the coffee grounds are thoroughly saturated, which promotes a consistent brew. Proper stirring helps release essential flavors and oils from the coffee grounds into the water, enhancing the richness and complexity of your cup of coffee.

Timing is everything when it comes to stirring in the coffee press process. By stirring immediately after adding the hot water, you're ensuring that the coffee grounds begin to release their flavors and oils right from the start. This early agitation aids in the even extraction of these compounds, which is crucial for producing a well-balanced and flavorful brew.

When you stir the mixture properly, you're not just mixing the coffee grounds with water; you're actively facilitating the extraction process. This even distribution of grounds prevents any potential pockets of dry coffee, ensuring every particle is contributing to the final flavor profile. Consequently, this method helps you achieve a consistent and high-quality cup of coffee, every time.

Advertisement

Benefits of Stirring

When you stir the coffee press mixture, you ensure that all the grounds are evenly distributed, leading to a balanced and flavorful brew. Stirring the mixture vigorously in your French Press Coffee Maker is essential for breaking up the grounds and making sure they don't clump together. This step is important for promoting a consistent brewing process, which is one of the key aspects of efficient brewing methods that use immersion techniques.

By stirring, you optimize the extraction of flavors and aromas from the coffee grounds, greatly enhancing the overall coffee taste. This process allows water to saturate each particle of coffee uniformly, ensuring that no grounds remain dry or under-extracted. Consequently, you achieve a more complete and flavorful extraction, resulting in a well-balanced and satisfying coffee experience.

Proper stirring before steeping not only aids in the even distribution of the coffee grounds but also ensures uniform saturation. This uniformity is crucial because it contributes directly to the robustness and complexity of the brew, making it far superior to preparations where stirring is neglected.

Incorporating vigorous stirring into your routine can significantly elevate your French Press coffee, making sure each cup is consistently delightful.

Steep the Coffee

brewing fresh morning coffee

Steeping the coffee grounds in hot water lets you extract the rich flavors and aromas essential for a full-bodied brew. During the steeping process, the hot water interacts with the coffee grounds, allowing the release of oils and various compounds that contribute to the coffee's depth and complexity.

The steeping time can vary depending on your personal taste preferences, but it's important for achieving the desired strength and taste. Typically, a steeping time of around four minutes is recommended to develop a full-bodied flavor profile without over-extracting bitter compounds.

Advertisement

As you steep, you'll notice the water gradually turning darker, indicating the infusion of rich flavors from the grounds. The duration of steeping directly influences the coffee's final taste; a shorter steeping time results in a milder brew, while a longer steeping period can lead to a more robust and intense cup.

However, be cautious not to over-steep, as this can introduce undesirable bitterness. Ensuring an ideal steeping time is essential for balancing the extraction of flavors, resulting in a well-rounded and satisfying coffee experience. Remember, the art of steeping lies in finding that perfect balance to suit your taste.

Press the Plunger

inserting the coffee filter

To complete the brewing process, gently press the plunger down to separate the grounds from the coffee. The plunger features a filter that's designed to push the grounds to the bottom of the press, while allowing the brewed coffee to pass through smoothly. When you press the plunger, make sure that you apply firm but not excessive pressure. This action ensures a smooth extraction process, preventing the grounds from escaping through the filter and into your brewed coffee.

It's vital to operate the plunger with care. Pressing it too quickly can lead to agitation of the grounds, which could result in a bitter taste due to over-extraction. Conversely, pressing too slowly mightn't effectively separate the grounds, leaving sediment in your cup. By maintaining a steady, controlled motion, you help ensure that the filter effectively separates the grounds from the liquid coffee, resulting in a well-brewed cup.

Properly plunging the filter is essential for achieving the desired flavor profile. By following these steps, you can make sure that your brewed coffee is smooth and free of unwanted grounds, providing a satisfying and enjoyable coffee experience.

Serve and Enjoy

delicious picnic on beach

After you've pressed the plunger, immediately pour the freshly brewed coffee to maintain its peak flavor and aroma. This step is crucial as leaving the coffee in the press can lead to over-extraction, resulting in bitterness. Serving the coffee right away guarantees you capture the best flavor and aroma, allowing you to fully appreciate the rich, robust taste that characterizes French Press coffee.

To help you serve immediately and enjoy your coffee to its fullest, follow these steps:

Advertisement
StepActionPurpose
1Plunger pushedSeparate grounds from coffee
2Pour immediatelyMaintain best flavor
3Serve right awayPrevent bitterness
4EnjoySavor the full-bodied taste

The immersion brewing method used in a French Press allows the coffee to develop a full-bodied and aromatic profile, making it a delightful experience. When you serve immediately after the plunger is pushed, you're ensuring that the coffee remains fresh and enjoyable. This method not only highlights the coffee's richness but also preserves its delicate nuances, providing a well-rounded and satisfying cup. So, take a moment to savor the full-bodied and aromatic experience of your freshly brewed French Press coffee.

Frequently Asked Questions

How Does a Coffee Press Work?

A coffee press operates by immersing coarsely ground coffee beans in hot water, typically around 200°F, to extract flavor.

After steeping for about four minutes, you press the plunger down, which uses a metal mesh filter to separate the grounds from the brewed coffee.

This method extracts more oils and sediments, creating a robust flavor.

Serve the coffee immediately to avoid over-extraction.

Advertisement

What Are the Steps in Using a Coffee Maker?

Imagine the aroma of fresh coffee filling your kitchen.

To use a coffee maker, start by adding water to the reservoir.

Then, place a filter in the basket and add your ground coffee.

Close the lid and turn the machine on.

The water heats, passing through the coffee grounds and filter, dripping into the carafe.

Advertisement

In minutes, you'll have a pot of delicious coffee ready to enjoy.

How Do You Make French Press Coffee Steps?

To make French press coffee, follow these steps:

Measure 1 tablespoon of coarse ground coffee per 6 fluid ounces of water.

Heat the water to 200°F and pour it over the coffee grounds in the press.

Stir gently and let it steep for about four minutes.

Advertisement

Slowly press down the plunger to separate the grounds from the coffee.

Pour the coffee immediately for best flavor.

How Do You Use a Simple Coffee Press?

Imagine your coffee press as a bridge between beans and brew. To use it, measure coarsely ground coffee and hot water into the beaker.

Stir the mixture, then steep for a few minutes. Slowly press the plunger down to separate the grounds from the liquid.

This method guarantees a rich, flavorful coffee, allowing you to adjust strength and taste to your preference.

Advertisement

Can I Use a Regular Coffee Press for Making French Press Coffee?

Yes, you can use a regular coffee press for making French press coffee. The process and the result will be similar to how French press coffee makers work. Just add coarsely ground coffee to the press, pour hot water, let it steep, and press the plunger down slowly. Enjoy your homemade French press coffee!

Conclusion

Now that you've mastered the steps of using a coffee press, you're practically a barista! From gathering your materials to serving the perfect cup, you've got it all down.

Each step guarantees you're extracting the maximum flavor and aroma from your coffee grounds. So go ahead, press that plunger with confidence and savor every sip of your expertly brewed coffee.

Remember, the secret to a great cup lies in the details, and you've nailed them all!

Advertisement
Continue Reading

French Press

How Does the French Press Coffee Pot Work?

What makes the French Press coffee pot unique in delivering a rich, full-bodied brew? Discover the secrets behind its simple yet effective process.

Published

on

By

french press brewing method

A French Press coffee pot immerses coarsely ground coffee beans in hot water, typically around 200°F, to brew. You add the grounds to the beaker, pour hot water over them, ensuring they're fully saturated, and steep for about four minutes. The plunger, equipped with a metal mesh filter, is then pressed down to separate the coffee from the grounds. This design allows essential oils and fine particles to pass through, resulting in a full-bodied flavor. Proper grind size and timing are essential to prevent over-extraction and bitterness. To understand the nuances of each step, consider the specific techniques employed.

Key Takeaways

  • Coarsely ground coffee and hot water steep together in the beaker for about four minutes.
  • The plunger with a metal mesh filter is pressed down to separate the grounds from the brewed coffee.
  • The metal filter allows essential oils and fine particles to pass through for a full-bodied flavor.
  • The lid prevents grounds from escaping into the coffee when pouring.
  • The French Press offers control over steeping time, impacting the strength and flavor of the coffee.

French Press Components

The French Press is composed of a beaker, plunger, and filter, each playing an essential role in the brewing process. These components work together to create a unique and rich coffee experience.

The French press coffee maker's beaker, typically made of glass or stainless steel, holds the hot water and coffee grounds. It's designed to withstand high temperatures and allows you to observe the brewing process.

The plunger is connected to a metal rod and is essential for pressing the coffee grounds to the bottom of the beaker. Attached to the plunger is a metal filter, which plays a critical role. Unlike paper filters, this metal filter allows the natural oils and fine particles from the coffee grounds to pass through, giving French press coffee its distinct texture and flavor.

The lid of the French press fits securely onto the beaker, ensuring that no coffee grounds escape during brewing. Additionally, the handle is ergonomically designed to allow for easy and safe pouring of the brewed coffee.

Each of these components—the beaker, plunger, metal filter, lid, and handle—comes together to make the French press coffee maker a highly effective tool for brewing rich, flavorful coffee.

Advertisement

Brewing Process Overview

brewing coffee step by step

Brewing coffee with a French press involves steeping coarsely ground beans in hot water, guaranteeing a rich and robust flavor. To get started, use French press recipes that call for coarse-ground coffee, as finer grinds can clog the metal mesh filter.

Begin by heating water to around 200°F, which is perfect for ideal flavor extraction. Pour the hot water over the coarse-ground coffee in the French press, and stir gently to make sure all the grounds are fully saturated.

The immersion brewing method is employed here, meaning the coffee grounds remain in contact with the hot water throughout the brewing process. This method ensures consistent flavor extraction, allowing the coffee's natural oils and flavors to fully develop.

Let the coffee steep for about four minutes, a standard time recommended in many French press recipes.

After steeping, press down the plunger slowly and steadily. The metal mesh filter attached to the plunger will separate the grounds from the brewed coffee, allowing you to enjoy a cup free from sediment.

This process not only allows for full control over the brewing process but also results in a rich and robust coffee flavor that many enthusiasts appreciate.

Advertisement

Required Equipment

outdoor adventure gear list

To effectively use a French Press, you'll need three essential components: the French Press itself, coarsely ground coffee, and hot water at the right temperature.

The French Press consists of a beaker, a plunger, and a metal mesh filter that work together to steep and separate the coffee grounds from the liquid.

Ensuring you have the correct coffee grounds and water temperature is vital for achieving the best flavor and extraction.

French Press Components

When you're setting up your French Press, you'll need a beaker, plunger, metal filter, and a lid to get started. These components are essential to the brewing process and guarantee you get a smooth, rich cup of coffee.

The beaker, often made of glass, metal, plastic, or ceramic, is where you combine your coffee grounds and hot water. This container must withstand high temperatures and provide a clear view of the brewing process.

The plunger, connected to the metal filter via a sturdy metal rod, is designed to press the filter down through the coffee mixture. The metal filter is vital as it separates the coffee grounds from the brewed coffee, allowing the liquid to flow through while trapping the grounds. This fine mesh ensures that your coffee is free from sediment.

Advertisement

Lastly, the lid fits securely onto the top of the beaker, helping to prevent heat loss and maintain ideal brewing conditions. This lid often features a small opening for pouring, making it convenient to serve your freshly brewed coffee without removing it entirely.

These components work together to create a consistent and enjoyable coffee experience.

Necessary Coffee Grounds

Now that you understand the components of a French Press, let's explore the importance of using the right coffee grounds for best brewing results.

The grind size of your coffee grounds plays a significant role in flavor extraction and the overall quality of your brew. For a French Press, you'll need coarse grounds. Coarse grounds are essential because they prevent the coffee particles from passing through the metal filter, ensuring a clean and smooth cup.

Using coarse grounds aids in a slower extraction process, allowing more of the coffee's natural oils and flavors to pass through the metal mesh filter. This results in a rich and robust flavor profile, which is the hallmark of a well-brewed French Press coffee.

Advertisement

On the other hand, using fine grounds can lead to over-extraction. Over-extraction occurs when the coffee grounds are too fine, causing them to dissolve too quickly and release excessive bitter compounds, thereby ruining the taste of your coffee.

Water Temperature Essentials

Achieving the ideal water temperature is crucial for brewing a delicious French Press coffee, and having the right equipment can make all the difference. The French Press requires water at around 200°F for best flavor extraction.

Water temperature greatly impacts the taste of your coffee – water that's too hot can lead to a burnt flavor, while cooler water might result in under-extraction, leaving your coffee weak and unsatisfying.

To make sure you consistently reach the ideal 200°F, consider using the following equipment:

  1. Thermometer: A simple kitchen thermometer can help you measure the exact temperature of your water, making sure you hit that 200°F mark every time.
  2. Electric Kettle with Temperature Control: This handy device allows you to set the precise temperature you need, making the process straightforward and repeatable.
  3. Stovetop Kettle: While less precise, you can still achieve the desired temperature by boiling water and then letting it sit for about 30 seconds.
  4. Insulated Carafe: Once you've heated your water, an insulated carafe can help maintain the correct temperature as you prepare your French Press.

Using the right equipment ensures your water temperature is perfect, enhancing the taste of your French Press coffee and avoiding issues like burnt flavor or under-extraction.

Coffee to Water Ratio

brewing the perfect coffee

When preparing French press coffee, the ideal coffee to water ratio is 1:16, which means using 1 gram of coffee for every 16 grams of water.

Adjusting this ratio allows you to control the strength and flavor of your brew, catering to personal preferences.

Advertisement

Using a scale to measure both ingredients guarantees consistency and helps achieve a balanced, flavorful cup every time.

Ideal Brewing Measurements

Finding the perfect coffee to water ratio is key to brewing a delicious cup of French press coffee. The ideal measurements for the French press typically follow a coffee to water ratio of 1:16, which translates to 1 gram of coffee for every 16 grams of water. This ratio serves as a foundational guideline, ensuring a balanced and flavorful cup. During the brewing process, adhering to this ratio allows for the best extraction of coffee flavors, enhancing the overall flavor profile.

However, you can adjust ratios based on personal taste preferences. If you're aiming for a stronger brew, you might use a ratio of 1:15, while a milder cup could call for a 1:17 ratio. This customization lets you fine-tune the coffee's strength and flavor according to your liking.

To paint a clear picture, here are the steps for ideal brewing measurements:

  1. Measure your coffee beans: Use a kitchen scale to weigh out your coffee beans accurately.
  2. Grind the coffee: Coarsely grind the measured coffee beans for best extraction.
  3. Boil water: Heat the water to the appropriate temperature, typically just off the boil.
  4. Combine and brew: Add the coffee grounds to the French press, pour in the water, and let it steep for about four minutes.

Adjusting Strength Preferences

You can easily adjust the strength of your French press coffee by tweaking the coffee-to-water ratio to suit your taste preferences. The standard ratio of 1:16, where 1 gram of coffee is used for every 16 grams of water, serves as a baseline. However, adjusting this ratio can help you personalize the flavor profile to achieve your desired strength.

To fine-tune your coffee, consider experimenting with different ratios. A higher coffee-to-water ratio results in a stronger brew, while a lower ratio yields a milder cup. Consistency in your measurements is vital to achieving the same strength and flavor each time you brew.

Advertisement

Here's a guide to help you adjust the coffee-to-water ratio:

Coffee (grams)Water (grams)Strength
116Standard
114Stronger
118Milder
112Very Strong
120Very Mild

Experimentation is key to discovering what suits your palate best. By meticulously adjusting the ratio, you can guarantee that each cup of French press coffee matches your strength preferences, offering a consistent and enjoyable flavor profile every time.

Standard Proportion Guidelines

Understanding the standard coffee-to-water ratio is essential for brewing a well-balanced and flavorful French press coffee. The recommended ratio is 1:16, meaning 1 gram of coffee to 16 grams of water. This foundational guideline guarantees a balanced extraction, allowing the coffee's intricate flavors to shine.

Here's how you can apply this ratio:

  1. Measure the Coffee: Use a scale to measure 1 gram of coffee for every 16 grams of water you plan to use.
  2. Adjust Ratio: If you prefer a stronger brew, you can experiment with different ratios, such as 1:15 or even 1:14.
  3. Customize Coffee Strength: For a milder cup, try a 1:17 or 1:18 ratio to find your ideal flavor profile.
  4. Proportioning Coffee: Properly proportioning coffee to water is vital, so always measure accurately to achieve consistent results.

Heating the Water

turning up the heat

To achieve the perfect brew, start by heating your water to around 200°F. This temperature is essential for your French Press as it guarantees the coffee grounds steep properly, leading to ideal flavor extraction. If your water is too hot, reaching the boiling point of 212°F, it can burn the coffee grounds, resulting in a bitter taste. Conversely, if the water is too cool, it won't extract the flavors adequately, leaving you with a weak, underwhelming cup.

You can heat your water on a stove or use an electric kettle. Both methods are effective, but make sure to monitor the water temperature closely. Using a thermometer can help you achieve the precise 200°F needed.

Advertisement

Here's a quick guide to water temperatures and their effects:

Water TemperatureEffect on CoffeeIdeal for French Press?
212°FBurns groundsNo
200°FOptimal extractionYes
190°FUnder-extractedNo
180°FWeak flavorNo
Room TempNo extractionNo

Grinding the Coffee

brewing fresh morning coffee

After heating your water to the perfect temperature, the next step is grinding the coffee beans to the right consistency. For a French Press, a coarse grind is essential to prevent grounds from passing through the filter, guaranteeing a clean cup of coffee. Coarse grinds allow for a slower extraction process, which enhances flavor extraction, resulting in a more flavorful and robust brew.

Grinding coffee too fine can lead to over-extraction, causing a bitter taste in your final cup. The recommended grind size for a French Press is similar to breadcrumbs, striking the ideal balance for best flavor extraction. Consistency and uniformity in your coffee grind are critical to achieving a balanced and rich coffee flavor.

To help you visualize the process, here's a quick guide:

  1. Select Quality Beans: Start with fresh, whole coffee beans for the best flavor.
  2. Set Your Grinder: Adjust your grinder to a coarse setting, aiming for a grind size similar to breadcrumbs.
  3. Grind Consistently: Ensure all your coffee grounds are uniform to avoid over or under-extraction.
  4. Measure Correctly: Use the right coffee-to-water ratio, typically one ounce of coffee to 15 ounces of water.

Combining Ingredients

creating culinary masterpieces together

Start by pouring the coarse-ground coffee into the French press beaker. Ensuring that the coffee grounds are coarse is essential, as it allows for proper extraction of flavors without clogging the metal mesh filter.

Once the coffee grounds are in the beaker, it's time to pour hot water over them. The water should be just below boiling, around 200°F (93°C), to optimize the infusion process.

Carefully pour hot water in a steady stream, making sure all the grounds are fully saturated. This step is vital for allowing the flavors to infuse effectively. As the hot water mingles with the coarse-ground coffee, the brewing process begins, releasing the rich, aromatic characteristics of the coffee beans.

Advertisement

Next, place the lid on the French press with the plunger pulled all the way up. The metal mesh filter attached to the plunger will eventually be used to separate the brewed coffee from the grounds. However, for now, let the mixture sit undisturbed. This phase is crucial for achieving a well-balanced liquid coffee. The flavors from the coffee grounds will continue to infuse into the water, preparing for the final pressing step.

Steeping and Timing

brewing tea with precision

Steeping your coffee grounds for the right amount of time, typically 3 to 4 minutes, is crucial for achieving a balanced and flavorful cup. The steeping time in a French Press directly affects the best extraction of flavors from the coffee grounds.

Here's what you need to know to guarantee a well-balanced brew:

  1. Measure Your Coffee and Water: Use a ratio of about 1:15 (coffee to water). For instance, 30 grams of coffee to 450 grams of water.
  2. Set a Timer: Start your timer as soon as you pour hot water over the coffee grounds. This ensures that your steeping time is accurate.
  3. Monitor the Steeping: Keep an eye on the time to avoid over-extraction, which can lead to bitterness. A steeping time beyond 4 minutes can negatively impact the flavor.
  4. Prepare for Plunging: After the steeping time, use the metal mesh filter to separate the grounds from the liquid by slowly pressing down the plunger.

Pressing and Serving

preparing and distributing food

Pressing down the plunger in a French Press separates the coffee grounds from the brewed coffee, guaranteeing a smooth and flavorful pour. This action is vital for achieving a well-balanced cup. The plunger, equipped with a metal mesh filter, allows the liquid coffee to pass through while effectively trapping the grounds. By pressing the filter to the bottom of the beaker, you ensure that the coffee remains free of sediment, resulting in a clean and enjoyable beverage.

Once the plunger is fully depressed, serving the coffee immediately is crucial. Delaying this step can lead to over-extraction, which occurs when the coffee grounds remain in contact with the water for too long, resulting in a bitter and unpleasant taste. Therefore, prompt serving is key to maintaining the ideal flavor profile of your brewed coffee.

The design of the French Press facilitates easy and efficient serving. As you pour, the metal mesh filter ensures that no grounds escape into your cup, providing a sediment-free experience. This method not only enhances the overall quality of the coffee but also simplifies the serving process, making the French Press a preferred choice for many coffee enthusiasts.

Frequently Asked Questions

How Does the French Press Coffee Maker Work?

The French press coffee maker operates by immersing coarse coffee grounds in hot water, typically around 200°F, allowing them to steep for several minutes.

Advertisement

You then press a metal mesh filter through the mixture, effectively separating the grounds from the brewed coffee.

This immersion brewing method guarantees a consistent extraction of flavors, resulting in a rich and robust coffee.

Importantly, the French press doesn't require electricity, making it a straightforward and effective brewing method.

Why Use a French Press Instead of Coffee Maker?

Imagine waking up to the rich aroma of coffee oils and flavors that a French Press captures, unlike drip coffee makers.

You gain full control over brewing variables, ensuring a customized experience.

Advertisement

It's versatile for cold brews, teas, or herbal infusions. Plus, it's eco-friendly since you're not using paper filters.

A French Press not only enriches taste but also promotes sustainability, making it a superior choice.

Do You Need Coffee Filters for a French Press?

You don't need coffee filters for a French Press because it uses a built-in metal mesh filter. This filter allows natural oils and fine particles to pass through, enhancing the coffee's flavor and texture.

The plunger with the metal mesh filter efficiently separates the grounds from the liquid, resulting in a rich and robust coffee. Therefore, the absence of paper filters contributes to a fuller-bodied coffee experience.

Can You Use Regular Ground Coffee in a French Press?

Yes, you can use regular ground coffee in a French press, but there's a catch. Regular ground coffee might lead to over-extraction and a gritty texture that diminishes the experience.

Advertisement

For the best results, choose coarser ground coffee. It allows for ideal flavor extraction and minimizes the silty residue at the bottom of your cup, ensuring a clean and flavorful brew every time.

What are the Steps for Using a French Press Coffee Pot?

To use a French press coffee pot, start by adding coarse coffee grounds to the pot. Then, pour hot water over the grounds, stir, and let it steep for about four minutes. After that, press down the plunger slowly to separate the grounds from the coffee. That’s the coffee press operation explained.

Conclusion

Just as an artist combines colors to create a masterpiece, using a French press requires precise steps. By understanding each component and following the brewing process closely, you'll produce a rich, flavorful coffee.

From the accurate coffee-to-water ratio to the exact timing for steeping, each detail matters. Embrace this method, and you'll appreciate how its simplicity belies the complexity behind a perfect cup.

Mastery of the French press is truly an art in itself.

Advertisement
Continue Reading

Brewing Guides

Campfire Coffee Percolator Guide: 3 Simple Steps

Discover the art of brewing the perfect outdoor brew with our Campfire Coffee Percolator Guide. Master it in 3 simple steps for a robust cup every time.

Published

on

By

How to make campfire coffee percolator (3 Simple-steps)

Coffee and camping go hand-in-hand. There’s something truly magical about waking up to the aroma of freshly brewed campfire coffee, sipping it as you watch the morning mist rise from the mountains. But, do you know the secret to brewing a perfect cup of campfire coffee with a percolator?

Many campers believe that making campfire coffee is a complex and time-consuming process. However, I’m here to tell you that it can be as simple as 1, 2, 3! In this guide, we’ll unveil the three simple steps that will elevate your campfire coffee game and ensure you never settle for a subpar cup.

Are you ready to unlock the secrets to brewing a rich and flavorful cup of campfire coffee? Let’s dive in!

Key Takeaways:

  • Discover the three simple steps to brew delicious campfire coffee with a percolator.
  • Challenge the common belief that making campfire coffee is a complex process.
  • Learn how to unlock the secrets to brewing a rich and flavorful cup of campfire coffee.
  • Understand the importance of choosing the right percolator and familiarizing yourself with its parts.
  • Explore the step-by-step process of filling the percolator pot, adding coffee, and starting the brewing process.

Choose the Right Percolator for Camping

When it comes to making campfire coffee with a percolator, selecting the right one for your camping adventures is crucial. Two popular options that camping enthusiasts swear by are the GSI Outdoors 8 Cup Enamelware Percolator and the GSI Outdoors Glacier Stainless Steel Percolator Coffee Pot.

The GSI Outdoors 8 Cup Enamelware Percolator is a classic choice that combines nostalgia with practicality. Made from durable enamel-coated steel, it can withstand the rigors of outdoor use. This percolator has an eight-cup capacity, making it suitable for larger groups. Its cheerful blue finish adds a touch of charm to any campsite.

For those seeking durability and performance, the GSI Outdoors Glacier Stainless Steel Percolator Coffee Pot is an excellent option. Crafted from high-quality stainless steel, this percolator is built to last. It features a convenient pour spout and a cool-touch handle, ensuring easy and safe pouring. With its nine-cup capacity, this percolator is ideal for larger camping gatherings.

When choosing a camping percolator, consider factors such as size, weight, and durability. Determine how many cups of coffee you typically need to brew and find a percolator that meets your requirements. The GSI Outdoors 8 Cup Enamelware Percolator and the GSI Outdoors Glacier Stainless Steel Percolator Coffee Pot offer options to suit various camping needs.

Consider the following comparison table to help you make an informed decision:

GSI Outdoors 8 Cup Enamelware Percolator GSI Outdoors Glacier Stainless Steel Percolator Coffee Pot
Material: Enamel-coated steel Material: Stainless steel
Capacity: 8 cups Capacity: 9 cups
Weight: 25 oz Weight: 30 oz
Durable and nostalgic design Durable and high-performance

Image:

Choose a camping percolator that suits your style, needs, and brewing preferences. With the right percolator in hand, you’ll be on your way to enjoying a freshly brewed cup of campfire coffee that perfectly complements your outdoor adventure.

Familiarize Yourself with the Percolator Parts

Before brewing a delicious cup of campfire coffee with a percolator, it’s essential to understand the different parts that make up this brewing tool. Familiarizing yourself with the percolator parts will ensure that you can assemble and use it correctly to achieve the perfect brew.

percolator parts

  1. Pot: The pot is the main vessel of the percolator where the water is held and heated. It usually has a handle for easy pouring and a spout for controlled pouring.
  2. Vertical Tube: The vertical tube, also known as the percolator tube or stem, extends from the bottom of the pot to the top. It serves as a pathway for the heated water to travel through the percolator.
  3. Basket: The basket sits at the top of the vertical tube and holds the coffee grounds. It usually has small holes or perforations to allow the brewed coffee to flow back down into the pot.
  4. Lid: The lid covers the top of the percolator to prevent heat from escaping and keep the coffee grounds inside the basket. It typically has a knob or handle for easy removal.

When all the parts are properly assembled, the percolator functions by circulating boiling water through the vertical tube and over the coffee grounds in the basket. This process extracts the flavors and oils from the coffee, resulting in a rich and bold cup of campfire coffee.

Now that you have familiarized yourself with the percolator parts, let’s move on to the next step and learn how to fill the percolator pot with water.

Fill the Percolator Pot

Before you can enjoy a delicious cup of campfire coffee, it’s important to fill the percolator pot with the right amount of water. Take care not to overfill the pot to avoid any spillage. To make the process easier, some percolators have a convenient fill line inside as a helpful guide.

If you’re using a camping stove to brew your coffee, it’s important to keep the flame at medium strength. This ensures a steady and even heat distribution, allowing the water to reach the optimal brewing temperature. By maintaining the right flame intensity, you can achieve a perfect extraction of flavors from your coffee grounds.

camping stove

Why Use a Fill Line?

A fill line inside the percolator pot serves as a reference point to help you determine the ideal amount of water for brewing. It ensures consistency in taste and prevents any potential overflow, which can be messy and wasteful. So, when filling the pot, make sure to follow the fill line if your percolator has one.

Optimizing Brewing with a Camping Stove

Using a camping stove to brew your campfire coffee offers convenience and control over the brewing process. When using a camping stove, it’s important to monitor the flame intensity and adjust it accordingly. Keeping the flame at medium strength allows for a consistent and controlled brewing temperature, ensuring a flavorful and aromatic cup of coffee.

Brewing campfire coffee with a percolator on a camping stove not only provides you with a delicious cup of coffee but also enhances your outdoor experience. The gentle hiss of the stove, the aroma of freshly brewed coffee, and the surrounding nature create the perfect ambiance for enjoying your morning or evening brew.

In Summary

When starting your campfire coffee brewing journey, filling the percolator pot with the right amount of water is crucial. Avoid overfilling the pot to prevent any spillage, and be sure to use the fill line if your percolator has one. If using a camping stove, maintain a medium flame intensity for optimal brewing. These simple steps will set the foundation for a flavorful and enjoyable cup of campfire coffee.

Add Coffee to the Percolator

Now that you have the percolator set up and filled with water, it’s time to add the coffee. Depending on your preference, you can use either ground coffee or fresh coarsely ground coffee for a richer flavor.

If you’re using regular ground coffee, you may need to use filters that fit your percolator basket to prevent any coffee grounds from ending up in your cup. Simply place the filter in the basket and add the desired amount of ground coffee.

On the other hand, if you prefer the boldness of fresh coarsely ground coffee, you may not need to use filters. The larger coffee grounds will not pass through the basket holes, allowing you to enjoy a full-bodied cup of coffee. Add the desired amount of coarsely ground coffee directly to the basket.

Remember, the amount of coffee you add will depend on your personal taste preferences. You can start with a tablespoon per cup of water and adjust it according to your desired strength. Feel free to experiment with different amounts of coffee to find the perfect balance for your taste buds.

To summarize, when adding coffee to the percolator, use filters for regular ground coffee and adjust the amount of coffee based on your desired taste. If using fresh coarsely ground coffee, filters may not be necessary. Enjoy the process of finding the right coffee-to-water ratio that suits your camping coffee experience.

add coffee to the percolator

Percolating Coffee Tips:

  1. Start with a tablespoon of coffee per cup of water and adjust to taste.
  2. For a stronger brew, add an extra tablespoon of coffee.
  3. If you prefer a milder flavor, decrease the amount of coffee slightly.
  4. Experiment with different coffee-to-water ratios until you find your preferred strength.

Start the Brewing Process

With the percolator assembled and filled with water and coffee, it’s time to start the brewing process. Whether you’re enjoying the tranquility of a campfire in the wilderness or utilizing a camping stove for convenience, the steps remain the same. Place the percolator on the campfire or camping stove, ensuring it is stable and secure.

Once the percolator is in position, it’s important to monitor the brewing process closely. Keeping a watchful eye ensures that the temperature remains consistent and the coffee brews to perfection. Adjust the heat source as needed, whether it’s raising or lowering the flames on a campfire or adjusting the flame intensity on a camping stove.

As the percolator begins to heat up, the magic of campfire coffee unfolds. The water inside the pot will start to heat, creating pressure that forces the water up through the vertical tube and over the coffee grounds in the basket. This continuous process of water circulating and percolating releases the rich aroma and flavorful oils from the coffee grounds.

“The brewing process is an art in itself, and it’s important to strike a balance between heat intensity and brewing time to achieve the perfect cup of campfire coffee.” Noah, the Editor-in-Chief at Cappuccino Oracle

Allow the percolator to brew for approximately 10-15 minutes, depending on your taste preferences. This brewing time allows the flavors to develop fully and creates a robust and satisfying cup of campfire coffee. However, it’s important to exercise caution and avoid over-extraction, which can result in a bitter taste.

During the brewing process, take a moment to immerse yourself in the surroundings. The aroma of the coffee, the crackling of the campfire, and the beauty of nature create a serene and delightful atmosphere. It’s a true sensory experience that enhances the enjoyment of your cup of campfire coffee.

campfire coffee brewing process

Once the brewing time is complete, carefully remove the percolator from the heat source, using oven mitts or pot holders to protect your hands from the hot surfaces. The coffee inside will be piping hot, so handle with care.

Now, with the brewing process finished, it’s time to pour yourself a cup of freshly brewed campfire coffee and savor the rich flavors. Each sip is a testament to the art of crafting coffee in the great outdoors.

Pour and Enjoy

After the brewing time is complete, it’s time to savor the fruits of your labor and pour yourself a cup of freshly brewed campfire coffee. The aroma fills the air as you carefully pour the coffee into your favorite mug, watching as the rich, dark liquid cascades into the cup.

Take a moment to appreciate the simplicity of the brewing process and the natural beauty that surrounds you. Whether you’re nestled deep in the woods, perched on a mountainside, or enjoying the tranquility of a lakeside campsite, there’s something magical about enjoying a cup of campfire coffee amidst nature’s embrace.

As you lift the cup to your lips, the warmth from the mug spreads through your hands, comforting and soothing. The first sip brings an explosion of flavors, a delightful symphony of boldness and smoothness. Each subsequent sip envelops your taste buds, transporting you to a place of contentment and pleasure.

Savor the moment, relishing in the simplicity of campfire coffee. As the sun rises over the horizon, casting its golden glow upon the landscape, you sit back, taking in the tranquil surroundings. The crackling of the campfire and the sound of nature provide the perfect soundtrack to your morning routine.

With each sip, you become more present, grounding yourself in the present moment. The worries of the world fade away, replaced by a sense of calm and connection. The simplicity of campfire coffee reminds you to slow down, to appreciate life’s simple pleasures, and to find joy in the little things.

So, pour yourself another cup of campfire coffee and immerse yourself in the beauty of the great outdoors. Let the flavors awaken your senses and the serenity of nature rejuvenate your spirit. Campfire coffee is more than just a beverage; it’s a ritual that allows you to connect with yourself, with others, and with the world around you.

“Coffee is a language in itself.” – Jackie Chan

And indeed, campfire coffee is a language that speaks to the soul. Its warmth and flavor bring people together, igniting conversations and creating memories that last a lifetime.

Campfire Coffee Essentials

Item Description
Campfire Coffee Percolator A durable and efficient percolator specifically designed for brewing coffee over an open fire or camping stove.
Quality Coffee Beans Freshly roasted coffee beans of your preference that will be ground for the percolation process.
Mug or Cup Your favorite camping mug or cup to enjoy the delicious cup of campfire coffee.
Campfire or Camping Stove A safe and controlled heat source for brewing your campfire coffee.
Water Clean, filtered water to ensure the best flavor in your campfire coffee.

With these essentials at hand, you’re well-equipped to embark on your campfire coffee journey. So, whether you’re a seasoned outdoor enthusiast or a first-time camper, pour yourself a cup of campfire coffee and let the magic unfold.

enjoy campfire coffee

Start Your Campfire

Before brewing your campfire coffee, it’s essential to start your campfire. This sets the stage for a truly authentic and enjoyable outdoor coffee experience. Here are a few methods you can use to get your campfire going:

1. Fire Pit Grate

If you have access to a fire pit grate, it can serve as a convenient base for your campfire. Clear any debris from the grate and gather your firewood. Position the logs in a pyramid shape, leaving enough space for air circulation. Use fire starters or kindling to ignite the wood, gradually adding larger pieces as the fire grows. Once the flames are roaring, you’re ready to brew your campfire coffee.

2. Hanging the Percolator

Hanging the percolator above the flames is another popular method for brewing campfire coffee. Find a sturdy branch or tripod where you can suspend the percolator over the fire. Adjust the height to control the intensity of the heat. As the flames dance beneath the percolator, you’ll be treated to the aroma of freshly brewing coffee.

3. Setting Near Hot Coals

For a more controlled and gentle heat source, set your percolator near hot coals. After building a small fire, allow it to burn down until you’re left with a bed of hot embers. Position the percolator close to the coals without directly touching them. The radiant heat will gradually brew your coffee to perfection.

Remember to prioritize safety when starting your campfire. Choose a well-ventilated area, away from flammable objects, and always have a bucket of water or sand nearby for emergencies.

campfire coffee percolator

Method Description
Fire Pit Grate Clear the grate and arrange logs in a pyramid shape. Ignite and add larger pieces as the fire grows.
Hanging the Percolator Suspend the percolator over the flames using a branch or tripod. Adjust the height for desired heat intensity.
Setting Near Hot Coals Place the percolator near hot embers. The radiant heat will brew your coffee gradually.

Fill Your Camping Coffee Maker

When it comes to brewing coffee in the great outdoors, filling your camping coffee maker with the right amount of water is essential for a perfect brew. Whether you’re planning a solo camping trip or enjoying a weekend getaway with friends, the COLETTI percolator is a reliable choice for your camping coffee needs.

Start by measuring the water for your camping coffee maker. Clean water is highly recommended, and for the best results, consider using filtered water. The COLETTI percolator is thoughtfully designed to hold up to nine cups of water, making it ideal for a group of coffee-loving campers. However, if you prefer a smaller brew, you can easily adjust the amount of water based on your needs.

Remember to be mindful not to overfill the percolator. Overfilling can lead to messy spills and affect the brewing process. It’s always better to err on the side of caution and pour a slightly lesser amount of water than to risk overflowing your camping coffee maker.

Preparing your camping coffee maker with the right amount of water sets the foundation for a satisfying brew. So, fill it up, and get ready to enjoy a piping hot cup of campfire coffee amidst the beauty of nature.

COLETTI percolator

Assemble and Brew

Now that you have familiarized yourself with the percolator parts and filled the pot, it’s time to assemble and brew your campfire coffee. Follow these simple steps to create a delicious cup of coffee in the great outdoors.

  1. Assemble the filter basket by attaching it to the stem. Make sure it is securely in place.
  2. Add your preferred amount of coffee to the basket. Whether you like a bold or mild flavor, adjust the quantity of coffee accordingly.
  3. Place the assembled basket into the percolator pot. Ensure that it sits snugly inside.
  4. Start the brewing process by placing the percolator pot on the campfire or camping stove.
  5. Move the percolator away from direct flames to control the temperature and prevent over-brewing.
  6. Allow the coffee to percolate for 5-10 minutes, depending on your desired strength.

While the coffee percolates, savor the aroma wafting through the air and use this time to relax and enjoy the beauty of nature. The brewing process will infuse your surroundings with the wonderful scent of freshly brewed coffee.

Once the brewing time is complete, carefully remove the percolator from the heat source and set it aside. The rich and flavorful campfire coffee is now ready to be poured and enjoyed.

Expert Tip:

If you prefer a stronger cup of coffee, you can extend the brewing time slightly. Just keep an eye on the color of the brew to ensure it doesn’t become too concentrated.

brewing process

Conclusion

Brewing campfire coffee with a percolator is a rewarding experience that allows you to enjoy a delicious cup of coffee while embracing the great outdoors. By following the 3 simple steps outlined in this guide, you can brew the perfect cup every time.

Start by choosing the right camping percolator for your needs, whether it’s the GSI Outdoors 8 Cup Enamelware Percolator or the GSI Outdoors Glacier Stainless Steel Percolator Coffee Pot. Familiarize yourself with the different percolator parts such as the pot, vertical tube, basket, and lid to ensure proper brewing.

Once you have assembled and filled the percolator with water and coffee, start the brewing process on your campfire or camping stove. Monitor the process closely and adjust the heat as needed. After the brewing time is complete, pour yourself a cup of freshly brewed coffee and enjoy outdoor coffee as you appreciate the beauty of nature surrounding you.

In conclusion, with the right campfire coffee percolator and these simple steps, you can brew the perfect cup of coffee and enhance your camping experience. So, gather your supplies, start your campfire, and savor the rich flavor of campfire coffee.

FAQ

What is a percolator?

A percolator is a coffee brewing device commonly used for making campfire coffee. It consists of a pot, vertical tube, basket, and lid.

What are the popular options for camping percolators?

Popular options for camping percolators include the GSI Outdoors 8 Cup Enamelware Percolator and the GSI Outdoors Glacier Stainless Steel Percolator Coffee Pot.

How do I fill the percolator pot?

Fill the percolator pot with the desired amount of water, being mindful not to overfill. Some percolators have a fill line inside as a guide.

Do I need filters for adding coffee to the percolator?

If using regular ground coffee, filters that fit the basket may be necessary. However, if using fresh coarsely ground coffee, filters may not be required.

How do I start the brewing process with a percolator?

Place the assembled percolator on a campfire or camping stove, monitor the process closely, and adjust the heat as needed. Let the percolator brew for 10-15 minutes.

How do I start my campfire?

Start your campfire according to your preferred method, such as using a fire pit grate, hanging the percolator above flames, or setting it near hot coals.

How much water should I use in my camping coffee maker?

Use clean water, ideally filtered, and adjust the amount based on your needs. The COLETTI percolator is designed to hold nine cups of water.

How do I assemble and brew with a camping percolator?

Assemble the filter basket by attaching it to the stem, add your preferred amount of coffee to the basket, place it into the percolator pot, and move the percolator away from direct flames. Allow it to percolate for 5-10 minutes.

How can I brew the perfect cup of campfire coffee with a percolator?

By following these simple steps, choosing the right percolator, and adjusting the water and coffee amounts to your taste preferences, you can brew the perfect cup of campfire coffee with a percolator.
Continue Reading

Trending