
Coffee and camping are a perfect match. There is a special feeling in starting your day with the smell of freshly brewed campfire coffee, enjoying it while observing the morning mist over the mountains. But, do you know the trick to making a flawless cup of campfire coffee with a percolator?
Translated in English (US):
Coffee and camping are a perfect match. There is a special feeling in starting your day with the smell of freshly brewed campfire coffee, enjoying it while observing the morning mist over the mountains. But, do you know the trick to making a flawless cup of campfire coffee with a percolator?
Many campers believe that making campfire coffee is a complex and time-consuming process. However, I’m here to tell you that it can be as simple as 1, 2, 3! In this guide, we’ll unveil the three simple steps that will elevate your campfire coffee game and ensure you never settle for a subpar cup.
Are you ready to unlock the secrets to brewing a rich and flavorful cup of campfire coffee? Let’s dive in!
Key Takeaways:
- Discover the three simple steps to brew delicious campfire coffee with a percolator.
- Challenge the common belief that making campfire coffee is a complex process.
- Learn how to unlock the secrets to brewing a rich and flavorful cup of campfire coffee.
- Understand the importance of choosing the right percolator and familiarizing yourself with its parts.
- Explore the step-by-step process of filling the percolator pot, adding coffee, and starting the brewing process.
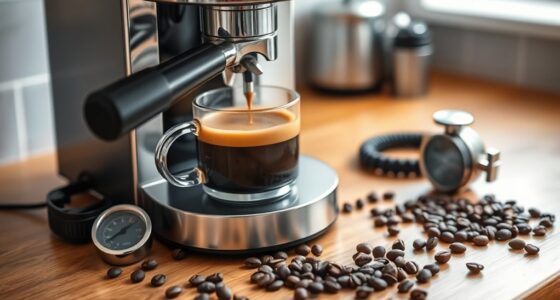
Choose the Right Percolator for Camping
When it comes to making campfire coffee with a percolator, selecting the right one for your camping adventures is crucial. Two popular options that camping enthusiasts swear by are the GSI Outdoors 8 Cup Enamelware Percolator and the GSI Outdoors Glacier Stainless Steel Percolator Coffee Pot.
The GSI Outdoors 8 Cup Enamelware Percolator is a classic choice that combines nostalgia with practicality. Made from durable enamel-coated steel, it can withstand the rigors of outdoor use. This percolator has an eight-cup capacity, making it suitable for larger groups. Its cheerful blue finish adds a touch of charm to any campsite.
For those seeking durability and performance, the GSI Outdoors Glacier Stainless Steel Percolator Coffee Pot is an excellent option. Crafted from high-quality stainless steel, this percolator is built to last. It features a convenient pour spout and a cool-touch handle, ensuring easy and safe pouring. With its nine-cup capacity, this percolator is ideal for larger camping gatherings.
When choosing a camping percolator, consider factors such as size, weight, and durability. Determine how many cups of coffee you typically need to brew and find a percolator that meets your requirements. The GSI Outdoors 8 Cup Enamelware Percolator and the GSI Outdoors Glacier Stainless Steel Percolator Coffee Pot offer options to suit various camping needs.
Consider the following comparison table to help you make an informed decision:
| GSI Outdoors 8 Cup Enamelware Percolator | GSI Outdoors Glacier Stainless Steel Percolator Coffee Pot |
|---|---|
| Material: Enamel-coated steel | Material: Stainless steel |
| Capacity: 8 cups | Capacity: 9 cups |
| Weight: 25 oz | Weight: 30 oz |
| Durable and nostalgic design | Durable and high-performance |
Image:
Choose a camping percolator that suits your style, needs, and brewing preferences. With the right percolator in hand, you’ll be on your way to enjoying a freshly brewed cup of campfire coffee that perfectly complements your outdoor adventure.

Keurig K-Mini Single Serve K-Cup Pod Coffee Maker, 6 to 12oz Brew size, with Cord Storage, Perfect for Small Spaces, Black
- Compact Design: Fits small spaces under 5 inches wide
- Adjustable Brew Size: Brew 6-12oz cups with Keurig pods
- Removable Water Reservoir: Add fresh water for each brew
As an affiliate, we earn on qualifying purchases.
Familiarize Yourself with the Percolator Parts
Before brewing a delicious cup of campfire coffee with a percolator, it’s essential to understand the different parts that make up this brewing tool. Familiarizing yourself with the percolator parts will ensure that you can assemble and use it correctly to achieve the perfect brew.

- Pot: The pot is the main vessel of the percolator where the water is held and heated. It usually has a handle for easy pouring and a spout for controlled pouring.
- Vertical Tube: The vertical tube, also known as the percolator tube or stem, extends from the bottom of the pot to the top. It serves as a pathway for the heated water to travel through the percolator.
- Basket: The basket sits at the top of the vertical tube and holds the coffee grounds. It usually has small holes or perforations to allow the brewed coffee to flow back down into the pot.
- Lid: The lid covers the top of the percolator to prevent heat from escaping and keep the coffee grounds inside the basket. It typically has a knob or handle for easy removal.
When all the parts are properly assembled, the percolator functions by circulating boiling water through the vertical tube and over the coffee grounds in the basket. This process extracts the flavors and oils from the coffee, resulting in a rich and bold cup of campfire coffee.
Now that you have familiarized yourself with the percolator parts, let’s move on to the next step and learn how to fill the percolator pot with water.
Fill the Percolator Pot
Before you can enjoy a delicious cup of campfire coffee, it’s important to fill the percolator pot with the right amount of water. Take care not to overfill the pot to avoid any spillage. To make the process easier, some percolators have a convenient fill line inside as a helpful guide.
If you’re using a camping stove to brew your coffee, it’s important to keep the flame at medium strength. This ensures a steady and even heat distribution, allowing the water to reach the optimal brewing temperature. By maintaining the right flame intensity, you can achieve a perfect extraction of flavors from your coffee grounds.

Why Use a Fill Line?
A fill line inside the percolator pot serves as a reference point to help you determine the ideal amount of water for brewing. It ensures consistency in taste and prevents any potential overflow, which can be messy and wasteful. So, when filling the pot, make sure to follow the fill line if your percolator has one.
Optimizing Brewing with a Camping Stove
Using a camping stove to brew your campfire coffee offers convenience and control over the brewing process. When using a camping stove, it’s important to monitor the flame intensity and adjust it accordingly. Keeping the flame at medium strength allows for a consistent and controlled brewing temperature, ensuring a flavorful and aromatic cup of coffee.
Brewing campfire coffee with a percolator on a camping stove not only provides you with a delicious cup of coffee but also enhances your outdoor experience. The gentle hiss of the stove, the aroma of freshly brewed coffee, and the surrounding nature create the perfect ambiance for enjoying your morning or evening brew.
In Summary
When starting your campfire coffee brewing journey, filling the percolator pot with the right amount of water is crucial. Avoid overfilling the pot to prevent any spillage, and be sure to use the fill line if your percolator has one. If using a camping stove, maintain a medium flame intensity for optimal brewing. These simple steps will set the foundation for a flavorful and enjoyable cup of campfire coffee.
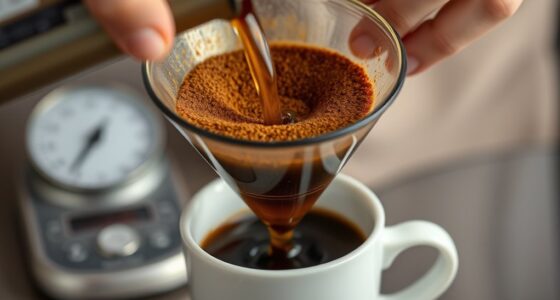
Add Coffee to the Percolator
Now that you have the percolator set up and filled with water, it’s time to add the coffee. Depending on your preference, you can use either ground coffee or fresh coarsely ground coffee for a richer flavor.
If you’re using regular ground coffee, you may need to use filters that fit your percolator basket to prevent any coffee grounds from ending up in your cup. Simply place the filter in the basket and add the desired amount of ground coffee.
On the other hand, if you prefer the boldness of fresh coarsely ground coffee, you may not need to use filters. The larger coffee grounds will not pass through the basket holes, allowing you to enjoy a full-bodied cup of coffee. Add the desired amount of coarsely ground coffee directly to the basket.
Remember, the amount of coffee you add will depend on your personal taste preferences. You can start with a tablespoon per cup of water and adjust it according to your desired strength. Feel free to experiment with different amounts of coffee to find the perfect balance for your taste buds.
To summarize, when adding coffee to the percolator, use filters for regular ground coffee and adjust the amount of coffee based on your desired taste. If using fresh coarsely ground coffee, filters may not be necessary. Enjoy the process of finding the right coffee-to-water ratio that suits your camping coffee experience.

Percolating Coffee Tips:
- Start with a tablespoon of coffee per cup of water and adjust to taste.
- For a stronger brew, add an extra tablespoon of coffee.
- If you prefer a milder flavor, decrease the amount of coffee slightly.
- Experiment with different coffee-to-water ratios until you find your preferred strength.
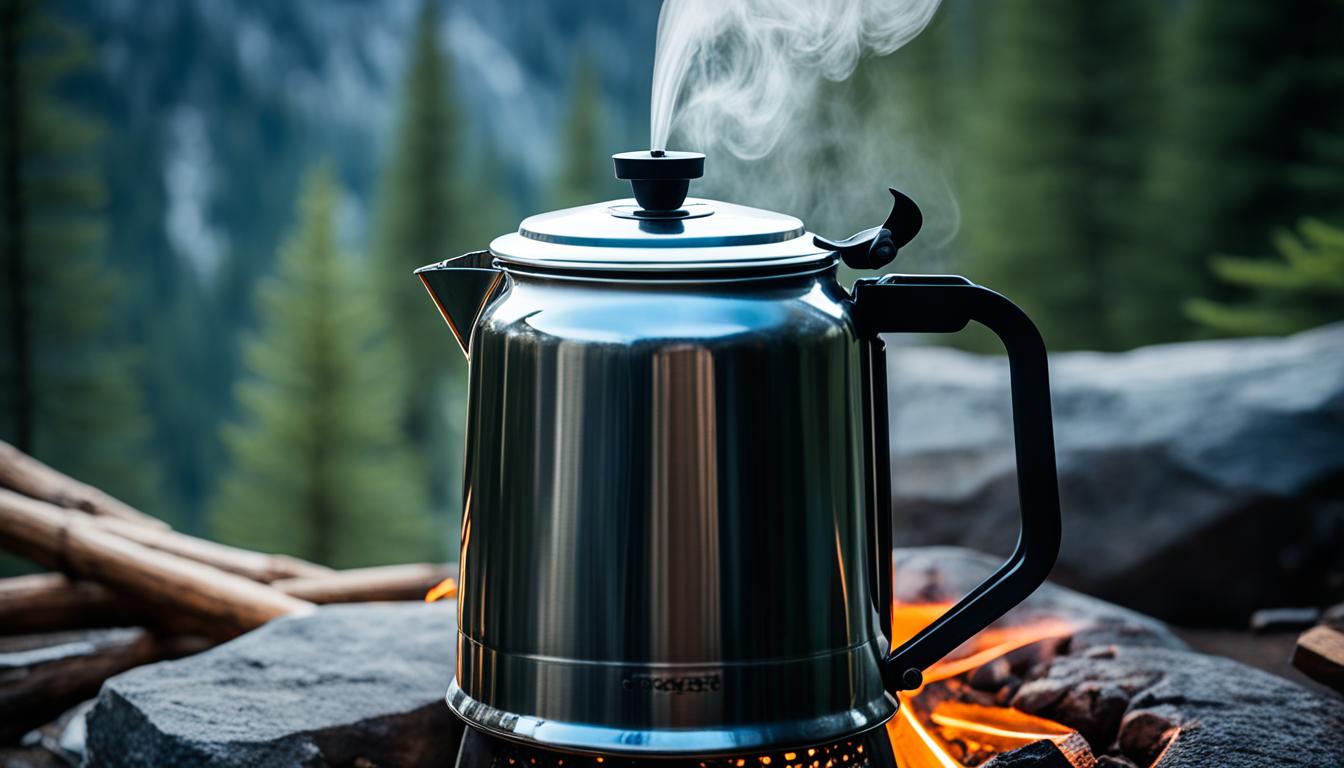
Start the Brewing Process
With the percolator assembled and filled with water and coffee, it’s time to start the brewing process. Whether you’re enjoying the tranquility of a campfire in the wilderness or utilizing a camping stove for convenience, the steps remain the same. Place the percolator on the campfire or camping stove, ensuring it is stable and secure.
Once the percolator is in position, it’s important to monitor the brewing process closely. Keeping a watchful eye ensures that the temperature remains consistent and the coffee brews to perfection. Adjust the heat source as needed, whether it’s raising or lowering the flames on a campfire or adjusting the flame intensity on a camping stove.
As the percolator begins to heat up, the magic of campfire coffee unfolds. The water inside the pot will start to heat, creating pressure that forces the water up through the vertical tube and over the coffee grounds in the basket. This continuous process of water circulating and percolating releases the rich aroma and flavorful oils from the coffee grounds.
“The brewing process is an art in itself, and it’s important to strike a balance between heat intensity and brewing time to achieve the perfect cup of campfire coffee.” Noah, the Editor-in-Chief at Cappuccino Oracle
Allow the percolator to brew for approximately 10-15 minutes, depending on your taste preferences. This brewing time allows the flavors to develop fully and creates a robust and satisfying cup of campfire coffee. However, it’s important to exercise caution and avoid over-extraction, which can result in a bitter taste.
During the brewing process, take a moment to immerse yourself in the surroundings. The aroma of the coffee, the crackling of the campfire, and the beauty of nature create a serene and delightful atmosphere. It’s a true sensory experience that enhances the enjoyment of your cup of campfire coffee.

Once the brewing time is complete, carefully remove the percolator from the heat source, using oven mitts or pot holders to protect your hands from the hot surfaces. The coffee inside will be piping hot, so handle with care.
Now, with the brewing process finished, it’s time to pour yourself a cup of freshly brewed campfire coffee and savor the rich flavors. Each sip is a testament to the art of crafting coffee in the great outdoors.
Pour and Enjoy
After the brewing time is complete, it’s time to savor the fruits of your labor and pour yourself a cup of freshly brewed campfire coffee. The aroma fills the air as you carefully pour the coffee into your favorite mug, watching as the rich, dark liquid cascades into the cup.
Take a moment to appreciate the simplicity of the brewing process and the natural beauty that surrounds you. Whether you’re nestled deep in the woods, perched on a mountainside, or enjoying the tranquility of a lakeside campsite, there’s something magical about enjoying a cup of campfire coffee amidst nature’s embrace.
As you lift the cup to your lips, the warmth from the mug spreads through your hands, comforting and soothing. The first sip brings an explosion of flavors, a delightful symphony of boldness and smoothness. Each subsequent sip envelops your taste buds, transporting you to a place of contentment and pleasure.
Savor the moment, relishing in the simplicity of campfire coffee. As the sun rises over the horizon, casting its golden glow upon the landscape, you sit back, taking in the tranquil surroundings. The crackling of the campfire and the sound of nature provide the perfect soundtrack to your morning routine.
With each sip, you become more present, grounding yourself in the present moment. The worries of the world fade away, replaced by a sense of calm and connection. The simplicity of campfire coffee reminds you to slow down, to appreciate life’s simple pleasures, and to find joy in the little things.
So, pour yourself another cup of campfire coffee and immerse yourself in the beauty of the great outdoors. Let the flavors awaken your senses and the serenity of nature rejuvenate your spirit. Campfire coffee is more than just a beverage; it’s a ritual that allows you to connect with yourself, with others, and with the world around you.
“Coffee is a language in itself.” – Jackie Chan
And indeed, campfire coffee is a language that speaks to the soul. Its warmth and flavor bring people together, igniting conversations and creating memories that last a lifetime.
Campfire Coffee Essentials
| Item | Description |
|---|---|
| Campfire Coffee Percolator | A durable and efficient percolator specifically designed for brewing coffee over an open fire or camping stove. |
| Quality Coffee Beans | Freshly roasted coffee beans of your preference that will be ground for the percolation process. |
| Mug or Cup | Your favorite camping mug or cup to enjoy the delicious cup of campfire coffee. |
| Campfire or Camping Stove | A safe and controlled heat source for brewing your campfire coffee. |
| Water | Clean, filtered water to ensure the best flavor in your campfire coffee. |
With these essentials at hand, you’re well-equipped to embark on your campfire coffee journey. So, whether you’re a seasoned outdoor enthusiast or a first-time camper, pour yourself a cup of campfire coffee and let the magic unfold.

Start Your Campfire
Before brewing your campfire coffee, it’s essential to start your campfire. This sets the stage for a truly authentic and enjoyable outdoor coffee experience. Here are a few methods you can use to get your campfire going:
1. Fire Pit Grate
If you have access to a fire pit grate, it can serve as a convenient base for your campfire. Clear any debris from the grate and gather your firewood. Position the logs in a pyramid shape, leaving enough space for air circulation. Use fire starters or kindling to ignite the wood, gradually adding larger pieces as the fire grows. Once the flames are roaring, you’re ready to brew your campfire coffee.
2. Hanging the Percolator
Hanging the percolator above the flames is another popular method for brewing campfire coffee. Find a sturdy branch or tripod where you can suspend the percolator over the fire. Adjust the height to control the intensity of the heat. As the flames dance beneath the percolator, you’ll be treated to the aroma of freshly brewing coffee.
3. Setting Near Hot Coals
For a more controlled and gentle heat source, set your percolator near hot coals. After building a small fire, allow it to burn down until you’re left with a bed of hot embers. Position the percolator close to the coals without directly touching them. The radiant heat will gradually brew your coffee to perfection.
Remember to prioritize safety when starting your campfire. Choose a well-ventilated area, away from flammable objects, and always have a bucket of water or sand nearby for emergencies.

| Method | Description |
|---|---|
| Fire Pit Grate | Clear the grate and arrange logs in a pyramid shape. Ignite and add larger pieces as the fire grows. |
| Hanging the Percolator | Suspend the percolator over the flames using a branch or tripod. Adjust the height for desired heat intensity. |
| Setting Near Hot Coals | Place the percolator near hot embers. The radiant heat will brew your coffee gradually. |
Fill Your Camping Coffee Maker
When it comes to brewing coffee in the great outdoors, filling your camping coffee maker with the right amount of water is essential for a perfect brew. Whether you’re planning a solo camping trip or enjoying a weekend getaway with friends, the COLETTI percolator is a reliable choice for your camping coffee needs.
Start by measuring the water for your camping coffee maker. Clean water is highly recommended, and for the best results, consider using filtered water. The COLETTI percolator is thoughtfully designed to hold up to nine cups of water, making it ideal for a group of coffee-loving campers. However, if you prefer a smaller brew, you can easily adjust the amount of water based on your needs.
Remember to be mindful not to overfill the percolator. Overfilling can lead to messy spills and affect the brewing process. It’s always better to err on the side of caution and pour a slightly lesser amount of water than to risk overflowing your camping coffee maker.
Preparing your camping coffee maker with the right amount of water sets the foundation for a satisfying brew. So, fill it up, and get ready to enjoy a piping hot cup of campfire coffee amidst the beauty of nature.

Assemble and Brew
Now that you have familiarized yourself with the percolator parts and filled the pot, it’s time to assemble and brew your campfire coffee. Follow these simple steps to create a delicious cup of coffee in the great outdoors.
- Assemble the filter basket by attaching it to the stem. Make sure it is securely in place.
- Add your preferred amount of coffee to the basket. Whether you like a bold or mild flavor, adjust the quantity of coffee accordingly.
- Place the assembled basket into the percolator pot. Ensure that it sits snugly inside.
- Start the brewing process by placing the percolator pot on the campfire or camping stove.
- Move the percolator away from direct flames to control the temperature and prevent over-brewing.
- Allow the coffee to percolate for 5-10 minutes, depending on your desired strength.
While the coffee percolates, savor the aroma wafting through the air and use this time to relax and enjoy the beauty of nature. The brewing process will infuse your surroundings with the wonderful scent of freshly brewed coffee.
Once the brewing time is complete, carefully remove the percolator from the heat source and set it aside. The rich and flavorful campfire coffee is now ready to be poured and enjoyed.
Expert Tip:
If you prefer a stronger cup of coffee, you can extend the brewing time slightly. Just keep an eye on the color of the brew to ensure it doesn’t become too concentrated.

Conclusion
Brewing campfire coffee with a percolator is a rewarding experience that allows you to enjoy a delicious cup of coffee while embracing the great outdoors. By following the 3 simple steps outlined in this guide, you can brew the perfect cup every time.
Start by choosing the right camping percolator for your needs, whether it’s the GSI Outdoors 8 Cup Enamelware Percolator or the GSI Outdoors Glacier Stainless Steel Percolator Coffee Pot. Familiarize yourself with the different percolator parts such as the pot, vertical tube, basket, and lid to ensure proper brewing.
Once you have assembled and filled the percolator with water and coffee, start the brewing process on your campfire or camping stove. Monitor the process closely and adjust the heat as needed. After the brewing time is complete, pour yourself a cup of freshly brewed coffee and enjoy outdoor coffee as you appreciate the beauty of nature surrounding you.
In conclusion, with the right campfire coffee percolator and these simple steps, you can brew the perfect cup of coffee and enhance your camping experience. So, gather your supplies, start your campfire, and savor the rich flavor of campfire coffee.