Connect with us

Tips and Tricks

Lift Top Diy: How to Build a Coffee Table With Lift Top!

Lift your coffee table game with this DIY project that will elevate your space – learn how to build a coffee table with a lift top!

Published

on

coffee table lift top

Ready to enhance your space with a lift-top coffee table? Gather materials and tools for this fun project. Follow step-by-step instructions to construct the table efficiently. Consider dimensions and design for a tailored finish. Estimate costs and opt for quality materials. Discover new uses for lift-top mechanisms and corner brackets for stability. Guarantee operational ease and sturdy support for your creation. Apply finishes like polyurethane for a chic look. Admire your craftsmanship, adding chamfered edges for a polished touch. Enjoy the functional and aesthetic benefits of your new coffee table. Craft with confidence and creativity – your project awaits more insights. Explore additional customization options for your lift-top coffee table, such as adding hidden storage compartments or incorporating unique hardware for a one-of-a-kind look. Once your project is complete, consider showcasing and potentially selling your creations at mobile coffee trailer sales or local artisan markets. Embrace the satisfaction of creating a functional and stylish piece of furniture, and share your passion with others who appreciate handcrafted items. Your lift-top coffee table is sure to be a conversation starter, whether in your own home or at a mobile coffee trailer sales event.

Key Takeaways

  • Use hardwood and lift top mechanism for durability and functionality.
  • Follow step-by-step construction guide for precise assembly.
  • Consider dimensions, design, and personalization options.
  • Opt for customization like hidden compartments or walnut accents.
  • Finish with polyurethane for a professional look and enjoy craftsmanship satisfaction.

Materials and Tools Needed

You'll need hardwood, a lift top mechanism, plywood, glue, and pocket hole screws for building the coffee table with a lift top.

When selecting the hardwood, consider using species like ash for durability and aesthetics. The plywood will be essential for constructing the sides, bottom, and top pieces of the table. Make sure you have a table saw to accurately cut the wood to the required sizes, such as 36' x 9' and 34.5' x 34.5'.

The lift top mechanism will allow for easy adjustment and added functionality to your coffee table. Additionally, pocket screws will be necessary for securely joining the different wooden components together.

Investing in quality materials like hardwood and a reliable lift top mechanism might increase the total cost, estimated around $175. Remember, depending on the specific measurements of your lift kit, you may need wooden braces to support the lift table.

Customizable design options are available, allowing you to personalize the coffee table with different wood types and sizes according to your preferences.

Advertisement

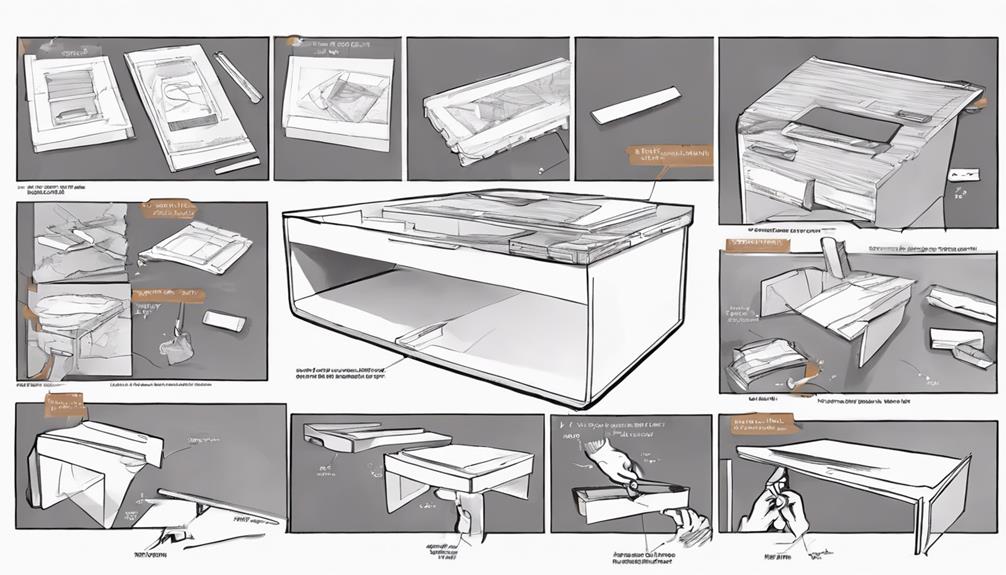
Step-By-Step Construction

step by step instructions for building

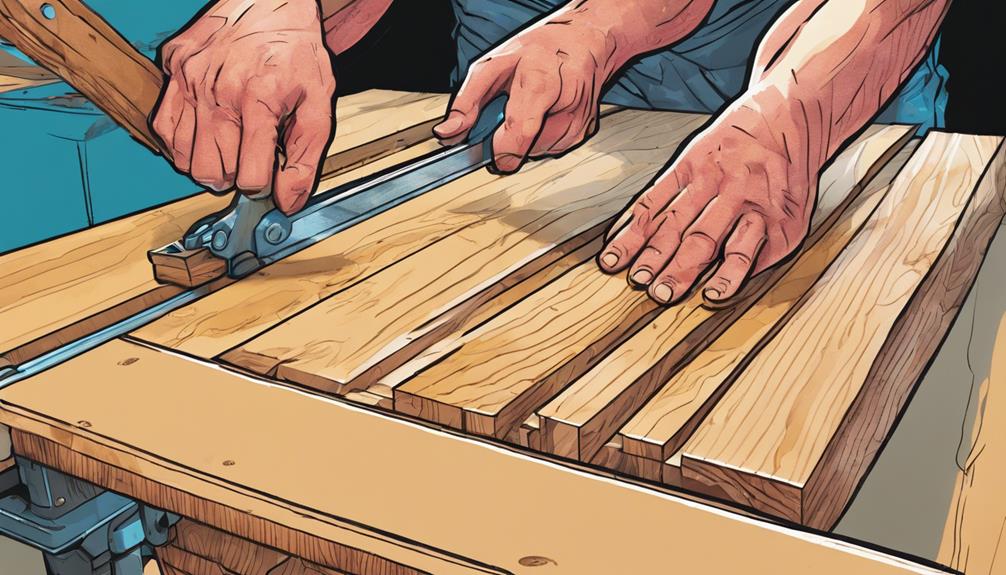
To begin constructing the lift top coffee table, cut the hardwood pieces to the specified dimensions as outlined in the building plan. Use a track saw for precise cuts to guarantee the pieces fit together seamlessly.

Assemble the side panels and base around the plywood, making sure everything is securely attached. Next, affix the lift top mechanism to the base, verifying it operates smoothly and securely. Position yourself ergonomically to work comfortably while assembling the table components.

Customize the top by adding additional wood pieces to create a unique design that suits your style. Once the construction is complete, finish the table by staining it to your desired color and applying a coat of polyurethane for a polished look.

Following these steps will result in a beautifully crafted lift top coffee table that's both functional and aesthetically pleasing.

Dimensions and Design

data analysis for architecture

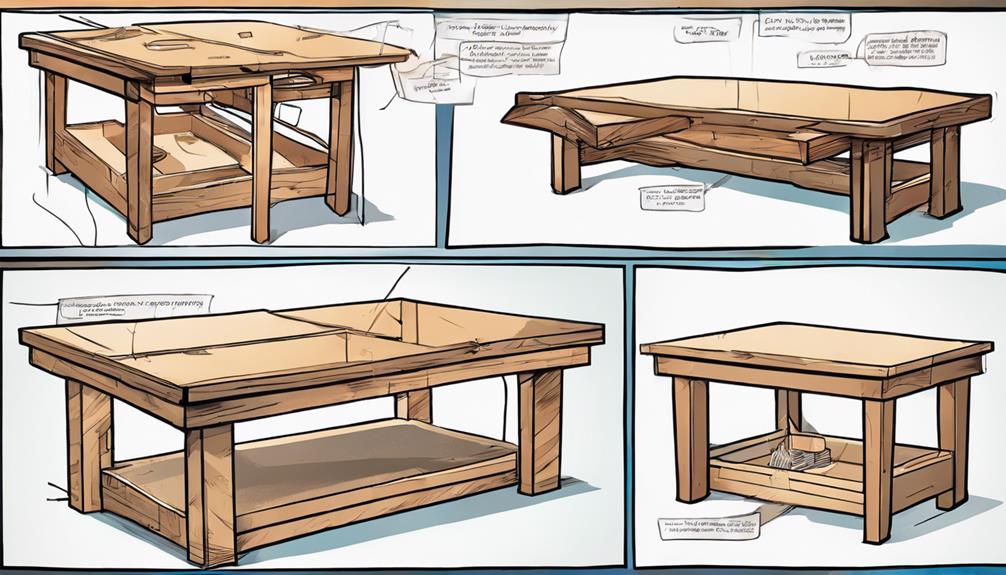
When building your coffee table, consider the specifications for the table size, incorporating elements of aesthetic design for a sleek finish.

You can further personalize the table with various customization options to suit your style preferences.

The dimensions and design choices will play an essential role in the overall look and functionality of your new coffee table.

Advertisement

Table Size Specifications

The table size specifications for the lift-top coffee table feature dimensions of 39 x 25.5 x 8 inches, combining functionality with a compact design.

The top, constructed from four 1×8 ash pieces, provides a sturdy surface for daily use. Its base, made of plywood, ensures stability and support for the lift mechanism and top. Additionally, a clear top coating adds a modern touch to the overall aesthetic.

Inside, the compartments are customizable, with dimensions like 34.5' x 9', offering ample storage options according to individual preferences. This design not only prioritizes practicality but also allows for personalization to suit your needs.

With its compact size and customizable features, this lift-top coffee table strikes the perfect balance between style and practicality, making it a versatile and valuable addition to your living space.

Aesthetic Design Elements

Several aesthetic design elements enhance the visual appeal and functionality of the lift-top coffee table, including its dimensions and materials. The table with a lift typically measures approximately 39 x 25.5 x 8 inches, with a lift mechanism that raises it by 6 1/2 inches.

Advertisement

When you envision the table, visualize a clear top coating that adds a shiny finish, corner accents crafted from solid walnut for a touch of sophistication, and sleek aluminum legs that provide a modern and sturdy base.

These design elements combine to create a stylish and versatile piece of furniture that not only elevates the aesthetic of your space but also offers practicality and convenience. The solid walnut corner accents bring warmth and elegance, while the aluminum legs guarantee stability and a contemporary look.

With the lift-top feature, you can seamlessly shift from using the table for dining or working to enjoying a cozy coffee break, making it a versatile and functional addition to your home.

Customization Options

To customize your lift-top coffee table, consider adjusting the dimensions and design to suit your specific preferences and space requirements. You can personalize the table top, lift mechanism, customizable compartments, and personalization options according to your needs. Here are some customization options you can choose from:

Customization Options Description Example
Table Top Choose the size and shape of the table top to fit your space and style. Rectangular table top
Lift Mechanism Opt for an adjustable lift mechanism to transform the table for different purposes. Hydraulic lift system
Customizable Compartments Customize inside compartments for additional storage solutions tailored to your needs. Hidden drawer compartments

Cost and Materials

quality control in manufacturing

When building a coffee table with a lift top, you'll need to budget approximately $175 for materials such as hardwood, a lift top mechanism, glue, and plywood.

Here are the essential items required:

Advertisement
  1. Hardwood: Choose quality hardwood like ash for its beautiful grain patterns and staining properties, ensuring a durable and aesthetically pleasing table.
  2. Lift Top Mechanism: Invest in a reliable lift top mechanism that will allow for smooth and easy operation of the table's lifting function, adding versatility to its usage.
  3. Glue and Plywood: Use strong glue to securely bond the wood pieces together, and high-quality plywood for the table's base and other structural components.

Alternative Applications

exploring diverse software options

Explore the adaptability and versatility of the lift top mechanism beyond its traditional use in a coffee table project.

The lift top mechanism can be creatively adapted for a sit-stand desk variation, offering a functional and ergonomic solution for your workspace.

By incorporating the lift top mechanism into different furniture projects, you can enjoy the aesthetically pleasing design of a coffee table with a lift top in various settings around your home.

The customizable nature of the mechanism allows for personalized touches, enabling you to tailor the features to your specific needs and preferences.

Whether it's adjusting the height or adding additional storage compartments, the lift top mechanism offers endless possibilities for customization.

Let the lift top coffee table project inspire you to explore innovative designs and create DIY furniture pieces that showcase the unique capabilities of this versatile mechanism.

Advertisement

Assembly Instructions

follow detailed assembly steps

Attach the lift top mechanism to the base using 5/8 inch #6 screws with washers.

Secure the lift brackets by drilling pilot holes and using 1.25 inch flat-headed screws.

Add additional support with corner brackets attached with pocket screws.

To assemble your coffee table with a lift top, follow these steps closely:

  1. Connect Lift Top Mechanism: Start by fastening the lift top mechanism to the base using 5/8 inch #6 screws with washers. Make sure that the mechanism is centered and aligned correctly for optimal functionality.
  2. Fasten Lift Brackets: Drill pilot holes and secure the lift brackets using 1.25 inch flat-headed screws. This step is essential for ensuring the stability and smooth operation of the lift table.
  3. Enhance Support with Corner Brackets: Strengthen the structural integrity of your coffee table with lift by attaching corner brackets using pocket screws. This extra support will help distribute weight evenly and prevent wobbling during use.

Finishing Touches and Enjoyment

decked out for fun

Now that you've added the final touches and applied the polyurethane finish, it's time to step back and enjoy your creation.

Admiring the sleek edges and smooth surface, you can feel proud of the craftsmanship put into your coffee table.

With its lift top, storage, and unique copper pipe base, your creation isn't only functional but also a beautiful piece to enjoy in your living space.

Advertisement

Final Touches

To complete the coffee table project, make certain that the final touches, such as chamfering edges and applying a polyurethane finish, are done meticulously for a professional and satisfying result.

Here are three key steps to perfecting your coffee table:

  1. Chamfering Edges: Use a block plane to create clean and angled edges on the tabletop and sides. This step not only adds a touch of sophistication but also enhances the overall aesthetic appeal of the table.
  2. Applying Polyurethane Finish: Make sure you apply three coats of water-based polyurethane finish with an HVLP sprayer. This process guarantees a durable and smooth surface, protecting the wood while showcasing its natural beauty.
  3. Admiring Your Creation: Once the final touches, including edge banding and polyurethane finish, are complete, take a moment to enjoy your finished coffee table. The lift top, storage compartments, and unique copper pipe base will undeniably bring you immense satisfaction and pride in your craftsmanship.

Enjoying Your Creation

Experience the satisfaction of completing your coffee table with lift top by adding the finishing touches and admiring your craftsmanship.

Start by chamfering the edges with a block plane for a smooth finish on the plywood lift-top. Utilize a saw to cut the aluminum tubing to the desired length for the lifting mechanism, ensuring functionality and durability.

Apply three coats of water-based polyurethane finish using HVLP for a professional and protective surface on the coffee table. Once the finishing touches are complete, take a moment to revel in your creation.

The combination of storage, lift-top convenience, and a unique copper pipe base showcases your woodworking skills. Enhance both function and aesthetics by adding walnut edge banding, rubber feet, and bumpers. Each detail contributes to the overall appeal and usability of your coffee table, making it a piece to be proud of.

Advertisement

Sit back, relax, and enjoy the fruits of your labor with a cup of coffee on your newly crafted masterpiece.

Frequently Asked Questions

How Do You Close a Lift Top Coffee Table?

To close a lift top coffee table, gently push down on the lift top until it closes smoothly. Remember to clear the top of any items to avoid damage. Some tables have a lock for security. Follow manufacturer's instructions for proper use.

How Can I Raise My Table Higher?

To raise your table higher, simply activate the lift top mechanism. This handy feature offers adjustable height for your convenience. Guarantee a secure installation and stability when lifting the table to your desired level.

Why Do Coffee Tables Have Lift Tops?

Coffee tables have lift tops to provide versatile functionality for dining, working, or storage purposes. They offer ergonomic positions for various activities without the need for additional furniture. This feature is popular in small living spaces for its practicality.

Can You Eat on a Lift Top Coffee Table?

Sure, you can eat on a lift top coffee table! It offers a versatile surface for dining or working. The adjustable height makes it convenient for meals. Transform it into a dining table in seconds. Practical and space-saving for small spaces.

Advertisement

Conclusion

Congratulations on successfully building your own lift top coffee table!

Did you know that DIY furniture projects have increased by 30% in the past year alone?

Keep up the great work and enjoy your new piece of furniture that combines functionality and style.

Happy building!

Advertisement
Continue Reading
Advertisement

Tips and Tricks

Pallet Project: How to Build a Coffee Table From Pallet Wood!

Want to transform pallet wood into a stunning coffee table?

Published

on

By

diy coffee table project

Create a charming coffee table from pallet wood by disassembling pallets and salvaging top boards. Construct a sturdy base with scrap 2x4s and secure them using a brad nailer. Trim for your desired size. Finish by torching the wood for a rustic feel, sanding, and applying a protective finish. Craft sturdy legs using 4×4 pieces and fasten securely. Enhance aesthetics with metal accents. Remember safety gear and ventilation when torching wood. Follow our step-by-step guide for a unique and personalized furniture piece.

Key Takeaways

  • Disassemble pallets, salvage wood, and construct a sturdy base.
  • Torch wood for a rustic look and sand for a smooth finish.
  • Select and attach 18-20 inch 4×4 legs securely.
  • Apply protective finish, metal accents, and experiment with designs.
  • Prioritize safety gear, ventilation for torching, and fire extinguisher readiness.

Disassembling the Pallets

To begin constructing your coffee table from pallet wood, make certain to carefully disassemble the pallets by separating the top boards from the rest of the structure. The first step involves prying the pallets apart to salvage the usable wood. Using a hammer, pry bar, or nail puller, remove any nails from the top pieces to guarantee a clean surface for your coffee table project.

After separating the top boards, gather scrap 2×4 pieces to create a sturdy base for the table. This base will provide the necessary stability and support for your coffee table. When assembling, use a brad nailer to securely attach the top boards to the base, creating a solid foundation for the table.

As you progress with the project, remember to trim any excess wood from the pallets using a circular saw. This step will allow you to achieve the desired size and shape for your coffee table.

Finishing the Top

completing the roof installation

Skirt the edges of the pallet wood coffee table top with remaining pieces to add a polished finishing touch. This step will give your table a clean and cohesive appearance.

Consider torching the wood surface for a rustic look that adds character. By lightly burning the wood, you can enhance the depth and texture of the grain, creating a unique and artistic finish.

After torching, make sure to sand the pallet wood surface thoroughly. This step is essential to achieving a smooth and visually appealing finish. Utilize an orbital sander to darken the wood, enhancing the overall aesthetic appeal of the coffee table.

Advertisement

The dark finish won't only look great but also provide a protective layer. By following these steps, you can transform your pallet wood into a stunning coffee table that will be a focal point in any room.

Creating the Legs

building prosthetic legs carefully

To create the legs for your coffee table, you'll need to carefully select sturdy 4×4 pieces of wood for stability.

Adjust the legs to your desired height, typically between 18-20 inches, for comfort and functionality.

When attaching the legs to the table base, consider various techniques to securely support the weight of the table and any items placed on top.

Leg Material Selection

Consider using robust 4×4 pieces of wood for the legs when crafting your coffee table from pallet wood to ensure stability and resilience. This choice of material guarantees that the legs can support the weight of the table and endure regular use without wobbling or breaking.

Trimming the legs to a height between 18 to 20 inches will offer the ideal proportions for your coffee table, allowing for comfortable use while seated on a standard couch or chair.

Advertisement

To enhance the visual appeal of your coffee table, you may want to torch the legs to create a textured and rustic look that complements the pallet wood top.

Once you have selected and prepared the legs, firmly attach them to the table frame to establish a sturdy and dependable foundation. For an added touch of industrial style, consider incorporating metal fasteners or brackets, which can both enhance the overall aesthetic and provide additional structural support to your coffee table.

Leg Height Adjustment

Crafting the legs for your coffee table involves cutting 4×4 wood pieces to a height between 18 to 20 inches for best comfort and stability. This height range guarantees that your table isn't too low or too high, making it ideal for both lounging and working purposes.

Once you have decided on the height, consider torching the legs to give them a textured and rustic appearance that complements the pallet wood top of the table beautifully.

To make sure that the legs can adequately support the weight of the table, it's important to securely attach them to the table base. You can explore using industrial-style fasteners or accents to add a unique and personalized touch to the legs, enhancing the overall aesthetic appeal of your coffee table.

Advertisement

Leg Attachment Techniques

Fasten the legs securely to the coffee table base using appropriate hardware to guarantee stability and support for the tabletop. Opt for 4×4 pieces of wood to maintain a sturdy foundation. Cut the legs to a height between 18-20 inches for balanced proportions. To enhance the rustic aesthetic, torch the legs for a textured finish that complements the pallet wood tabletop.

When securing the legs, choose hardware that can withstand the weight of the tabletop. Consider industrial-style fasteners or brackets to not only reinforce the attachment but also add a unique design element to the coffee table. Verify that the attachment is secure to prevent any wobbling or instability.

Final Assembly

final product assembly process

Securely attaching the legs to the table is essential for providing stability and durability in the final assembly of your pallet wood coffee table. Once the legs are firmly fixed, you can move on to the finishing touches that will make your creation stand out.

Here are some steps to contemplate for the final assembly:

  1. Protective Coat: Apply a clear coat to your coffee table to safeguard it from everyday wear and tear while also giving it a sleek, glossy appearance.
  2. Enhance Wood Grain: Bring out the natural beauty of the wood by treating it with a suitable finishing product that enriches the grain patterns.
  3. Metal Accents: For an industrial and rustic look, ponder incorporating metal accents or fasteners into the design, adding an extra touch of character to your table.
  4. Share Your Creation: Be proud of your unique pallet wood coffee table and share your DIY journey with others to inspire creativity and showcase your skills.

Additional Tips

text details and tips

For additional tips to enhance the appearance and resilience of your pallet wood coffee table, consider experimenting with different finishes such as stains, paints, or varnishes. These finishes not only safeguard the wood but also allow you to achieve the desired aesthetic for your table. Personalizing the design is another way to make your coffee table stand out.

Add unique touches like metal accents, decorative hardware, or a custom inlay to give it a personalized touch that reflects your style.

When it comes to assembly, consider using alternative methods like wood glue, dowels, or screws to guarantee your coffee table is sturdy and long-lasting.

Advertisement

Enjoy the process of creating furniture from pallet wood as a rewarding DIY project that showcases your creativity and woodworking skills.

Share your results and experiences with others on social media, DIY forums, or at home gatherings to inspire fellow DIY enthusiasts to engage in their own pallet wood projects.

Tools and Materials Needed

preparing for a project

Gather the necessary tools and materials to begin constructing your pallet wood coffee table. Here's what you'll need:

  1. Tools:
  • Circular saw
  • Brad nailer
  • Torch
  • Orbital sander
  • Clear coat
  1. Materials:
  • Pallet wood
  • Scrap 2×4 pieces
  • 4×4 pieces for legs
  • Industrial-style fasteners

To trim the excess wood from the pallet pieces, you'll use the circular saw. The brad nailer will come in handy for securing the different parts together.

If you want to add a rustic texture to the legs and top of the table, the torch will be your go-to tool.

Once the construction is complete, applying the clear coat won't only protect your coffee table but also give it a glossy finish.

With these tools and materials at your disposal, you'll be all set to start creating your own unique pallet wood coffee table.

Advertisement

Safety Precautions

safety during pandemic period

Make sure to always wear safety goggles and gloves when using power tools to keep your eyes and hands protected.

It's essential to use a dust mask during sanding and cutting to safeguard against inhaling harmful particles.

Remember to maintain proper ventilation when working with torches or finishes to steer clear of fume exposure.

Safety Gear Importance

Prioritize your safety by ensuring you have the necessary gear when working with pallet wood, including gloves, safety glasses, and a dust mask. Here are some key safety gear items to keep in mind:

  1. Gloves: Protect your hands from splinters, cuts, and rough surfaces while handling pallet wood.
  2. Safety Glasses: Shield your eyes from flying debris, dust, and potential eye injuries caused by tools or wood particles.
  3. Dust Mask: Prevent inhalation of wood dust, which can irritate your respiratory system and cause health issues.
  4. Closed-Toe Shoes: Wear sturdy footwear to safeguard your feet from falling objects, sharp nails, or tools.

Hazard Identification Tips

Inspect pallets thoroughly before starting your project to identify any potential hazards such as nails, splinters, or damage that could lead to accidents during the woodworking process.

Wear gloves, goggles, and a mask to protect yourself from splinters, dust, and eye injuries.

Before dismantling the pallets, check for nails, splinters, and damage to avoid accidents.

Advertisement

Use a sturdy work surface and clamps to secure wood pieces while cutting, torching, or assembling to prevent slipping or injuries.

Verify tools like saws, nailers, and torches are in good working condition to minimize the risk of accidents or malfunctions during the project.

When torching wood, work in a well-ventilated area to prevent harmful fumes, and keep a fire extinguisher nearby as a precaution.

Inspiration and Ideas

encouraging creativity and innovation

Explore a variety of design inspirations for your pallet wood coffee table, from rustic to modern styles, to kickstart your creative process. Here are some ideas to get you inspired:

  1. Rustic Charm: Embrace the natural look of pallet wood by keeping the design simple with a distressed finish and visible wood grains.
  2. Industrial Edge: Incorporate metal accents, such as hairpin legs or industrial piping, to give your coffee table a modern industrial vibe.
  3. Hidden Gems: Consider adding hidden compartments or built-in storage solutions to maximize functionality without compromising style.
  4. Personal Touch: Infuse your personality into the design by customizing the table with engravings, a splash of color, or other unique details.

Frequently Asked Questions

Can You Make a Table From Pallets?

Yes, you can create a table from pallets by disassembling them, using scrap wood for the base, and brad nailing the top. Customize the legs with torched 4x4s, secure them well, and add industrial-style fasteners for flair.

Can You Make Furniture Out of Pallet Wood?

Yes, you can make furniture from pallet wood. It's a popular choice for DIY projects due to its charm, affordability, and sustainability. Repurpose pallets to create unique pieces that match your style and decor perfectly.

How Do You Make a Pallet Bed Step by Step?

To make a pallet bed, gather pallets, disassemble them, cut wood, sand for smoothness, assemble with screws or nails, and finish with a clear coat or paint. Confirm dimensions fit your mattress for a sturdy frame.

Advertisement

How Do You Prepare Pallet Wood for Projects?

When prepping pallet wood for projects, start by gently separating the pallets and removing nails to salvage usable wood. Secure scrap 2x4s for stability, use a brad nailer for assembly, and trim with a circular saw for the perfect piece.

Conclusion

Now that you've tackled this pallet project and built your own unique coffee table, sit back and enjoy the fruits of your labor.

Remember, every piece of wood has a story to tell, just like the memories you'll create around your new table.

Let your creativity flow as you continue to repurpose and craft with pallet wood.

The possibilities are endless, just like the grains in the wood itself.

Advertisement

Happy building!

Continue Reading

Tips and Tricks

Leg Day: How to Build Coffee Table Legs for a Sturdy Base!

Prepare to transform your coffee table with sturdy legs and expert finishing techniques in this comprehensive guide.

Published

on

By

building sturdy coffee table

To craft sturdy coffee table legs, start by sanding pine for a smooth surface. Opt for gel stain to achieve a sleek, professional finish. Smooth tabletops with coarse, then fine sandpaper before sealing. Use foam brush for even sealant application. Strengthen legs with biscuit joinery and apply polyurethane coats. Employ pocket screws strategically for a strong base. Add decorative hardware to personalize your table. Mastering these steps guarantees a robust base for your coffee table.

Key Takeaways

  • Use biscuit joinery with beech wood biscuits for strength.
  • Incorporate pocket screws strategically for sturdy leg attachment.
  • Sand legs for smooth finish before assembly.
  • Secure legs with clamps for precise screwing.
  • Ensure proper alignment for a stable coffee table base.

Pine Leg Preparation

Prepare the pine legs by sanding them to create a smooth surface for applying the gel stain. Since we've got repurposed pine for the coffee table legs, sanding is important to make sure the stain adheres well and the finish looks professional.

Once the legs are sanded, it's time to move on to the gel staining process.

The repurposed pine provides a sturdy and cost-effective base for the coffee table legs. By sanding them down, you'll create a clean canvas for the gel stain application. This step is necessary to achieve a sleek black finish that enhances the overall look of the legs.

After sanding, the gel stain should be evenly applied using a brush or rag. Make sure to coat the legs thoroughly to maintain a consistent color. Allow the stain to sit for 5-10 minutes before wiping off any excess for a smooth and flawless finish.

These prepared pine legs are designed to complement the tabletop, adding a modern touch to your coffee table project.

Advertisement

Gel Staining Technique

wood furniture makeover method

For achieving a rich and uniform color on your wooden coffee table legs, gel staining is a highly effective technique. Gel staining allows for a more even finish compared to traditional liquid stains as it sits on the wood's surface. By using a brush or rag to apply the gel stain, you gain better control and coverage over the legs. To achieve the desired color intensity, let the gel stain sit for a few minutes before wiping off the excess. This technique can result in a professional-looking black finish that enhances the overall appearance of your coffee table.

Gel Staining Technique
Advantages Application Tips
– Provides even color finish – Use a brush or rag for control
– Sits on wood surface – Let stain sit for a few minutes
– Enhances overall appearance – Wipe off excess for intensity

Tabletop Sanding Process

refining wood surfaces smoothly

To ensure a smooth and even surface for staining and sealing, start the tabletop sanding process with coarse sandpaper to eliminate any existing finish or imperfections. Begin by sanding the tabletop thoroughly, paying close attention to the edges and corners to make sure they're free of rough spots.

As you progress, switch to finer grit sandpaper to achieve the desired smoothness for the final finish. Remember that proper sanding is essential for achieving a professional and polished look on the tabletop of your coffee table.

After sanding, make sure to eliminate any dust or debris from the tabletop before proceeding to apply a sealant to protect the wood. This step is vital to ensure the sealant adheres properly and provides long-lasting protection for your tabletop.

Sealant Application Method

precise sealant application process

Using a foam brush, evenly apply the sealant on the bottom surface of the tabletop to guarantee complete protection against moisture and stains. Ensure that every inch of the wood is covered to create a barrier that shields it from potential damage.

Let the sealant dry thoroughly before proceeding with the next steps to ensure its effectiveness. If you feel like an extra layer of protection is needed, don't hesitate to apply a second coat of sealant for added durability.

Markdown List to Evoke Emotion:

  1. Feel the satisfaction of knowing your hard work is safeguarded against spills and wear.
  2. Embrace the peace of mind that comes with protecting your coffee table from moisture damage.
  3. Experience the sense of accomplishment as you see the beautiful finish that the sealant provides.

Leg Joinery With Biscuits

strong precise biscuit joinery

How can biscuit joinery enhance the strength and alignment of your coffee table legs?

Biscuit joinery is a fantastic technique that can greatly improve the durability and stability of your woodworking projects, including your coffee table legs. By using small, oval-shaped wooden biscuits and corresponding slots, you can ensure that the legs aren't only aligned correctly but also reinforced with additional strength when glued together.

Advertisement

The specialized tool known as a biscuit joiner, or plate joiner, is essential for cutting precise slots to accommodate the biscuits in the wood pieces. These biscuits, typically made of compressed beech wood, expand when they come into contact with glue, forming a tight and secure bond in the joint.

This method is widely employed in furniture making due to its ability to create robust and nearly invisible joints in tabletops, cabinets, and various woodworking projects.

Polyurethane Coating Steps

applying protective coating process

Now, it's time to focus on the essential steps of sanding between coats and buffing with paste wax for a flawless polyurethane finish on your coffee table.

Sanding will guarantee a smooth application, while buffing with paste wax will enhance the protective shine.

Remember to follow these steps diligently for a durable and attractive tabletop coating.

Sanding Between Coats

To achieve a smooth and even finish on your coffee table legs, sanding between coats of polyurethane is necessary for removing imperfections and guaranteeing better adhesion of subsequent layers. Here's why this step is vital:

Advertisement
  1. Smooth Perfection: Sanding between coats using a fine-grit sandpaper, like 220 grit, helps eliminate any rough spots or imperfections, resulting in a flawless surface for your coffee table legs.
  2. Enhanced Durability: By sanding between coats, you allow the subsequent layers of polyurethane to adhere better to the surface. This enhances the durability and longevity of the finish, making your coffee table legs more resistant to wear and tear.
  3. Professional Finish: The sanding process not only removes any dust particles or drips but also guarantees a consistent sheen and texture across the legs. This attention to detail translates into a professional-looking final product that you can be proud to showcase in your home.

Buffing With Paste Wax

After applying three coats of polyurethane, enhance the finish of your coffee table legs by buffing with paste wax for added shine and protection. Using a clean, soft cloth, apply a thin layer of paste wax in a circular motion over the polyurethane-coated surface.

Let the paste wax dry for a few minutes before buffing with another clean cloth to achieve a smooth, lustrous finish. Buffing with paste wax not only provides an extra layer of protection but also helps to highlight the natural beauty of the wood grain.

This final step adds a professional touch to your coffee table legs, ensuring a durable and attractive finish that will stand the test of time. By incorporating paste wax into your finishing process, you aren't only protecting your hard work but also elevating the overall aesthetic appeal of your DIY coffee table.

Pocket Screw Assembly

compact fastening method used

You can enjoy the benefits of using pocket screws for assembling your coffee table legs. These fasteners provide a strong and secure connection, ensuring your table is sturdy and durable.

Follow some key assembly tips to make sure your pocket screw joints are effectively created.

Pocket Screw Benefits

Pocket screws offer a reliable and discreet method for creating strong joints when securing coffee table legs to the tabletop. The benefits of using pocket screws for building your coffee table legs are numerous:

  1. Strength: Pocket screws provide excellent holding power and stability, ensuring that your coffee table has a sturdy base that can withstand daily use without wobbling or loosening joints.
  2. Convenience: The easy disassembly and reassembly facilitated by pocket screws make it convenient to transport or move your coffee table when needed, allowing for hassle-free maintenance.
  3. Professional Finish: The angled design of pocket screws enables you to secure the legs at precise angles, resulting in a polished and professional appearance without visible fasteners detracting from the overall aesthetic.

Assembly Tips

For a strong and stable coffee table base, ensure strategic placement of the pocket screws when attaching the legs to the tabletop.

To achieve this, pre-drill pilot holes to prevent splitting and verify accurate screw placement. Use clamps to secure the legs in position while driving in the pocket screws, ensuring a precise and snug fit that enhances stability.

Advertisement

When tightening the pocket screws, be thorough to prevent any potential wobbling or instability in the coffee table structure.

Final Coffee Table Touches

adding decorative items carefully

The final touches on the coffee table included adding decorative hardware to enhance its overall appearance. This step not only adds a touch of elegance but also provides a functional element to the piece.

Here are three key elements that will elevate the look and feel of your coffee table:

  1. Choose eye-catching knobs or pulls: Opt for hardware that complements the style of your coffee table. Whether you prefer sleek modern handles or vintage-inspired knobs, the right choice can tie the whole look together.
  2. Consider metal accents: Adding metal corner brackets or decorative accents can give your coffee table an industrial edge or a touch of glamour, depending on the finish you choose.
  3. Personalize with a custom engraving: Make your coffee table truly unique by adding a custom engraving or plaque. Whether it's a meaningful quote, your family name, or a special date, this personal touch will make your table one of a kind.

Frequently Asked Questions

How Do You Stabilize Coffee Table Legs?

To stabilize coffee table legs, make sure they're cut evenly and have a flat surface. Add cross bracing or corner brackets for support. Use hardwood for durability. Install adjustable feet for uneven floors. Reinforce with blocks or stretchers between legs.

How to Make Stable Table Legs?

To make stable table legs, choose sturdy wood like pine or oak. Use joinery techniques like biscuits or mortise and tenon joints. Apply plenty of wood glue for solid adhesion. Guarantee precise alignment when attaching legs for a sturdy base.

What Table Legs Are Most Stable?

Looking for stability in table legs? Tapered legs offer a modern flair and sturdiness. Chunky legs are your go-to for heavy tabletops. Metal hairpin legs scream stability with a sleek look. X-shaped legs distribute weight evenly.

How to Secure Legs to Tabletop?

Align and space the legs correctly before using a drill to create pilot holes for pocket screws. Tighten the screws firmly to prevent wobbling and guarantee stability. Confirm the legs are securely attached to the tabletop.

Advertisement

Conclusion

Now that you've built sturdy coffee table legs, you're one step closer to enjoying a beautiful piece of furniture in your home.

Did you know that on average, Americans spend over 4 hours a day sitting at a table?

With your new coffee table, you'll have a strong and stylish place to gather with family and friends for years to come.

Keep up the great work and enjoy your handcrafted creation!

Advertisement
Continue Reading

Tips and Tricks

Creative Reuse: How to Build a Coffee Table Out of Pallets!

Craft a stunning coffee table from pallets in this guide, starting with disassembly and assembly tips – a must-read for DIY enthusiasts!

Published

on

By

repurposing pallets for furniture

To build a coffee table out of pallets, start by carefully disassembling and preparing the wood. Trim and gather pieces for a sturdy base, then assemble using a brad nailer for efficiency. Finish the table top by skirting edges and experimenting with different treatments for a personalized touch. Create and attach sturdy legs using 4×4 wood pieces and secure them to prevent wobbling. For the final assembly, evaluate balance and apply a clear coat for protection. You can further customize with metal components for an industrial-rustic look. Discover more ways to enhance your coffee table creation!

Key Takeaways

  • Disassemble pallets carefully, trim wood, and gather sturdy pieces for the base.
  • Skirt edges for a polished look, sand thoroughly, and apply desired finishes.
  • Use 4×4 wood for stable legs, torch for rustic look, and secure attachment.
  • Secure legs with industrial-style connectors, evaluate balance, and apply clear coat.
  • Experiment with staining, painting, or waxing finishes for personalization.

Disassembling the Pallets

To start building your coffee table out of pallets, make sure to take the first step of carefully separating the pallets from the top boards by prying them apart. This process requires precision to avoid damaging the wood.

Once you have successfully disassembled the pallets, the next step is to remove any nails from the top pieces. Using a hammer or nail puller will help prevent any wood damage during this step.

After separating the pallets and removing the nails, gather some scrap 2×4 pieces to create a sturdy base for your coffee table. Utilizing a brad nailer will make the assembly of the disassembled pallet pieces more efficient.

Remember to trim any excess wood from the pallets using a circular saw to achieve the desired dimensions for your table.

Finishing the Top

completing the final touches

Skirt the edges of the pallet top with remaining pieces to give it a polished and finished appearance. This step adds a touch of refinement to your coffee table project. Once the edges are neatly covered, you can consider torching the wood to achieve a rustic look and enhance the texture.

Sand the surface of the pallet top thoroughly to guarantee a smooth finish before moving on to any additional treatments. For those aiming for a deeper wood grain effect, burning the wood with a torch can enhance its visual appeal. Conversely, if you prefer a darker, more polished finish, using an orbital sander on the pallet top can help achieve this look.

Advertisement

These techniques provide different aesthetic options, allowing you to customize your coffee table to fit your style preferences. Experiment with these finishing touches to create a unique and personalized piece that will be a conversation starter in your living space.

Creating the Legs

building sturdy table legs

Consider using sturdy 4×4 pieces of wood to create the legs for your pallet coffee table, providing essential stability and support. Cut the legs to your desired height, typically ranging from 18 to 20 inches, ensuring the table is at a comfortable level. To add a textured and rustic look that complements the design, you might want to torch the legs. Securely attach the legs to the table structure, making sure they are level and won't wobble or shift. For an industrial flair, think about incorporating industrial-style fasteners into the leg design to enhance the overall aesthetic of the coffee table.

Creating the Legs Tips Description
Use 4×4 wood pieces Provides stability and support for the table.
Cut legs to 18-20 inches Ensures the table is at a comfortable height.
Torch the legs for a rustic look Adds texture and complements the table's design.

Final Assembly

innovative manufacturing techniques

Fasten the firmly attached 4×4 legs to the table structure with industrial-style connectors to secure stability and balance in the final assembly of your pallet coffee table. Make certain the legs are securely attached to prevent any wobbling or instability. Once the legs are in place, step back and evaluate the overall balance of your creation to verify it sits level on the floor.

After fixing the legs, apply a clear coat to the coffee table. This not only shields the wood from wear and tear but also provides a shiny finish that enhances the natural wood grain. Take your time to evenly cover the entire surface, allowing the wood's beauty to radiate.

To achieve an industrial and rustic look, the pairing of pallet wood with metal components is essential. Embrace the difference between the rough-hewn wood and the smooth metal to add character to your piece. Appreciate the unique and handmade aspect of your coffee table design by showcasing it proudly in your home decor.

Additional Tips

useful travel advice tips

Experiment with various finishes such as staining, painting, or waxing to achieve the desired appearance for your pallet coffee table. These finishes not only enhance the look but also provide protection against wear and tear.

Personalize your design by including unique elements like metal accents, glass inserts, or custom engravings to add character and make the table uniquely yours.

When putting together your coffee table, consider alternative methods like using wood glue, screws, or brackets for added stability and durability. These choices guarantee that your table can withstand daily use and remain in excellent condition for years to come.

Advertisement

Embrace the creativity and satisfaction that come with crafting furniture from pallets; it's a rewarding DIY project that showcases your skills and style. Share your progress and insights with others, either online or in person, to inspire fellow DIY enthusiasts to explore the world of pallet furniture. Your experiences can ignite creativity and motivate others to engage in their own upcycling adventures.

Tools and Materials Needed

tools and materials list

Gather the necessary tools and materials to begin constructing your pallet coffee table. You will need a circular saw, brad nailer, orbital sander, and torch. For materials, gather pallets, scrap 2×4 wood pieces, 4×4 wood for the legs, clear coat finish, and industrial-style fasteners.

Tools:

  • Circular Saw: Essential for cutting and shaping the pallet wood.
  • Brad Nailer: Perfect for securely fastening the pieces together.
  • Orbital Sander: Ideal for smoothing out rough edges and surfaces.
  • Torch: Used to add a textured finish to the 4×4 leg pieces.

Materials:

  • Pallets
  • Scrap 2×4 wood pieces
  • 4×4 wood for the legs
  • Clear coat finish
  • Industrial-style fasteners

These tools and materials will help you repurpose pallets into a stylish coffee table that combines an industrial look with rustic charm. Prepare your workspace with these items to begin the creative process.

Safety Precautions

safety first always prepared

Make sure to wear safety goggles and gloves when handling tools and materials for your pallet coffee table project.

Confirm your workspace is well-ventilated, especially when using heat sources like torches.

Keeping your work area clean and organized is vital to prevent accidents and injuries.

Safety Gear Essentials

Make sure proper safety gear essentials like goggles, ear protection, dust mask, first aid kit, and gloves are worn to safeguard yourself during the construction of the pallet coffee table.

Advertisement
  • Safety Goggles: Protect your eyes from flying debris while using tools.
  • Ear Protection: Prevent damage to your hearing from loud power tools.
  • Dust Mask: Avoid inhaling sawdust and wood particles that can irritate your respiratory system.
  • First Aid Kit: Keep it handy in case of minor injuries or accidents during the building process.
  • Gloves: Protect your hands from splinters, cuts, and blisters while handling rough materials.

When working on your pallet coffee table project, make sure you have these safety essentials on hand and properly worn. Safety gear is essential to prevent accidents and injuries, making your DIY experience safer and more enjoyable.

Workspace Preparations

Before starting work on your pallet coffee table project, ensure your workspace is prepared with necessary safety precautions to prevent accidents and promote a safe DIY experience.

Clear the area of clutter and debris to avoid tripping hazards, especially when using power tools.

Adequate ventilation is essential to disperse any fumes that may arise during the torching process.

Don the appropriate safety gear, including safety goggles, gloves, and a mask, to shield yourself from splinters, dust, and fumes.

Have a fire extinguisher within reach in case of emergencies during torching.

Advertisement

Take time to familiarize yourself with the operation and safety guidelines of all tools and equipment you'll be using in the workspace.

Frequently Asked Questions

Can You Make a Table From Pallets?

You can definitely make a table from pallets. By disassembling them and using the wood for the top and base, along with 4×4 pieces for legs, you can create a cost-effective and eco-friendly DIY project.

How Do You Make Wooden Pallets Usable?

To make wooden pallets usable, separate them, remove nails, and gather wood for repurposing. Use a brad nailer for assembly, a circular saw for trimming, and finish by sanding. Torch for a rustic look, secure legs, level them, and add a clear coat.

Can You Reuse Pallet Wood?

Sure, you can totally reuse pallet wood! Just grab those overlooked pallets and get creative. Clean, sand, treat them for safety, and voila! Transform them into unique furniture pieces. Embrace the DIY spirit!

How Do You Make Stuff Out of Old Pallets?

To make stuff out of old pallets, disassemble them, gather materials, finish the top and create legs, assemble securely, and add protective coat. Experiment with finishes, personalize the design, enjoy the process, and share your results for a unique creation.

Advertisement

Conclusion

Now that you've taken the time to repurpose those old pallets into a stylish coffee table, you've truly turned trash into treasure. By thinking creatively and putting in a little effort, you've transformed something ordinary into something extraordinary.

Keep up the good work and continue to see the potential in everyday items – you never know what masterpiece you might create next!

Continue Reading
Advertisement

Affiliate disclaimer

As an affiliate, we may earn a commission from qualifying purchases. We get commissions for purchases made through links on this website from Amazon and other third parties.

Advertisement

Vetted

Tanpopo Konditorei Café Munich Tanpopo Konditorei Café Munich
Vetted3 weeks ago

Indulge in Delights at Tanpopo Konditorei Café Munich

Savor the exquisite pastries and serene ambiance at Tanpopo Konditorei Café Munich, your go-to spot for a sweet retreat in...

Vetted4 weeks ago

Here’s a new version of the review for “The Creative Spark: Unleashing Your Inner Artist”:

Book Review: “The Creative Spark: Unleashing Your Inner Artist” Illuminating the Path to Creative Awakening Manifestation Journal – Goal &...

top shower scrubbers 2024 top shower scrubbers 2024
Vetted2 months ago

15 Best Shower Scrubbers to Make Cleaning a Breeze in 2024

Discover the top 15 shower scrubbers of 2024 that promise effortless cleaning—find out which one will transform your scrubbing experience!

top storm doors 2024 top storm doors 2024
Vetted2 months ago

The 15 Best Storm Doors of 2024 – Enhance Your Home's Curb Appeal and Protection

Optimize your home's curb appeal and security with the 15 best storm doors of 2024—discover the unique features that could...

stylish outdoor dining sets stylish outdoor dining sets
Vetted2 months ago

15 Best Outdoor Dining Sets for Stylish Al Fresco Dining in 2024

Browse our curated list of the 15 best outdoor dining sets for stylish al fresco dining in 2024, and discover...

top cordless lawn mowers top cordless lawn mowers
Vetted2 months ago

15 Best Cordless Electric Lawn Mowers of 2024 – Power and Convenience Combined

Harness the power of convenience with the 15 best cordless electric lawn mowers of 2024—discover which one will revolutionize your...

top stackable washer dryers top stackable washer dryers
Vetted2 months ago

15 Best Stackable Washer Dryers of 2024 – Space-Saving Solutions for Your Laundry Room

Get ready to discover the 15 best stackable washer dryers of 2024 that will transform your laundry room into a...

ultimate comfort chair massagers ultimate comfort chair massagers
Vetted2 months ago

15 Best Back Massagers for Your Chair: Ultimate Comfort and Relief

Have you been searching for the perfect back massager to elevate your comfort? Discover the 15 best options that promise...

healthier caffeine free mushroom coffees healthier caffeine free mushroom coffees
Vetted2 months ago

14 Best Caffeine-Free Mushroom Coffees for a Healthier Brew

Mushroom coffees offer a healthier brew alternative—discover the 14 best caffeine-free options that might just transform your morning routine!

top bathroom fans 2024 top bathroom fans 2024
Vetted2 months ago

15 Best Bathroom Fans of 2024 – Quiet, Efficient, and Stylish Options

You won't believe the stylish and efficient bathroom fans of 2024 that promise quiet operation and enhanced ventilation—discover your perfect...

adaptogenic mushroom coffee benefits adaptogenic mushroom coffee benefits
Vetted2 months ago

15 Best Adaptogenic Mushroom Coffees to Boost Your Wellness Routine

The 15 best adaptogenic mushroom coffees promise to elevate your wellness routine—discover how these blends can transform your health and...

mushroom coffee pods selection mushroom coffee pods selection
Vetted2 months ago

15 Best Mushroom Coffee Pods to Boost Your Morning Brew

Uncover the top 15 mushroom coffee pods that can transform your morning routine and unleash a new level of energy...

Advertisement

Trending