Connect with us

Tips and Tricks

Brew Basics: How to Use a Bunn Coffee Maker!

Want to master the art of brewing with a Bunn Coffee Maker?

Published

on

coffee maker user guide

To use a Bunn Coffee Maker, start by ensuring a clean brew funnel and using the right filter. Place the brew funnel and carafe correctly. Follow specific brewing instructions for your model. Keep the water reservoir filled for consistent brewing. Hit the brew button to start. Enjoy the rich flavors and aromas in your cup. Remember, regular cleaning is key. Discover even more tips for getting the best brew. Consider adjusting brew temperature for a personalized taste. If your coffee is too weak, try increasing the brew temperature. On the other hand, if your coffee is too bitter, try decreasing the brew temperature. Experiment with different settings to find the perfect brew for you. And don’t forget to regularly clean and maintain your Bunn Coffee Maker for optimal performance.

Key Takeaways

  • Clean brew funnel and use Bunn filter for optimal brewing.
  • Position funnel and carafe correctly for smooth operation.
  • Follow specific brewing instructions for your Bunn model.
  • Maintain water reservoir for consistent water supply.
  • Initiate brewing by pressing the brew button.
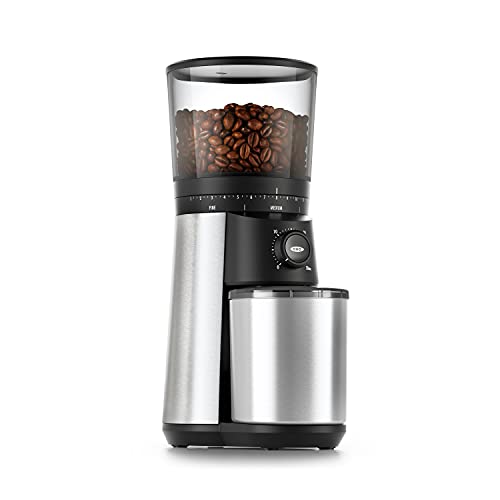
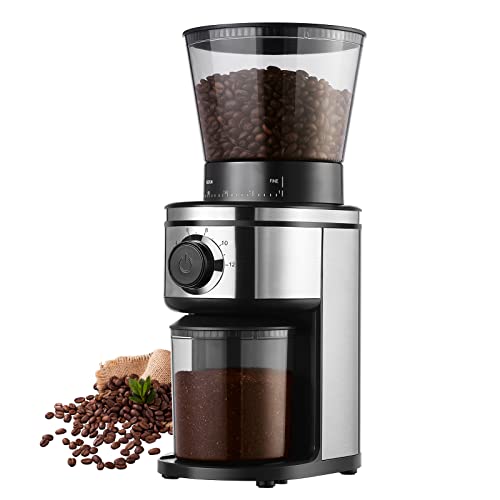
Axiom Series Brewers

To brew coffee using the Axiom Series Brewers, follow these steps for a perfect cup every time:

  1. Make sure the brew funnel is clean and empty before starting.
  2. Use a Bunn filter in the brew funnel to ensure ideal brewing.
  3. Pour fresh coffee grounds into the filter for a flavorful brew.
  4. Securely insert the brew funnel into the rails to avoid mishaps during brewing.
  5. Place a clean carafe under the funnel to catch the freshly brewed coffee.

VPR & VPS Series Brewers

commercial coffee brewing equipment

For brewing with the VPR & VPS Series Brewers, make certain a Bunn filter is placed in the brew funnel before adding fresh coffee grounds. Insert the brew funnel into the rails of the brewer and follow these steps:

  • Open the flip top lid and pour water into the water reservoir.
  • Confirm a clean pot is placed under the brew funnel to collect the brewed coffee.
  • Start the brewing process according to the specific instructions for the VPR or VPS Series Brewers.

Using Commercial Bunn Coffee makers like the VPR & VPS Series Brewers can simplify the process of making a delicious pot of coffee.

With the brew funnel properly set up and the water reservoir filled, you're all set to enjoy a fresh brew.

Following these steps will secure that your Commercial Bunn Coffee maker runs smoothly, providing you with a satisfying coffee experience.
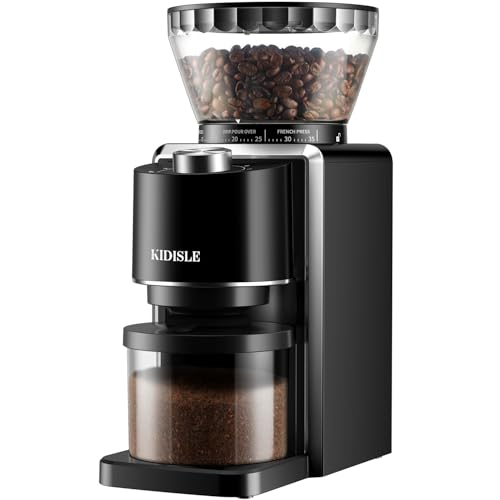
CDBC & CDBF Series Brewers

specialty coffee brewers series

Place a Bunn filter in the brew funnel and add fresh coffee grounds when using the CDBC & CDBF Series Brewers.

Confirm the water reservoir is filled with cold water and the coffee pot is ready.

Insert the brew funnel into the rails of your Bunn coffee machine and position a clean carafe under the funnel to collect the brewed coffee.

Advertisement

Slide the empty brew funnel into the machine, making sure it fits securely.

Press the ON/OFF switch, then the BREW switch to kickstart the brewing process.

Once the brewing is complete, enjoy a delicious cup of coffee from your CDBC or CDBF Series Bunn Coffee Maker.

Remember to clean the machine thoroughly after each use to maintain its performance and longevity.

Brewing with your Bunn machine is a simple and satisfying experience with the CDBC & CDBF Series Brewers.

Advertisement

Subscribe Today

stay informed and updated

Sign up today to stay informed with the latest resource news from Parts Town by subscribing to our email updates. By entering your email address, you can make certain that you receive important updates and information about Bunn coffee makers.

Here are some key benefits of subscribing:

  • Valuable Insights: Get tips on preventative maintenance to keep your Bunn coffee maker running smoothly.
  • Quick Parts Acquisition: Stay updated on how to efficiently acquire parts for your Bunn coffee maker.
  • Faster Delivery: Set your location for expedited parts delivery and check local inventory availability to get your coffee maker up and running in no time.

Subscribing to Parts Town's email updates won't only keep you informed about Bunn coffee makers but also provide you with essential knowledge on maintenance, parts acquisition, and delivery options.

Don't miss out on the opportunity to stay ahead with the latest information in the world of coffee makers.

Featured Resources

helpful and informative resources

Explore the newest featured resources to enhance your knowledge and maximize the performance of your commercial Bunn coffee maker. With preventive maintenance, you can extend the lifespan of your Bunn coffee maker by taking proactive care measures.

Parts In Town provides access to genuine parts for your Bunn coffee maker, guaranteeing quick and efficient replacements when needed. By setting your location, you can benefit from rapid parts delivery and check local inventory availability for immediate access to essential components.

Stay updated on resource news from Parts Town to remain informed about the latest developments and maintenance tips for your commercial equipment. Additionally, simplify your future orders by logging in to your Parts Town account, where you can save account details, access order history, and streamline transactions seamlessly.

Utilize these featured resources to keep your Bunn coffee maker in peak condition and ensure uninterrupted brewing performance.

Advertisement

Why Log In?

online account access benefits

When logging in to your account, you gain access to various benefits that streamline your ordering process and guarantee efficient transactions. By utilizing your account, you can benefit from:

  • Access to Discounts or Contract Pricing: Logging in allows you to view special discounts and contract pricing tailored to your account, helping you save on your purchases.
  • Saved Information for Faster Transactions: Keep your payment information, shipping addresses, and order history stored securely for quick and easy checkout on future orders.
  • Equipment Details at Your Fingertips: Access and update your equipment details anytime, making sure you have the necessary information for maintenance and ordering parts.

Logging in not only simplifies the ordering process but also gives you the advantage of being able to fill your cart with the Parts In Town logo securely.

Take advantage of these features to make sure a smoother and more convenient experience when shopping for your coffee maker needs.

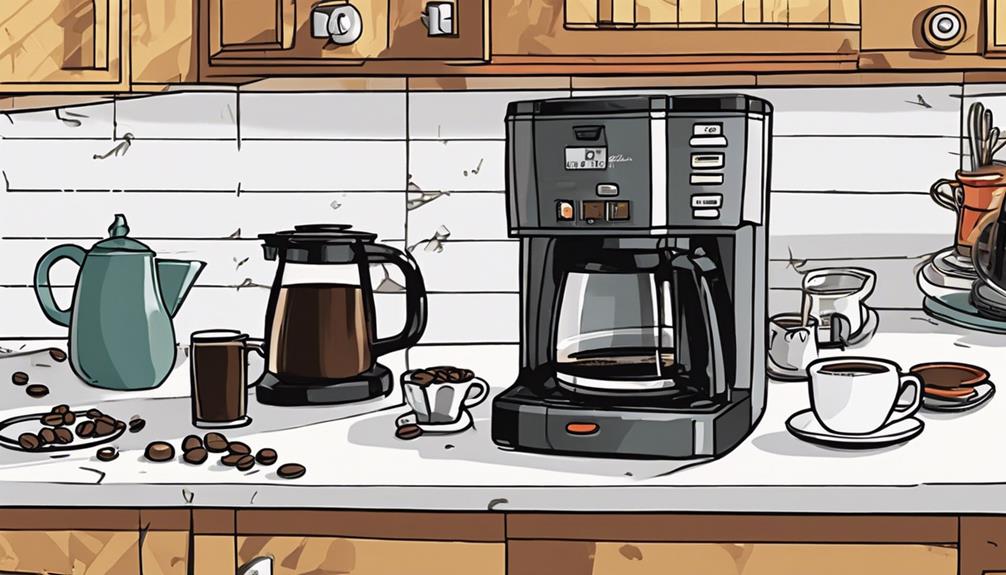
Components of a Bunn Coffee Maker

parts of bunn machine

As you prepare to use your Bunn Coffee Maker, it's important to understand the key components that make up this brewing marvel.

The brewer funnel lid, internal hot water tank, glass carafe, and warmer plate all play vital roles in delivering that perfect cup of coffee.

Get familiar with these parts to guarantee a smooth and delicious brewing experience every time.

Bunn Coffee Maker Parts

You'll find that a commercial Bunn coffee maker comprises necessary components such as a brewer funnel cover, internal hot water reservoir, glass carafe cover (for GR, BX, NHS models), glass carafe (for GR, BX, NHS models), and a warmer plate (for all three models). These parts work together seamlessly to brew a delicious pot of coffee for you to enjoy.

The brewer funnel cover aids in directing the flow of water and coffee grounds during the brewing process.

Advertisement

The internal hot water reservoir guarantees that the water is heated to the proper temperature for brewing.

The glass carafe and cover are necessary for serving and storing the brewed coffee.

Lastly, the warmer plate maintains the coffee in the carafe hot and ready to serve.

Each component plays an important role in the coffee-making process, ensuring that you get a perfect cup every time.

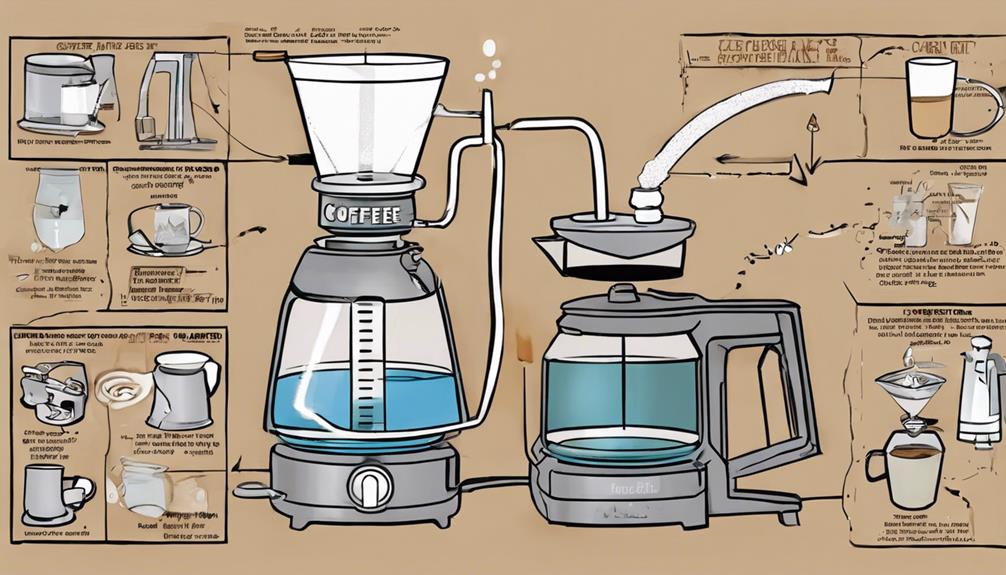
Understanding Brewer Components

To comprehend the mechanics of a Bunn Coffee Maker, familiarize yourself with its essential brewer components. The Bunn coffee maker consists of real parts that work together to brew your perfect cup of coffee.

Advertisement

The cold water reservoir, found at the back of the machine, needs to be filled with cold water to guarantee a fresh brew. The empty brew funnel is where you place your coffee grounds for brewing. The Parts catalog can help you identify these components for any maintenance needs.

Once the cold water reservoir is filled, place the coffee pot with cold water on the warmer plate. This triggers the brewing process. The internal hot water tank then heats the water to the ideal temperature for brewing.

Understanding these brewer components will allow you to effectively operate your Bunn coffee maker and enjoy a delicious cup of coffee whenever you desire.

Steps to Brew With Bunn

bunn brewing process guide

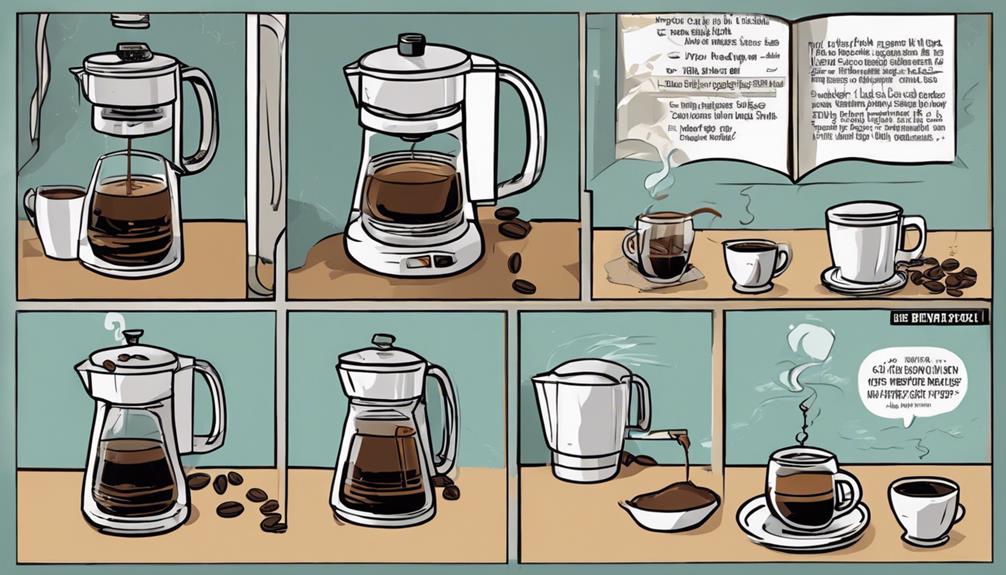
Start by placing a Bunn filter in the brew funnel before adding fresh coffee grounds.

Insert the brew funnel into the rails of the Bunn coffee maker.

Position a clean carafe under the brew funnel to collect the brewed coffee.

Advertisement

To brew with a Bunn coffee maker, add water to the water reservoir, ensuring it's filled to the appropriate level for your desired amount of coffee.

Following the specific instructions for your Bunn model is essential to achieving a perfect cup of coffee.

Once everything is set up, simply press the brew button and let the machine work its magic.

The water will heat up and drip through the coffee grounds, extracting the rich flavors and aromas.

Soon enough, you'll have a delicious pot of coffee ready to be enjoyed.

Advertisement

Remember to clean the brew funnel and carafe after each use to maintain the quality of your brews.

Frequently Asked Questions

How Do You Operate a Bunn Coffee Maker?

To operate a Bunn coffee maker, make sure the brew funnel is clean, add a filter, pour fresh coffee grounds, secure the funnel, and place a carafe below. Follow these steps for a perfect brew every time.

What Is the Coffee to Water Ratio for a Bunn Coffee Maker?

To get the best brew from your Bunn coffee maker, aim for a coffee to water ratio of 1 ounce of grounds per 16 ounces of water. Adjust to suit your taste. Find that perfect balance for your morning cup!

How Do I Tell if My Bunn Coffee Maker Is On?

To know if your Bunn coffee maker is on, check for the power indicator light, feel the warmth of the heating plate, listen for water heating, feel the sides for warmth, or refer to the user manual for specific indicators.

Why Isn T My Bunn Coffee Maker Brewing?

Make sure the water reservoir is full, brew funnel is secure, coffee grounds are fresh, spray head is clean, and brew switch is on. If it still won't brew, consult the manual or contact customer support for help.

Advertisement

Conclusion

Now that you've mastered the art of brewing with your Bunn coffee maker, you'll be able to enjoy a delicious cup of coffee every morning without any hassle.

So go ahead and start your day off right with a freshly brewed cup of joe from your trusty Bunn coffee maker.

Happy brewing!

Continue Reading
Advertisement

Tips and Tricks

Drawers for Days: How to Build a Coffee Table With Drawers!

Are you ready to add stylish storage to your living room?

Published

on

By

coffee table with drawers

Ready to transform your space? Build a coffee table with drawers using durable knotty alder wood, screws, and a Kreg Jig. Add drawer slides for smooth operation. Attach legs, backboard, and drawer boxes in your construction steps. Consider finishing touches like wood filler, paint, or decorative drawer pulls. Share your creation for inspiration. For optimized space, drill and attach the shelf securely. Install aprons for structure, rip plywood for boxes, and securely attach drawer fronts. Incorporating these steps will bring your coffee table with drawers to life!

Key Takeaways

  • Utilize 4/4 and 6/4 knotty alder wood for durability and a custom look.
  • Employ a Kreg Jig with pocket hole screws for precise assembly.
  • Ensure smooth operation with drawer slides for easy access.
  • Use wood filler, sandpaper, and finishing supplies for a polished finish.
  • Share your project on social media to inspire others with your creation.

Materials and Tools

Gather the necessary materials and tools to start building your DIY coffee table with drawers. For the table, consider using 4/4 and 6/4 knotty alder wood for durability and a custom look. You'll need wood screws and a Kreg Jig with pocket hole screws for precise assembly. To ensure smooth operation, include drawer slides in your list of materials.

Make sure to have a thickness planer on hand to mill the wood to a uniform 3/4 thickness. When preparing the wood, cut the panel pieces slightly longer than needed to allow for squaring. Additionally, have wood filler, sandpaper, and finishing supplies ready to give your coffee table a polished appearance.

To add both functionality and style, consider incorporating drawer pulls into your design. By having all the necessary materials and tools ready, you can efficiently proceed with constructing your coffee table with drawers.

Construction Steps

building a sturdy foundation

Attach the legs to the sides of the coffee table to provide stability and support as you begin the construction process.

Next, install the backboard between the back legs to create a solid framework for your coffee table.

Construct the large and small drawer boxes, ensuring they fit snugly and smoothly.

Advertisement

Once the drawer boxes are ready, install the drawer fronts, making sure to leave appropriate gaps for easy front opening and closing.

Finally, secure the coffee table top to the base to complete the construction process.

  • Embrace the satisfaction of seeing your coffee table take shape with each step.
  • Feel the excitement of creating functional and stylish storage solutions with the drawer boxes.
  • Experience the sense of accomplishment as you attach the final piece, the coffee table top, bringing your project to completion.

Optional Finishing

customizable project completion choices

Consider enhancing the aesthetic appeal and durability of your DIY coffee table with drawers through optional finishing steps.

Start by using a Kreg Jig and pocket hole screws for assembly, ensuring a sturdy construction.

Before sanding the coffee table, fill any visible holes with wood filler to achieve a seamless look.

Once the surface is smooth, apply finishing supplies like paint, stain, or sealer to give your coffee table a polished finish that suits your style.

Advertisement

Installing decorative drawer pulls can add a personal touch and elevate the overall design of the piece.

Don't forget to share your finished project on social media to inspire others in their DIY endeavors.

These optional finishing techniques won't only enhance the appearance of your coffee table but also increase its longevity, making it a standout piece in your living space.

Building Components

components in construction work

To begin constructing the coffee table with drawers, it is important to glue the edges of the boards for the side panels and shelf before drilling pocket holes for assembly. This step guarantees a sturdy foundation for the coffee table with storage.

Building Components:

  • Drawer Box: Construct robust drawer boxes using pocket screws for durability.
  • Side Panels: Attach side panels securely with glue and pocket screws to preserve structural integrity.
  • Shelf Assembly: Drill pocket holes for the shelf assembly to offer ample storage space.

Installation Process

smooth software installation process

For a smooth assembly of the coffee table with drawers, start by drilling pocket holes in the shelf ends and securely attaching it using pocket screws to optimize storage space. Mark the positions for shelf installation and glue and clamp the shelf in place during the installation process. Additionally, install aprons at the base of the table to reinforce its structural integrity. When working on the drawer construction, remember to rip plywood for the drawer boxes and assemble them using pocket screws for functionality. Ultimately, make sure to securely attach the drawer fronts with screws and install the drawer slides and boxes for easy access to the storage space.

Installation Process Steps Tips
Shelves Drill pocket holes Maximize storage space
Aprons Attach at the base Enhance structural integrity
Drawer Construction Assemble with pocket screws Ensure functionality

Frequently Asked Questions

Which Way Do You Face a Coffee Table With Drawers?

When designing a coffee table with drawers, face them towards you for easy access to essentials like remotes and magazines. Guarantee the drawers align with your seating arrangement and complement the room's layout.

Advertisement

How Do I Keep My Coffee Table Organized?

To keep your coffee table organized, use dividers or trays to separate items, label or color-code drawers for easy access, and declutter regularly. By staying on top of organization, you can create a neat and functional space for relaxation.

How to Set up a Coffee Table?

So, you're setting up a coffee table? Position it centrally, guarantee stability, and add coasters for protection. Decorate with candles, books, or a plant. Use drawers for remote controls, magazines, and organization. Enjoy your cozy space!

Conclusion

Now you have a beautiful coffee table with drawers that won't only add functionality to your space but also provide extra storage for all your everyday essentials.

It's like having a trusted friend by your side, always there to help and support you whenever you need it.

Enjoy your new DIY creation and revel in the satisfaction of a job well done!

Advertisement
Continue Reading

Tips and Tricks

Lift Top Diy: How to Build a Coffee Table With Lift Top!

Lift your coffee table game with this DIY project that will elevate your space – learn how to build a coffee table with a lift top!

Published

on

By

coffee table lift top

Ready to enhance your space with a lift-top coffee table? Gather materials and tools for this fun project. Follow step-by-step instructions to construct the table efficiently. Consider dimensions and design for a tailored finish. Estimate costs and opt for quality materials. Discover new uses for lift-top mechanisms and corner brackets for stability. Guarantee operational ease and sturdy support for your creation. Apply finishes like polyurethane for a chic look. Admire your craftsmanship, adding chamfered edges for a polished touch. Enjoy the functional and aesthetic benefits of your new coffee table. Craft with confidence and creativity – your project awaits more insights. Explore additional customization options for your lift-top coffee table, such as adding hidden storage compartments or incorporating unique hardware for a one-of-a-kind look. Once your project is complete, consider showcasing and potentially selling your creations at mobile coffee trailer sales or local artisan markets. Embrace the satisfaction of creating a functional and stylish piece of furniture, and share your passion with others who appreciate handcrafted items. Your lift-top coffee table is sure to be a conversation starter, whether in your own home or at a mobile coffee trailer sales event.

Key Takeaways

  • Use hardwood and lift top mechanism for durability and functionality.
  • Follow step-by-step construction guide for precise assembly.
  • Consider dimensions, design, and personalization options.
  • Opt for customization like hidden compartments or walnut accents.
  • Finish with polyurethane for a professional look and enjoy craftsmanship satisfaction.

Materials and Tools Needed

You'll need hardwood, a lift top mechanism, plywood, glue, and pocket hole screws for building the coffee table with a lift top.

When selecting the hardwood, consider using species like ash for durability and aesthetics. The plywood will be essential for constructing the sides, bottom, and top pieces of the table. Make sure you have a table saw to accurately cut the wood to the required sizes, such as 36' x 9' and 34.5' x 34.5'.

The lift top mechanism will allow for easy adjustment and added functionality to your coffee table. Additionally, pocket screws will be necessary for securely joining the different wooden components together.

Investing in quality materials like hardwood and a reliable lift top mechanism might increase the total cost, estimated around $175. Remember, depending on the specific measurements of your lift kit, you may need wooden braces to support the lift table.

Customizable design options are available, allowing you to personalize the coffee table with different wood types and sizes according to your preferences.

Advertisement

Step-By-Step Construction

step by step instructions for building

To begin constructing the lift top coffee table, cut the hardwood pieces to the specified dimensions as outlined in the building plan. Use a track saw for precise cuts to guarantee the pieces fit together seamlessly.

Assemble the side panels and base around the plywood, making sure everything is securely attached. Next, affix the lift top mechanism to the base, verifying it operates smoothly and securely. Position yourself ergonomically to work comfortably while assembling the table components.

Customize the top by adding additional wood pieces to create a unique design that suits your style. Once the construction is complete, finish the table by staining it to your desired color and applying a coat of polyurethane for a polished look.

Following these steps will result in a beautifully crafted lift top coffee table that's both functional and aesthetically pleasing.

Dimensions and Design

data analysis for architecture

When building your coffee table, consider the specifications for the table size, incorporating elements of aesthetic design for a sleek finish.

You can further personalize the table with various customization options to suit your style preferences.

The dimensions and design choices will play an essential role in the overall look and functionality of your new coffee table.

Advertisement

Table Size Specifications

The table size specifications for the lift-top coffee table feature dimensions of 39 x 25.5 x 8 inches, combining functionality with a compact design.

The top, constructed from four 1×8 ash pieces, provides a sturdy surface for daily use. Its base, made of plywood, ensures stability and support for the lift mechanism and top. Additionally, a clear top coating adds a modern touch to the overall aesthetic.

Inside, the compartments are customizable, with dimensions like 34.5' x 9', offering ample storage options according to individual preferences. This design not only prioritizes practicality but also allows for personalization to suit your needs.

With its compact size and customizable features, this lift-top coffee table strikes the perfect balance between style and practicality, making it a versatile and valuable addition to your living space.

Aesthetic Design Elements

Several aesthetic design elements enhance the visual appeal and functionality of the lift-top coffee table, including its dimensions and materials. The table with a lift typically measures approximately 39 x 25.5 x 8 inches, with a lift mechanism that raises it by 6 1/2 inches.

Advertisement

When you envision the table, visualize a clear top coating that adds a shiny finish, corner accents crafted from solid walnut for a touch of sophistication, and sleek aluminum legs that provide a modern and sturdy base.

These design elements combine to create a stylish and versatile piece of furniture that not only elevates the aesthetic of your space but also offers practicality and convenience. The solid walnut corner accents bring warmth and elegance, while the aluminum legs guarantee stability and a contemporary look.

With the lift-top feature, you can seamlessly shift from using the table for dining or working to enjoying a cozy coffee break, making it a versatile and functional addition to your home.

Customization Options

To customize your lift-top coffee table, consider adjusting the dimensions and design to suit your specific preferences and space requirements. You can personalize the table top, lift mechanism, customizable compartments, and personalization options according to your needs. Here are some customization options you can choose from:

Customization Options Description Example
Table Top Choose the size and shape of the table top to fit your space and style. Rectangular table top
Lift Mechanism Opt for an adjustable lift mechanism to transform the table for different purposes. Hydraulic lift system
Customizable Compartments Customize inside compartments for additional storage solutions tailored to your needs. Hidden drawer compartments

Cost and Materials

quality control in manufacturing

When building a coffee table with a lift top, you'll need to budget approximately $175 for materials such as hardwood, a lift top mechanism, glue, and plywood.

Here are the essential items required:

Advertisement
  1. Hardwood: Choose quality hardwood like ash for its beautiful grain patterns and staining properties, ensuring a durable and aesthetically pleasing table.
  2. Lift Top Mechanism: Invest in a reliable lift top mechanism that will allow for smooth and easy operation of the table's lifting function, adding versatility to its usage.
  3. Glue and Plywood: Use strong glue to securely bond the wood pieces together, and high-quality plywood for the table's base and other structural components.

Alternative Applications

exploring diverse software options

Explore the adaptability and versatility of the lift top mechanism beyond its traditional use in a coffee table project.

The lift top mechanism can be creatively adapted for a sit-stand desk variation, offering a functional and ergonomic solution for your workspace.

By incorporating the lift top mechanism into different furniture projects, you can enjoy the aesthetically pleasing design of a coffee table with a lift top in various settings around your home.

The customizable nature of the mechanism allows for personalized touches, enabling you to tailor the features to your specific needs and preferences.

Whether it's adjusting the height or adding additional storage compartments, the lift top mechanism offers endless possibilities for customization.

Let the lift top coffee table project inspire you to explore innovative designs and create DIY furniture pieces that showcase the unique capabilities of this versatile mechanism.

Advertisement

Assembly Instructions

follow detailed assembly steps

Attach the lift top mechanism to the base using 5/8 inch #6 screws with washers.

Secure the lift brackets by drilling pilot holes and using 1.25 inch flat-headed screws.

Add additional support with corner brackets attached with pocket screws.

To assemble your coffee table with a lift top, follow these steps closely:

  1. Connect Lift Top Mechanism: Start by fastening the lift top mechanism to the base using 5/8 inch #6 screws with washers. Make sure that the mechanism is centered and aligned correctly for optimal functionality.
  2. Fasten Lift Brackets: Drill pilot holes and secure the lift brackets using 1.25 inch flat-headed screws. This step is essential for ensuring the stability and smooth operation of the lift table.
  3. Enhance Support with Corner Brackets: Strengthen the structural integrity of your coffee table with lift by attaching corner brackets using pocket screws. This extra support will help distribute weight evenly and prevent wobbling during use.

Finishing Touches and Enjoyment

decked out for fun

Now that you've added the final touches and applied the polyurethane finish, it's time to step back and enjoy your creation.

Admiring the sleek edges and smooth surface, you can feel proud of the craftsmanship put into your coffee table.

With its lift top, storage, and unique copper pipe base, your creation isn't only functional but also a beautiful piece to enjoy in your living space.

Advertisement

Final Touches

To complete the coffee table project, make certain that the final touches, such as chamfering edges and applying a polyurethane finish, are done meticulously for a professional and satisfying result.

Here are three key steps to perfecting your coffee table:

  1. Chamfering Edges: Use a block plane to create clean and angled edges on the tabletop and sides. This step not only adds a touch of sophistication but also enhances the overall aesthetic appeal of the table.
  2. Applying Polyurethane Finish: Make sure you apply three coats of water-based polyurethane finish with an HVLP sprayer. This process guarantees a durable and smooth surface, protecting the wood while showcasing its natural beauty.
  3. Admiring Your Creation: Once the final touches, including edge banding and polyurethane finish, are complete, take a moment to enjoy your finished coffee table. The lift top, storage compartments, and unique copper pipe base will undeniably bring you immense satisfaction and pride in your craftsmanship.

Enjoying Your Creation

Experience the satisfaction of completing your coffee table with lift top by adding the finishing touches and admiring your craftsmanship.

Start by chamfering the edges with a block plane for a smooth finish on the plywood lift-top. Utilize a saw to cut the aluminum tubing to the desired length for the lifting mechanism, ensuring functionality and durability.

Apply three coats of water-based polyurethane finish using HVLP for a professional and protective surface on the coffee table. Once the finishing touches are complete, take a moment to revel in your creation.

The combination of storage, lift-top convenience, and a unique copper pipe base showcases your woodworking skills. Enhance both function and aesthetics by adding walnut edge banding, rubber feet, and bumpers. Each detail contributes to the overall appeal and usability of your coffee table, making it a piece to be proud of.

Advertisement

Sit back, relax, and enjoy the fruits of your labor with a cup of coffee on your newly crafted masterpiece.

Frequently Asked Questions

How Do You Close a Lift Top Coffee Table?

To close a lift top coffee table, gently push down on the lift top until it closes smoothly. Remember to clear the top of any items to avoid damage. Some tables have a lock for security. Follow manufacturer's instructions for proper use.

How Can I Raise My Table Higher?

To raise your table higher, simply activate the lift top mechanism. This handy feature offers adjustable height for your convenience. Guarantee a secure installation and stability when lifting the table to your desired level.

Why Do Coffee Tables Have Lift Tops?

Coffee tables have lift tops to provide versatile functionality for dining, working, or storage purposes. They offer ergonomic positions for various activities without the need for additional furniture. This feature is popular in small living spaces for its practicality.

Can You Eat on a Lift Top Coffee Table?

Sure, you can eat on a lift top coffee table! It offers a versatile surface for dining or working. The adjustable height makes it convenient for meals. Transform it into a dining table in seconds. Practical and space-saving for small spaces.

Advertisement

Conclusion

Congratulations on successfully building your own lift top coffee table!

Did you know that DIY furniture projects have increased by 30% in the past year alone?

Keep up the great work and enjoy your new piece of furniture that combines functionality and style.

Happy building!

Advertisement
Continue Reading

Tips and Tricks

Storage Savvy: How to Build a Coffee Table With Storage!

Prepare to transform your living space with a stylish and practical coffee table that offers hidden storage solutions – perfect for small spaces!

Published

on

By

coffee table with storage

Ready to upgrade your living space? Build a coffee table that's both stylish and storage-savvy! Using plywood, oak, and basic tools, create a table with hinges, latch hardware, and a lifting framework for ample storage. Enhance the design with trim work techniques and finish with staining tips for a polished look. The versatile dual-functionality of this table offers a spacious storage area, perfect for small living spaces. Get started on this DIY project to add functionality and style to your home!

Key Takeaways

  • Utilize PureBond Plywood and solid oak for durability and aesthetics.
  • Incorporate hinges and latch hardware for functional storage compartments.
  • Construct a lifting framework for easy access to the ample storage area.
  • Apply edge banding and trim work techniques for a polished finish.
  • Finish with ZAR Moorish Teak stain and water-based poly for protection and style.

Materials and Tools Required

To construct the coffee table with storage, gather the necessary materials and tools, including PureBond Plywood, solid oak, a saw, drill, screwdriver, sandpaper, measuring tape, hinges, latch hardware, wood glue, and screws.

When starting on this DIY coffee table project, the key materials like PureBond Plywood provide a sturdy base, while solid oak trim adds a touch of elegance to the design. With the right tools such as a saw for cutting the wood, a drill for making holes, a screwdriver for assembling parts, sandpaper for a smooth finish, and a measuring tape for precision, you're well-equipped for the task ahead.

Hinges and latch hardware are essential components for the storage functionality of the table. They allow the top to swivel, providing easy access to the concealed storage compartment beneath. Remember to use wood glue and screws for secure assembly, ensuring that your coffee table not only looks great but also functions perfectly for storing your essentials.

Building Components Overview

building components detailed description

Gather the necessary building components to construct the coffee table with storage. Start by gluing edges of boards to create the side panels and shelf. Drill pocket holes for the shelf assembly, ensuring a secure attachment of the shelf boards.

Construct the coffee table sides by drilling pocket holes in the cross supports and attaching panels with glue for added strength.

To build a sturdy frame, secure the legs to the cross supports. This step is essential in ensuring the overall stability of the coffee table. Additionally, install aprons at the base of the table to further enhance its stability and structural integrity.

Advertisement

Trim Work Techniques

trimming with precision skills

Now, let's talk about the trim work techniques involved in creating a sleek coffee table with storage.

Learn how to expertly apply edge banding, attach custom trim pieces securely, and fill nail holes for a flawless finish.

These steps will elevate the look of your coffee table and give it a professional touch.

Edge Banding Application

For a professional and polished finish on your coffee table with storage, mastering the technique of edge banding application is vital. Edge banding is a method used to cover the exposed edges of plywood to give it the appearance of real wood.

When applying edge banding veneer, use an iron to adhere the banding to the plywood edges. Once the banding is applied, trimming off the excess is necessary for achieving a clean and seamless look.

Trimming the edge banding carefully ensures that the edges blend smoothly with the surface, enhancing the overall appearance of the table. Additionally, attaching trim to the coffee table box further elevates its look and provides a polished finish.

Advertisement

To achieve a professional result, fill any nail holes in the trim with wood filler and sand them down to create a smooth surface. Mastering these edge banding techniques will help you create a coffee table that's both functional and aesthetically pleasing.

Trim Attachment Methods

Attaching trim to your coffee table with storage involves customizing pieces with adhesive and brad nails to achieve a personalized and polished finish. To guarantee a seamless and professional look, consider the following trim attachment methods:

  1. Adhesive Squeeze Technique: Apply a small line of wood adhesive along the edge of the trim piece before pressing it onto the coffee table. The adhesive squeeze method helps create a strong bond between the trim and the table surface.
  2. Clamping for Precision: Once the trim is positioned, use clamps to hold it securely in place while the adhesive dries. This step ensures that the trim stays aligned and adheres properly to the table.
  3. Finish with Brad Nails: After the adhesive has set, reinforce the attachment by driving brad nails through the trim into the coffee table. Be sure to countersink the nails slightly and fill the holes for a clean finish.

Nail Hole Filling

To achieve a seamless finish on your coffee table with storage, start by filling nail holes with wood filler. Use a putty knife to apply the filler, ensuring uniform coverage. Allow the filler to dry completely before proceeding. Once dry, gently sand it down for a smooth surface. This step is crucial for preparing the surface for staining or painting.

Sanding the filled nail holes will ensure a polished and professional appearance for your coffee table. After sanding, wipe away any excess wood filler dust for a clean surface. Taking the time to fill and sand nail holes properly is essential for the overall aesthetic of your finished coffee table with storage.

Finishing and Staining Tips

woodworking finishing techniques advice

When it comes to finishing and staining your coffee table, make sure to sand and dust the surface thoroughly for a clean finish.

Consider using ZAR Moorish Teak stain for a rich and vibrant color.

Opt for a water-based poly finish to protect the wood and achieve a polished look.

Advertisement

Staining Techniques

Consider experimenting with different staining techniques to achieve the desired finish on your coffee table with storage. Staining not only enhances the appearance of the wood but also provides protection from wear and tear. Here are some staining techniques to help you achieve a professional look:

  1. Layered Staining: By applying multiple layers of stain with varying tones, you can create depth and richness in the finish of your coffee table. This technique works well to mimic the look of expensive hardwoods.
  2. Blotching Prevention: To prevent uneven absorption of stain, especially on plywood or veneer surfaces, consider using a pre-stain wood conditioner. This will help the stain penetrate more evenly for a uniform finish.
  3. Faux Finishing: Edge banding can be stained to resemble real wood and give your coffee table a polished look. Use techniques like glazing or distressing to add character and uniqueness to the piece.

Finishing Tips

Experiment with applying ZAR Moorish Teak stain for a rich color on your coffee table. Ensure uniform coverage by using a brush or cloth in the direction of the wood grain. Allow the stain to permeate for the recommended time before wiping off any excess to achieve the desired shade.

After the stain has fully dried, it's time to apply the water-based poly finish. This finish provides a protective coating that's resistant to water and scratches, making it ideal for a coffee table. Use a clean brush to apply thin, even layers of polyurethane, sanding lightly between each coat for a smooth finish.

Once the final layer of water-based poly finish has dried, consider adding alternative hardware options to personalize your coffee table further. Sand the surface for any imperfections before exploring edge banding or moulding strips to give your table a polished look.

These finishing touches will enhance the overall appearance of your storage-savvy coffee table.

Design and Construction Details

design and build specifics

Explore the intricate design and construction details of the coffee table with storage, highlighting its innovative features and functionality. The coffee table isn't just a piece of furniture but a versatile storage solution that maximizes space in a stylish and practical way. Here are some key design and construction details to ponder: The coffee table features a sleek and modern design with a lift top that reveals a hidden storage compartment, perfect for stowing away remotes, magazines, and other living room essentials. The sturdy construction and high-quality materials ensure durability and longevity, making it a valuable addition to any living space. And if you’re feeling particularly handy, you can even build your own lift top coffee table to customize the design to your exact specifications.

  1. Lifting Framework: The coffee table boasts a unique lifting framework that allows for a double-layered desktop, providing ample space for storage and organization. This innovative feature enhances the functionality of the table, making it ideal for small living spaces.
  2. Large Storage Area: Beneath the desktop, there's a spacious storage area designed to help you keep your items neatly organized and easily accessible. This feature guarantees that your living room remains clutter-free while offering convenient storage solutions.
  3. Side Cave: The coffee table also includes a side cave for storing family-shared objects conveniently. This additional storage space adds to the table's versatility, allowing you to keep important items within reach without compromising on style.

Installation Process Breakdown

installation step by step guide provided

To begin the installation process breakdown for constructing the coffee table with storage, drill pocket holes in the shelf ends to ensure secure attachment. This step establishes a strong connection between the shelf and the table structure.

Next, mark the positions for shelf installation on the table's solid wood base to confirm proper alignment. Once marked, apply glue to the shelf ends and clamp them in place during assembly. This helps in keeping the shelf steady while attaching it securely with pocket screws, enhancing the overall stability of the table.

Advertisement

Additionally, install aprons at the base of the table to provide extra support and structural integrity. These aprons not only add to the aesthetic appeal but also contribute to the durability of the table.

Assembly Steps Simplified

assembly made easier now

Simplify the assembly process for constructing a coffee table with ample storage by following these step-by-step instructions:

  1. Cutting and Joining:

Begin by following detailed guidance to cut the pieces for the coffee table box to size. Utilize proper joining techniques to assemble the box securely, guaranteeing it can support the weight of items stored inside.

  1. Adding Bottom:

Learn how to attach the bottom to the box using a combination of glue and screws for added strength and durability. This step is essential to secure the stability of the coffee table with storage.

  1. Customization and Trim Work:

Explore customization tips for trim work to personalize the coffee table to match your unique style preferences. Whether you prefer a sleek modern look or a more rustic feel, adding trim can enhance the aesthetic appeal of the table.

Usage and Benefits Overview

four word summary suggestion understanding usage and benefits

Discover the practicality and versatility of the lift top coffee table for maximizing space and functionality in your living area. Coffee tables with storage are a game-changer, offering a double-layered desktop that transforms into a convenient desk when needed.

Beneath the tabletop, a spacious storage area provides ample room for books, games, and snacks, while a side cave offers a perfect spot for storing family-shared items. Perfect for small living spaces, this table not only serves as a place for your morning coffee but also provides convenient support for your laptop, making it ideal for work or leisure activities.

Customers praise the lift top coffee table for being affordable, multifunctional, and suitable for a variety of activities. With an assembly time of around 45 minutes, this table offers quality and convenience at a reasonable price point, making it a valuable addition to any home.

Customer Review and Features

review and product details

Explore what customers have to say about the lift top coffee table and its impressive features. Customers have praised the lift top coffee table for its versatility and practicality in small living spaces.

Here are three key features highlighted by satisfied users:

  1. Dual Functionality: The ability of the coffee table to transform into a desk has been a standout feature for many customers. It offers a convenient workspace that can easily be hidden away when not in use.
  2. Ample Storage: The large storage area beneath the tabletop has been commended for its capacity to store various items, keeping the living space organized and clutter-free.
  3. Family-Friendly Design: Users have appreciated the side cave feature of the coffee table, which provides a designated space for storing commonly shared items within easy reach for all family members.

Frequently Asked Questions

How to Build a Storage Ottoman Coffee Table?

To build a storage ottoman coffee table, measure and cut wood for the frame. Attach hinges for the top lid and casters for mobility. Upholster the piece with fabric of choice, adding a hidden compartment for storage.

How Do You Pack a Table for Storage?

To pack a table for storage, disassemble it by removing legs or shelves. Wrap components in protective material. Use cardboard or wood panels to shield the tabletop. Store in a clean, dry area. Label parts for easy reassembly.

Advertisement

How Do You Make a Coffee Table Stable?

To make a coffee table stable, guarantee a sturdy frame, quality materials, and even weight distribution. Use traditional joinery techniques for added support. Test its stability by applying pressure and checking all components. Stay grounded with these tips!

How Much Space Do You Need for a Coffee Table?

You need 12 to 18 inches around the coffee table for comfortable movement. Consider the room size and furniture layout. Leave 18 inches between the table and sofa for legroom. Tailor the table size to fit the room's layout and your preferences.

Conclusion

Now that you've built your own coffee table with storage, you'll be amazed at how much easier it's to keep your living room organized.

And did you know that 85% of people feel more relaxed and at ease in a clutter-free environment?

With this stylish and functional piece of furniture, you can enjoy a tidier space and a more serene atmosphere.

Advertisement

Happy building and organizing!

Continue Reading
Advertisement

Affiliate disclaimer

As an affiliate, we may earn a commission from qualifying purchases. We get commissions for purchases made through links on this website from Amazon and other third parties.

Advertisement

Vetted

Tanpopo Konditorei Café Munich Tanpopo Konditorei Café Munich
Vetted2 weeks ago

Indulge in Delights at Tanpopo Konditorei Café Munich

Savor the exquisite pastries and serene ambiance at Tanpopo Konditorei Café Munich, your go-to spot for a sweet retreat in...

Vetted3 weeks ago

Here’s a new version of the review for “The Creative Spark: Unleashing Your Inner Artist”:

Book Review: “The Creative Spark: Unleashing Your Inner Artist” Illuminating the Path to Creative Awakening Manifestation Journal – Goal &...

top shower scrubbers 2024 top shower scrubbers 2024
Vetted2 months ago

15 Best Shower Scrubbers to Make Cleaning a Breeze in 2024

Discover the top 15 shower scrubbers of 2024 that promise effortless cleaning—find out which one will transform your scrubbing experience!

top storm doors 2024 top storm doors 2024
Vetted2 months ago

The 15 Best Storm Doors of 2024 – Enhance Your Home's Curb Appeal and Protection

Optimize your home's curb appeal and security with the 15 best storm doors of 2024—discover the unique features that could...

stylish outdoor dining sets stylish outdoor dining sets
Vetted2 months ago

15 Best Outdoor Dining Sets for Stylish Al Fresco Dining in 2024

Browse our curated list of the 15 best outdoor dining sets for stylish al fresco dining in 2024, and discover...

top cordless lawn mowers top cordless lawn mowers
Vetted2 months ago

15 Best Cordless Electric Lawn Mowers of 2024 – Power and Convenience Combined

Harness the power of convenience with the 15 best cordless electric lawn mowers of 2024—discover which one will revolutionize your...

top stackable washer dryers top stackable washer dryers
Vetted2 months ago

15 Best Stackable Washer Dryers of 2024 – Space-Saving Solutions for Your Laundry Room

Get ready to discover the 15 best stackable washer dryers of 2024 that will transform your laundry room into a...

ultimate comfort chair massagers ultimate comfort chair massagers
Vetted2 months ago

15 Best Back Massagers for Your Chair: Ultimate Comfort and Relief

Have you been searching for the perfect back massager to elevate your comfort? Discover the 15 best options that promise...

healthier caffeine free mushroom coffees healthier caffeine free mushroom coffees
Vetted2 months ago

14 Best Caffeine-Free Mushroom Coffees for a Healthier Brew

Mushroom coffees offer a healthier brew alternative—discover the 14 best caffeine-free options that might just transform your morning routine!

top bathroom fans 2024 top bathroom fans 2024
Vetted2 months ago

15 Best Bathroom Fans of 2024 – Quiet, Efficient, and Stylish Options

You won't believe the stylish and efficient bathroom fans of 2024 that promise quiet operation and enhanced ventilation—discover your perfect...

adaptogenic mushroom coffee benefits adaptogenic mushroom coffee benefits
Vetted2 months ago

15 Best Adaptogenic Mushroom Coffees to Boost Your Wellness Routine

The 15 best adaptogenic mushroom coffees promise to elevate your wellness routine—discover how these blends can transform your health and...

mushroom coffee pods selection mushroom coffee pods selection
Vetted2 months ago

15 Best Mushroom Coffee Pods to Boost Your Morning Brew

Uncover the top 15 mushroom coffee pods that can transform your morning routine and unleash a new level of energy...

Advertisement

Trending