Connect with us

Tips and Tricks

Mobile Setup: How to Build a Coffee Cart!

Create your dream coffee cart with expert tips on legalities, equipment, design, and location – perfect your mobile setup for success!

Published

on

coffee cart building guide

To build a coffee cart, start by checking legal requirements in your area. Get permits and a business license. Keep hygiene in mind with the right equipment. Understand your audience through market research. Test locations and adapt accordingly. Design your cart for efficiency using IKEA Vihals Sideboard and oak plywood. Pick portable and durable equipment. Choose strategic spots with high foot traffic. Consider seasonal menu changes. Learn more about equipment layout and functionality for a successful coffee cart venture. Consider investing in quality coffee bar essentials, such as a commercial-grade espresso machine and grinder. These items are essential for brewing and serving high-quality coffee to your customers. Additionally, having a good stock of high-quality coffee beans, different syrups, and a variety of milk options can help you cater to different customer preferences and ensure that you are able to serve a wide range of coffee beverages. With these essentials in place, you can ensure that your coffee cart is well-equipped to meet the demands of your discerning customers.

Key Takeaways

  • Use IKEA Vihals Sideboard for the cart base.
  • Incorporate white oak plywood top with banding.
  • Add red oak strips and roller skate wheels for mobility.
  • Install surge protector with rotatable sockets for power.
  • Utilize reclaimed wood for a rustic bar counter.

Legal Requirements and Compliance

To operate a coffee cart legally, you must verify compliance with street vending regulations in your city. This includes obtaining the necessary business license and permits to guarantee you're authorized to sell your products.

Additionally, it's essential to adhere to health department guidelines regarding product handling, storage, and preparation. By following these regulations, you can confirm that your coffee cart meets health and safety standards, keeping both your customers and business protected.

Furthermore, it's important to comply with commissary requirements by operating from a licensed kitchen for food preparation. This ensures that your products are prepared in a safe and sanitary environment, meeting the standards set by the health department.

Additionally, make sure your equipment meets specifications and hygiene policies to maintain compliance with regulations. By following these legal requirements and confirming proper compliance, you can operate your coffee cart successfully and with peace of mind.

Research and Strategy Development

in depth research and planning

You need to conduct thorough market research to understand your target customers and tailor your offerings effectively.

Test different locations to find the best spot that maximizes foot traffic and customer demand.

Advertisement

Adapt your strategies based on competitive analysis to stay relevant and meet customer preferences.

Market Research Essentials

Conduct comprehensive market research to understand your target audience's preferences and identify strategic locations for your coffee cart. Begin by analyzing coffee consumption habits and trends in your area to pinpoint the preferences of your potential customers.

Research potential trading locations taking into account factors like foot traffic, demographics, and competitor presence. By understanding customer options and competition, you can effectively differentiate your coffee cart offerings.

It's vital to continuously evolve your business strategy based on market research findings to stay competitive in the market. Tailoring your coffee cart offerings to meet customer preferences and needs identified through thorough research will give you a competitive edge.

Keep in mind that market research is an ongoing process that will help you refine your business approach and guarantee the success of your coffee cart plans.

Advertisement

Location Testing Strategies

Identify target market preferences by utilizing surveys, focus groups, and observation at potential locations when developing your location testing strategies. To optimize the success of your coffee cart, it is essential to analyze foot traffic, demographics, and competition in various areas to determine ideal trading locations. Conducting test runs at different locations allows you to assess sales performance, gather customer feedback, and evaluate visibility. Consider seasonal factors, events, and weather conditions that might impact the success of your coffee cart in different locations. Utilize data-driven insights to refine your business strategy, adjust pricing, and tailor offerings to meet customer demands in specific locations.

Location Testing Strategies Benefits
Surveys Gather direct feedback from potential customers
Focus Groups Engage in-depth discussions to understand preferences
Observation Study customer behavior and interactions at potential locations

Competitive Adaptation Tips

To enhance your coffee cart's competitive edge, thoroughly research and develop strategic adaptations based on customer feedback and market analysis. Here are some tips to help you build a DIY competitive adaptation:

  • Identify your target market's preferences through thorough research and analysis.
  • Adapt your business strategy based on customer feedback and market trends.
  • Stay competitive by constantly evolving your offerings and services.
  • Analyze competitors to understand their strengths and weaknesses.
  • Test different locations to determine the most profitable trading spots for your coffee cart.

Starting a Coffee Cart Business Guide

coffee cart business startup

Let's kickstart your coffee cart business journey by focusing on designing your cart, selecting the right equipment, and strategizing your location.

These key points will lay the foundation for a successful venture in the competitive coffee market.

Get ready to brew up a winning business plan with these essential steps.

Designing Your Cart

Consider utilizing the IKEA Vihals Sideboard as the foundation for your coffee cart design. To create a stylish and functional DIY coffee cart, follow these steps:

Advertisement
  • Incorporate a white oak plywood top with banding for a sleek and durable finish.
  • Add red oak strips and roller skate wheels for mobility and ease of transport.
  • Install a surge protector with rotatable sockets for convenient access to power sources.
  • Utilize reclaimed wood for the bar counter to add a rustic and eco-friendly touch to your coffee cart design.
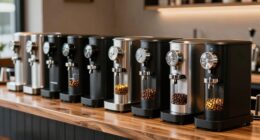
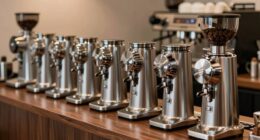
Equipment Selection

Selecting high-quality equipment is essential for the success of your coffee cart business. When choosing equipment for your coffee cart, it is vital to prioritize factors such as portability, durability, and compatibility with power sources. Opt for equipment like espresso machines, grinders, and brewers that offer easy maintenance, user-friendly features, and efficient brewing capabilities. Investing in reliable water filtration systems is also key to ensuring the best taste and quality in your coffee offerings. Additionally, consider equipment that aligns with your menu offerings, space constraints, and budget for a smooth coffee cart setup.

Equipment Features Considerations
Espresso Machine User-friendly, efficient brewing Menu compatibility
Grinder Consistent grind quality Durability, maintenance
Brewer Easy operation, brewing consistency Portability, power source
Water Filter Quality filtration, taste enhancement Maintenance, space

Location Strategy

To maximize the potential success of your coffee cart business, carefully strategize your location choices based on factors like target audience preferences and foot traffic density. When implementing your location strategy for the coffee cart, keep these key points in mind:

  • Research the best locations for your coffee cart by targeting areas with a high concentration of gourmet coffee drinkers.
  • Consider different time shifts to optimize sales, such as early mornings for commuters or late afternoons for students.
  • Adapt to weather conditions by offering hot drinks in colder months and iced beverages during warmer seasons.
  • Look into the most profitable times to cater to your target audience, such as setting up near offices during morning rush hours.
  • Location is pivotal for the success of your coffee cart business, so choose spots with high foot traffic and visibility.

Advantages of Coffee Cart Business

mobile coffee cart benefits

With low start-up costs and high profit margins, starting a coffee cart business offers significant advantages. Mobile coffee cart businesses provide an accessible entry point into the coffee industry, with carts available for as little as EUR 4000.

The growing trend in the coffee industry attracts coffee connoisseurs seeking high-quality coffee, creating a lucrative market for mobile coffee carts. Coffee sales also provide great profit margins of up to 90%, allowing for rapid expansion and increased revenue potential.

Unlike seasonal products, coffee sales remain consistent throughout the year, ensuring a steady flow of customers and revenue. Additionally, mobile coffee cart businesses offer flexibility, enabling operators to work part-time or full-time and cater to different events and locations, maximizing earning opportunities.

Challenges in Coffee Cart Business

coffee cart business obstacles

Exploring the competitive landscape of the coffee cart business demands a keen focus on pricing, quality, and service to distinguish yourself effectively. When building your coffee cart business, you'll encounter several challenges:

  • Intense Competition: Competitors vying for the same customers can make it challenging to carve out a niche.
  • Skill Development: Mastering the art of making exceptional coffee, from understanding blends to perfecting preparation techniques, is vital.
  • Brand Loyalty: Winning over customers who already have favorite coffee spots can be tough.
  • Legal Compliance: Meeting the diverse regulatory requirements across different jurisdictions is essential for operating your coffee cart smoothly.
  • Location Selection: Choosing the right spots for your coffee cart is critical; conducting thorough research and strategic planning is necessary to guarantee profitability.

Navigating these challenges with a well-thought-out strategy and dedication to excellence can set your coffee cart business on the path to success.

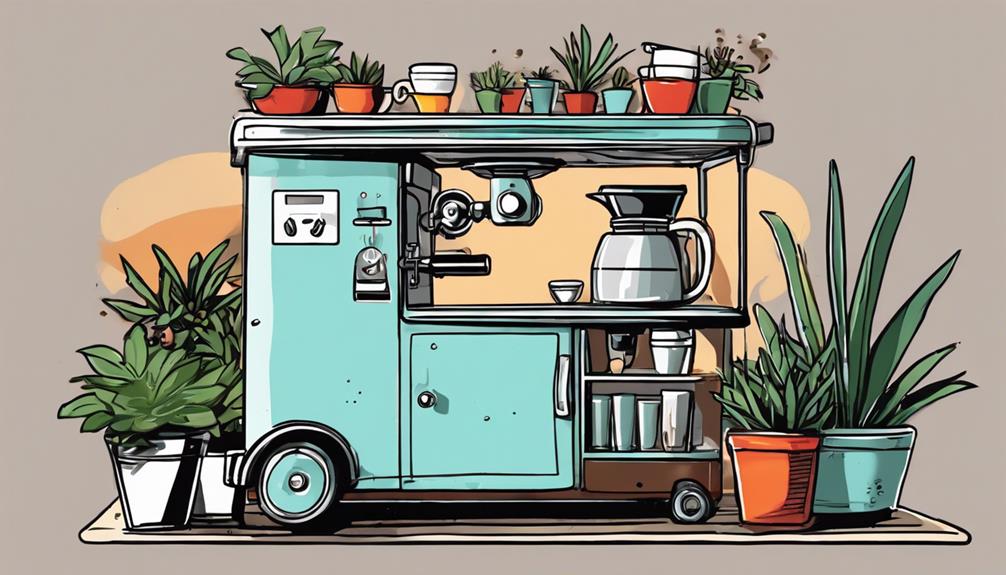
DIY Coffee Cart Construction and Design

building a mobile coffee cart

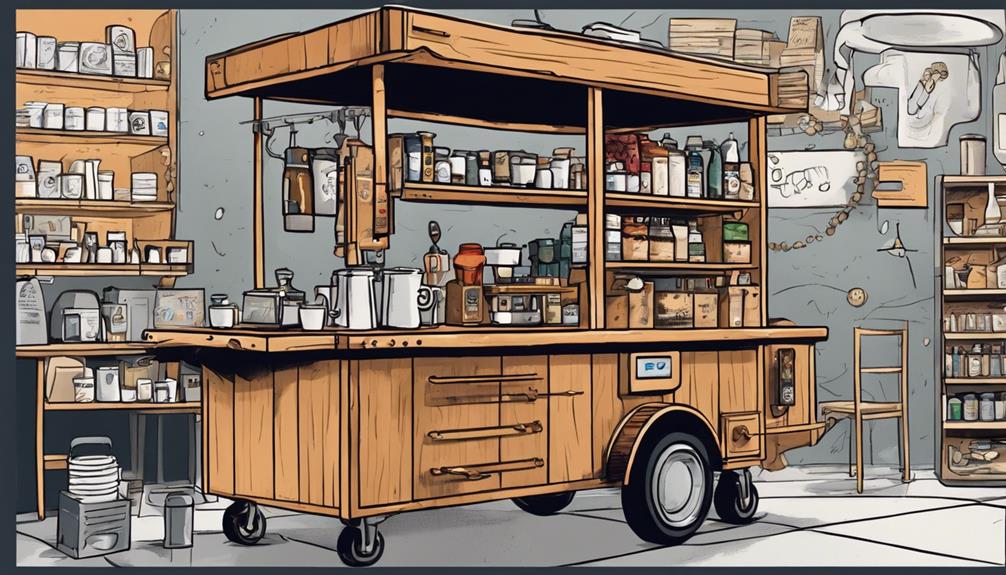
When constructing and designing your DIY coffee cart, consider utilizing IKEA Vihals Sideboard as the base for a sturdy foundation.

To achieve a sleek and durable design, incorporate a white oak plywood top with banding.

For mobility and ease of transport, add red oak strips and roller skate wheels to your coffee cart.

Advertisement

Enhance convenience by installing a surge protector with rotatable sockets for easy power access.

If you're looking to infuse a unique touch, draw inspiration from Scandinavian design principles and incorporate reclaimed wood into your coffee cart construction.

By combining these elements, you can create a stylish and functional DIY coffee cart that suits your needs.

Remember to focus on both practicality and aesthetics when designing your coffee cart to make sure it not only looks great but also functions effectively in your mobile setup. Consider the layout of your coffee cart to ensure easy access to tools and ingredients while also creating an inviting atmosphere for your customers. Additionally, investing in high-quality equipment and storage solutions will not only enhance the aesthetics of your setup but also ensure smooth operations during service. This attention to detail is key in creating a successful and efficient home coffee bar setup.

Equipment Layout and Functionality

designing laboratory equipment layout

Consider the strategic placement of your equipment on the coffee cart to optimize workflow and guarantee efficient operation. When setting up your coffee cart, the layout plays a pivotal role in securing a smooth operation.

Here are some key points to keep in mind:

Advertisement
  • Position the espresso setup on the left side near the sink, fridge, and waste bin for easy access and convenience.
  • Arrange the filter setup on the right side of the cart to streamline the brewing process and avoid any confusion.
  • Utilize the central area as a versatile work area for both setups, allowing for smooth shifts and maximizing workflow efficiency.
  • Secure all equipment and supplies are within arm's reach to minimize downtime and enhance functionality.
  • Design the layout with a focus on prioritizing efficient workflow to create a cohesive and well-functioning coffee cart setup that meets your needs.

Frequently Asked Questions

Do Mobile Coffee Shops Make Money?

Yes, mobile coffee shops can be profitable by offering convenience and quality to customers. With profit margins ranging from 60% to 90%, low start-up costs, and the ability to cater to diverse locations, they have great potential for success.

Is Coffee Cart a Good Business?

A coffee cart is a fantastic business opportunity! Its low start-up costs, high profit margins, and flexible operation make it an attractive venture. You can capitalize on the growing coffee trend and serve customers delicious brews on-the-go.

What Is a Mobile Coffee Stall?

A mobile coffee stall is a portable setup for serving coffee on-the-go. It includes equipment like an espresso machine and grinder. Ideal for events and markets, it offers flexibility in location and serves freshly brewed coffee.

How to Power a Coffee Trailer?

To power a coffee trailer, calculate your equipment's power needs. Use a generator or solar power system for electricity. Install a safe electrical system with proper grounding. Consult an electrician for help setting up the power supply.

Conclusion

Congratulations on completing your coffee cart setup! You're now a mobile coffee powerhouse ready to take on the world. Don’t forget to stock up on all your coffee bar essentials, like beans, syrups, and milk alternatives, to keep your customers happy and coming back for more. With your eye-catching setup and delicious drinks, you’ll be sure to make a strong impression at your next event or location. Keep pushing forward and serving up those amazing brews!

With your wheels in motion and caffeine in hand, there's no stopping you now.

Advertisement

Get ready to brew up success and serve up happiness wherever you go.

Cheers to your new coffee cart adventure!

Continue Reading
Advertisement

Tips and Tricks

Leg Day: How to Build Coffee Table Legs for a Sturdy Base!

Prepare to transform your coffee table with sturdy legs and expert finishing techniques in this comprehensive guide.

Published

on

By

building sturdy coffee table

To craft sturdy coffee table legs, start by sanding pine for a smooth surface. Opt for gel stain to achieve a sleek, professional finish. Smooth tabletops with coarse, then fine sandpaper before sealing. Use foam brush for even sealant application. Strengthen legs with biscuit joinery and apply polyurethane coats. Employ pocket screws strategically for a strong base. Add decorative hardware to personalize your table. Mastering these steps guarantees a robust base for your coffee table.

Key Takeaways

  • Use biscuit joinery with beech wood biscuits for strength.
  • Incorporate pocket screws strategically for sturdy leg attachment.
  • Sand legs for smooth finish before assembly.
  • Secure legs with clamps for precise screwing.
  • Ensure proper alignment for a stable coffee table base.

Pine Leg Preparation

Prepare the pine legs by sanding them to create a smooth surface for applying the gel stain. Since we've got repurposed pine for the coffee table legs, sanding is important to make sure the stain adheres well and the finish looks professional.

Once the legs are sanded, it's time to move on to the gel staining process.

The repurposed pine provides a sturdy and cost-effective base for the coffee table legs. By sanding them down, you'll create a clean canvas for the gel stain application. This step is necessary to achieve a sleek black finish that enhances the overall look of the legs.

After sanding, the gel stain should be evenly applied using a brush or rag. Make sure to coat the legs thoroughly to maintain a consistent color. Allow the stain to sit for 5-10 minutes before wiping off any excess for a smooth and flawless finish.

These prepared pine legs are designed to complement the tabletop, adding a modern touch to your coffee table project.

Advertisement

Gel Staining Technique

wood furniture makeover method

For achieving a rich and uniform color on your wooden coffee table legs, gel staining is a highly effective technique. Gel staining allows for a more even finish compared to traditional liquid stains as it sits on the wood's surface. By using a brush or rag to apply the gel stain, you gain better control and coverage over the legs. To achieve the desired color intensity, let the gel stain sit for a few minutes before wiping off the excess. This technique can result in a professional-looking black finish that enhances the overall appearance of your coffee table.

Gel Staining Technique
Advantages Application Tips
– Provides even color finish – Use a brush or rag for control
– Sits on wood surface – Let stain sit for a few minutes
– Enhances overall appearance – Wipe off excess for intensity

Tabletop Sanding Process

refining wood surfaces smoothly

To ensure a smooth and even surface for staining and sealing, start the tabletop sanding process with coarse sandpaper to eliminate any existing finish or imperfections. Begin by sanding the tabletop thoroughly, paying close attention to the edges and corners to make sure they're free of rough spots.

As you progress, switch to finer grit sandpaper to achieve the desired smoothness for the final finish. Remember that proper sanding is essential for achieving a professional and polished look on the tabletop of your coffee table.

After sanding, make sure to eliminate any dust or debris from the tabletop before proceeding to apply a sealant to protect the wood. This step is vital to ensure the sealant adheres properly and provides long-lasting protection for your tabletop.

Sealant Application Method

precise sealant application process

Using a foam brush, evenly apply the sealant on the bottom surface of the tabletop to guarantee complete protection against moisture and stains. Ensure that every inch of the wood is covered to create a barrier that shields it from potential damage.

Let the sealant dry thoroughly before proceeding with the next steps to ensure its effectiveness. If you feel like an extra layer of protection is needed, don't hesitate to apply a second coat of sealant for added durability.

Markdown List to Evoke Emotion:

  1. Feel the satisfaction of knowing your hard work is safeguarded against spills and wear.
  2. Embrace the peace of mind that comes with protecting your coffee table from moisture damage.
  3. Experience the sense of accomplishment as you see the beautiful finish that the sealant provides.

Leg Joinery With Biscuits

strong precise biscuit joinery

How can biscuit joinery enhance the strength and alignment of your coffee table legs?

Biscuit joinery is a fantastic technique that can greatly improve the durability and stability of your woodworking projects, including your coffee table legs. By using small, oval-shaped wooden biscuits and corresponding slots, you can ensure that the legs aren't only aligned correctly but also reinforced with additional strength when glued together.

Advertisement

The specialized tool known as a biscuit joiner, or plate joiner, is essential for cutting precise slots to accommodate the biscuits in the wood pieces. These biscuits, typically made of compressed beech wood, expand when they come into contact with glue, forming a tight and secure bond in the joint.

This method is widely employed in furniture making due to its ability to create robust and nearly invisible joints in tabletops, cabinets, and various woodworking projects.

Polyurethane Coating Steps

applying protective coating process

Now, it's time to focus on the essential steps of sanding between coats and buffing with paste wax for a flawless polyurethane finish on your coffee table.

Sanding will guarantee a smooth application, while buffing with paste wax will enhance the protective shine.

Remember to follow these steps diligently for a durable and attractive tabletop coating.

Sanding Between Coats

To achieve a smooth and even finish on your coffee table legs, sanding between coats of polyurethane is necessary for removing imperfections and guaranteeing better adhesion of subsequent layers. Here's why this step is vital:

Advertisement
  1. Smooth Perfection: Sanding between coats using a fine-grit sandpaper, like 220 grit, helps eliminate any rough spots or imperfections, resulting in a flawless surface for your coffee table legs.
  2. Enhanced Durability: By sanding between coats, you allow the subsequent layers of polyurethane to adhere better to the surface. This enhances the durability and longevity of the finish, making your coffee table legs more resistant to wear and tear.
  3. Professional Finish: The sanding process not only removes any dust particles or drips but also guarantees a consistent sheen and texture across the legs. This attention to detail translates into a professional-looking final product that you can be proud to showcase in your home.

Buffing With Paste Wax

After applying three coats of polyurethane, enhance the finish of your coffee table legs by buffing with paste wax for added shine and protection. Using a clean, soft cloth, apply a thin layer of paste wax in a circular motion over the polyurethane-coated surface.

Let the paste wax dry for a few minutes before buffing with another clean cloth to achieve a smooth, lustrous finish. Buffing with paste wax not only provides an extra layer of protection but also helps to highlight the natural beauty of the wood grain.

This final step adds a professional touch to your coffee table legs, ensuring a durable and attractive finish that will stand the test of time. By incorporating paste wax into your finishing process, you aren't only protecting your hard work but also elevating the overall aesthetic appeal of your DIY coffee table.

Pocket Screw Assembly

compact fastening method used

You can enjoy the benefits of using pocket screws for assembling your coffee table legs. These fasteners provide a strong and secure connection, ensuring your table is sturdy and durable.

Follow some key assembly tips to make sure your pocket screw joints are effectively created.

Pocket Screw Benefits

Pocket screws offer a reliable and discreet method for creating strong joints when securing coffee table legs to the tabletop. The benefits of using pocket screws for building your coffee table legs are numerous:

  1. Strength: Pocket screws provide excellent holding power and stability, ensuring that your coffee table has a sturdy base that can withstand daily use without wobbling or loosening joints.
  2. Convenience: The easy disassembly and reassembly facilitated by pocket screws make it convenient to transport or move your coffee table when needed, allowing for hassle-free maintenance.
  3. Professional Finish: The angled design of pocket screws enables you to secure the legs at precise angles, resulting in a polished and professional appearance without visible fasteners detracting from the overall aesthetic.

Assembly Tips

For a strong and stable coffee table base, ensure strategic placement of the pocket screws when attaching the legs to the tabletop.

To achieve this, pre-drill pilot holes to prevent splitting and verify accurate screw placement. Use clamps to secure the legs in position while driving in the pocket screws, ensuring a precise and snug fit that enhances stability.

Advertisement

When tightening the pocket screws, be thorough to prevent any potential wobbling or instability in the coffee table structure.

Final Coffee Table Touches

adding decorative items carefully

The final touches on the coffee table included adding decorative hardware to enhance its overall appearance. This step not only adds a touch of elegance but also provides a functional element to the piece.

Here are three key elements that will elevate the look and feel of your coffee table:

  1. Choose eye-catching knobs or pulls: Opt for hardware that complements the style of your coffee table. Whether you prefer sleek modern handles or vintage-inspired knobs, the right choice can tie the whole look together.
  2. Consider metal accents: Adding metal corner brackets or decorative accents can give your coffee table an industrial edge or a touch of glamour, depending on the finish you choose.
  3. Personalize with a custom engraving: Make your coffee table truly unique by adding a custom engraving or plaque. Whether it's a meaningful quote, your family name, or a special date, this personal touch will make your table one of a kind.

Frequently Asked Questions

How Do You Stabilize Coffee Table Legs?

To stabilize coffee table legs, make sure they're cut evenly and have a flat surface. Add cross bracing or corner brackets for support. Use hardwood for durability. Install adjustable feet for uneven floors. Reinforce with blocks or stretchers between legs.

How to Make Stable Table Legs?

To make stable table legs, choose sturdy wood like pine or oak. Use joinery techniques like biscuits or mortise and tenon joints. Apply plenty of wood glue for solid adhesion. Guarantee precise alignment when attaching legs for a sturdy base.

What Table Legs Are Most Stable?

Looking for stability in table legs? Tapered legs offer a modern flair and sturdiness. Chunky legs are your go-to for heavy tabletops. Metal hairpin legs scream stability with a sleek look. X-shaped legs distribute weight evenly.

How to Secure Legs to Tabletop?

Align and space the legs correctly before using a drill to create pilot holes for pocket screws. Tighten the screws firmly to prevent wobbling and guarantee stability. Confirm the legs are securely attached to the tabletop.

Advertisement

Conclusion

Now that you've built sturdy coffee table legs, you're one step closer to enjoying a beautiful piece of furniture in your home.

Did you know that on average, Americans spend over 4 hours a day sitting at a table?

With your new coffee table, you'll have a strong and stylish place to gather with family and friends for years to come.

Keep up the great work and enjoy your handcrafted creation!

Advertisement
Continue Reading

Tips and Tricks

Creative Reuse: How to Build a Coffee Table Out of Pallets!

Craft a stunning coffee table from pallets in this guide, starting with disassembly and assembly tips – a must-read for DIY enthusiasts!

Published

on

By

repurposing pallets for furniture

To build a coffee table out of pallets, start by carefully disassembling and preparing the wood. Trim and gather pieces for a sturdy base, then assemble using a brad nailer for efficiency. Finish the table top by skirting edges and experimenting with different treatments for a personalized touch. Create and attach sturdy legs using 4×4 wood pieces and secure them to prevent wobbling. For the final assembly, evaluate balance and apply a clear coat for protection. You can further customize with metal components for an industrial-rustic look. Discover more ways to enhance your coffee table creation!

Key Takeaways

  • Disassemble pallets carefully, trim wood, and gather sturdy pieces for the base.
  • Skirt edges for a polished look, sand thoroughly, and apply desired finishes.
  • Use 4×4 wood for stable legs, torch for rustic look, and secure attachment.
  • Secure legs with industrial-style connectors, evaluate balance, and apply clear coat.
  • Experiment with staining, painting, or waxing finishes for personalization.

Disassembling the Pallets

To start building your coffee table out of pallets, make sure to take the first step of carefully separating the pallets from the top boards by prying them apart. This process requires precision to avoid damaging the wood.

Once you have successfully disassembled the pallets, the next step is to remove any nails from the top pieces. Using a hammer or nail puller will help prevent any wood damage during this step.

After separating the pallets and removing the nails, gather some scrap 2×4 pieces to create a sturdy base for your coffee table. Utilizing a brad nailer will make the assembly of the disassembled pallet pieces more efficient.

Remember to trim any excess wood from the pallets using a circular saw to achieve the desired dimensions for your table.

Finishing the Top

completing the final touches

Skirt the edges of the pallet top with remaining pieces to give it a polished and finished appearance. This step adds a touch of refinement to your coffee table project. Once the edges are neatly covered, you can consider torching the wood to achieve a rustic look and enhance the texture.

Sand the surface of the pallet top thoroughly to guarantee a smooth finish before moving on to any additional treatments. For those aiming for a deeper wood grain effect, burning the wood with a torch can enhance its visual appeal. Conversely, if you prefer a darker, more polished finish, using an orbital sander on the pallet top can help achieve this look.

Advertisement

These techniques provide different aesthetic options, allowing you to customize your coffee table to fit your style preferences. Experiment with these finishing touches to create a unique and personalized piece that will be a conversation starter in your living space.

Creating the Legs

building sturdy table legs

Consider using sturdy 4×4 pieces of wood to create the legs for your pallet coffee table, providing essential stability and support. Cut the legs to your desired height, typically ranging from 18 to 20 inches, ensuring the table is at a comfortable level. To add a textured and rustic look that complements the design, you might want to torch the legs. Securely attach the legs to the table structure, making sure they are level and won't wobble or shift. For an industrial flair, think about incorporating industrial-style fasteners into the leg design to enhance the overall aesthetic of the coffee table.

Creating the Legs Tips Description
Use 4×4 wood pieces Provides stability and support for the table.
Cut legs to 18-20 inches Ensures the table is at a comfortable height.
Torch the legs for a rustic look Adds texture and complements the table's design.

Final Assembly

innovative manufacturing techniques

Fasten the firmly attached 4×4 legs to the table structure with industrial-style connectors to secure stability and balance in the final assembly of your pallet coffee table. Make certain the legs are securely attached to prevent any wobbling or instability. Once the legs are in place, step back and evaluate the overall balance of your creation to verify it sits level on the floor.

After fixing the legs, apply a clear coat to the coffee table. This not only shields the wood from wear and tear but also provides a shiny finish that enhances the natural wood grain. Take your time to evenly cover the entire surface, allowing the wood's beauty to radiate.

To achieve an industrial and rustic look, the pairing of pallet wood with metal components is essential. Embrace the difference between the rough-hewn wood and the smooth metal to add character to your piece. Appreciate the unique and handmade aspect of your coffee table design by showcasing it proudly in your home decor.

Additional Tips

useful travel advice tips

Experiment with various finishes such as staining, painting, or waxing to achieve the desired appearance for your pallet coffee table. These finishes not only enhance the look but also provide protection against wear and tear.

Personalize your design by including unique elements like metal accents, glass inserts, or custom engravings to add character and make the table uniquely yours.

When putting together your coffee table, consider alternative methods like using wood glue, screws, or brackets for added stability and durability. These choices guarantee that your table can withstand daily use and remain in excellent condition for years to come.

Advertisement

Embrace the creativity and satisfaction that come with crafting furniture from pallets; it's a rewarding DIY project that showcases your skills and style. Share your progress and insights with others, either online or in person, to inspire fellow DIY enthusiasts to explore the world of pallet furniture. Your experiences can ignite creativity and motivate others to engage in their own upcycling adventures.

Tools and Materials Needed

tools and materials list

Gather the necessary tools and materials to begin constructing your pallet coffee table. You will need a circular saw, brad nailer, orbital sander, and torch. For materials, gather pallets, scrap 2×4 wood pieces, 4×4 wood for the legs, clear coat finish, and industrial-style fasteners.

Tools:

  • Circular Saw: Essential for cutting and shaping the pallet wood.
  • Brad Nailer: Perfect for securely fastening the pieces together.
  • Orbital Sander: Ideal for smoothing out rough edges and surfaces.
  • Torch: Used to add a textured finish to the 4×4 leg pieces.

Materials:

  • Pallets
  • Scrap 2×4 wood pieces
  • 4×4 wood for the legs
  • Clear coat finish
  • Industrial-style fasteners

These tools and materials will help you repurpose pallets into a stylish coffee table that combines an industrial look with rustic charm. Prepare your workspace with these items to begin the creative process.

Safety Precautions

safety first always prepared

Make sure to wear safety goggles and gloves when handling tools and materials for your pallet coffee table project.

Confirm your workspace is well-ventilated, especially when using heat sources like torches.

Keeping your work area clean and organized is vital to prevent accidents and injuries.

Safety Gear Essentials

Make sure proper safety gear essentials like goggles, ear protection, dust mask, first aid kit, and gloves are worn to safeguard yourself during the construction of the pallet coffee table.

Advertisement
  • Safety Goggles: Protect your eyes from flying debris while using tools.
  • Ear Protection: Prevent damage to your hearing from loud power tools.
  • Dust Mask: Avoid inhaling sawdust and wood particles that can irritate your respiratory system.
  • First Aid Kit: Keep it handy in case of minor injuries or accidents during the building process.
  • Gloves: Protect your hands from splinters, cuts, and blisters while handling rough materials.

When working on your pallet coffee table project, make sure you have these safety essentials on hand and properly worn. Safety gear is essential to prevent accidents and injuries, making your DIY experience safer and more enjoyable.

Workspace Preparations

Before starting work on your pallet coffee table project, ensure your workspace is prepared with necessary safety precautions to prevent accidents and promote a safe DIY experience.

Clear the area of clutter and debris to avoid tripping hazards, especially when using power tools.

Adequate ventilation is essential to disperse any fumes that may arise during the torching process.

Don the appropriate safety gear, including safety goggles, gloves, and a mask, to shield yourself from splinters, dust, and fumes.

Have a fire extinguisher within reach in case of emergencies during torching.

Advertisement

Take time to familiarize yourself with the operation and safety guidelines of all tools and equipment you'll be using in the workspace.

Frequently Asked Questions

Can You Make a Table From Pallets?

You can definitely make a table from pallets. By disassembling them and using the wood for the top and base, along with 4×4 pieces for legs, you can create a cost-effective and eco-friendly DIY project.

How Do You Make Wooden Pallets Usable?

To make wooden pallets usable, separate them, remove nails, and gather wood for repurposing. Use a brad nailer for assembly, a circular saw for trimming, and finish by sanding. Torch for a rustic look, secure legs, level them, and add a clear coat.

Can You Reuse Pallet Wood?

Sure, you can totally reuse pallet wood! Just grab those overlooked pallets and get creative. Clean, sand, treat them for safety, and voila! Transform them into unique furniture pieces. Embrace the DIY spirit!

How Do You Make Stuff Out of Old Pallets?

To make stuff out of old pallets, disassemble them, gather materials, finish the top and create legs, assemble securely, and add protective coat. Experiment with finishes, personalize the design, enjoy the process, and share your results for a unique creation.

Advertisement

Conclusion

Now that you've taken the time to repurpose those old pallets into a stylish coffee table, you've truly turned trash into treasure. By thinking creatively and putting in a little effort, you've transformed something ordinary into something extraordinary.

Keep up the good work and continue to see the potential in everyday items – you never know what masterpiece you might create next!

Continue Reading

Tips and Tricks

Drawers for Days: How to Build a Coffee Table With Drawers!

Are you ready to add stylish storage to your living room?

Published

on

By

coffee table with drawers

Ready to transform your space? Build a coffee table with drawers using durable knotty alder wood, screws, and a Kreg Jig. Add drawer slides for smooth operation. Attach legs, backboard, and drawer boxes in your construction steps. Consider finishing touches like wood filler, paint, or decorative drawer pulls. Share your creation for inspiration. For optimized space, drill and attach the shelf securely. Install aprons for structure, rip plywood for boxes, and securely attach drawer fronts. Incorporating these steps will bring your coffee table with drawers to life!

Key Takeaways

  • Utilize 4/4 and 6/4 knotty alder wood for durability and a custom look.
  • Employ a Kreg Jig with pocket hole screws for precise assembly.
  • Ensure smooth operation with drawer slides for easy access.
  • Use wood filler, sandpaper, and finishing supplies for a polished finish.
  • Share your project on social media to inspire others with your creation.

Materials and Tools

Gather the necessary materials and tools to start building your DIY coffee table with drawers. For the table, consider using 4/4 and 6/4 knotty alder wood for durability and a custom look. You'll need wood screws and a Kreg Jig with pocket hole screws for precise assembly. To ensure smooth operation, include drawer slides in your list of materials.

Make sure to have a thickness planer on hand to mill the wood to a uniform 3/4 thickness. When preparing the wood, cut the panel pieces slightly longer than needed to allow for squaring. Additionally, have wood filler, sandpaper, and finishing supplies ready to give your coffee table a polished appearance.

To add both functionality and style, consider incorporating drawer pulls into your design. By having all the necessary materials and tools ready, you can efficiently proceed with constructing your coffee table with drawers.

Construction Steps

building a sturdy foundation

Attach the legs to the sides of the coffee table to provide stability and support as you begin the construction process.

Next, install the backboard between the back legs to create a solid framework for your coffee table.

Construct the large and small drawer boxes, ensuring they fit snugly and smoothly.

Advertisement

Once the drawer boxes are ready, install the drawer fronts, making sure to leave appropriate gaps for easy front opening and closing.

Finally, secure the coffee table top to the base to complete the construction process.

  • Embrace the satisfaction of seeing your coffee table take shape with each step.
  • Feel the excitement of creating functional and stylish storage solutions with the drawer boxes.
  • Experience the sense of accomplishment as you attach the final piece, the coffee table top, bringing your project to completion.

Optional Finishing

customizable project completion choices

Consider enhancing the aesthetic appeal and durability of your DIY coffee table with drawers through optional finishing steps.

Start by using a Kreg Jig and pocket hole screws for assembly, ensuring a sturdy construction.

Before sanding the coffee table, fill any visible holes with wood filler to achieve a seamless look.

Once the surface is smooth, apply finishing supplies like paint, stain, or sealer to give your coffee table a polished finish that suits your style.

Advertisement

Installing decorative drawer pulls can add a personal touch and elevate the overall design of the piece.

Don't forget to share your finished project on social media to inspire others in their DIY endeavors.

These optional finishing techniques won't only enhance the appearance of your coffee table but also increase its longevity, making it a standout piece in your living space.

Building Components

components in construction work

To begin constructing the coffee table with drawers, it is important to glue the edges of the boards for the side panels and shelf before drilling pocket holes for assembly. This step guarantees a sturdy foundation for the coffee table with storage.

Building Components:

  • Drawer Box: Construct robust drawer boxes using pocket screws for durability.
  • Side Panels: Attach side panels securely with glue and pocket screws to preserve structural integrity.
  • Shelf Assembly: Drill pocket holes for the shelf assembly to offer ample storage space.

Installation Process

smooth software installation process

For a smooth assembly of the coffee table with drawers, start by drilling pocket holes in the shelf ends and securely attaching it using pocket screws to optimize storage space. Mark the positions for shelf installation and glue and clamp the shelf in place during the installation process. Additionally, install aprons at the base of the table to reinforce its structural integrity. When working on the drawer construction, remember to rip plywood for the drawer boxes and assemble them using pocket screws for functionality. Ultimately, make sure to securely attach the drawer fronts with screws and install the drawer slides and boxes for easy access to the storage space.

Installation Process Steps Tips
Shelves Drill pocket holes Maximize storage space
Aprons Attach at the base Enhance structural integrity
Drawer Construction Assemble with pocket screws Ensure functionality

Frequently Asked Questions

Which Way Do You Face a Coffee Table With Drawers?

When designing a coffee table with drawers, face them towards you for easy access to essentials like remotes and magazines. Guarantee the drawers align with your seating arrangement and complement the room's layout.

Advertisement

How Do I Keep My Coffee Table Organized?

To keep your coffee table organized, use dividers or trays to separate items, label or color-code drawers for easy access, and declutter regularly. By staying on top of organization, you can create a neat and functional space for relaxation.

How to Set up a Coffee Table?

So, you're setting up a coffee table? Position it centrally, guarantee stability, and add coasters for protection. Decorate with candles, books, or a plant. Use drawers for remote controls, magazines, and organization. Enjoy your cozy space!

Conclusion

Now you have a beautiful coffee table with drawers that won't only add functionality to your space but also provide extra storage for all your everyday essentials.

It's like having a trusted friend by your side, always there to help and support you whenever you need it.

Enjoy your new DIY creation and revel in the satisfaction of a job well done!

Advertisement
Continue Reading
Advertisement

Affiliate disclaimer

As an affiliate, we may earn a commission from qualifying purchases. We get commissions for purchases made through links on this website from Amazon and other third parties.

Advertisement

Vetted

Tanpopo Konditorei Café Munich Tanpopo Konditorei Café Munich
Vetted3 weeks ago

Indulge in Delights at Tanpopo Konditorei Café Munich

Savor the exquisite pastries and serene ambiance at Tanpopo Konditorei Café Munich, your go-to spot for a sweet retreat in...

Vetted3 weeks ago

Here’s a new version of the review for “The Creative Spark: Unleashing Your Inner Artist”:

Book Review: “The Creative Spark: Unleashing Your Inner Artist” Illuminating the Path to Creative Awakening Manifestation Journal – Goal &...

top shower scrubbers 2024 top shower scrubbers 2024
Vetted2 months ago

15 Best Shower Scrubbers to Make Cleaning a Breeze in 2024

Discover the top 15 shower scrubbers of 2024 that promise effortless cleaning—find out which one will transform your scrubbing experience!

top storm doors 2024 top storm doors 2024
Vetted2 months ago

The 15 Best Storm Doors of 2024 – Enhance Your Home's Curb Appeal and Protection

Optimize your home's curb appeal and security with the 15 best storm doors of 2024—discover the unique features that could...

stylish outdoor dining sets stylish outdoor dining sets
Vetted2 months ago

15 Best Outdoor Dining Sets for Stylish Al Fresco Dining in 2024

Browse our curated list of the 15 best outdoor dining sets for stylish al fresco dining in 2024, and discover...

top cordless lawn mowers top cordless lawn mowers
Vetted2 months ago

15 Best Cordless Electric Lawn Mowers of 2024 – Power and Convenience Combined

Harness the power of convenience with the 15 best cordless electric lawn mowers of 2024—discover which one will revolutionize your...

top stackable washer dryers top stackable washer dryers
Vetted2 months ago

15 Best Stackable Washer Dryers of 2024 – Space-Saving Solutions for Your Laundry Room

Get ready to discover the 15 best stackable washer dryers of 2024 that will transform your laundry room into a...

ultimate comfort chair massagers ultimate comfort chair massagers
Vetted2 months ago

15 Best Back Massagers for Your Chair: Ultimate Comfort and Relief

Have you been searching for the perfect back massager to elevate your comfort? Discover the 15 best options that promise...

healthier caffeine free mushroom coffees healthier caffeine free mushroom coffees
Vetted2 months ago

14 Best Caffeine-Free Mushroom Coffees for a Healthier Brew

Mushroom coffees offer a healthier brew alternative—discover the 14 best caffeine-free options that might just transform your morning routine!

top bathroom fans 2024 top bathroom fans 2024
Vetted2 months ago

15 Best Bathroom Fans of 2024 – Quiet, Efficient, and Stylish Options

You won't believe the stylish and efficient bathroom fans of 2024 that promise quiet operation and enhanced ventilation—discover your perfect...

adaptogenic mushroom coffee benefits adaptogenic mushroom coffee benefits
Vetted2 months ago

15 Best Adaptogenic Mushroom Coffees to Boost Your Wellness Routine

The 15 best adaptogenic mushroom coffees promise to elevate your wellness routine—discover how these blends can transform your health and...

mushroom coffee pods selection mushroom coffee pods selection
Vetted2 months ago

15 Best Mushroom Coffee Pods to Boost Your Morning Brew

Uncover the top 15 mushroom coffee pods that can transform your morning routine and unleash a new level of energy...

Advertisement

Trending