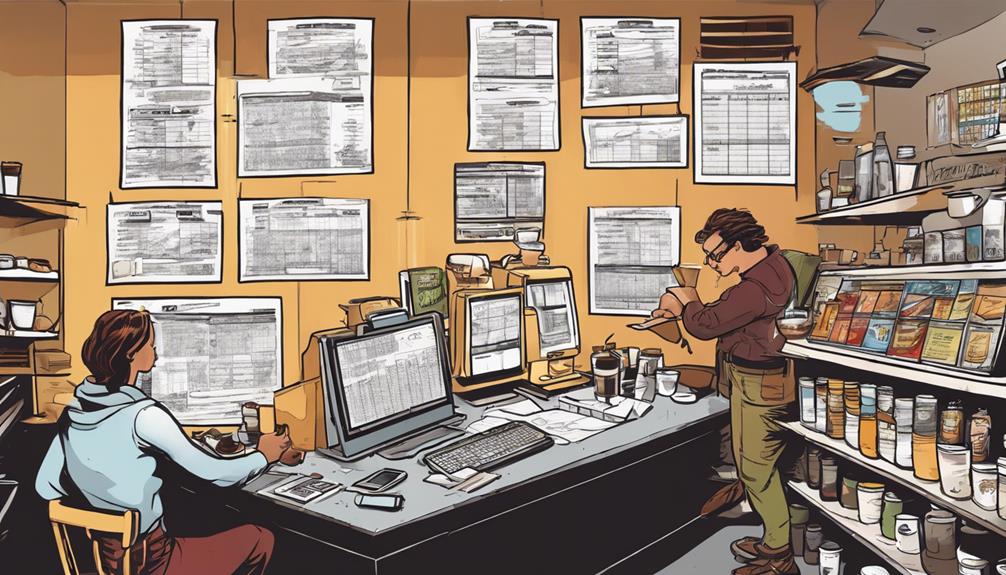
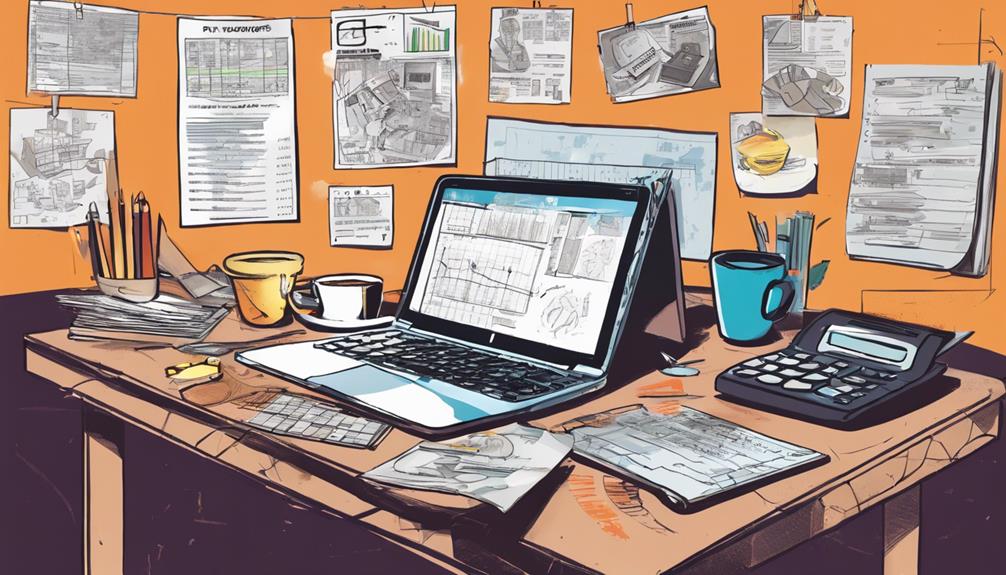
Connect with us

Tips and Tricks

Financial Plan: How to Budget for Opening a Coffee Shop!

Foster success with a solid financial plan for opening a coffee shop, ensuring strategic budgeting and cost-effective strategies for long-term sustainability.

Published

on

coffee shop budgeting guide

When budgeting for your coffee shop, identify startup costs first. Consider equipment, real estate, and operational expenses. Develop a detailed budget and track expenses accurately. Allocate funds strategically, prioritizing essential costs like marketing. Don't forget to set aside an emergency fund. Economical strategies like starting small or using shared spaces can help. Separate personal and business finances for clarity. Prepare for cost evolution with a contingency plan. Understanding these financial aspects is vital for success!

Key Takeaways

  • Identify initial investment needs based on cost breakdown.
  • Allocate funds strategically for equipment, real estate, and working capital.
  • Prioritize essential costs and marketing expenses.
  • Separate personal and business finances for clarity.
  • Prepare for budget evolution with contingency planning.

Coffee Shop Budget Essentials

When budgeting for opening a coffee shop, you must carefully consider the important expenses that will impact your startup costs. Coffee shop equipment, such as espresso machines, grinders, and brewing equipment, can be a significant initial investment.

Real estate expenses, including lease or purchase costs for your shop's location, are key to factor into your budget. Working capital is crucial for covering operational expenses like rent, utilities, and employee wages until your business becomes profitable.

Staffing and training costs for baristas and other employees are necessary for providing excellent customer service.

Budgeting and financial planning are essential to ensuring you have enough funds to cover all startup costs and prevent cash flow issues down the line. It's vital to have a clear understanding of operational expenses such as supplies, marketing, and maintenance, to avoid financial challenges post-opening.

Seeking advice from professionals in the coffee industry, like Reverie Coffee Roasters, can provide valuable insights for successful budgeting and financial management.

Advertisement

Understanding Startup Costs

analyzing financial aspects thoroughly

Understanding the startup costs for opening a coffee shop is important for effective financial planning and budgeting. When creating your Coffee Shop Budget, it's vital to take into account the initial investment required to cover costs of opening, such as equipment, permits, and initial inventory. These costs can vary from $20,000 to $400,000 depending on various factors.

Additionally, operational costs, including rent, utilities, insurance, and maintenance, should be factored into your budget around monthly expenses that can impact your budget significantly. Renting a space can vary from $3,500 to $12,000 monthly, while purchasing a property may cost between $150,000 to $700,000. Marketing expenses are also important to take into account as they can have a significant impact on the total startup costs.

Lastly, it's crucial to allocate funds for creating a contingency fund to handle unexpected emergencies that may arise during the setup phase and ongoing operations of your coffee shop.

Developing a Budget Proposal

budget proposal development process

Now, let's focus on developing a budget proposal for your coffee shop.

You need to strategize how to allocate your budget effectively, track expenses diligently, and plan for flexibility in your budget.

Budget Allocation Strategy

To develop a budget proposal for your coffee shop, start by clearly outlining all expenses associated with your business concept. Here is a strategic budget allocation plan to guide you through this process:

  1. Prioritize Essential Costs:

Allocate a significant portion of your budget to critical expenses such as rent, utilities, equipment, and initial inventory to ensure smooth operations from the start.

  1. Invest in Quality Coffee:

Dedicate a portion of your budget to sourcing high-caliber coffee beans and other supplies to attract and retain customers with exceptional products.

  1. Marketing and Branding:

Allocate funds for marketing strategies and branding efforts to create awareness and establish a strong presence in the competitive coffee shop market.

  1. Employee Training and Development:

Set aside a budget for training programs and ongoing skill development for your staff to deliver exceptional customer service and maintain a positive work environment.

Expense Tracking Methods

Consider implementing a detailed expense tracking system using a spreadsheet to effectively categorize all costs associated with opening your coffee shop.

Advertisement

By breaking down expenses into categories such as equipment, rent, utilities, and permits, you can guarantee accurate tracking of all financial outflows.

This method will enable you to create a thorough budget proposal that reflects both tracked expenses and anticipated costs.

Regularly updating this proposal as new expenses arise or estimates change is vital to maintaining financial discipline and effective cost management.

Keep a close eye on budget variances to identify any deviations from the planned expenditure, allowing you to make necessary adjustments promptly.

With accurate tracking and categorization of expenses through a detailed spreadsheet, you can establish a solid foundation for managing your coffee shop's finances efficiently.

Advertisement

Budget Flexibility Planning

Develop a detailed budget proposal for your coffee shop by clearly outlining all expenses and determining the total business concept cost. Utilize a thorough coffee shop business plan to organize and adjust your budget as you progress.

Here are four key points to keep in mind when planning your budget flexibility:

  1. Be transparent about all costs associated with starting a coffee shop to guarantee accuracy in your budget proposal.
  2. Stay faithful to your estimated costs and sales projections to avoid financial surprises down the road.
  3. Allocate funds for categories such as legal fees, equipment, utilities, and inventory to cover all essential expenses.
  4. Take into account the time required to open your coffee shop and plan accordingly for a smooth financial progression.

Managing Financial Resources

effective financial resource management

When managing financial resources for opening a coffee shop, prioritize allocating funds strategically to cover equipment, seating, ambiance, food equipment, and operational essentials. To give you a clearer picture of where your budget should be allocated, refer to the table below:

Category Estimated Costs Range Description
Equipment Costs $5,000 – $20,000 Includes espresso machines and quality grinders
Seating and Ambiance $10,000 – $15,000 Enhance customer experience with comfortable seating
Food Equipment $3,000 – $7,000 Essential equipment like ovens and refrigeration

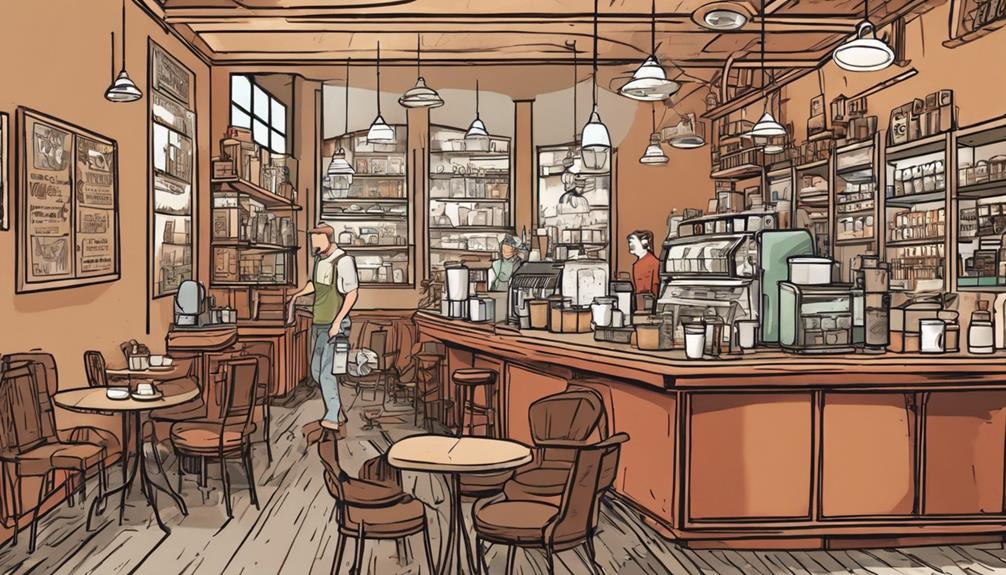
Coffee Shop Equipment Expenses

coffee shop startup costs

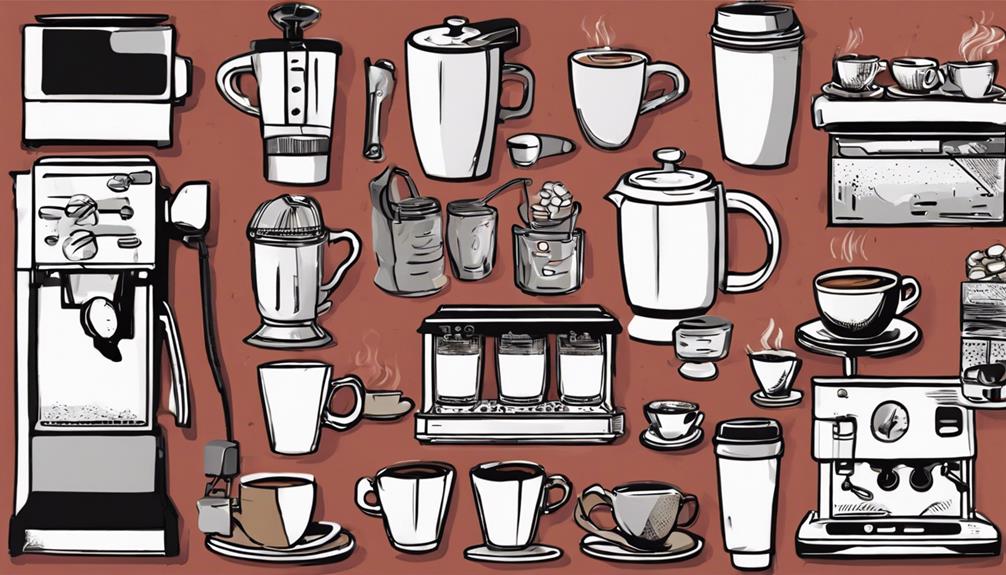
To effectively equip your coffee shop for success, it's important to carefully budget for the necessary equipment expenses, including commercial espresso machines, quality grinders, seating, ambiance enhancements, and essential food equipment.

Here's a breakdown of the costs to ponder:

  1. Commercial Espresso Machine: Budget between $5,000 to $20,000 for a top-quality espresso machine to maintain consistency in your coffee offerings.
  2. Quality Grinders: Allocate $500 to $2,500 for grinders that will assist you in delivering freshly ground coffee to your customers.
  3. Seating and Ambiance: Enhance the customer experience by investing $10,000 to $15,000 in creating a cozy and inviting atmosphere with comfortable seating.
  4. Essential Food Equipment: Set aside $3,000 to $7,000 for convection ovens, refrigeration units, and other necessary equipment to expand your menu offerings.

Remember to also factor in additional equipment like furniture, refrigerators, freezers, and beverage equipment to meet your operational needs effectively.

Pre-Opening Financial Preparation

pre opening financial readiness plan

When preparing financially for your coffee shop's grand opening, it's vital to break down costs meticulously, plan for unexpected expenses, and strategize how to allocate your resources efficiently.

By understanding the essentials of cost breakdown, creating a financial buffer, and implementing a solid resource allocation strategy, you can better navigate the pre-opening financial landscape.

Stay proactive, plan wisely, and be prepared for the financial journey ahead to guarantee a successful coffee shop launch.

Advertisement

Cost Breakdown Essentials

Essential to the pre-opening financial preparation for a coffee shop is a detailed breakdown of costs to guarantee a successful launch. To ensure a smooth coffee shop launch, consider the following cost breakdown essentials:

  1. Cost to Open: Pre-opening expenses for a coffee shop can vary widely, typically ranging from $20,000 to $120,000. It's important to have a clear understanding of the initial investment needed for a successful start.
  2. Inventory Costs: Inventory costs encompass a variety of items such as coffee beans, plates, utensils, and office supplies. Allocating funds for inventory is crucial to have everything in place when opening your coffee shop.
  3. Training Costs: Investing in staff training and additional inventory like cups and sleeves is vital for a well-prepared launch. Properly trained staff can enhance customer experience and operational efficiency.
  4. Merchandise Costs: Including merchandise costs in your financial planning is essential for branding your coffee shop and creating a unique identity in the market. Allocating funds for merchandise can help attract customers and build brand loyalty.

Financial Buffer Planning

Consider allocating a financial cushion of at least 10-20% of your total budget to prepare for unforeseen costs during the pre-opening phase of your coffee shop. This financial safety net is essential for addressing unexpected expenses such as permit delays, equipment malfunctions, or construction setbacks.

By having a financial cushion in place, you can mitigate risks and guarantee that you have enough capital to navigate any financial challenges that may arise before your coffee shop opens. Anticipate the need for extra funds for marketing, training, or other unforeseen expenses to maintain financial stability during this critical phase.

Preparing a financial cushion demonstrates prudent financial planning and helps safeguard the success of your coffee shop. It's a proactive approach that can provide you with peace of mind and a solid foundation as you work towards opening your coffee shop.

Resource Allocation Strategy

Implementing a strategic resource allocation plan is essential for effectively managing pre-opening financial preparations for your coffee shop. When allocating resources, consider the following:

  1. Prioritize Pre-Opening Expenses:

Allocate funds for equipment, permits, and initial inventory based on detailed cost breakdowns to secure a smooth start.

  1. Cover Essential Costs:

Implement a resource allocation strategy to manage construction costs, real estate expenses, and working capital requirements efficiently.

  1. Prepare for the Unexpected:

Set aside a financial buffer to mitigate risks during the pre-opening phase and handle unforeseen expenses effectively.

  1. Invest in Professional Services:

Consider hiring experts for design and construction services to enhance customer experience and operational efficiency, setting a strong foundation for your coffee shop's success.

Marketing and Branding Budgeting

strategic financial planning process

When budgeting for opening a coffee shop, allocating funds for marketing and branding is vital to establishing a strong brand identity and attracting customers.

Marketing and branding costs associated with starting a coffee shop typically range from 3-6% of total sales. This includes expenses for branding such as creating a logo, slogan, and color scheme, as well as branded coffee cups and bags to enhance brand awareness.

Advertisement

In addition to these branding costs, marketing expenses may involve utilizing social media platforms, PR services, and digital advertisements to promote the coffee shop effectively. It's important to invest in these strategies to build an emotional connection with customers through unique product offerings and community engagement.

Ensuring Emergency Funds

maintaining financial safety nets

You must prioritize establishing an emergency fund ranging from $15,000 to $75,000 to safeguard against unforeseen financial challenges.

Regularly assess your financial statements to guarantee the fund's adequacy and accessibility in times of need.

Remember to diversify your menu offerings to maintain steady revenue streams and bolster financial stability.

Emergency Fund Importance

Establishing an adequate emergency fund is essential for guaranteeing the financial resilience of your coffee shop in the face of unpredictable cash flow situations. To emphasize the importance of an emergency fund, consider the following:

  1. Review Financial Statements: Regularly analyzing your financial statements will help you determine the amount needed in your emergency fund.
  2. Diversify Menu Offerings: Expanding your menu offerings can create additional revenue streams, guaranteeing better financial stability during emergencies.
  3. Include Emergency Provisions in Business Plan: Guarantee your business plan includes strategies for obtaining loans or attracting investors to supplement your emergency funds.
  4. Utilize Tailored Financial Plans: Implement easy-to-use financial plans customized for coffee shop models to assure the availability of emergency funds when needed.

Fund Allocation Strategy

To secure the availability of emergency funds for your coffee shop, implementing a clear fund allocation strategy is important. Allocate a dedicated emergency fund ranging from $15,000 to $75,000 to cover unpredictable cash flow situations effectively. Establishing a robust fund allocation strategy guarantees that these emergency funds are readily available when needed.

Regularly reviewing financial statements is vital to assess the adequacy of your emergency fund and maintain business sustainability. By having a clear fund allocation strategy in place, you can mitigate financial risks and handle unexpected expenses that may arise in the coffee shop industry.

Advertisement

Additionally, consider diversifying your revenue streams and menu offerings to enhance financial resilience and secure long-term business success. Remember, a well-thought-out fund allocation strategy is key to safeguarding your coffee shop's financial stability and adapting to unforeseen challenges.

Contingency Planning Essentials

Developing a strong backup plan is crucial to secure the availability of emergency funds for your coffee shop. Here are some key essentials to keep in mind:

  1. Establish an emergency fund: Allocate between $15,000 to $75,000 to handle unpredictable cash flow situations that may arise in the future.
  2. Regularly review financial statements: Keep a close eye on your financial health and make necessary adjustments to guarantee business sustainability.
  3. Diversify menu offerings: Explore new menu items to attract a broader customer base and increase revenue streams.
  4. Develop a detailed business plan: Create a detailed plan outlining your financial projections for the next three years to secure loans or attract potential investors.

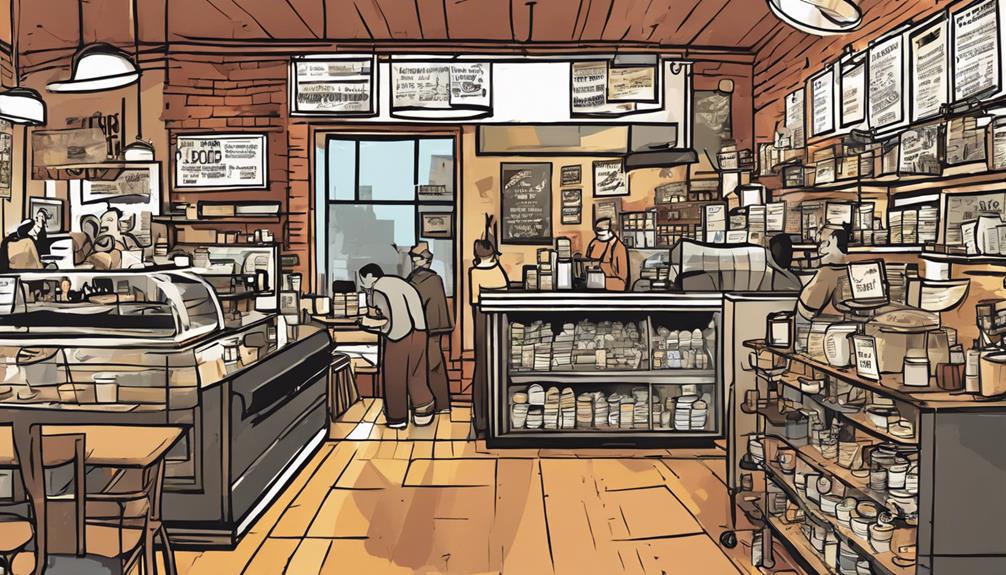
Opening a Coffee Shop Economically

starting a coffee shop

Consider starting small with a coffee kiosk or cart as a cost-effective way to open a coffee shop economically. By opting for budget-friendly equipment, you can reduce initial investment costs. Additionally, exploring shared spaces or pop-up locations can help lower real estate costs and minimize construction expenses.

Implementing efficient design strategies is key to maximizing space utilization and reducing renovation costs. Focus on offering essential menu items to streamline inventory costs and simplify operations. This approach not only helps in keeping your initial expenses under control but also allows you to test the market before committing to a larger investment.

Effective Business Planning

strategic business planning process

Create a detailed business plan outlining all expenses to effectively plan and adjust your budget for your coffee shop venture. To secure financial stability and success, follow these key steps:

  1. Lay out all expenses clearly in your business plan:

By comprehending your budgetary needs upfront, you can make informed decisions and avoid financial pitfalls down the line.

  1. Separate personal and business finances:

Keeping your finances distinct from the start will help you track expenses accurately and maintain financial openness.

  1. Prepare for budget evolution:

Recognize that as your coffee shop concept evolves, so will your expenses. Stay adaptable and be ready to adjust your budget accordingly.

  1. Allocate a financial buffer:

Include a cushion in your budget to cover unexpected costs and emergencies, securing that you have a safety net in place for any unforeseen expenses.

Frequently Asked Questions

How Much Money Should You Have to Open a Coffee Shop?

You should have a budget ranging from $60,000 to $2 million, depending on the type of coffee shop you plan to open. Costs vary widely, so make sure you research thoroughly and plan accordingly.

How Much Does It Cost to Set up a Coffee Shop?

Setting up a coffee shop can cost anywhere from $100,000 to $2 million. Expenses vary based on the type of shop you plan to open, with factors like equipment, pre-opening costs, and marketing contributing to overall expenses.

Advertisement

How Much Does It Cost to Start a Small Coffee Business?

Starting a small coffee business can cost between $20,000 to $400,000. Initial inventory, marketing expenses, rent, equipment, and operational costs play a role. Budget wisely, consider all factors, and plan for potential emergencies in your financial plan.

What Are the Monthly Expenses of a Coffee Shop?

Monthly expenses of a coffee shop vary based on rent, operational costs, maintenance, and marketing. It is important to budget for these factors, including contingency funds. Keep track of expenses to guarantee financial stability and business success.

Conclusion

So, now you know how to budget for opening a coffee shop! Remember, the key is to plan carefully and allocate your resources wisely. When deciding on suppliers and equipment, consider choosing options that are cost-effective but still high quality. Additionally, think about implementing budgetfriendly coffee tips, such as offering daily specials or creating unique promotions to attract customers while keeping costs down. By being mindful of your budget and finding creative ways to save money, you can set your coffee shop up for success from the very beginning.

Don't underestimate the importance of having a solid financial plan in place. By following these steps and staying on top of your budget, you'll be on your way to running a successful coffee shop in no time. Furthermore, having a well-thought-out coffee shop budget planning process will help you allocate funds efficiently and avoid any unnecessary financial strain. It will also allow you to make informed decisions about where to invest in your business, whether it’s in high-quality coffee beans, top-notch equipment, or skilled staff. By prioritizing your spending and tracking your financial progress, you can ensure the long-term success and sustainability of your coffee shop.

Good luck and happy brewing!

Advertisement
Continue Reading
Advertisement

Tips and Tricks

Leg Day: How to Build Coffee Table Legs for a Sturdy Base!

Prepare to transform your coffee table with sturdy legs and expert finishing techniques in this comprehensive guide.

Published

on

By

building sturdy coffee table

To craft sturdy coffee table legs, start by sanding pine for a smooth surface. Opt for gel stain to achieve a sleek, professional finish. Smooth tabletops with coarse, then fine sandpaper before sealing. Use foam brush for even sealant application. Strengthen legs with biscuit joinery and apply polyurethane coats. Employ pocket screws strategically for a strong base. Add decorative hardware to personalize your table. Mastering these steps guarantees a robust base for your coffee table.

Key Takeaways

  • Use biscuit joinery with beech wood biscuits for strength.
  • Incorporate pocket screws strategically for sturdy leg attachment.
  • Sand legs for smooth finish before assembly.
  • Secure legs with clamps for precise screwing.
  • Ensure proper alignment for a stable coffee table base.

Pine Leg Preparation

Prepare the pine legs by sanding them to create a smooth surface for applying the gel stain. Since we've got repurposed pine for the coffee table legs, sanding is important to make sure the stain adheres well and the finish looks professional.

Once the legs are sanded, it's time to move on to the gel staining process.

The repurposed pine provides a sturdy and cost-effective base for the coffee table legs. By sanding them down, you'll create a clean canvas for the gel stain application. This step is necessary to achieve a sleek black finish that enhances the overall look of the legs.

After sanding, the gel stain should be evenly applied using a brush or rag. Make sure to coat the legs thoroughly to maintain a consistent color. Allow the stain to sit for 5-10 minutes before wiping off any excess for a smooth and flawless finish.

These prepared pine legs are designed to complement the tabletop, adding a modern touch to your coffee table project.

Advertisement

Gel Staining Technique

wood furniture makeover method

For achieving a rich and uniform color on your wooden coffee table legs, gel staining is a highly effective technique. Gel staining allows for a more even finish compared to traditional liquid stains as it sits on the wood's surface. By using a brush or rag to apply the gel stain, you gain better control and coverage over the legs. To achieve the desired color intensity, let the gel stain sit for a few minutes before wiping off the excess. This technique can result in a professional-looking black finish that enhances the overall appearance of your coffee table.

Gel Staining Technique
Advantages Application Tips
– Provides even color finish – Use a brush or rag for control
– Sits on wood surface – Let stain sit for a few minutes
– Enhances overall appearance – Wipe off excess for intensity

Tabletop Sanding Process

refining wood surfaces smoothly

To ensure a smooth and even surface for staining and sealing, start the tabletop sanding process with coarse sandpaper to eliminate any existing finish or imperfections. Begin by sanding the tabletop thoroughly, paying close attention to the edges and corners to make sure they're free of rough spots.

As you progress, switch to finer grit sandpaper to achieve the desired smoothness for the final finish. Remember that proper sanding is essential for achieving a professional and polished look on the tabletop of your coffee table.

After sanding, make sure to eliminate any dust or debris from the tabletop before proceeding to apply a sealant to protect the wood. This step is vital to ensure the sealant adheres properly and provides long-lasting protection for your tabletop.

Sealant Application Method

precise sealant application process

Using a foam brush, evenly apply the sealant on the bottom surface of the tabletop to guarantee complete protection against moisture and stains. Ensure that every inch of the wood is covered to create a barrier that shields it from potential damage.

Let the sealant dry thoroughly before proceeding with the next steps to ensure its effectiveness. If you feel like an extra layer of protection is needed, don't hesitate to apply a second coat of sealant for added durability.

Markdown List to Evoke Emotion:

  1. Feel the satisfaction of knowing your hard work is safeguarded against spills and wear.
  2. Embrace the peace of mind that comes with protecting your coffee table from moisture damage.
  3. Experience the sense of accomplishment as you see the beautiful finish that the sealant provides.

Leg Joinery With Biscuits

strong precise biscuit joinery

How can biscuit joinery enhance the strength and alignment of your coffee table legs?

Biscuit joinery is a fantastic technique that can greatly improve the durability and stability of your woodworking projects, including your coffee table legs. By using small, oval-shaped wooden biscuits and corresponding slots, you can ensure that the legs aren't only aligned correctly but also reinforced with additional strength when glued together.

Advertisement

The specialized tool known as a biscuit joiner, or plate joiner, is essential for cutting precise slots to accommodate the biscuits in the wood pieces. These biscuits, typically made of compressed beech wood, expand when they come into contact with glue, forming a tight and secure bond in the joint.

This method is widely employed in furniture making due to its ability to create robust and nearly invisible joints in tabletops, cabinets, and various woodworking projects.

Polyurethane Coating Steps

applying protective coating process

Now, it's time to focus on the essential steps of sanding between coats and buffing with paste wax for a flawless polyurethane finish on your coffee table.

Sanding will guarantee a smooth application, while buffing with paste wax will enhance the protective shine.

Remember to follow these steps diligently for a durable and attractive tabletop coating.

Sanding Between Coats

To achieve a smooth and even finish on your coffee table legs, sanding between coats of polyurethane is necessary for removing imperfections and guaranteeing better adhesion of subsequent layers. Here's why this step is vital:

Advertisement
  1. Smooth Perfection: Sanding between coats using a fine-grit sandpaper, like 220 grit, helps eliminate any rough spots or imperfections, resulting in a flawless surface for your coffee table legs.
  2. Enhanced Durability: By sanding between coats, you allow the subsequent layers of polyurethane to adhere better to the surface. This enhances the durability and longevity of the finish, making your coffee table legs more resistant to wear and tear.
  3. Professional Finish: The sanding process not only removes any dust particles or drips but also guarantees a consistent sheen and texture across the legs. This attention to detail translates into a professional-looking final product that you can be proud to showcase in your home.

Buffing With Paste Wax

After applying three coats of polyurethane, enhance the finish of your coffee table legs by buffing with paste wax for added shine and protection. Using a clean, soft cloth, apply a thin layer of paste wax in a circular motion over the polyurethane-coated surface.

Let the paste wax dry for a few minutes before buffing with another clean cloth to achieve a smooth, lustrous finish. Buffing with paste wax not only provides an extra layer of protection but also helps to highlight the natural beauty of the wood grain.

This final step adds a professional touch to your coffee table legs, ensuring a durable and attractive finish that will stand the test of time. By incorporating paste wax into your finishing process, you aren't only protecting your hard work but also elevating the overall aesthetic appeal of your DIY coffee table.

Pocket Screw Assembly

compact fastening method used

You can enjoy the benefits of using pocket screws for assembling your coffee table legs. These fasteners provide a strong and secure connection, ensuring your table is sturdy and durable.

Follow some key assembly tips to make sure your pocket screw joints are effectively created.

Pocket Screw Benefits

Pocket screws offer a reliable and discreet method for creating strong joints when securing coffee table legs to the tabletop. The benefits of using pocket screws for building your coffee table legs are numerous:

  1. Strength: Pocket screws provide excellent holding power and stability, ensuring that your coffee table has a sturdy base that can withstand daily use without wobbling or loosening joints.
  2. Convenience: The easy disassembly and reassembly facilitated by pocket screws make it convenient to transport or move your coffee table when needed, allowing for hassle-free maintenance.
  3. Professional Finish: The angled design of pocket screws enables you to secure the legs at precise angles, resulting in a polished and professional appearance without visible fasteners detracting from the overall aesthetic.

Assembly Tips

For a strong and stable coffee table base, ensure strategic placement of the pocket screws when attaching the legs to the tabletop.

To achieve this, pre-drill pilot holes to prevent splitting and verify accurate screw placement. Use clamps to secure the legs in position while driving in the pocket screws, ensuring a precise and snug fit that enhances stability.

Advertisement

When tightening the pocket screws, be thorough to prevent any potential wobbling or instability in the coffee table structure.

Final Coffee Table Touches

adding decorative items carefully

The final touches on the coffee table included adding decorative hardware to enhance its overall appearance. This step not only adds a touch of elegance but also provides a functional element to the piece.

Here are three key elements that will elevate the look and feel of your coffee table:

  1. Choose eye-catching knobs or pulls: Opt for hardware that complements the style of your coffee table. Whether you prefer sleek modern handles or vintage-inspired knobs, the right choice can tie the whole look together.
  2. Consider metal accents: Adding metal corner brackets or decorative accents can give your coffee table an industrial edge or a touch of glamour, depending on the finish you choose.
  3. Personalize with a custom engraving: Make your coffee table truly unique by adding a custom engraving or plaque. Whether it's a meaningful quote, your family name, or a special date, this personal touch will make your table one of a kind.

Frequently Asked Questions

How Do You Stabilize Coffee Table Legs?

To stabilize coffee table legs, make sure they're cut evenly and have a flat surface. Add cross bracing or corner brackets for support. Use hardwood for durability. Install adjustable feet for uneven floors. Reinforce with blocks or stretchers between legs.

How to Make Stable Table Legs?

To make stable table legs, choose sturdy wood like pine or oak. Use joinery techniques like biscuits or mortise and tenon joints. Apply plenty of wood glue for solid adhesion. Guarantee precise alignment when attaching legs for a sturdy base.

What Table Legs Are Most Stable?

Looking for stability in table legs? Tapered legs offer a modern flair and sturdiness. Chunky legs are your go-to for heavy tabletops. Metal hairpin legs scream stability with a sleek look. X-shaped legs distribute weight evenly.

How to Secure Legs to Tabletop?

Align and space the legs correctly before using a drill to create pilot holes for pocket screws. Tighten the screws firmly to prevent wobbling and guarantee stability. Confirm the legs are securely attached to the tabletop.

Advertisement

Conclusion

Now that you've built sturdy coffee table legs, you're one step closer to enjoying a beautiful piece of furniture in your home.

Did you know that on average, Americans spend over 4 hours a day sitting at a table?

With your new coffee table, you'll have a strong and stylish place to gather with family and friends for years to come.

Keep up the great work and enjoy your handcrafted creation!

Advertisement
Continue Reading

Tips and Tricks

Creative Reuse: How to Build a Coffee Table Out of Pallets!

Craft a stunning coffee table from pallets in this guide, starting with disassembly and assembly tips – a must-read for DIY enthusiasts!

Published

on

By

repurposing pallets for furniture

To build a coffee table out of pallets, start by carefully disassembling and preparing the wood. Trim and gather pieces for a sturdy base, then assemble using a brad nailer for efficiency. Finish the table top by skirting edges and experimenting with different treatments for a personalized touch. Create and attach sturdy legs using 4×4 wood pieces and secure them to prevent wobbling. For the final assembly, evaluate balance and apply a clear coat for protection. You can further customize with metal components for an industrial-rustic look. Discover more ways to enhance your coffee table creation!

Key Takeaways

  • Disassemble pallets carefully, trim wood, and gather sturdy pieces for the base.
  • Skirt edges for a polished look, sand thoroughly, and apply desired finishes.
  • Use 4×4 wood for stable legs, torch for rustic look, and secure attachment.
  • Secure legs with industrial-style connectors, evaluate balance, and apply clear coat.
  • Experiment with staining, painting, or waxing finishes for personalization.

Disassembling the Pallets

To start building your coffee table out of pallets, make sure to take the first step of carefully separating the pallets from the top boards by prying them apart. This process requires precision to avoid damaging the wood.

Once you have successfully disassembled the pallets, the next step is to remove any nails from the top pieces. Using a hammer or nail puller will help prevent any wood damage during this step.

After separating the pallets and removing the nails, gather some scrap 2×4 pieces to create a sturdy base for your coffee table. Utilizing a brad nailer will make the assembly of the disassembled pallet pieces more efficient.

Remember to trim any excess wood from the pallets using a circular saw to achieve the desired dimensions for your table.

Finishing the Top

completing the final touches

Skirt the edges of the pallet top with remaining pieces to give it a polished and finished appearance. This step adds a touch of refinement to your coffee table project. Once the edges are neatly covered, you can consider torching the wood to achieve a rustic look and enhance the texture.

Sand the surface of the pallet top thoroughly to guarantee a smooth finish before moving on to any additional treatments. For those aiming for a deeper wood grain effect, burning the wood with a torch can enhance its visual appeal. Conversely, if you prefer a darker, more polished finish, using an orbital sander on the pallet top can help achieve this look.

Advertisement

These techniques provide different aesthetic options, allowing you to customize your coffee table to fit your style preferences. Experiment with these finishing touches to create a unique and personalized piece that will be a conversation starter in your living space.

Creating the Legs

building sturdy table legs

Consider using sturdy 4×4 pieces of wood to create the legs for your pallet coffee table, providing essential stability and support. Cut the legs to your desired height, typically ranging from 18 to 20 inches, ensuring the table is at a comfortable level. To add a textured and rustic look that complements the design, you might want to torch the legs. Securely attach the legs to the table structure, making sure they are level and won't wobble or shift. For an industrial flair, think about incorporating industrial-style fasteners into the leg design to enhance the overall aesthetic of the coffee table.

Creating the Legs Tips Description
Use 4×4 wood pieces Provides stability and support for the table.
Cut legs to 18-20 inches Ensures the table is at a comfortable height.
Torch the legs for a rustic look Adds texture and complements the table's design.

Final Assembly

innovative manufacturing techniques

Fasten the firmly attached 4×4 legs to the table structure with industrial-style connectors to secure stability and balance in the final assembly of your pallet coffee table. Make certain the legs are securely attached to prevent any wobbling or instability. Once the legs are in place, step back and evaluate the overall balance of your creation to verify it sits level on the floor.

After fixing the legs, apply a clear coat to the coffee table. This not only shields the wood from wear and tear but also provides a shiny finish that enhances the natural wood grain. Take your time to evenly cover the entire surface, allowing the wood's beauty to radiate.

To achieve an industrial and rustic look, the pairing of pallet wood with metal components is essential. Embrace the difference between the rough-hewn wood and the smooth metal to add character to your piece. Appreciate the unique and handmade aspect of your coffee table design by showcasing it proudly in your home decor.

Additional Tips

useful travel advice tips

Experiment with various finishes such as staining, painting, or waxing to achieve the desired appearance for your pallet coffee table. These finishes not only enhance the look but also provide protection against wear and tear.

Personalize your design by including unique elements like metal accents, glass inserts, or custom engravings to add character and make the table uniquely yours.

When putting together your coffee table, consider alternative methods like using wood glue, screws, or brackets for added stability and durability. These choices guarantee that your table can withstand daily use and remain in excellent condition for years to come.

Advertisement

Embrace the creativity and satisfaction that come with crafting furniture from pallets; it's a rewarding DIY project that showcases your skills and style. Share your progress and insights with others, either online or in person, to inspire fellow DIY enthusiasts to explore the world of pallet furniture. Your experiences can ignite creativity and motivate others to engage in their own upcycling adventures.

Tools and Materials Needed

tools and materials list

Gather the necessary tools and materials to begin constructing your pallet coffee table. You will need a circular saw, brad nailer, orbital sander, and torch. For materials, gather pallets, scrap 2×4 wood pieces, 4×4 wood for the legs, clear coat finish, and industrial-style fasteners.

Tools:

  • Circular Saw: Essential for cutting and shaping the pallet wood.
  • Brad Nailer: Perfect for securely fastening the pieces together.
  • Orbital Sander: Ideal for smoothing out rough edges and surfaces.
  • Torch: Used to add a textured finish to the 4×4 leg pieces.

Materials:

  • Pallets
  • Scrap 2×4 wood pieces
  • 4×4 wood for the legs
  • Clear coat finish
  • Industrial-style fasteners

These tools and materials will help you repurpose pallets into a stylish coffee table that combines an industrial look with rustic charm. Prepare your workspace with these items to begin the creative process.

Safety Precautions

safety first always prepared

Make sure to wear safety goggles and gloves when handling tools and materials for your pallet coffee table project.

Confirm your workspace is well-ventilated, especially when using heat sources like torches.

Keeping your work area clean and organized is vital to prevent accidents and injuries.

Safety Gear Essentials

Make sure proper safety gear essentials like goggles, ear protection, dust mask, first aid kit, and gloves are worn to safeguard yourself during the construction of the pallet coffee table.

Advertisement
  • Safety Goggles: Protect your eyes from flying debris while using tools.
  • Ear Protection: Prevent damage to your hearing from loud power tools.
  • Dust Mask: Avoid inhaling sawdust and wood particles that can irritate your respiratory system.
  • First Aid Kit: Keep it handy in case of minor injuries or accidents during the building process.
  • Gloves: Protect your hands from splinters, cuts, and blisters while handling rough materials.

When working on your pallet coffee table project, make sure you have these safety essentials on hand and properly worn. Safety gear is essential to prevent accidents and injuries, making your DIY experience safer and more enjoyable.

Workspace Preparations

Before starting work on your pallet coffee table project, ensure your workspace is prepared with necessary safety precautions to prevent accidents and promote a safe DIY experience.

Clear the area of clutter and debris to avoid tripping hazards, especially when using power tools.

Adequate ventilation is essential to disperse any fumes that may arise during the torching process.

Don the appropriate safety gear, including safety goggles, gloves, and a mask, to shield yourself from splinters, dust, and fumes.

Have a fire extinguisher within reach in case of emergencies during torching.

Advertisement

Take time to familiarize yourself with the operation and safety guidelines of all tools and equipment you'll be using in the workspace.

Frequently Asked Questions

Can You Make a Table From Pallets?

You can definitely make a table from pallets. By disassembling them and using the wood for the top and base, along with 4×4 pieces for legs, you can create a cost-effective and eco-friendly DIY project.

How Do You Make Wooden Pallets Usable?

To make wooden pallets usable, separate them, remove nails, and gather wood for repurposing. Use a brad nailer for assembly, a circular saw for trimming, and finish by sanding. Torch for a rustic look, secure legs, level them, and add a clear coat.

Can You Reuse Pallet Wood?

Sure, you can totally reuse pallet wood! Just grab those overlooked pallets and get creative. Clean, sand, treat them for safety, and voila! Transform them into unique furniture pieces. Embrace the DIY spirit!

How Do You Make Stuff Out of Old Pallets?

To make stuff out of old pallets, disassemble them, gather materials, finish the top and create legs, assemble securely, and add protective coat. Experiment with finishes, personalize the design, enjoy the process, and share your results for a unique creation.

Advertisement

Conclusion

Now that you've taken the time to repurpose those old pallets into a stylish coffee table, you've truly turned trash into treasure. By thinking creatively and putting in a little effort, you've transformed something ordinary into something extraordinary.

Keep up the good work and continue to see the potential in everyday items – you never know what masterpiece you might create next!

Continue Reading

Tips and Tricks

Drawers for Days: How to Build a Coffee Table With Drawers!

Are you ready to add stylish storage to your living room?

Published

on

By

coffee table with drawers

Ready to transform your space? Build a coffee table with drawers using durable knotty alder wood, screws, and a Kreg Jig. Add drawer slides for smooth operation. Attach legs, backboard, and drawer boxes in your construction steps. Consider finishing touches like wood filler, paint, or decorative drawer pulls. Share your creation for inspiration. For optimized space, drill and attach the shelf securely. Install aprons for structure, rip plywood for boxes, and securely attach drawer fronts. Incorporating these steps will bring your coffee table with drawers to life!

Key Takeaways

  • Utilize 4/4 and 6/4 knotty alder wood for durability and a custom look.
  • Employ a Kreg Jig with pocket hole screws for precise assembly.
  • Ensure smooth operation with drawer slides for easy access.
  • Use wood filler, sandpaper, and finishing supplies for a polished finish.
  • Share your project on social media to inspire others with your creation.

Materials and Tools

Gather the necessary materials and tools to start building your DIY coffee table with drawers. For the table, consider using 4/4 and 6/4 knotty alder wood for durability and a custom look. You'll need wood screws and a Kreg Jig with pocket hole screws for precise assembly. To ensure smooth operation, include drawer slides in your list of materials.

Make sure to have a thickness planer on hand to mill the wood to a uniform 3/4 thickness. When preparing the wood, cut the panel pieces slightly longer than needed to allow for squaring. Additionally, have wood filler, sandpaper, and finishing supplies ready to give your coffee table a polished appearance.

To add both functionality and style, consider incorporating drawer pulls into your design. By having all the necessary materials and tools ready, you can efficiently proceed with constructing your coffee table with drawers.

Construction Steps

building a sturdy foundation

Attach the legs to the sides of the coffee table to provide stability and support as you begin the construction process.

Next, install the backboard between the back legs to create a solid framework for your coffee table.

Construct the large and small drawer boxes, ensuring they fit snugly and smoothly.

Advertisement

Once the drawer boxes are ready, install the drawer fronts, making sure to leave appropriate gaps for easy front opening and closing.

Finally, secure the coffee table top to the base to complete the construction process.

  • Embrace the satisfaction of seeing your coffee table take shape with each step.
  • Feel the excitement of creating functional and stylish storage solutions with the drawer boxes.
  • Experience the sense of accomplishment as you attach the final piece, the coffee table top, bringing your project to completion.

Optional Finishing

customizable project completion choices

Consider enhancing the aesthetic appeal and durability of your DIY coffee table with drawers through optional finishing steps.

Start by using a Kreg Jig and pocket hole screws for assembly, ensuring a sturdy construction.

Before sanding the coffee table, fill any visible holes with wood filler to achieve a seamless look.

Once the surface is smooth, apply finishing supplies like paint, stain, or sealer to give your coffee table a polished finish that suits your style.

Advertisement

Installing decorative drawer pulls can add a personal touch and elevate the overall design of the piece.

Don't forget to share your finished project on social media to inspire others in their DIY endeavors.

These optional finishing techniques won't only enhance the appearance of your coffee table but also increase its longevity, making it a standout piece in your living space.

Building Components

components in construction work

To begin constructing the coffee table with drawers, it is important to glue the edges of the boards for the side panels and shelf before drilling pocket holes for assembly. This step guarantees a sturdy foundation for the coffee table with storage.

Building Components:

  • Drawer Box: Construct robust drawer boxes using pocket screws for durability.
  • Side Panels: Attach side panels securely with glue and pocket screws to preserve structural integrity.
  • Shelf Assembly: Drill pocket holes for the shelf assembly to offer ample storage space.

Installation Process

smooth software installation process

For a smooth assembly of the coffee table with drawers, start by drilling pocket holes in the shelf ends and securely attaching it using pocket screws to optimize storage space. Mark the positions for shelf installation and glue and clamp the shelf in place during the installation process. Additionally, install aprons at the base of the table to reinforce its structural integrity. When working on the drawer construction, remember to rip plywood for the drawer boxes and assemble them using pocket screws for functionality. Ultimately, make sure to securely attach the drawer fronts with screws and install the drawer slides and boxes for easy access to the storage space.

Installation Process Steps Tips
Shelves Drill pocket holes Maximize storage space
Aprons Attach at the base Enhance structural integrity
Drawer Construction Assemble with pocket screws Ensure functionality

Frequently Asked Questions

Which Way Do You Face a Coffee Table With Drawers?

When designing a coffee table with drawers, face them towards you for easy access to essentials like remotes and magazines. Guarantee the drawers align with your seating arrangement and complement the room's layout.

Advertisement

How Do I Keep My Coffee Table Organized?

To keep your coffee table organized, use dividers or trays to separate items, label or color-code drawers for easy access, and declutter regularly. By staying on top of organization, you can create a neat and functional space for relaxation.

How to Set up a Coffee Table?

So, you're setting up a coffee table? Position it centrally, guarantee stability, and add coasters for protection. Decorate with candles, books, or a plant. Use drawers for remote controls, magazines, and organization. Enjoy your cozy space!

Conclusion

Now you have a beautiful coffee table with drawers that won't only add functionality to your space but also provide extra storage for all your everyday essentials.

It's like having a trusted friend by your side, always there to help and support you whenever you need it.

Enjoy your new DIY creation and revel in the satisfaction of a job well done!

Advertisement
Continue Reading
Advertisement

Affiliate disclaimer

As an affiliate, we may earn a commission from qualifying purchases. We get commissions for purchases made through links on this website from Amazon and other third parties.

Advertisement

Vetted

Tanpopo Konditorei Café Munich Tanpopo Konditorei Café Munich
Vetted3 weeks ago

Indulge in Delights at Tanpopo Konditorei Café Munich

Savor the exquisite pastries and serene ambiance at Tanpopo Konditorei Café Munich, your go-to spot for a sweet retreat in...

Vetted3 weeks ago

Here’s a new version of the review for “The Creative Spark: Unleashing Your Inner Artist”:

Book Review: “The Creative Spark: Unleashing Your Inner Artist” Illuminating the Path to Creative Awakening Manifestation Journal – Goal &...

top shower scrubbers 2024 top shower scrubbers 2024
Vetted2 months ago

15 Best Shower Scrubbers to Make Cleaning a Breeze in 2024

Discover the top 15 shower scrubbers of 2024 that promise effortless cleaning—find out which one will transform your scrubbing experience!

top storm doors 2024 top storm doors 2024
Vetted2 months ago

The 15 Best Storm Doors of 2024 – Enhance Your Home's Curb Appeal and Protection

Optimize your home's curb appeal and security with the 15 best storm doors of 2024—discover the unique features that could...

stylish outdoor dining sets stylish outdoor dining sets
Vetted2 months ago

15 Best Outdoor Dining Sets for Stylish Al Fresco Dining in 2024

Browse our curated list of the 15 best outdoor dining sets for stylish al fresco dining in 2024, and discover...

top cordless lawn mowers top cordless lawn mowers
Vetted2 months ago

15 Best Cordless Electric Lawn Mowers of 2024 – Power and Convenience Combined

Harness the power of convenience with the 15 best cordless electric lawn mowers of 2024—discover which one will revolutionize your...

top stackable washer dryers top stackable washer dryers
Vetted2 months ago

15 Best Stackable Washer Dryers of 2024 – Space-Saving Solutions for Your Laundry Room

Get ready to discover the 15 best stackable washer dryers of 2024 that will transform your laundry room into a...

ultimate comfort chair massagers ultimate comfort chair massagers
Vetted2 months ago

15 Best Back Massagers for Your Chair: Ultimate Comfort and Relief

Have you been searching for the perfect back massager to elevate your comfort? Discover the 15 best options that promise...

healthier caffeine free mushroom coffees healthier caffeine free mushroom coffees
Vetted2 months ago

14 Best Caffeine-Free Mushroom Coffees for a Healthier Brew

Mushroom coffees offer a healthier brew alternative—discover the 14 best caffeine-free options that might just transform your morning routine!

top bathroom fans 2024 top bathroom fans 2024
Vetted2 months ago

15 Best Bathroom Fans of 2024 – Quiet, Efficient, and Stylish Options

You won't believe the stylish and efficient bathroom fans of 2024 that promise quiet operation and enhanced ventilation—discover your perfect...

adaptogenic mushroom coffee benefits adaptogenic mushroom coffee benefits
Vetted2 months ago

15 Best Adaptogenic Mushroom Coffees to Boost Your Wellness Routine

The 15 best adaptogenic mushroom coffees promise to elevate your wellness routine—discover how these blends can transform your health and...

mushroom coffee pods selection mushroom coffee pods selection
Vetted2 months ago

15 Best Mushroom Coffee Pods to Boost Your Morning Brew

Uncover the top 15 mushroom coffee pods that can transform your morning routine and unleash a new level of energy...

Advertisement

Trending