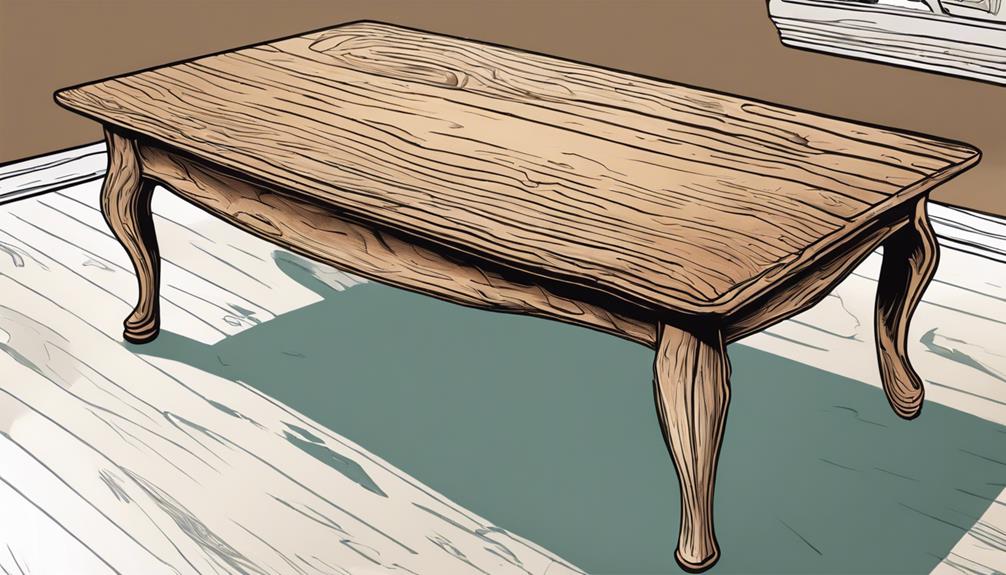
Connect with us

Tips and Tricks

Furniture Refresh: How to Bring a Coffee Table Back to Life!

Spruce up your coffee table effortlessly with expert tips and tricks for a stunning transformation.

Published

on

revitalizing a coffee table

Spruce up your coffee table by refinishing it with ease. Begin by removing the old finish using gentle techniques. Treat the wood with care for a stunning result. Follow a step-by-step process to restore its beauty. Opt for a quick restoration method that skips the sanding step. Gather simple materials for a fast refresh that yields undamaged, elegant outcomes. Discover more techniques and creative ideas to enhance your coffee table's appearance.

Key Takeaways

  • Remove old finishes gently with methylated spirits, wire wool, and nylon pads.
  • Preserve historical integrity by avoiding harsh chemicals and sanding.
  • Enhance wood's color and texture with wax application.
  • Achieve a smooth finish by buffing the surface.
  • Quick restoration without aggressive sanding in 3 to 5 minutes.

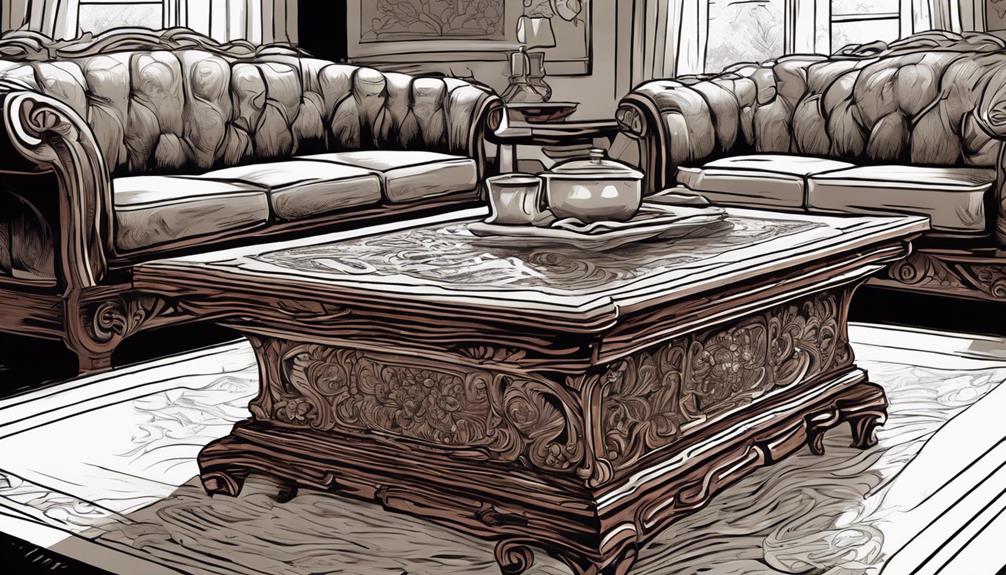
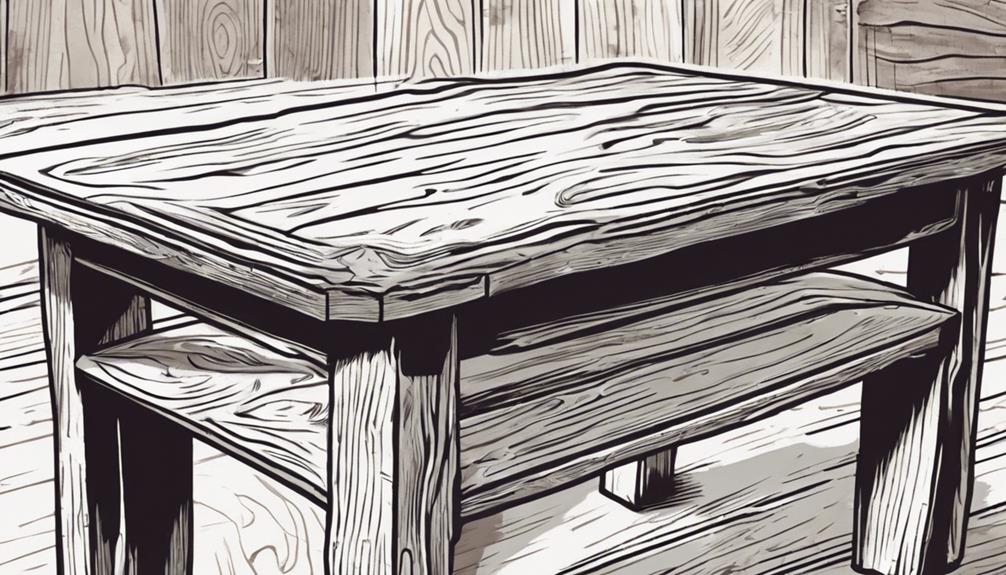
Mahogany Coffee Table Restoration Process

Revitalize your mahogany coffee table with a gentle restoration process that preserves its historical charm and quality.

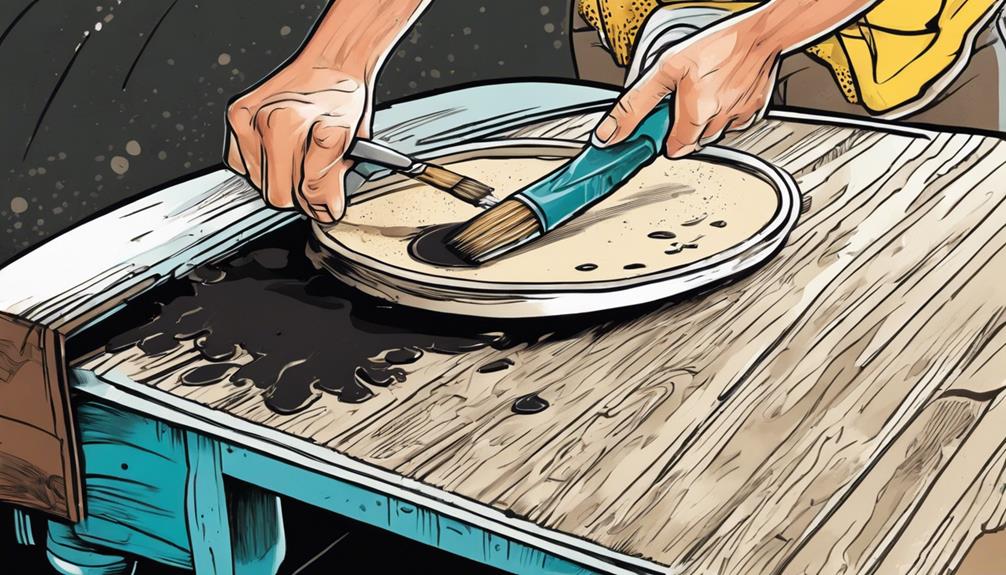
When restoring a 1720 mahogany coffee table, I'd say delicacy in handling the process is crucial. Begin by removing the shellac finish using methylated spirits, wire wool, and a nylon abrasive pad. This method guarantees a detailed restoration without harming the Cuba mahogany wood's integrity.

To maintain the historical significance of the piece, opt for a sympathetic restoration approach that avoids harsh chemicals and sandpaper. Instead, invest a little time in applying wax to enhance the wood's color without altering its original beauty. This meticulous process transforms the coffee table in just 3 to 5 minutes, eliminating the need for rough sanding while achieving a stunning result.

After applying the wax, buff the surface gently to create a smooth and undamaged finish that highlights the mahogany wood's quality. This careful restoration method ensures that your coffee table retains its historical charm for years to come.

Historical Significance of Mahogany Wood

mahogany s rich cultural history

The historical significance of mahogany wood stems from its origins in the Americas, particularly Cuban mahogany, renowned for its quality and desirability in furniture craftsmanship.

Mahogany has played a crucial role in furniture making due to its luxurious appearance, durability, and ease of working with.

Advertisement

Here are some key points highlighting the importance of mahogany wood:

  • Luxurious Choice: Mahogany has been a symbol of opulence and sophistication in furniture design for centuries.
  • Durable Material: Known for its longevity and resistance to decay, mahogany furniture pieces can last for generations.
  • Distinctive Appearance: The rich reddish-brown color and fine grain of mahogany make it a visually striking choice for furniture.
  • Craftsmanship Tradition: Mahogany has been a preferred material for skilled craftsmen, showcasing intricate designs and detailing.
  • Historical Value: Throughout history, mahogany furniture has been associated with wealth, elegance, and timeless beauty, making it a prized possession in many households.

Effective Finish Removal Techniques

refining removal of finishes

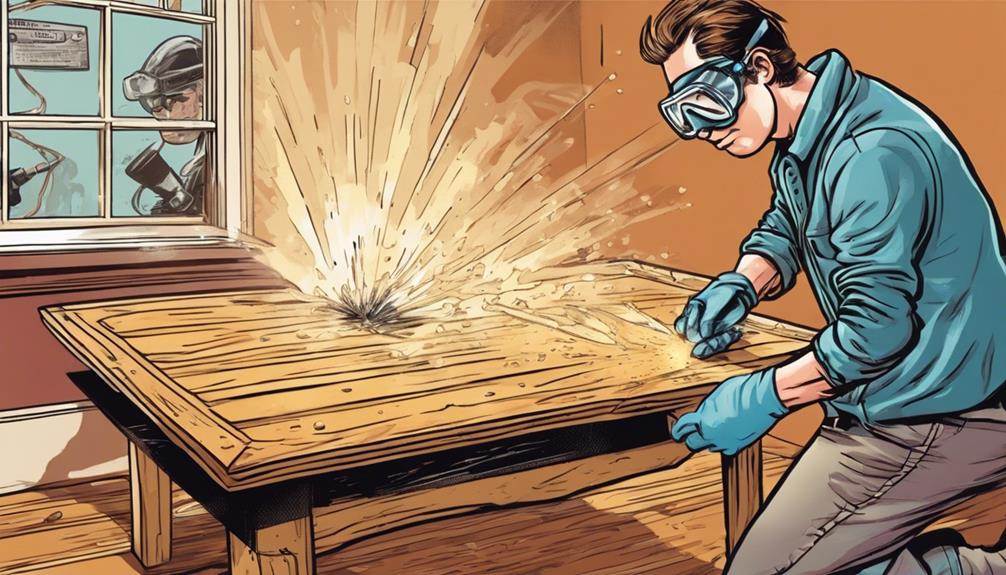
You can start by gently melting the shellac finish on your coffee table using methylated spirits for easy removal.

Break through the finish with a nylon abrasive pad, ensuring no damage to the wood.

Opt for fine wire wool to effectively remove the old finish without harsh chemicals or sandpaper.

Gentle Finish Removal

Wondering how to gently eliminate the finish from your coffee table without causing damage to the wood surface? Here are some effective techniques to help you achieve a refreshed look while preserving the integrity of the wood:

  • Utilize methylated spirits: Use this solution to dissolve the shellac finish gently, avoiding the need for aggressive sanding.
  • Employ a nylon abrasive pad: Break through the finish layer delicately to maintain the wood's original beauty during the restoration process.
  • Choose fine wire wool: Opt for this gentle material to effectively eliminate the finish without resorting to harsh chemicals that may harm the wood.
  • Dry off the wood thoroughly: After removing the finish, make sure the wood is completely dry before applying wax to protect the surface and enhance its color.
  • Buff the waxed surface: Achieve efficient and beautiful results by buffing the waxed surface to a smooth finish, preserving the natural beauty of the wood within minutes.

Efficient Restoration Process

To efficiently restore your coffee table, consider utilizing gentle finish removal techniques that preserve the wood's integrity and original beauty.

For instance, on a mahogany coffee table from 1720 with a shellac finish, you can gently remove the finish using methylated spirits, wire wool, and a nylon abrasive pad. This approach avoids the need for harsh chemicals or sandpaper, safeguarding the wood from unnecessary damage.

Advertisement

After removing the finish, make sure to dry off the wood thoroughly before applying wax. This step not only enhances the wood's color but also helps in preserving its natural beauty.

This restoration process can work wonders in as little as 3 to 5 minutes, showcasing the efficiency and effectiveness of these wood restoration techniques.

Sympathetic Wood Treatment

Using fine wire wool and methylated spirits for gentle finish removal can effectively preserve the historical integrity of your mahogany coffee table during the sympathetic wood treatment process. This approach allows you to restore the table without causing damage or altering its original charm.

Here are some key points to take into account:

  • Preservation of Historical Integrity: Gentle removal techniques help maintain the authenticity and character of the mahogany wood.
  • Avoidance of Chemicals and Sandpaper: The use of wire wool eliminates the need for harsh chemicals or abrasive sanding, ensuring a safe and respectful restoration.
  • Enhanced Color and Texture: Applying wax post-treatment enriches the wood's appearance, highlighting its natural beauty.
  • Smooth Finish: Buffing the surface after waxing results in a polished look that showcases the coffee table's elegance.
  • Efficient Restoration: Achieve a stunning transformation in minutes, revitalizing the table without the need for aggressive sanding methods.

Step-by-Step Wood Treatment Process

wood treatment guide details

Start by gently removing the old shellac finish on the mahogany coffee table using methylated spirits, wire wool, and a nylon abrasive pad. This process helps strip away the old coating, preparing the wood for the next steps.

Once the finish is removed, make sure the wood is completely dry before applying a wax treatment. The wax not only enhances the wood's color but also provides a protective layer for the surface. Apply the wax evenly and then buff the surface to achieve a smooth and polished finish, showcasing the natural beauty of the mahogany.

Advertisement

This restoration method is quick, taking only 3 to 5 minutes, and eliminates the need for harsh chemicals or extensive sanding. By following these simple steps, you can efficiently rejuvenate your mahogany coffee table, bringing it back to life without causing any harm to the wood.

Efficient Transformation Methods

effective data analysis techniques

You can revitalize your coffee table efficiently by using quick restoration techniques and effective wood treatment methods.

Achieve a beautiful finish within minutes without resorting to harsh chemicals or sandpaper, preserving the wood's original beauty.

Enhance the color and texture of the wood by utilizing simple materials like wax, nylon abrasive pads, and fine wire wool.

Quick Restoration Techniques

Effortlessly revitalize your coffee table with efficient restoration methods that bring it back to life in just a matter of minutes. Consider gentle techniques such as removing the shellac finish with methylated spirits and wire wool, achieving a beautiful transformation without harsh chemicals or sanding in only 3 to 5 minutes.

Preserve the historical significance of your mahogany coffee table with a sympathetic restoration approach. Enhance its color and beauty by applying wax and buffing for a smooth finish. Experience rapid results by utilizing simple materials like nylon abrasive pads and wax.

Advertisement

Transforming your coffee table doesn't have to be a time-consuming task. By following these quick restoration techniques, you can revive your furniture efficiently and bring out its natural beauty. With just a few minutes of work, you'll see a remarkable difference in the appearance of your beloved coffee table.

Effective Wood Treatment

Optimize your coffee table's appearance through efficient wood treatment methods that swiftly rejuvenate its natural beauty. To start, gently remove the shellac finish using methylated spirits and wire wool. This technique allows you to strip away the old finish without damaging the wood underneath.

Explore the historical significance of mahogany wood, which was first imported from the Americas in 1720 and has since been a prized material for furniture making due to its durability and rich color.

For a quick and effective restoration process that avoids harsh chemicals and sanding, consider using nylon abrasive pads. These pads can help you restore the wood's natural luster without causing any unnecessary damage.

After removing the finish, apply wax to enhance the wood's color and texture while preserving its innate beauty. By following these steps, you can achieve a beautiful, undamaged result in just 3 to 5 minutes, all while taking a gentle and sympathetic approach to wood restoration.

Advertisement

Preservation of Wood's Natural Beauty

preserving wood s natural charm

To maintain the natural beauty of wood, it's vital to handle it gently while eliminating old finishes with denatured alcohol and nylon abrasive pads. This process aids in revealing the wood's original allure while preparing it for restoration. Remember to handle wood with care to sustain its aesthetic appeal and quality over time. Here are some key points to emphasize:

  • Delicate Cleaning: Use denatured alcohol and nylon abrasive pads for a thorough yet gentle removal of old finishes.
  • Conservation: Preserve the wood's natural beauty by avoiding harsh chemicals that can diminish its shine.
  • Improvement: Apply wax after cleaning to enhance the wood's color and safeguard it from future damage.
  • Polishing: Achieve a smooth and refined finish by gently polishing the wood surface.
  • Durability: By conserving the wood's natural beauty, you safeguard that your furniture piece remains a timeless and sophisticated addition to your space.

Rapid Restoration Without Sanding

efficient refinishing sans sanding

You can achieve a rapid restoration of your coffee table without the need for sanding.

By utilizing gentle techniques like melting shellac finish with methylated spirits and using wire wool and nylon abrasive pads, you can quickly revive the wood's surface.

Experience efficient and effective transformation within minutes, preserving the wood's integrity and bringing back its natural beauty.

Sanding-Free Restoration

Revive your coffee table effortlessly with a rapid restoration technique that skips the sanding process. By utilizing methylated spirits to dissolve the shellac finish, you can achieve a smooth restoration without the labor-intensive sanding step.

Here's how to achieve a sanding-free restoration:

  • Use methylated spirits to dissolve the shellac finish.
  • Gently eliminate the finish with a nylon abrasive pad and fine wire wool.
  • Speed up the process within 3 to 5 minutes, avoiding harsh chemicals and sandpaper.

Apply wax to enhance the wood's color after drying off the wood post-finish removal. Achieve a sympathetic restoration with simple materials, preserving the wood's beauty effectively.

This method not only saves time and effort but also guarantees that your coffee table retains its natural charm without the risk of damage from aggressive sanding techniques.

Advertisement

Quick and Gentle Revival

Achieving a rapid restoration for your coffee table, without the need for sanding, can be efficiently done with a quick and gentle revival technique. By following a simple process that takes only 3 to 5 minutes, you can bring new life to your beloved furniture piece. Avoid the hassle of rough sanding by utilizing methylated spirits, wire wool, and a nylon abrasive pad to gently remove the finish. This sympathetic restoration approach helps preserve the integrity of the wood without resorting to harsh chemicals or sandpaper.

To enhance both the color and finish of your coffee table, consider applying wax and buffing the surface for a smooth and polished look. This method not only revives your table quickly but also guarantees a beautiful outcome. The table below summarizes the key steps for a quick and gentle revival of your coffee table:

Step Materials Needed Time Required
Finish Removal Methylated Spirits, Wire Wool 3-5 minutes
Surface Buffing Nylon Abrasive Pad, Wax 3-5 minutes
Final Polishing Cloth for Buffing 1 minute

Simple Materials for Quick Refresh

simple quick refreshing materials

Looking to refresh your coffee table quickly and effectively? You can achieve stunning results with just a few simple materials. To bring your coffee table back to life, consider using methylated spirits, wire wool, and nylon abrasive pads. These materials provide a gentle yet effective way to remove the old finish without damaging the wood.

Here are five items to keep in mind:

  • Methylated spirits: Ideal for cleaning and degreasing the surface before refinishing.
  • Wire wool: Helps in gently removing the old finish without scratching the wood.
  • Nylon abrasive pads: Useful for smoothing out any rough patches on the surface.
  • Wax: Applying wax after the restoration process enhances the wood's color and creates a beautiful finish.
  • Sympathetic restoration: By using these simple materials and techniques, you can achieve a stunning result while preserving the wood's integrity.

With these materials at hand, you can easily refresh your coffee table in just a few minutes, bringing back its natural beauty.

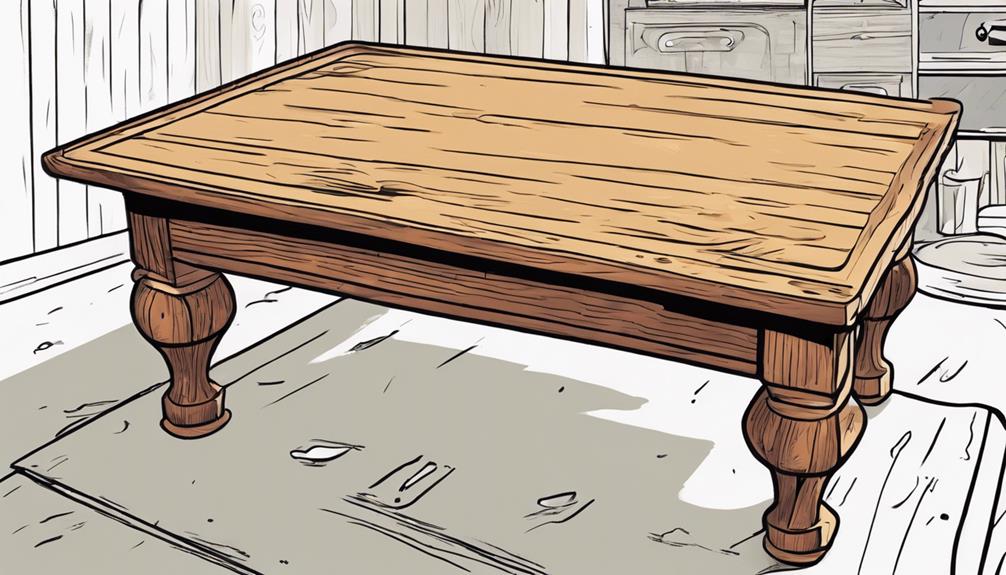
Achieving Beautiful, Undamaged Results

perfecting a flawless finish

To achieve stunning, undamaged results in wood restoration, consider employing a gentle approach using methylated spirits and nylon abrasive pads. This method allows for the effective removal of old shellac finishes without the need for sanding, preserving the wood's integrity.

For antique mahogany furniture pieces dating back to the 1720s, a sympathetic restoration using fine wire wool and wax application can enhance the wood's natural beauty, showcasing its historical significance and desirability. By carefully removing the finish, ensuring the wood is adequately dried, and buffing it with wax, you can achieve a smooth and undamaged result.

This efficient wood restoration technique can breathe new life into a damaged coffee table within a short timeframe of 3 to 5 minutes, eliminating the necessity for harsh chemicals or rough sanding. Embrace this gentle approach to revitalize your coffee table, bringing out its inherent beauty while maintaining its structural integrity.

Advertisement

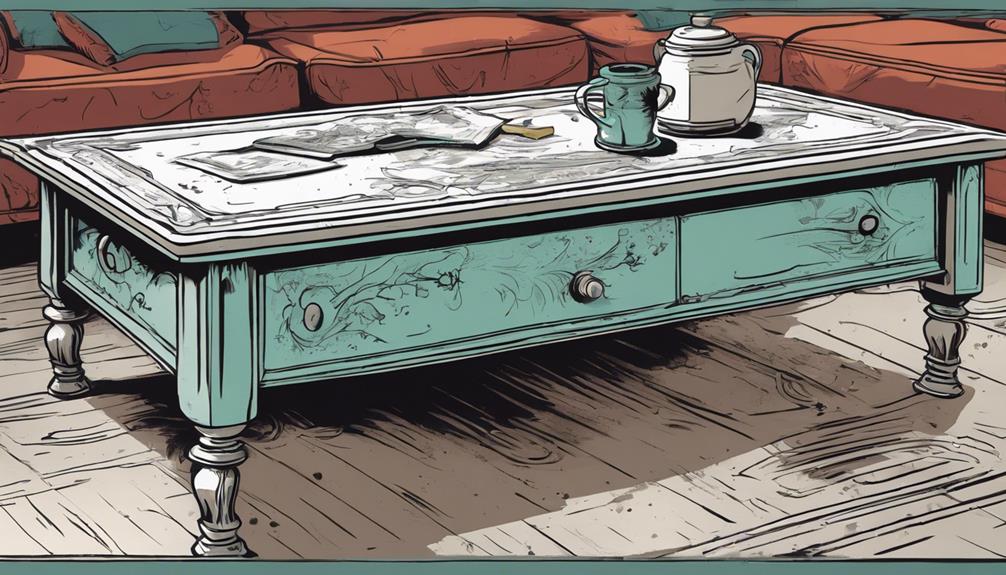
Enhancing Coffee Table's Elegance

elevating living room decor

Bring out the elegance of your coffee table by employing gentle restoration techniques that enhance its natural beauty and charm. Start by gently removing old finishes using methylated spirits, wire wool, and a nylon abrasive pad. This process helps preserve the wood's historical significance and beauty without resorting to harsh chemicals or sandpaper.

After removing the finish, apply wax to achieve a smooth and polished look, allowing the wood's natural color to shine through. Witness a rapid transformation of your coffee table in just 3 to 5 minutes, opting for efficient wood restoration techniques over rough sanding.

Enjoy the beautiful and undamaged result by utilizing simple materials and a gentle treatment process that brings your coffee table back to life. With just a little bit of sanding and a fresh coat of paint or varnish, your table can look brand new again. By taking the time to care for your furniture, you’ll be lifting your coffee table to its former glory and enjoying it for many more years to come. Additionally, ensuring that the legs and structure of the table are sturdy and secure will also contribute to its longevity. Reviving your coffee plant is a simple process that can be done with minimal effort, and the results will be well worth it. By taking the time to revive and refresh your coffee table, you’ll be able to enjoy it for years to come. Consider adding a stylish cushion to your revived coffee table to create a cozy and inviting space in your home. This simple addition can not only add comfort but also enhance the overall aesthetic of the table. By giving your coffee table a new lease on life, you’re not only saving money but also reducing waste and contributing to a more sustainable lifestyle.

  • Gently remove old finishes: Use methylated spirits, wire wool, and a nylon abrasive pad.
  • Preserve historical significance: Opt for a sympathetic restoration approach without harsh chemicals.
  • Smooth and polished finish: Apply wax after finish removal for a natural color shine.
  • Rapid transformation: Witness quick changes without rough sanding.
  • Simple materials, beautiful results: Utilize gentle treatment for an undamaged outcome.

Frequently Asked Questions

How Do You Bring an Old Table Back to Life?

You bring an old table back to life by considering its wood type and history. Use gentle finish removal techniques like melting shellac and applying wax for color enhancement. Witness a rapid transformation without compromising its original charm.

How Do I Make My Table Look New Again?

You can make your table look new again by embracing a gentle restoration method. Remove the old finish with care, preserve its essence, enhance its beauty with wax, and enjoy a transformed piece without harsh chemicals.

How to Restore a Weathered Wood Table?

To restore a weathered wood table, gently remove the existing finish with methylated spirits and a nylon abrasive pad. Use wire wool for a smooth finish. Apply wax for protection and enhanced color. Enjoy the transformation in minutes!

How to Make a Dull Wood Table Shine?

To make a dull wood table shine, gently remove old finishes with methylated spirits, wire wool, and an abrasive pad. Apply wax for a radiant glow, then buff for a polished finish – revealing its natural beauty effortlessly.

Advertisement

Conclusion

Now that you've learned how to bring your coffee table back to life, remember that mahogany wood has been prized for centuries for its durability and beauty.

In fact, did you know that mahogany trees can grow up to 150 feet tall?

With the right techniques and a little elbow grease, you can transform your tired coffee table into a stunning piece that will be the centerpiece of your living room for years to come.

Continue Reading
Advertisement

Tips and Tricks

Creative Reuse: How to Build a Coffee Table Out of Pallets!

Craft a stunning coffee table from pallets in this guide, starting with disassembly and assembly tips – a must-read for DIY enthusiasts!

Published

on

By

repurposing pallets for furniture

To build a coffee table out of pallets, start by carefully disassembling and preparing the wood. Trim and gather pieces for a sturdy base, then assemble using a brad nailer for efficiency. Finish the table top by skirting edges and experimenting with different treatments for a personalized touch. Create and attach sturdy legs using 4×4 wood pieces and secure them to prevent wobbling. For the final assembly, evaluate balance and apply a clear coat for protection. You can further customize with metal components for an industrial-rustic look. Discover more ways to enhance your coffee table creation!

Key Takeaways

  • Disassemble pallets carefully, trim wood, and gather sturdy pieces for the base.
  • Skirt edges for a polished look, sand thoroughly, and apply desired finishes.
  • Use 4×4 wood for stable legs, torch for rustic look, and secure attachment.
  • Secure legs with industrial-style connectors, evaluate balance, and apply clear coat.
  • Experiment with staining, painting, or waxing finishes for personalization.

Disassembling the Pallets

To start building your coffee table out of pallets, make sure to take the first step of carefully separating the pallets from the top boards by prying them apart. This process requires precision to avoid damaging the wood.

Once you have successfully disassembled the pallets, the next step is to remove any nails from the top pieces. Using a hammer or nail puller will help prevent any wood damage during this step.

After separating the pallets and removing the nails, gather some scrap 2×4 pieces to create a sturdy base for your coffee table. Utilizing a brad nailer will make the assembly of the disassembled pallet pieces more efficient.

Remember to trim any excess wood from the pallets using a circular saw to achieve the desired dimensions for your table.

Finishing the Top

completing the final touches

Skirt the edges of the pallet top with remaining pieces to give it a polished and finished appearance. This step adds a touch of refinement to your coffee table project. Once the edges are neatly covered, you can consider torching the wood to achieve a rustic look and enhance the texture.

Sand the surface of the pallet top thoroughly to guarantee a smooth finish before moving on to any additional treatments. For those aiming for a deeper wood grain effect, burning the wood with a torch can enhance its visual appeal. Conversely, if you prefer a darker, more polished finish, using an orbital sander on the pallet top can help achieve this look.

Advertisement

These techniques provide different aesthetic options, allowing you to customize your coffee table to fit your style preferences. Experiment with these finishing touches to create a unique and personalized piece that will be a conversation starter in your living space.

Creating the Legs

building sturdy table legs

Consider using sturdy 4×4 pieces of wood to create the legs for your pallet coffee table, providing essential stability and support. Cut the legs to your desired height, typically ranging from 18 to 20 inches, ensuring the table is at a comfortable level. To add a textured and rustic look that complements the design, you might want to torch the legs. Securely attach the legs to the table structure, making sure they are level and won't wobble or shift. For an industrial flair, think about incorporating industrial-style fasteners into the leg design to enhance the overall aesthetic of the coffee table.

Creating the Legs Tips Description
Use 4×4 wood pieces Provides stability and support for the table.
Cut legs to 18-20 inches Ensures the table is at a comfortable height.
Torch the legs for a rustic look Adds texture and complements the table's design.

Final Assembly

innovative manufacturing techniques

Fasten the firmly attached 4×4 legs to the table structure with industrial-style connectors to secure stability and balance in the final assembly of your pallet coffee table. Make certain the legs are securely attached to prevent any wobbling or instability. Once the legs are in place, step back and evaluate the overall balance of your creation to verify it sits level on the floor.

After fixing the legs, apply a clear coat to the coffee table. This not only shields the wood from wear and tear but also provides a shiny finish that enhances the natural wood grain. Take your time to evenly cover the entire surface, allowing the wood's beauty to radiate.

To achieve an industrial and rustic look, the pairing of pallet wood with metal components is essential. Embrace the difference between the rough-hewn wood and the smooth metal to add character to your piece. Appreciate the unique and handmade aspect of your coffee table design by showcasing it proudly in your home decor.

Additional Tips

useful travel advice tips

Experiment with various finishes such as staining, painting, or waxing to achieve the desired appearance for your pallet coffee table. These finishes not only enhance the look but also provide protection against wear and tear.

Personalize your design by including unique elements like metal accents, glass inserts, or custom engravings to add character and make the table uniquely yours.

When putting together your coffee table, consider alternative methods like using wood glue, screws, or brackets for added stability and durability. These choices guarantee that your table can withstand daily use and remain in excellent condition for years to come.

Advertisement

Embrace the creativity and satisfaction that come with crafting furniture from pallets; it's a rewarding DIY project that showcases your skills and style. Share your progress and insights with others, either online or in person, to inspire fellow DIY enthusiasts to explore the world of pallet furniture. Your experiences can ignite creativity and motivate others to engage in their own upcycling adventures.

Tools and Materials Needed

tools and materials list

Gather the necessary tools and materials to begin constructing your pallet coffee table. You will need a circular saw, brad nailer, orbital sander, and torch. For materials, gather pallets, scrap 2×4 wood pieces, 4×4 wood for the legs, clear coat finish, and industrial-style fasteners.

Tools:

  • Circular Saw: Essential for cutting and shaping the pallet wood.
  • Brad Nailer: Perfect for securely fastening the pieces together.
  • Orbital Sander: Ideal for smoothing out rough edges and surfaces.
  • Torch: Used to add a textured finish to the 4×4 leg pieces.

Materials:

  • Pallets
  • Scrap 2×4 wood pieces
  • 4×4 wood for the legs
  • Clear coat finish
  • Industrial-style fasteners

These tools and materials will help you repurpose pallets into a stylish coffee table that combines an industrial look with rustic charm. Prepare your workspace with these items to begin the creative process.

Safety Precautions

safety first always prepared

Make sure to wear safety goggles and gloves when handling tools and materials for your pallet coffee table project.

Confirm your workspace is well-ventilated, especially when using heat sources like torches.

Keeping your work area clean and organized is vital to prevent accidents and injuries.

Safety Gear Essentials

Make sure proper safety gear essentials like goggles, ear protection, dust mask, first aid kit, and gloves are worn to safeguard yourself during the construction of the pallet coffee table.

Advertisement
  • Safety Goggles: Protect your eyes from flying debris while using tools.
  • Ear Protection: Prevent damage to your hearing from loud power tools.
  • Dust Mask: Avoid inhaling sawdust and wood particles that can irritate your respiratory system.
  • First Aid Kit: Keep it handy in case of minor injuries or accidents during the building process.
  • Gloves: Protect your hands from splinters, cuts, and blisters while handling rough materials.

When working on your pallet coffee table project, make sure you have these safety essentials on hand and properly worn. Safety gear is essential to prevent accidents and injuries, making your DIY experience safer and more enjoyable.

Workspace Preparations

Before starting work on your pallet coffee table project, ensure your workspace is prepared with necessary safety precautions to prevent accidents and promote a safe DIY experience.

Clear the area of clutter and debris to avoid tripping hazards, especially when using power tools.

Adequate ventilation is essential to disperse any fumes that may arise during the torching process.

Don the appropriate safety gear, including safety goggles, gloves, and a mask, to shield yourself from splinters, dust, and fumes.

Have a fire extinguisher within reach in case of emergencies during torching.

Advertisement

Take time to familiarize yourself with the operation and safety guidelines of all tools and equipment you'll be using in the workspace.

Frequently Asked Questions

Can You Make a Table From Pallets?

You can definitely make a table from pallets. By disassembling them and using the wood for the top and base, along with 4×4 pieces for legs, you can create a cost-effective and eco-friendly DIY project.

How Do You Make Wooden Pallets Usable?

To make wooden pallets usable, separate them, remove nails, and gather wood for repurposing. Use a brad nailer for assembly, a circular saw for trimming, and finish by sanding. Torch for a rustic look, secure legs, level them, and add a clear coat.

Can You Reuse Pallet Wood?

Sure, you can totally reuse pallet wood! Just grab those overlooked pallets and get creative. Clean, sand, treat them for safety, and voila! Transform them into unique furniture pieces. Embrace the DIY spirit!

How Do You Make Stuff Out of Old Pallets?

To make stuff out of old pallets, disassemble them, gather materials, finish the top and create legs, assemble securely, and add protective coat. Experiment with finishes, personalize the design, enjoy the process, and share your results for a unique creation.

Advertisement

Conclusion

Now that you've taken the time to repurpose those old pallets into a stylish coffee table, you've truly turned trash into treasure. By thinking creatively and putting in a little effort, you've transformed something ordinary into something extraordinary.

Keep up the good work and continue to see the potential in everyday items – you never know what masterpiece you might create next!

Continue Reading

Tips and Tricks

Drawers for Days: How to Build a Coffee Table With Drawers!

Are you ready to add stylish storage to your living room?

Published

on

By

coffee table with drawers

Ready to transform your space? Build a coffee table with drawers using durable knotty alder wood, screws, and a Kreg Jig. Add drawer slides for smooth operation. Attach legs, backboard, and drawer boxes in your construction steps. Consider finishing touches like wood filler, paint, or decorative drawer pulls. Share your creation for inspiration. For optimized space, drill and attach the shelf securely. Install aprons for structure, rip plywood for boxes, and securely attach drawer fronts. Incorporating these steps will bring your coffee table with drawers to life!

Key Takeaways

  • Utilize 4/4 and 6/4 knotty alder wood for durability and a custom look.
  • Employ a Kreg Jig with pocket hole screws for precise assembly.
  • Ensure smooth operation with drawer slides for easy access.
  • Use wood filler, sandpaper, and finishing supplies for a polished finish.
  • Share your project on social media to inspire others with your creation.

Materials and Tools

Gather the necessary materials and tools to start building your DIY coffee table with drawers. For the table, consider using 4/4 and 6/4 knotty alder wood for durability and a custom look. You'll need wood screws and a Kreg Jig with pocket hole screws for precise assembly. To ensure smooth operation, include drawer slides in your list of materials.

Make sure to have a thickness planer on hand to mill the wood to a uniform 3/4 thickness. When preparing the wood, cut the panel pieces slightly longer than needed to allow for squaring. Additionally, have wood filler, sandpaper, and finishing supplies ready to give your coffee table a polished appearance.

To add both functionality and style, consider incorporating drawer pulls into your design. By having all the necessary materials and tools ready, you can efficiently proceed with constructing your coffee table with drawers.

Construction Steps

building a sturdy foundation

Attach the legs to the sides of the coffee table to provide stability and support as you begin the construction process.

Next, install the backboard between the back legs to create a solid framework for your coffee table.

Construct the large and small drawer boxes, ensuring they fit snugly and smoothly.

Advertisement

Once the drawer boxes are ready, install the drawer fronts, making sure to leave appropriate gaps for easy front opening and closing.

Finally, secure the coffee table top to the base to complete the construction process.

  • Embrace the satisfaction of seeing your coffee table take shape with each step.
  • Feel the excitement of creating functional and stylish storage solutions with the drawer boxes.
  • Experience the sense of accomplishment as you attach the final piece, the coffee table top, bringing your project to completion.

Optional Finishing

customizable project completion choices

Consider enhancing the aesthetic appeal and durability of your DIY coffee table with drawers through optional finishing steps.

Start by using a Kreg Jig and pocket hole screws for assembly, ensuring a sturdy construction.

Before sanding the coffee table, fill any visible holes with wood filler to achieve a seamless look.

Once the surface is smooth, apply finishing supplies like paint, stain, or sealer to give your coffee table a polished finish that suits your style.

Advertisement

Installing decorative drawer pulls can add a personal touch and elevate the overall design of the piece.

Don't forget to share your finished project on social media to inspire others in their DIY endeavors.

These optional finishing techniques won't only enhance the appearance of your coffee table but also increase its longevity, making it a standout piece in your living space.

Building Components

components in construction work

To begin constructing the coffee table with drawers, it is important to glue the edges of the boards for the side panels and shelf before drilling pocket holes for assembly. This step guarantees a sturdy foundation for the coffee table with storage.

Building Components:

  • Drawer Box: Construct robust drawer boxes using pocket screws for durability.
  • Side Panels: Attach side panels securely with glue and pocket screws to preserve structural integrity.
  • Shelf Assembly: Drill pocket holes for the shelf assembly to offer ample storage space.

Installation Process

smooth software installation process

For a smooth assembly of the coffee table with drawers, start by drilling pocket holes in the shelf ends and securely attaching it using pocket screws to optimize storage space. Mark the positions for shelf installation and glue and clamp the shelf in place during the installation process. Additionally, install aprons at the base of the table to reinforce its structural integrity. When working on the drawer construction, remember to rip plywood for the drawer boxes and assemble them using pocket screws for functionality. Ultimately, make sure to securely attach the drawer fronts with screws and install the drawer slides and boxes for easy access to the storage space.

Installation Process Steps Tips
Shelves Drill pocket holes Maximize storage space
Aprons Attach at the base Enhance structural integrity
Drawer Construction Assemble with pocket screws Ensure functionality

Frequently Asked Questions

Which Way Do You Face a Coffee Table With Drawers?

When designing a coffee table with drawers, face them towards you for easy access to essentials like remotes and magazines. Guarantee the drawers align with your seating arrangement and complement the room's layout.

Advertisement

How Do I Keep My Coffee Table Organized?

To keep your coffee table organized, use dividers or trays to separate items, label or color-code drawers for easy access, and declutter regularly. By staying on top of organization, you can create a neat and functional space for relaxation.

How to Set up a Coffee Table?

So, you're setting up a coffee table? Position it centrally, guarantee stability, and add coasters for protection. Decorate with candles, books, or a plant. Use drawers for remote controls, magazines, and organization. Enjoy your cozy space!

Conclusion

Now you have a beautiful coffee table with drawers that won't only add functionality to your space but also provide extra storage for all your everyday essentials.

It's like having a trusted friend by your side, always there to help and support you whenever you need it.

Enjoy your new DIY creation and revel in the satisfaction of a job well done!

Advertisement
Continue Reading

Tips and Tricks

Lift Top Diy: How to Build a Coffee Table With Lift Top!

Lift your coffee table game with this DIY project that will elevate your space – learn how to build a coffee table with a lift top!

Published

on

By

coffee table lift top

Ready to enhance your space with a lift-top coffee table? Gather materials and tools for this fun project. Follow step-by-step instructions to construct the table efficiently. Consider dimensions and design for a tailored finish. Estimate costs and opt for quality materials. Discover new uses for lift-top mechanisms and corner brackets for stability. Guarantee operational ease and sturdy support for your creation. Apply finishes like polyurethane for a chic look. Admire your craftsmanship, adding chamfered edges for a polished touch. Enjoy the functional and aesthetic benefits of your new coffee table. Craft with confidence and creativity – your project awaits more insights. Explore additional customization options for your lift-top coffee table, such as adding hidden storage compartments or incorporating unique hardware for a one-of-a-kind look. Once your project is complete, consider showcasing and potentially selling your creations at mobile coffee trailer sales or local artisan markets. Embrace the satisfaction of creating a functional and stylish piece of furniture, and share your passion with others who appreciate handcrafted items. Your lift-top coffee table is sure to be a conversation starter, whether in your own home or at a mobile coffee trailer sales event.

Key Takeaways

  • Use hardwood and lift top mechanism for durability and functionality.
  • Follow step-by-step construction guide for precise assembly.
  • Consider dimensions, design, and personalization options.
  • Opt for customization like hidden compartments or walnut accents.
  • Finish with polyurethane for a professional look and enjoy craftsmanship satisfaction.

Materials and Tools Needed

You'll need hardwood, a lift top mechanism, plywood, glue, and pocket hole screws for building the coffee table with a lift top.

When selecting the hardwood, consider using species like ash for durability and aesthetics. The plywood will be essential for constructing the sides, bottom, and top pieces of the table. Make sure you have a table saw to accurately cut the wood to the required sizes, such as 36' x 9' and 34.5' x 34.5'.

The lift top mechanism will allow for easy adjustment and added functionality to your coffee table. Additionally, pocket screws will be necessary for securely joining the different wooden components together.

Investing in quality materials like hardwood and a reliable lift top mechanism might increase the total cost, estimated around $175. Remember, depending on the specific measurements of your lift kit, you may need wooden braces to support the lift table.

Customizable design options are available, allowing you to personalize the coffee table with different wood types and sizes according to your preferences.

Advertisement

Step-By-Step Construction

step by step instructions for building

To begin constructing the lift top coffee table, cut the hardwood pieces to the specified dimensions as outlined in the building plan. Use a track saw for precise cuts to guarantee the pieces fit together seamlessly.

Assemble the side panels and base around the plywood, making sure everything is securely attached. Next, affix the lift top mechanism to the base, verifying it operates smoothly and securely. Position yourself ergonomically to work comfortably while assembling the table components.

Customize the top by adding additional wood pieces to create a unique design that suits your style. Once the construction is complete, finish the table by staining it to your desired color and applying a coat of polyurethane for a polished look.

Following these steps will result in a beautifully crafted lift top coffee table that's both functional and aesthetically pleasing.

Dimensions and Design

data analysis for architecture

When building your coffee table, consider the specifications for the table size, incorporating elements of aesthetic design for a sleek finish.

You can further personalize the table with various customization options to suit your style preferences.

The dimensions and design choices will play an essential role in the overall look and functionality of your new coffee table.

Advertisement

Table Size Specifications

The table size specifications for the lift-top coffee table feature dimensions of 39 x 25.5 x 8 inches, combining functionality with a compact design.

The top, constructed from four 1×8 ash pieces, provides a sturdy surface for daily use. Its base, made of plywood, ensures stability and support for the lift mechanism and top. Additionally, a clear top coating adds a modern touch to the overall aesthetic.

Inside, the compartments are customizable, with dimensions like 34.5' x 9', offering ample storage options according to individual preferences. This design not only prioritizes practicality but also allows for personalization to suit your needs.

With its compact size and customizable features, this lift-top coffee table strikes the perfect balance between style and practicality, making it a versatile and valuable addition to your living space.

Aesthetic Design Elements

Several aesthetic design elements enhance the visual appeal and functionality of the lift-top coffee table, including its dimensions and materials. The table with a lift typically measures approximately 39 x 25.5 x 8 inches, with a lift mechanism that raises it by 6 1/2 inches.

Advertisement

When you envision the table, visualize a clear top coating that adds a shiny finish, corner accents crafted from solid walnut for a touch of sophistication, and sleek aluminum legs that provide a modern and sturdy base.

These design elements combine to create a stylish and versatile piece of furniture that not only elevates the aesthetic of your space but also offers practicality and convenience. The solid walnut corner accents bring warmth and elegance, while the aluminum legs guarantee stability and a contemporary look.

With the lift-top feature, you can seamlessly shift from using the table for dining or working to enjoying a cozy coffee break, making it a versatile and functional addition to your home.

Customization Options

To customize your lift-top coffee table, consider adjusting the dimensions and design to suit your specific preferences and space requirements. You can personalize the table top, lift mechanism, customizable compartments, and personalization options according to your needs. Here are some customization options you can choose from:

Customization Options Description Example
Table Top Choose the size and shape of the table top to fit your space and style. Rectangular table top
Lift Mechanism Opt for an adjustable lift mechanism to transform the table for different purposes. Hydraulic lift system
Customizable Compartments Customize inside compartments for additional storage solutions tailored to your needs. Hidden drawer compartments

Cost and Materials

quality control in manufacturing

When building a coffee table with a lift top, you'll need to budget approximately $175 for materials such as hardwood, a lift top mechanism, glue, and plywood.

Here are the essential items required:

Advertisement
  1. Hardwood: Choose quality hardwood like ash for its beautiful grain patterns and staining properties, ensuring a durable and aesthetically pleasing table.
  2. Lift Top Mechanism: Invest in a reliable lift top mechanism that will allow for smooth and easy operation of the table's lifting function, adding versatility to its usage.
  3. Glue and Plywood: Use strong glue to securely bond the wood pieces together, and high-quality plywood for the table's base and other structural components.

Alternative Applications

exploring diverse software options

Explore the adaptability and versatility of the lift top mechanism beyond its traditional use in a coffee table project.

The lift top mechanism can be creatively adapted for a sit-stand desk variation, offering a functional and ergonomic solution for your workspace.

By incorporating the lift top mechanism into different furniture projects, you can enjoy the aesthetically pleasing design of a coffee table with a lift top in various settings around your home.

The customizable nature of the mechanism allows for personalized touches, enabling you to tailor the features to your specific needs and preferences.

Whether it's adjusting the height or adding additional storage compartments, the lift top mechanism offers endless possibilities for customization.

Let the lift top coffee table project inspire you to explore innovative designs and create DIY furniture pieces that showcase the unique capabilities of this versatile mechanism.

Advertisement

Assembly Instructions

follow detailed assembly steps

Attach the lift top mechanism to the base using 5/8 inch #6 screws with washers.

Secure the lift brackets by drilling pilot holes and using 1.25 inch flat-headed screws.

Add additional support with corner brackets attached with pocket screws.

To assemble your coffee table with a lift top, follow these steps closely:

  1. Connect Lift Top Mechanism: Start by fastening the lift top mechanism to the base using 5/8 inch #6 screws with washers. Make sure that the mechanism is centered and aligned correctly for optimal functionality.
  2. Fasten Lift Brackets: Drill pilot holes and secure the lift brackets using 1.25 inch flat-headed screws. This step is essential for ensuring the stability and smooth operation of the lift table.
  3. Enhance Support with Corner Brackets: Strengthen the structural integrity of your coffee table with lift by attaching corner brackets using pocket screws. This extra support will help distribute weight evenly and prevent wobbling during use.

Finishing Touches and Enjoyment

decked out for fun

Now that you've added the final touches and applied the polyurethane finish, it's time to step back and enjoy your creation.

Admiring the sleek edges and smooth surface, you can feel proud of the craftsmanship put into your coffee table.

With its lift top, storage, and unique copper pipe base, your creation isn't only functional but also a beautiful piece to enjoy in your living space.

Advertisement

Final Touches

To complete the coffee table project, make certain that the final touches, such as chamfering edges and applying a polyurethane finish, are done meticulously for a professional and satisfying result.

Here are three key steps to perfecting your coffee table:

  1. Chamfering Edges: Use a block plane to create clean and angled edges on the tabletop and sides. This step not only adds a touch of sophistication but also enhances the overall aesthetic appeal of the table.
  2. Applying Polyurethane Finish: Make sure you apply three coats of water-based polyurethane finish with an HVLP sprayer. This process guarantees a durable and smooth surface, protecting the wood while showcasing its natural beauty.
  3. Admiring Your Creation: Once the final touches, including edge banding and polyurethane finish, are complete, take a moment to enjoy your finished coffee table. The lift top, storage compartments, and unique copper pipe base will undeniably bring you immense satisfaction and pride in your craftsmanship.

Enjoying Your Creation

Experience the satisfaction of completing your coffee table with lift top by adding the finishing touches and admiring your craftsmanship.

Start by chamfering the edges with a block plane for a smooth finish on the plywood lift-top. Utilize a saw to cut the aluminum tubing to the desired length for the lifting mechanism, ensuring functionality and durability.

Apply three coats of water-based polyurethane finish using HVLP for a professional and protective surface on the coffee table. Once the finishing touches are complete, take a moment to revel in your creation.

The combination of storage, lift-top convenience, and a unique copper pipe base showcases your woodworking skills. Enhance both function and aesthetics by adding walnut edge banding, rubber feet, and bumpers. Each detail contributes to the overall appeal and usability of your coffee table, making it a piece to be proud of.

Advertisement

Sit back, relax, and enjoy the fruits of your labor with a cup of coffee on your newly crafted masterpiece.

Frequently Asked Questions

How Do You Close a Lift Top Coffee Table?

To close a lift top coffee table, gently push down on the lift top until it closes smoothly. Remember to clear the top of any items to avoid damage. Some tables have a lock for security. Follow manufacturer's instructions for proper use.

How Can I Raise My Table Higher?

To raise your table higher, simply activate the lift top mechanism. This handy feature offers adjustable height for your convenience. Guarantee a secure installation and stability when lifting the table to your desired level.

Why Do Coffee Tables Have Lift Tops?

Coffee tables have lift tops to provide versatile functionality for dining, working, or storage purposes. They offer ergonomic positions for various activities without the need for additional furniture. This feature is popular in small living spaces for its practicality.

Can You Eat on a Lift Top Coffee Table?

Sure, you can eat on a lift top coffee table! It offers a versatile surface for dining or working. The adjustable height makes it convenient for meals. Transform it into a dining table in seconds. Practical and space-saving for small spaces.

Advertisement

Conclusion

Congratulations on successfully building your own lift top coffee table!

Did you know that DIY furniture projects have increased by 30% in the past year alone?

Keep up the great work and enjoy your new piece of furniture that combines functionality and style.

Happy building!

Advertisement
Continue Reading
Advertisement

Affiliate disclaimer

As an affiliate, we may earn a commission from qualifying purchases. We get commissions for purchases made through links on this website from Amazon and other third parties.

Advertisement

Vetted

Tanpopo Konditorei Café Munich Tanpopo Konditorei Café Munich
Vetted3 weeks ago

Indulge in Delights at Tanpopo Konditorei Café Munich

Savor the exquisite pastries and serene ambiance at Tanpopo Konditorei Café Munich, your go-to spot for a sweet retreat in...

Vetted3 weeks ago

Here’s a new version of the review for “The Creative Spark: Unleashing Your Inner Artist”:

Book Review: “The Creative Spark: Unleashing Your Inner Artist” Illuminating the Path to Creative Awakening Manifestation Journal – Goal &...

top shower scrubbers 2024 top shower scrubbers 2024
Vetted2 months ago

15 Best Shower Scrubbers to Make Cleaning a Breeze in 2024

Discover the top 15 shower scrubbers of 2024 that promise effortless cleaning—find out which one will transform your scrubbing experience!

top storm doors 2024 top storm doors 2024
Vetted2 months ago

The 15 Best Storm Doors of 2024 – Enhance Your Home's Curb Appeal and Protection

Optimize your home's curb appeal and security with the 15 best storm doors of 2024—discover the unique features that could...

stylish outdoor dining sets stylish outdoor dining sets
Vetted2 months ago

15 Best Outdoor Dining Sets for Stylish Al Fresco Dining in 2024

Browse our curated list of the 15 best outdoor dining sets for stylish al fresco dining in 2024, and discover...

top cordless lawn mowers top cordless lawn mowers
Vetted2 months ago

15 Best Cordless Electric Lawn Mowers of 2024 – Power and Convenience Combined

Harness the power of convenience with the 15 best cordless electric lawn mowers of 2024—discover which one will revolutionize your...

top stackable washer dryers top stackable washer dryers
Vetted2 months ago

15 Best Stackable Washer Dryers of 2024 – Space-Saving Solutions for Your Laundry Room

Get ready to discover the 15 best stackable washer dryers of 2024 that will transform your laundry room into a...

ultimate comfort chair massagers ultimate comfort chair massagers
Vetted2 months ago

15 Best Back Massagers for Your Chair: Ultimate Comfort and Relief

Have you been searching for the perfect back massager to elevate your comfort? Discover the 15 best options that promise...

healthier caffeine free mushroom coffees healthier caffeine free mushroom coffees
Vetted2 months ago

14 Best Caffeine-Free Mushroom Coffees for a Healthier Brew

Mushroom coffees offer a healthier brew alternative—discover the 14 best caffeine-free options that might just transform your morning routine!

top bathroom fans 2024 top bathroom fans 2024
Vetted2 months ago

15 Best Bathroom Fans of 2024 – Quiet, Efficient, and Stylish Options

You won't believe the stylish and efficient bathroom fans of 2024 that promise quiet operation and enhanced ventilation—discover your perfect...

adaptogenic mushroom coffee benefits adaptogenic mushroom coffee benefits
Vetted2 months ago

15 Best Adaptogenic Mushroom Coffees to Boost Your Wellness Routine

The 15 best adaptogenic mushroom coffees promise to elevate your wellness routine—discover how these blends can transform your health and...

mushroom coffee pods selection mushroom coffee pods selection
Vetted2 months ago

15 Best Mushroom Coffee Pods to Boost Your Morning Brew

Uncover the top 15 mushroom coffee pods that can transform your morning routine and unleash a new level of energy...

Advertisement

Trending