Connect with us

Tips and Tricks

What to Do With Coffee Grounds to Avoid Drain Blockages

Transform your coffee grounds into sustainable solutions to prevent drain blockages and improve your garden – discover more tips inside!

Published

on

coffee ground disposal tips

In order to avoid clogging in your pipes, refrain from pouring coffee grounds down the drain as they can lead to plumbing issues. Instead, consider repurposing them for sustainable practices such as composting or using them as a natural insect repellent in your garden. By opting out of disposing them in the sink, you reduce the risk of blockages and keep your plumbing system running smoothly. Reusing coffee grounds for other purposes not only benefits your plants but also the environment. By embracing these alternatives, you ensure the functionality of your drainage system while making a positive impact on your surroundings. For more tips on effectively managing coffee grounds, check out additional insights here.

Key Takeaways

Alternative Uses for Coffee Grounds

Moreover, when considering alternative uses for coffee grounds, you'll find a variety of practical and eco-friendly options to explore.

One key aspect to remember is to avoid putting coffee grounds down your plumbing or drains. Coffee grounds can create blockages in pipes due to their texture, potentially leading to costly plumbing issues.

Instead, consider utilizing coffee grounds in more beneficial ways such as using them as fertilizer for plants to enhance growth and soil quality. Another useful method is to mix coffee grounds with water to create a natural exfoliator for your skin care routine.

Additionally, you can sprinkle coffee grounds in outdoor areas to act as a natural insect or flea repellent. Moreover, adding coffee grounds to your compost pile can improve its richness and nutrient content, benefiting your gardening endeavors.

Composting Coffee Grounds
eco friendly recycling coffee waste

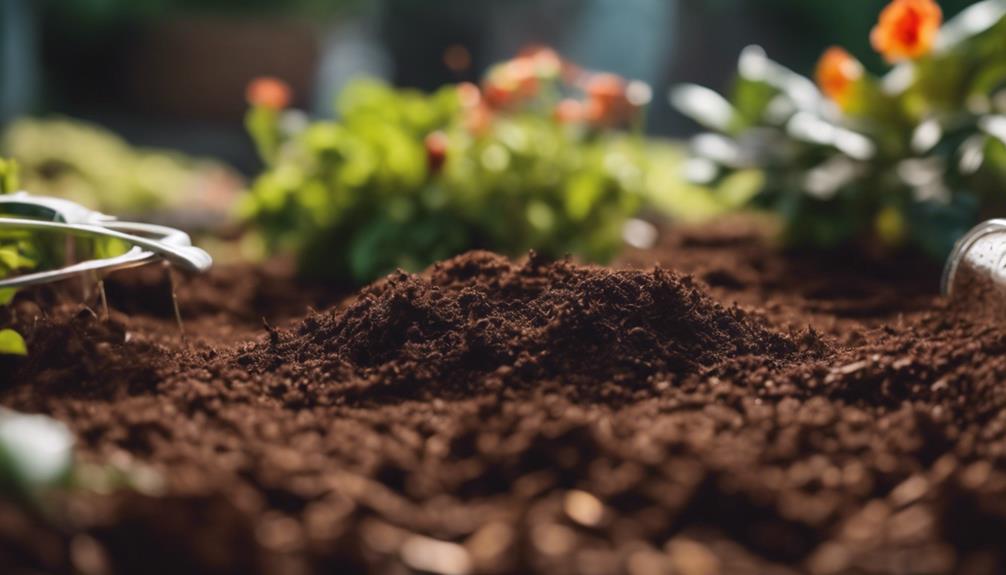
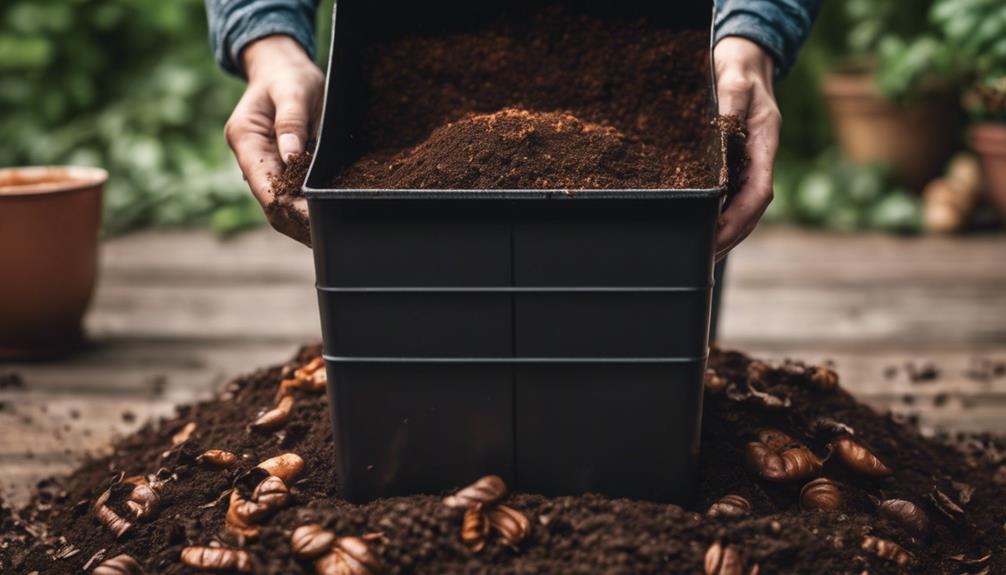
Composting coffee grounds enriches soil with essential nutrients and enhances overall soil health. When you compost coffee grounds, you provide your soil with valuable elements like nitrogen and potassium, important for plant growth. The structure, aeration, and water retention of the soil also benefit from incorporating coffee grounds into compost. Additionally, adding coffee grounds attracts beneficial earthworms, which further improve soil health. These grounds act as a natural fertilizer, promoting plant vitality and growth. By composting coffee grounds, you engage in sustainable gardening practices, reducing waste and supporting a healthier environment. Check out the table below for a quick overview of the benefits of composting coffee grounds:

Benefits of Composting Coffee Grounds
Enriches soil with essential nutrients
Improves soil structure and water retention
Attracts beneficial earthworms
Acts as a natural fertilizer for plants

Garden Mulch With Coffee Grounds

eco friendly garden mulching option

Using coffee grounds as garden mulch can offer numerous benefits to your plants. The grounds help retain moisture, provide essential nutrients, and even deter pests like slugs and snails.

Mulching Benefits Plants

Mulching your garden with coffee grounds provides numerous benefits to plants, enhancing soil quality and promoting healthy growth.

Advertisement

Here are three key advantages of using coffee ground garden mulch:

  1. Nutrient Enrichment: Coffee grounds are rich in essential nutrients like nitrogen, potassium, and phosphorus, which are crucial for plant growth and development. When used as mulch, they gradually release these nutrients into the soil, providing a natural and sustainable source of nourishment for your plants.
  2. Soil Improvement: By incorporating coffee grounds as mulch, you can enhance soil structure, increase moisture retention, and improve aeration. This creates a conducive environment for root growth, leading to healthier and more robust plants in your garden.
  3. Acid-Loving Plant Support: The natural acidity of coffee grounds is beneficial for plants that thrive in acidic soil, such as azaleas, rhododendrons, and blueberries. Mulching with coffee grounds can help maintain the best pH levels for these acid-loving plants, supporting their growth and overall health.

Coffee Grounds as Mulch

Enhancing your garden's soil quality and nourishing your plants can be effectively achieved by utilizing coffee grounds as mulch. Coffee grounds, when used as garden mulch, not only improve soil quality but also provide essential nutrients for plant growth.

One significant benefit of mulching with coffee grounds is their ability to retain moisture in the soil, promoting healthy root development and reducing water loss through evaporation. Additionally, coffee grounds act as a natural weed suppressant, helping to keep unwanted plants at bay.

For those with acid-loving plants such as roses, azaleas, and blueberries, coffee grounds are particularly beneficial due to their acidity. By incorporating coffee grounds into your garden mulch, you can create a favorable environment for these plants to thrive.

Whether spread directly onto the soil or composted for later use, using coffee grounds as mulch is an eco-friendly way to recycle waste and enhance the productivity of your garden. Consider incorporating coffee grounds into your gardening routine to reap these benefits and promote a healthy, thriving garden.

Applying Coffee Mulch

To effectively apply coffee mulch in your garden, consider spreading a layer of coffee grounds around the base of your plants.

Advertisement

Here are three key benefits of using coffee grounds as garden mulch:

  1. Improving Soil Quality: Coffee mulch adds valuable organic matter to the soil, enhancing nutrient levels that are essential for healthy plant growth.
  2. Sustainable Gardening: By using coffee grounds as mulch, you can reduce the reliance on chemical fertilizers, promoting sustainable gardening practices that are beneficial for both plants and the environment.
  3. Benefiting Acid-Loving Plants: The acidity of coffee grounds is particularly advantageous for acid-loving plants like blueberries, azaleas, and rhododendrons. When used as mulch, coffee grounds can create an ideal environment for these plants to thrive.

Hand and Facial Scrub Ideas
diy skincare scrub recipes

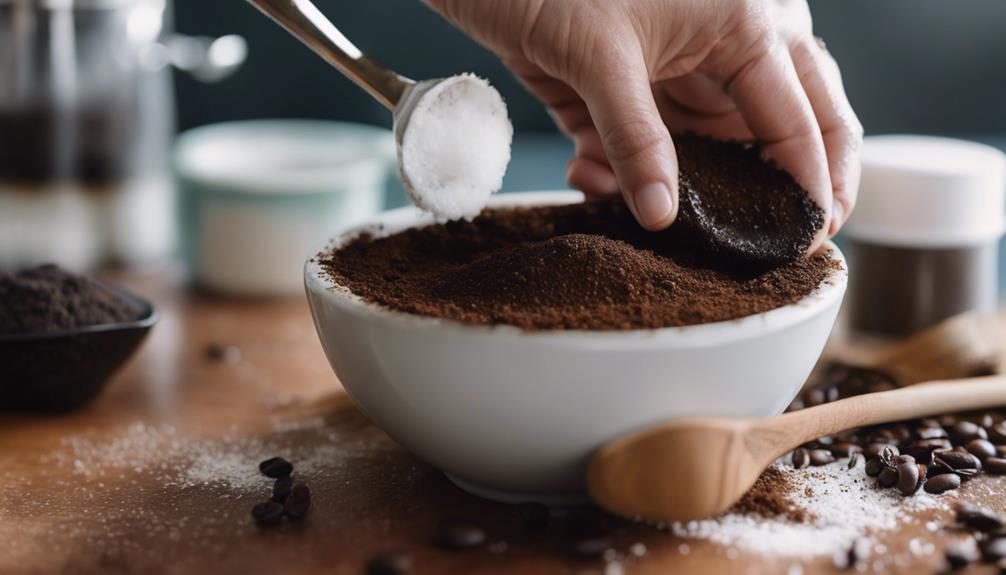
For smooth and rejuvenated skin, consider trying out these coffee ground-based hand and facial scrub ideas. Coffee grounds are excellent for exfoliating dead skin cells, promoting circulation, and potentially reducing cellulite. Here are some simple DIY scrub recipes using coffee grounds:

Scrub Type Ingredients Benefits
Hand Scrub Coffee Grounds + Coconut Oil Smoother hands with improved texture
Facial Scrub Coffee Grounds + Honey + Yogurt Brighter and exfoliated facial skin
Exfoliating Scrub Coffee Grounds + Sugar + Olive Oil Gentle exfoliation for softer skin

These scrubs can help revitalize your skin, leaving you feeling refreshed and glowing. The texture of coffee grounds provides the perfect amount of abrasion for effective exfoliation, revealing healthier skin underneath. Consider incorporating these coffee ground scrubs into your skincare routine for a natural and rejuvenating experience.

Preventing Drain Blockages
keep drains clean always

Dispose of coffee grounds properly to prevent drain blockages. Here are three essential tips to help you avoid clogs and keep your drains running smoothly: First, never pour coffee grounds down the sink, as they can quickly accumulate and create a sludgy mess that can clog your pipes. Instead, consider composting them or throwing them in the trash. Another option is to mix the coffee grounds with other organic materials, such as vegetable peels or eggshells, before disposing of them. Following these coffee grounds disposal tips will help you maintain a healthy and clog-free drainage system in your home.

  1. Use a Sink Strainer: Placing a sink strainer over your drain can effectively trap coffee grounds and prevent them from entering the pipes. This simple tool is a great way to catch debris before it causes any blockages.
  2. Regularly Clean the Drain: Make it a habit to clean your drain regularly to remove any buildup of coffee grounds and other substances. By keeping your drain clean, you can prevent blockages from forming in the first place.
  3. Flush with Hot Water: Pouring hot water down the drain can help dissolve minor blockages caused by coffee grounds. This simple and effective method can clear your pipes and prevent more significant issues from developing.

Avoiding Garbage Disposal Damage
preventing damage to disposal

Coffee grounds pose a threat to your garbage disposal system, potentially leading to damage and blockages if not disposed of properly. When you put coffee grounds down the garbage disposal, they can accumulate and form a thick paste that clogs pipes and damages the blades of the disposal unit. Grinding up coffee can seem convenient, but it's best to avoid putting coffee grounds in the garbage disposal to prevent costly repairs and maintain the functionality of your system.

Properly disposing of coffee grounds by throwing them in the trash or compost can help you avoid clogged pipes and prevent drain blockages. By preventing coffee grounds from entering the disposal, you can save yourself from potential plumbing nightmares and safeguard the longevity of your garbage disposal unit. Remember, a little extra effort to dispose of coffee grounds correctly can go a long way in keeping your garbage disposal system in good condition.

Sustainable Coffee Ground Disposal
properly disposing coffee waste

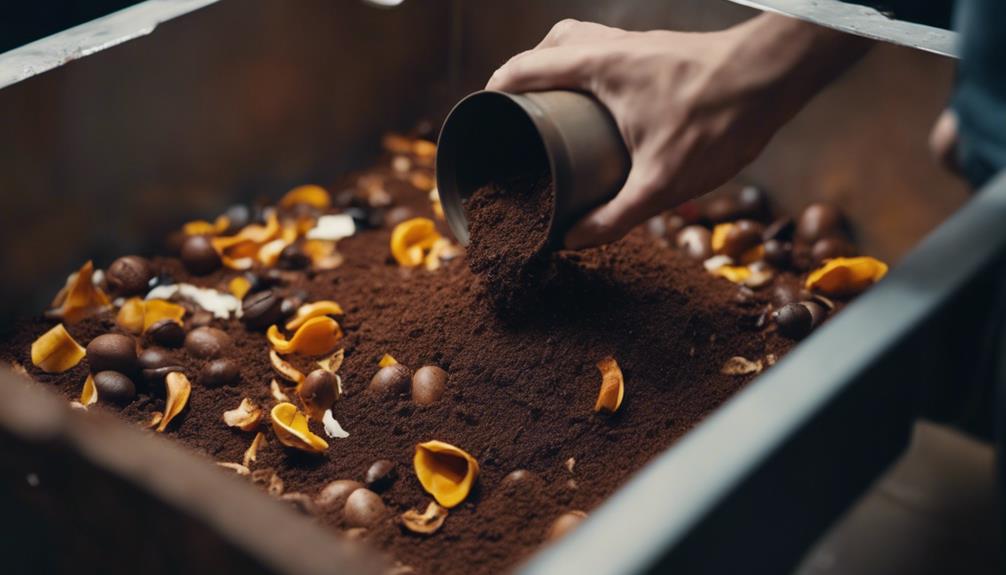
Consider utilizing coffee grounds in a sustainable manner to benefit both your garden and the environment. Instead of putting used coffee grounds in the trash or down the sink, there are eco-friendly ways to repurpose them that can help reduce waste and promote sustainability.

Here are three ways to make the most of your coffee grounds:

  1. Composting: Mix coffee grounds with other organic materials like fruit and vegetable scraps to create nutrient-rich compost for your garden. This natural fertilizer can help improve soil quality and promote plant growth.
  2. Mulching: Spread a layer of coffee grounds around plants in your garden to help retain moisture, suppress weeds, and provide essential nutrients to the soil. This can also reduce the need for watering, conserving water resources.
  3. Repelling Pests: Coffee grounds can act as a natural deterrent for pests like slugs and snails. Creating a barrier of coffee grounds around vulnerable plants can help protect them without harming the environment.

Healthy Plumbing Practices
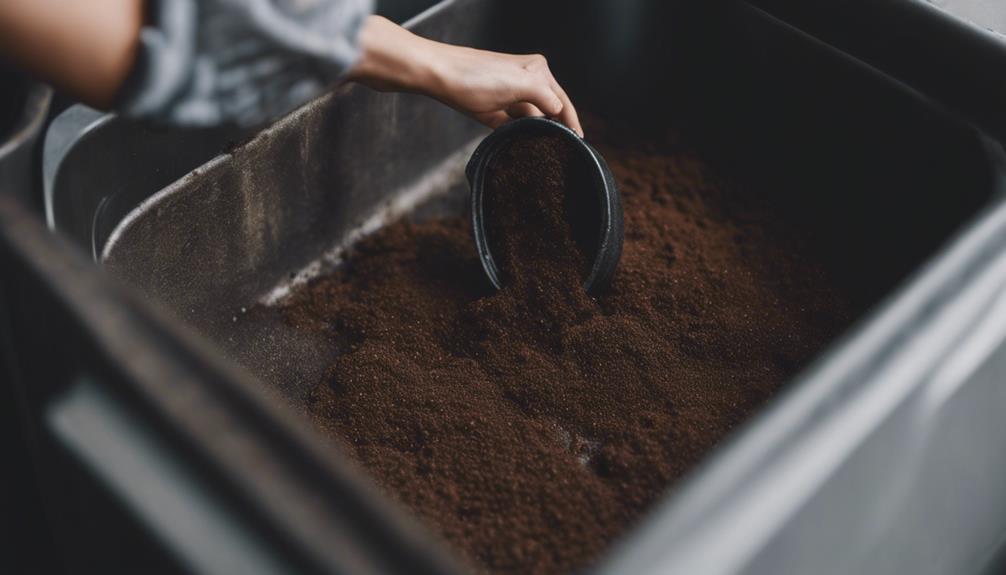
maintaining good plumbing habits

You can prevent drain clogs and maintain eco-friendly practices by avoiding the disposal of coffee grounds down your sink.

Opt for eco-friendly disposal options such as composting or throwing coffee grounds in the trash to keep your plumbing healthy and free from blockages.

Advertisement

Implementing these simple habits can save you from plumbing issues and costly repairs in the long run.

Prevent Drain Clogs

To maintain healthy plumbing and prevent drain clogs, make sure you dispose of coffee grounds properly and avoid letting them go down the sink.

Here are three essential tips to help you prevent drain blockages:

  1. Use Sink Strainers: Place sink strainers over your drains to catch any coffee grounds or food debris before they can go down the pipes. This simple tool can prevent clogs and keep your plumbing system running smoothly.
  2. Regular Drain Cleaning: Implement a routine drain cleaning schedule using safe methods like hot water or vinegar to flush out any potential build-up of coffee grounds or other substances. This proactive approach can help you avoid costly plumbing repairs in the future.
  3. Avoid Food Debris: In addition to coffee grounds, make sure to avoid putting any food debris down the sink. This practice can help prevent clogged drains and maintain the overall health of your plumbing system.

Eco-Friendly Disposal Options

Properly disposing of coffee grounds in eco-friendly ways is essential for maintaining healthy plumbing practices and preventing drain blockages. When it comes to eco-friendly disposal options, avoid rinsing used coffee grounds down the drain as they can accumulate and lead to clogs.

Instead, consider throwing them in the trash or compost bin. Repurposing coffee grounds as compost for your garden isn't only vital for the environment but also beneficial for your plants. As organic materials, coffee grounds can help improve soil quality and provide essential nutrients to support plant growth.

Moreover, using coffee grounds in the garden can absorb odors in the trash or compost, making them a useful and sustainable disposal option. Remember, grinding food waste like coffee grounds can be convenient, but it's important to dispose of them responsibly to prevent drain blockages.

Advertisement

Frequently Asked Questions

How to Get Rid of Coffee Grounds in the Drain?

When it comes to disposing of coffee grounds, avoid pouring them down the drain. Instead, opt for composting or using them as a natural exfoliator.

Flushing coffee grounds down the garbage disposal can lead to clogs and damage. Safely dispose of grounds in the trash or let them dry before throwing them away to prevent drain blockages.

Proper disposal helps maintain clear drains and avoids costly plumbing issues.

Do Coffee Grounds Really Clog Drains?

Yes, coffee grounds can indeed clog drains. Their sedimentary nature and texture make them prone to accumulation in pipes, leading to blockages over time.

Flushing coffee grounds down drains can result in plumbing nightmares, causing thick sludge buildup that's challenging to clear. To prevent costly repairs and plumbing issues, it's essential to avoid disposing of coffee grounds down the drain and opt for alternative disposal methods.

Advertisement

What Will Dissolve Coffee Grounds?

To dissolve coffee grounds effectively, consider using boiling water. Boiling water breaks down the grounds. Another option is baking soda, whose abrasiveness helps in breaking down the grounds. White vinegar can act as a natural cleaner to dissolve the coffee grounds. Enzyme-based drain cleaners specifically target organic matter, making them another effective option. A mixture of salt, baking soda, and vinegar can also be a potent solution for dissolving coffee grounds. Use these methods to prevent drain blockages caused by coffee grounds.

Will Coffee Grounds Clog a Toilet?

Flushing coffee grounds down a toilet can indeed lead to clogs. When coffee grounds accumulate in pipes, they form a dense mass that can block the plumbing system.

This sedimentary nature makes them particularly troublesome for toilet drainage. To prevent such issues, always dispose of coffee grounds in the trash rather than down the toilet, ensuring smooth plumbing operation and avoiding costly repairs.

Conclusion

To sum up, coffee grounds can be repurposed in various ways to prevent drain blockages and promote sustainability. By composting, using as garden mulch, or creating scrubs, you can avoid clogs and keep your plumbing in good condition.

Remember to never dispose of coffee grounds down the drain or garbage disposal to prevent potential damage. By following these practices, you can guarantee a healthy and environmentally friendly disposal of coffee grounds.

Advertisement

Remember, 'One person's waste is another's treasure.'
Advertisement

Tips and Tricks

Counter Design: How to Build a Coffee Shop Counter for Efficient Service!

Amp up your coffee shop's efficiency with expert tips on building a stylish and functional counter that will impress your customers!

Published

on

By

efficient coffee shop counter

To create a successful coffee shop counter, focus on making precise cuts using tools like circular saws. Add matching trim and decorations for a cohesive appearance. Ensure accuracy in measurements and use high-quality materials for long-lasting durability. Improve stability with a counter joint filler and proper installation of carpet grip. Coordinate colors and textures to attract customers. Lastly, prioritize aesthetics to leave a positive impression on your patrons. Following these steps will help you not only set up a functional counter, but also please your customers. To ensure that your coffee shop counter aligns with your overall business objectives, include the design and construction process in your coffee shop business plan. This will help you allocate resources and schedule the work in a way that minimizes disruptions to your operations. Planning in advance will allow you to create a welcoming and efficient counter that leads to the success of your coffee shop.

Key Takeaways

  • Use circular saws for precise cuts and miter joints for aesthetics.
  • Coordinate colors, trim, and decorations for customer attraction.
  • Install carpet grip for stability and safety.
  • Prioritize aesthetics for enhanced customer experience.
  • Incorporate stylish elements like curtains for ambiance.

Tools for Counter Construction

When constructing a coffee shop counter, you'll need a variety of tools to ensure precise cuts and professional results. Circular saws are essential for cutting materials like wood or laminate to the exact measurements required for the counter.

Window bay partitions can be crafted using these saws to match the counter, creating a seamless and cohesive design throughout the space.

Additionally, trim and decorations play a pivotal role in the overall appearance of the counter. Miter joints, often created using precise cuts from circular saws, are commonly used in trim work to give the counter a polished and refined look.

These details can elevate the aesthetics of the counter, making it more visually appealing to customers.

Matching Decor for Cohesive Design

coordinated decor for aesthetic

When aiming for a cohesive design in your coffee shop counter, consider the placement of decorative trim and a coordinated color scheme. These elements can tie together the various components of your counter's decor, creating a unified and visually appealing space for your customers to enjoy.

Decorative Trim Placement

To achieve a coherent and visually appealing design for your coffee shop counter, focus on strategically placing decorative embellishments that complement the overall decor. Here are some key points to ponder when working on decorative embellishment placement:

Advertisement
  1. Utilize Miter Joints:

Incorporating trim with miter joints adds a level of professionalism and elegance to the counter design, creating clean and seamless shifts between embellishment pieces.

  1. Coordinate Trim with Counter Sides and Top:

Make sure that the decorative embellishment matches or complements the material and color of the counter sides and top. This consistency helps create a unified and harmonious look.

  1. Tie in with Overall Theme:

Select decorative embellishments that align with the theme and style of your coffee shop. This helps to tie in the counter design with the overall ambiance, providing a coherent and inviting atmosphere.

  1. Attention to Detail:

Paying attention to the precise placement of embellishments can notably enhance the perceived quality of the counter, showcasing a dedication to craftsmanship and design excellence.

Coordinated Color Scheme

A coordinated color scheme plays an essential role in creating a cohesive and visually appealing design for your coffee shop counter. Matching the color scheme of the counter with the overall decor sets the tone for the entire space.

When customers walk in, the first thing they notice is the harmonious blend of colors, creating a welcoming atmosphere that invites them to linger and enjoy their coffee. Throughout the day, the consistent color choices contribute to the branding of your coffee shop, making it easily recognizable and memorable.

Choosing complementary colors for the counter and surrounding elements not only enhances the aesthetics but also reflects professionalism and attention to detail. At the end of the day, the attention to detail in color coordination leaves a lasting impression on customers, influencing their perception and ensuring they've good times whenever they visit your coffee shop.

Finishing Touches for Durability

strengthening for long lasting durability

When finishing your coffee shop counter, make certain to apply durable trim for added strength and aesthetic appeal.

Fill in any joints to guarantee a smooth and precise finish, enhancing the counter's overall durability.

Adding grip to the carpeted area will improve stability and longevity, creating a sturdy foundation for your business operations.

Advertisement

Durable Trim Installation

For enhanced endurance and a refined finish, make certain the trim installation on your coffee shop counter is done meticulously. Here are some key points to keep in mind for durable trim installation:

  1. Accurate Measurements:

Precise measurements are essential for a smooth fit of the trim pieces. Take your time to measure each section carefully before cutting the trim.

  1. High-Quality Materials:

Invest in top-notch trim materials that are robust and able to withstand the daily wear and tear of a bustling coffee shop environment. Resilient materials will guarantee the longevity of your counter trim.

  1. Secure Fastening:

Firmly fasten the trim pieces to the counter using suitable tools and techniques. This will prevent the trim from loosening over time and maintain a professional appearance.

  1. Flawless Joints:

Miter joints offer a neat and refined look to the trim installation. Make sure that the joints are precisely cut and aligned for a seamless finish that enhances the overall aesthetics of your coffee shop counter.

Counter Joint Filler

To further strengthen the durability of your coffee shop counter, consider utilizing a counter joint filler for seamless and long-lasting construction. Joint filler serves to fill gaps and seams between counter sections, providing stability and resilience to guarantee a long-lasting build. The filler not only enhances the counter's structural integrity but also contributes to a smooth surface finish, elevating the overall appearance of your counter. Proper application of joint filler is crucial to achieving a professional and polished look, emphasizing the importance of attention to detail in this final stage of construction. When selecting a filler, opt for a color that matches the counter material to maintain a cohesive design aesthetic.

Benefits of Counter Joint Filler Tips for Application
– Seamless finish – Clean gaps thoroughly
– Reinforced durability – Use a putty knife
– Improved stability – Match filler color
– Professional appearance – Smooth excess filler
– Cohesive design – Allow proper drying time

Carpet Grip Stability

Enhancing the stability and safety of your coffee shop flooring, carpet grip serves as an essential finishing touch for durability. Installing carpet grip in your high-traffic areas is pivotal to prevent slippage and guarantee the carpet stays in place, reducing the risk of accidents.

To maximize the benefits of carpet grip, follow these key steps:

  1. Proper Installation: Ensure the carpet grip is correctly installed to secure the carpet firmly to the floor, enhancing safety and longevity.
  2. Enhanced Safety: By providing stability and preventing slippage, carpet grip contributes significantly to the safety of your customers and staff.
  3. Professional Finish: The addition of carpet grip not only improves safety but also provides a polished and professional look to your coffee shop flooring.
  4. Improved Durability: Choosing the right type of carpet grip can boost the overall durability and performance of your flooring material, increasing its lifespan and reducing maintenance costs.

Attention to Carpentry and Joints

emphasis on woodworking craftsmanship

Accuracy in carpentry work plays a pivotal role in ensuring a seamless and professional finish when constructing a coffee shop counter. The connections in the counter are crucial for achieving both durability and aesthetic appeal. By ensuring that the connections are precise, you can create a cohesive design that not only looks good but also provides structural integrity. Sometimes, fillers may be necessary to perfect these connections and guarantee precision in the overall construction.

Paying attention to the details of the carpentry work will elevate the counter's appearance and make it more visually appealing to customers.

Advertisement

Well-executed connections are fundamental for the longevity of the coffee shop counter, as they contribute significantly to its stability and overall strength. By focusing on the carpentry and connections during the construction process, you can guarantee a counter that not only serves its practical function efficiently but also enhances the visual appeal of your coffee shop.

Ensuring Stability and Grip

securing firm footing always

To maintain the stability and grip of your coffee shop counter, consider using a non-slip material or grip underneath to prevent any unwanted movement.

Anchoring the counter securely to the floor and adding rubber feet can further enhance its stability.

Regularly testing and maintaining these stability techniques will help guarantee the durability and safety of your counter for both customers and staff.

Stability Techniques Overview

For best stability and grip in your coffee shop counter, consider implementing various techniques to secure the counter in place.

  1. Use a Grip Under the Counter:

Prevent sliding by using a grip under the counter to ensure steadiness during service.

  1. Add Rubber Feet or Pads:

Enhance grip on the floor surface by adding rubber feet or pads to the bottom of the counter.

  1. Secure with Brackets or Screws:

Improve stability by securing the counter to the wall or floor with brackets or screws.

  1. Implement Counterweight or Anchoring System:

Further enhance stability by implementing a counterweight or anchoring system to keep the counter steady.

Importance of Counter Grip

Constructing a stable coffee shop counter involves maintaining a firm hold to prevent movement and uphold safety during service. Counter hold is vital in preserving stability and averting any slipping or shifting during the rush and commotion of serving customers.

Advertisement

By having a proper grasp on the counter surface, you can ensure that items such as cups, plates, and utensils stay firmly in place, reducing the risk of accidents or spills.

To enhance hold on the counter, consider using materials like rubberized mats or applying non-slip coatings. These additions not only help maintain a professional appearance but also contribute significantly to the safety of both your staff and customers.

The stability achieved through proper counter hold not only improves efficiency but also facilitates a seamless and smooth customer service experience. So, make sure to prioritize counter hold when designing your coffee shop counter to guarantee a safe and efficient workspace.

Ensuring Counter Durability

Consider using rubber as a stable grip material for your coffee shop counter base to prevent sliding or shifting during service.

To assure the durability and stability of your counter, follow these essential tips:

Advertisement
  1. Leveling and Anchoring: Properly level and anchor the counter to the floor to maintain stability and prevent wobbling, especially during busy service hours.
  2. Anti-Slip Pads: Incorporate anti-slip pads or feet on the bottom of the counter legs to enhance grip and avoid unwanted movement on various surfaces, providing a secure foundation.
  3. Weight Distribution: Carefully consider the weight distribution and load capacity of the counter to prevent tipping or imbalance issues, guaranteeing it can withstand the demands of daily use.
  4. Regular Maintenance: Regularly inspect and maintain the counter's stability to address any wear and tear promptly, preserving its durability over time and ensuring a reliable workspace for your baristas.

Challenges in Service Coordination

navigating service coordination challenges

Moving through the challenges of service coordination can be a complex task in ensuring timely completion of sign installation and glossing work for the coffee shop counter project. Coordinating tasks with service providers has proven to be difficult due to delays in obtaining quotes and responses.

Interactions with companies have added stress to the coordination process, making it more challenging to stay on schedule. The lack of communication from service providers has further complicated matters, leading to setbacks in the coordination of tasks.

Overcoming these challenges has become a primary focus this week, as ensuring that the sign installation and glossing work are completed efficiently is essential for the overall success of the coffee shop counter project. By addressing these coordination issues head-on and finding solutions to improve communication and response times, the project can move forward smoothly and meet its deadlines effectively.

Overcoming Delays and Communication

navigating obstacles with patience

To address delays and improve communication, proactive engagement with service providers was essential in securing timely completion of glossing work for the coffee shop counter project. Despite initial challenges, effective strategies were implemented to navigate through the obstacles and keep the project on track.

Here are some key actions taken to overcome delays and enhance communication:

  1. Regular Follow-Ups: Consistent follow-ups were conducted with service providers to monitor progress and address any emerging issues promptly.
  2. Clear Communication Channels: Establishing transparent lines of communication helped streamline interactions and guarantee that all parties were on the same page regarding project requirements.
  3. Timely Decision-Making: Swift decision-making processes were adopted to prevent bottlenecks and facilitate the prompt resolution of any arising concerns.
  4. Flexibility and Adaptability: Being adaptable and flexible in scheduling and resource management enabled the team to adjust to unforeseen circumstances and maintain project momentum.

Future Plans for Shop Front

shop renovation and expansion

For the upcoming phase of the project, focus on finalizing glossing work on the shop front to enhance its visual appeal and allure to potential customers.

Make certain to coordinate with a chat for glossing work over the weekend to meet deadlines effectively.

By continuing efforts in completing remaining tasks and decorations, you can achieve a polished look that will attract customers.

Advertisement

As you plan the next steps in shop setup and design, consider how to create a welcoming environment that encourages customers to step inside.

Keep an eye on the overall progress and outlook for future work on the shop front to guarantee that it aligns with your goals of attracting more foot traffic.

Strategy for Customer Engagement

enhancing customer relationships effectively

As you aim to draw in more customers with an inviting atmosphere and attractive aesthetics, developing a strategic approach for customer engagement is key to fostering a memorable experience at your coffee shop.

Here are four essential strategies to enhance customer engagement:

  1. Personalized Interactions: Train your staff to engage with customers on a personal level, remembering their preferences and making tailored recommendations. This creates a sense of belonging and encourages repeat visits.
  2. Community Events: Host events like open mic nights, book clubs, or art exhibitions to bring the community together and create a vibrant atmosphere that customers will want to be a part of.
  3. Feedback Loop: Encourage customer feedback through comment cards, online surveys, or social media. Actively listening to your customers' suggestions and concerns shows that you value their opinion and are committed to improving their experience.
  4. Loyalty Programs: Implement a loyalty program that rewards frequent customers with discounts, free items, or exclusive deals. This incentivizes repeat business and fosters a sense of loyalty among your customers.

Aesthetics for Customer Retention

enhancing customer experience design

Enhancing the aesthetic appeal of your coffee shop counter is vital for retaining customers and creating a lasting impression. Aesthetically pleasing counters can greatly impact customer retention by offering a welcoming and memorable experience.

Paying attention to detail in the design, such as ensuring that partitions, trim, and decorations match, can attract and retain customers. Coordinating colors, materials, and textures on the counter can particularly appeal to target demographics like women and mothers.

By incorporating stylish elements such as curtains, matching paper, and miter joints in trim, you can elevate the overall ambiance and enhance customer satisfaction. Remember, the visual appeal of your coffee shop counter plays an important role in engaging customers and leaving a positive impression.

Advertisement

Make sure to prioritize aesthetics to create a space that not only serves efficiently but also captivates and retains your valued customers.

Frequently Asked Questions

How High Should a Coffee Shop Counter Be?

For efficient service in a coffee shop, your counter should typically be between 36 to 42 inches high. Consider ADA guidelines for accessibility with a maximum height of 36 inches. Adjustable counters provide flexibility for various needs.

How Can I Improve My Coffee Shop Customer Service?

To enhance your coffee shop customer service, prioritize clear communication, efficient order processing, and friendly interactions. Utilize POS systems, train staff well, offer diverse payment options, and maintain a welcoming atmosphere. Consistent efforts will elevate customer satisfaction.

How Big Should a Cafe Counter Be?

To create a efficient cafe counter, aim for a height of 36-42 inches, a depth of 24-30 inches, and a length of 8-12 feet. Consider factors like traffic flow and staff numbers for best functionality.

What Is the Ideal Space for a Coffee Shop?

For a coffee shop, the ideal space should prioritize efficient movement of staff and customers. Consider counter height, width, and depth for equipment and interactions. Adequate storage and layout promote a smooth workflow and customer experience.

Advertisement

Conclusion

To sum up, building a coffee shop counter requires attention to detail and careful planning. Did you know that 85% of customers believe the design of a counter impacts their overall experience at a coffee shop?

By focusing on tools, decor, finishes, and stability, you can create an efficient and welcoming space for your customers.

Don't overlook the importance of a well-designed counter in providing a positive experience for your patrons.

Continue Reading

Tips and Tricks

Pallet Project: How to Build a Coffee Table From Pallet Wood!

Want to transform pallet wood into a stunning coffee table?

Published

on

By

diy coffee table project

Want to create a unique coffee table from pallet wood? Start by taking apart pallets and reusing the top boards. Build a strong base with leftover 2x4s and secure them with a nail gun. Customize the size to fit your space. Add a rustic touch by charring the wood, sanding it down, and applying a protective finish. Create sturdy legs using 4×4 pieces and attach them securely. Elevate the look with metal details. Remember to wear safety gear and work in a well-ventilated area when charring the wood. Dive into our detailed guide to craft your one-of-a-kind piece of furniture. Beginners will benefit greatly from this fun and creative project.

Key Takeaways

  • Disassemble pallets, salvage wood, and construct a sturdy base.
  • Torch wood for a rustic look and sand for a smooth finish.
  • Select and attach 18-20 inch 4×4 legs securely.
  • Apply protective finish, metal accents, and experiment with designs.
  • Prioritize safety gear, ventilation for torching, and fire extinguisher readiness.

Disassembling the Pallets

To begin constructing your coffee table from pallet wood, make certain to carefully disassemble the pallets by separating the top boards from the rest of the structure. The first step involves prying the pallets apart to salvage the usable wood. Using a hammer, pry bar, or nail puller, remove any nails from the top pieces to guarantee a clean surface for your coffee table project.

After separating the top boards, gather scrap 2×4 pieces to create a sturdy base for the table. This base will provide the necessary stability and support for your coffee table. When assembling, use a brad nailer to securely attach the top boards to the base, creating a solid foundation for the table.

As you progress with the project, remember to trim any excess wood from the pallets using a circular saw. This step will allow you to achieve the desired size and shape for your coffee table.

Finishing the Top

completing the roof installation

Skirt the edges of the pallet wood coffee table top with remaining pieces to add a polished finishing touch. This step will give your table a clean and cohesive appearance.

Consider torching the wood surface for a rustic look that adds character. By lightly burning the wood, you can enhance the depth and texture of the grain, creating a unique and artistic finish.

After torching, make sure to sand the pallet wood surface thoroughly. This step is essential to achieving a smooth and visually appealing finish. Utilize an orbital sander to darken the wood, enhancing the overall aesthetic appeal of the coffee table.

Advertisement

The dark finish won't only look great but also provide a protective layer. By following these steps, you can transform your pallet wood into a stunning coffee table that will be a focal point in any room.

Creating the Legs

building prosthetic legs carefully

To create the legs for your coffee table, you'll need to carefully select sturdy 4×4 pieces of wood for stability.

Adjust the legs to your desired height, typically between 18-20 inches, for comfort and functionality.

When attaching the legs to the table base, consider various techniques to securely support the weight of the table and any items placed on top.

Leg Material Selection

Consider using robust 4×4 pieces of wood for the legs when crafting your coffee table from pallet wood to ensure stability and resilience. This choice of material guarantees that the legs can support the weight of the table and endure regular use without wobbling or breaking.

Trimming the legs to a height between 18 to 20 inches will offer the ideal proportions for your coffee table, allowing for comfortable use while seated on a standard couch or chair.

Advertisement

To enhance the visual appeal of your coffee table, you may want to torch the legs to create a textured and rustic look that complements the pallet wood top.

Once you have selected and prepared the legs, firmly attach them to the table frame to establish a sturdy and dependable foundation. For an added touch of industrial style, consider incorporating metal fasteners or brackets, which can both enhance the overall aesthetic and provide additional structural support to your coffee table.

Leg Height Adjustment

Crafting the legs for your coffee table involves cutting 4×4 wood pieces to a height between 18 to 20 inches for best comfort and stability. This height range guarantees that your table isn't too low or too high, making it ideal for both lounging and working purposes.

Once you have decided on the height, consider torching the legs to give them a textured and rustic appearance that complements the pallet wood top of the table beautifully.

To make sure that the legs can adequately support the weight of the table, it's important to securely attach them to the table base. You can explore using industrial-style fasteners or accents to add a unique and personalized touch to the legs, enhancing the overall aesthetic appeal of your coffee table.

Advertisement

Leg Attachment Techniques

Fasten the legs securely to the coffee table base using appropriate hardware to guarantee stability and support for the tabletop. Opt for 4×4 pieces of wood to maintain a sturdy foundation. Cut the legs to a height between 18-20 inches for balanced proportions. To enhance the rustic aesthetic, torch the legs for a textured finish that complements the pallet wood tabletop.

When securing the legs, choose hardware that can withstand the weight of the tabletop. Consider industrial-style fasteners or brackets to not only reinforce the attachment but also add a unique design element to the coffee table. Verify that the attachment is secure to prevent any wobbling or instability.

Final Assembly

final product assembly process

Securely attaching the legs to the table is essential for providing stability and durability in the final assembly of your pallet wood coffee table. Once the legs are firmly fixed, you can move on to the finishing touches that will make your creation stand out.

Here are some steps to contemplate for the final assembly:

  1. Protective Coat: Apply a clear coat to your coffee table to safeguard it from everyday wear and tear while also giving it a sleek, glossy appearance.
  2. Enhance Wood Grain: Bring out the natural beauty of the wood by treating it with a suitable finishing product that enriches the grain patterns.
  3. Metal Accents: For an industrial and rustic look, ponder incorporating metal accents or fasteners into the design, adding an extra touch of character to your table.
  4. Share Your Creation: Be proud of your unique pallet wood coffee table and share your DIY journey with others to inspire creativity and showcase your skills.

Additional Tips

text details and tips

For additional tips to enhance the appearance and resilience of your pallet wood coffee table, consider experimenting with different finishes such as stains, paints, or varnishes. These finishes not only safeguard the wood but also allow you to achieve the desired aesthetic for your table. Personalizing the design is another way to make your coffee table stand out.

Add unique touches like metal accents, decorative hardware, or a custom inlay to give it a personalized touch that reflects your style.

When it comes to assembly, consider using alternative methods like wood glue, dowels, or screws to guarantee your coffee table is sturdy and long-lasting.

Advertisement

Enjoy the process of creating furniture from pallet wood as a rewarding DIY project that showcases your creativity and woodworking skills.

Share your results and experiences with others on social media, DIY forums, or at home gatherings to inspire fellow DIY enthusiasts to engage in their own pallet wood projects.

Tools and Materials Needed

preparing for a project

Gather the necessary tools and materials to begin constructing your pallet wood coffee table. Here's what you'll need: Gather the necessary tools and materials to begin constructing your pallet wood coffee table. Here’s what you’ll need: a pallet, saw, sander, wood glue, nails, hammer, and a level. Consider a round coffee table design to give your space a stylish and modern look. This design not only adds a unique touch to the room but also provides a functional and visually appealing piece of furniture.

  1. Tools:
  • Circular saw
  • Brad nailer
  • Torch
  • Orbital sander
  • Clear coat
  1. Materials:
  • Pallet wood
  • Scrap 2×4 pieces
  • 4×4 pieces for legs
  • Industrial-style fasteners

To trim the excess wood from the pallet pieces, you'll use the circular saw. The brad nailer will come in handy for securing the different parts together.

If you want to add a rustic texture to the legs and top of the table, the torch will be your go-to tool.

Once the construction is complete, applying the clear coat won't only protect your coffee table but also give it a glossy finish.

With these tools and materials at your disposal, you'll be all set to start creating your own unique pallet wood coffee table.

Advertisement

Safety Precautions

safety during pandemic period

Make sure to always wear safety goggles and gloves when using power tools to keep your eyes and hands protected.

It's essential to use a dust mask during sanding and cutting to safeguard against inhaling harmful particles.

Remember to maintain proper ventilation when working with torches or finishes to steer clear of fume exposure.

Safety Gear Importance

Prioritize your safety by ensuring you have the necessary gear when working with pallet wood, including gloves, safety glasses, and a dust mask. Here are some key safety gear items to keep in mind:

  1. Gloves: Protect your hands from splinters, cuts, and rough surfaces while handling pallet wood.
  2. Safety Glasses: Shield your eyes from flying debris, dust, and potential eye injuries caused by tools or wood particles.
  3. Dust Mask: Prevent inhalation of wood dust, which can irritate your respiratory system and cause health issues.
  4. Closed-Toe Shoes: Wear sturdy footwear to safeguard your feet from falling objects, sharp nails, or tools.

Hazard Identification Tips

Inspect pallets thoroughly before starting your project to identify any potential hazards such as nails, splinters, or damage that could lead to accidents during the woodworking process.

Wear gloves, goggles, and a mask to protect yourself from splinters, dust, and eye injuries.

Before dismantling the pallets, check for nails, splinters, and damage to avoid accidents.

Advertisement

Use a sturdy work surface and clamps to secure wood pieces while cutting, torching, or assembling to prevent slipping or injuries.

Verify tools like saws, nailers, and torches are in good working condition to minimize the risk of accidents or malfunctions during the project.

When torching wood, work in a well-ventilated area to prevent harmful fumes, and keep a fire extinguisher nearby as a precaution.

Inspiration and Ideas

encouraging creativity and innovation

Explore a variety of design inspirations for your pallet wood coffee table, from rustic to modern styles, to kickstart your creative process. Here are some ideas to get you inspired:

  1. Rustic Charm: Embrace the natural look of pallet wood by keeping the design simple with a distressed finish and visible wood grains.
  2. Industrial Edge: Incorporate metal accents, such as hairpin legs or industrial piping, to give your coffee table a modern industrial vibe.
  3. Hidden Gems: Consider adding hidden compartments or built-in storage solutions to maximize functionality without compromising style.
  4. Personal Touch: Infuse your personality into the design by customizing the table with engravings, a splash of color, or other unique details.

Frequently Asked Questions

Can You Make a Table From Pallets?

Yes, you can create a table from pallets by disassembling them, using scrap wood for the base, and brad nailing the top. Customize the legs with torched 4x4s, secure them well, and add industrial-style fasteners for flair.

Can You Make Furniture Out of Pallet Wood?

Yes, you can make furniture from pallet wood. It's a popular choice for DIY projects due to its charm, affordability, and sustainability. Repurpose pallets to create unique pieces that match your style and decor perfectly.

How Do You Make a Pallet Bed Step by Step?

To make a pallet bed, gather pallets, disassemble them, cut wood, sand for smoothness, assemble with screws or nails, and finish with a clear coat or paint. Confirm dimensions fit your mattress for a sturdy frame.

Advertisement

How Do You Prepare Pallet Wood for Projects?

When prepping pallet wood for projects, start by gently separating the pallets and removing nails to salvage usable wood. Secure scrap 2x4s for stability, use a brad nailer for assembly, and trim with a circular saw for the perfect piece.

Conclusion

Now that you've tackled this pallet project and built your own unique coffee table, sit back and enjoy the fruits of your labor.

Remember, every piece of wood has a story to tell, just like the memories you'll create around your new table.

Let your creativity flow as you continue to repurpose and craft with pallet wood.

The possibilities are endless, just like the grains in the wood itself.

Advertisement

Happy building!

Continue Reading

Tips and Tricks

Blood Orange Spritz

Perfectly refreshing and visually stunning, the Blood Orange Spritz is a cocktail that promises to elevate your gatherings—discover how to craft this delightful drink!

Published

on

By

refreshing citrus cocktail delight

The Blood Orange Spritz is a refreshing cocktail that blends the sweet, vibrant flavor of blood oranges with the crispness of prosecco and soda water. Perfect for gatherings or a relaxing day, this drink doesn't just taste great; it looks stunning too. You can easily customize the sweetness and fizz to your liking and enhance it with fresh mint or rosemary for extra flavor. Chill your glasses beforehand for a crisp experience, and savor each sip. It's a cocktail that embodies both simplicity and sophistication, making it a delightful choice for any occasion. There's more tasty inspiration ahead!

Key Takeaways

  • Blood Orange Spritz is a refreshing cocktail made with blood orange juice, prosecco, and soda water, perfect for various occasions.
  • Originating from Italian aperitivo culture, it stimulates appetite before meals and showcases vibrant flavors and colors.
  • The sweetness and fizz can be adjusted to personal taste, allowing for versatile enjoyment.
  • Enhancements like fresh mint or rosemary can elevate flavor and presentation, making the drink visually appealing.
  • Quality ingredients, including fresh blood oranges and high-quality sparkling wine, are essential for an exceptional cocktail experience.

History

understanding our past events

The Blood Orange Spritz has its roots in the vibrant Italian aperitivo culture, where drinks are meant to stimulate the appetite before meals. This tradition dates back to the early 20th century, when Italians began enjoying light, refreshing cocktails as a way to unwind after work and prepare for dinner.

The spritz itself emerged from the combination of local wines, soda water, and bitters, creating a drink that's both effervescent and flavorful.

As the years went by, various regional variations of the spritz developed, each showcasing unique flavors and ingredients. The blood orange, with its striking color and sweet-tart taste, became a popular choice for modern interpretations of this classic cocktail. Its use adds an eye-catching twist to the traditional recipe, elevating the drink's appeal.

You'll find the Blood Orange Spritz isn't just a drink but a celebration of Italian culture. It invites you to pause, enjoy the moment, and share good company.

Today, this refreshing cocktail resonates with a global audience, embodying the spirit of leisure and indulgence that defines the aperitivo experience. So, when you sip on a Blood Orange Spritz, you're partaking in a rich history of enjoyment and flavor.

Advertisement

Recipe

culinary instructions and ingredients

The Blood Orange Spritz is a refreshing and vibrant cocktail that perfectly captures the essence of sunny days and leisurely afternoons.

With its beautiful hue and delightful citrusy flavor, this drink is ideal for gatherings, brunches, or simply unwinding after a long day.

The combination of blood orange juice, bubbly prosecco, and a splash of soda water creates a light and effervescent drink that's both invigorating and delicious.

For those who appreciate unique flavor profiles, experimenting with different citrus juices can enhance your cocktail experience, similar to how caffeine content in espresso varies based on preparation methods.

To elevate this cocktail, you can add fresh herbs like rosemary or mint, which not only enhance the flavor but also add an aromatic touch.

The Blood Orange Spritz is versatile; you can adjust the sweetness and fizz to suit your taste, making it a crowd-pleaser for any occasion.

Advertisement

Serve it chilled in a stylish glass, garnished with a slice of blood orange or a sprig of herb, for a truly stunning presentation.

Cooking Steps

step by step cooking guide

To make your Blood Orange Spritz, start by juicing fresh blood oranges to get that vibrant flavor.

While you're at it, chill your serving glasses for a refreshing touch.

Next, mix in sparkling water, stir in the blood orange juice, and finish with a garnish of fresh mint.

Step 1. Juice Fresh Blood Oranges

fresh blood oranges juice

Juicing fresh blood oranges is a simple process that yields vibrant, flavorful juice perfect for your spritz. Blood oranges aren't only delicious, but they're also rich in vitamin C, which can help boost collagen production for firmer skin.

Start by selecting ripe blood oranges, which should feel heavy and firm, indicating juiciness. Rinse them under cold water to remove any dirt or residues.

Next, slice the oranges in half using a sharp knife. You can use a manual juicer or an electric one, depending on your preference. If you're using a manual juicer, press each half down firmly and twist to extract every last drop of juice. For an electric juicer, simply place the orange half on the juicing cone and let the machine do the work.

Advertisement

As you juice, keep an eye out for any seeds, and remove them if they slip through.

Once you've juiced all the oranges, you can strain the juice through a fine mesh sieve to catch any pulp or bits. This step ensures a smooth texture for your spritz, making it a refreshing beverage that not only tastes great but also promotes skin health.

Step 2. Chill the Serving Glasses

chill serving glasses first

Chilling the serving glasses enhances your Blood Orange Spritz, ensuring every sip is refreshingly cool.

Start by selecting your favorite glasses—whether they're highball, coupe, or any other style you love. Rinse them with cold water to remove any dust or residue, then place them in the freezer for about 15 to 20 minutes. This simple step makes a noticeable difference in the overall experience.

If you're short on time, you can also fill each glass with ice water. Let them sit for a few minutes while you prepare the rest of your ingredients. Once you're ready to serve, simply dump out the ice water and quickly pour in your freshly juiced blood orange concoction.

Another method is to chill the glasses in a bucket filled with ice. Just ensure the glasses are submerged deep enough to benefit from the cold.

Advertisement

Whichever method you choose, the goal is the same: to keep your cocktail icy cold right until the last drop. With chilled glasses, you'll elevate your Blood Orange Spritz and impress your guests, making every toast feel like a celebration. Cheers to that!

Step 3. Add Sparkling Water

incorporate sparkling water

Once you've prepared your blood orange juice, it's time to add a splash of sparkling water for that refreshing fizz. Grab a bottle of chilled sparkling water and open it carefully to preserve the bubbles.

Pour the sparkling water gently into your serving glass, filling it about halfway. You want to balance the flavors, so don't drown out the blood orange juice.

As you pour, keep an eye on the bubbles. They should rise and dance, adding that effervescent touch to your drink. If you prefer a lighter spritz, feel free to add more sparkling water until you reach your desired taste. Remember, the goal is to create a vibrant and refreshing beverage, so adjust the ratio according to your personal preference.

Once you've poured in the sparkling water, give it a moment to settle. This allows the flavors to meld just a bit without losing all that delightful fizz.

You're almost there! This bubbly addition will elevate your blood orange spritz, making it perfect for sipping on a sunny afternoon or at your next gathering. Enjoy the refreshing twist that sparkling water brings to your drink!

Advertisement

Step 4. Stir in Blood Orange Juice

incorporate blood orange juice

Now it's time to bring that vibrant blood orange juice into the mix. Grab your freshly squeezed blood oranges, and give them a good squeeze to extract the juice. If you're using store-bought juice, make sure it's 100% pure for the best flavor. You'll want about half a cup of this beautiful, deep red juice.

Carefully pour the blood orange juice into your sparkling water mixture. As you do this, stir gently with a spoon or a cocktail stirrer. This helps to blend the flavors without losing the effervescence of the sparkling water. You don't want to create too many bubbles, so keep your movements light and smooth.

Take a moment to appreciate the gorgeous color that'll start to swirl together. The sweet and tangy notes of the blood orange will begin to infuse into the sparkling water, creating a refreshing base for your spritz.

Taste your mixture at this point; you can adjust the amount of juice if you'd like a stronger flavor profile. Once you're satisfied with the balance, you're ready to move on to the next step in crafting your Blood Orange Spritz!

Step 5. Garnish With Fresh Mint

garnish using fresh mint

To elevate your Blood Orange Spritz, add a handful of fresh mint leaves as a garnish. Mint not only enhances the drink's visual appeal but also brings a refreshing aroma that complements the citrusy notes of blood orange.

Begin by selecting vibrant, fresh mint leaves. Look for leaves that are deep green and free from blemishes.

Next, give the mint leaves a gentle rinse under cool water to remove any dirt or impurities. Pat them dry with a clean towel. For a more intense flavor, you can gently bruise the leaves by pressing them between your fingers or tapping them with the back of a spoon. This releases the essential oils and enhances the minty aroma.

Advertisement

When you're ready to serve, place the mint leaves on top of your Blood Orange Spritz. You can either float them on the surface or tuck a few sprigs into the glass for a more decorative touch.

If you want to impress your guests, consider using a sprig of mint as a stirrer. This simple addition not only makes your cocktail look fantastic but also adds an extra layer of flavor with every sip. Enjoy your refreshing creation!

Final Thoughts

concluding reflections and insights

As you reflect on the delightful experience of crafting a Blood Orange Spritz, you'll find it's not just a drink but a celebration of flavor and creativity. This cocktail truly embodies the essence of refreshment, combining the vibrant sweetness of blood oranges with the crispness of sparkling wine.

Each sip invites you to bask in the moment, whether you're lounging on a sunny patio or hosting friends for a lively gathering.

You've learned that the key to a memorable spritz lies in the quality of the ingredients. Fresh blood oranges, a good sparkling wine, and a splash of soda create a harmonious balance that's hard to resist.

Don't forget the fresh mint garnish—it adds a fragrant touch that elevates your drink, making it visually appealing and aromatic.

Advertisement

Next time you're looking to impress guests or simply treat yourself, remember this delightful recipe. It's easy to make, yet it feels luxurious.

Frequently Asked Questions

Can I Use Other Citrus Fruits Instead of Blood Oranges?

Absolutely, you can use other citrus fruits! Oranges, grapefruits, or lemons all work well. Just remember, each fruit brings its unique flavor, so adjust your recipe to balance sweetness and acidity for the best result.

What Type of Glass Is Best for Serving a Blood Orange Spritz?

When serving cocktails, you'll want to choose a glass that enhances the drink's presentation and experience. A highball or stemless wine glass works perfectly, allowing you to enjoy the vibrant colors and aromas.

How Can I Make a Non-Alcoholic Version of This Drink?

You can create a non-alcoholic version by mixing blood orange juice with sparkling water, adding a splash of tonic, and garnishing with fresh herbs or citrus slices. It's refreshing and perfect for any occasion!

What Food Pairs Well With a Blood Orange Spritz?

You'll love pairing light, citrusy dishes with this refreshing drink. Try seafood like grilled shrimp, a zesty salad with feta, or even a light pasta primavera. These flavors enhance each other beautifully and create a delightful experience.

Advertisement

How Can I Garnish a Blood Orange Spritz Creatively?

To garnish creatively, consider using thinly sliced blood oranges, fresh herbs like mint or basil, or even edible flowers. You could also rim the glass with sugar or sea salt for added flair. Enjoy!

Continue Reading
Advertisement

Affiliate disclaimer

As an affiliate, we may earn a commission from qualifying purchases. We get commissions for purchases made through links on this website from Amazon and other third parties.

Advertisement

Vetted

Tanpopo Konditorei Café Munich Tanpopo Konditorei Café Munich
Vetted4 weeks ago

Indulge in Delights at Tanpopo Konditorei Café Munich

Savor the exquisite pastries and serene ambiance at Tanpopo Konditorei Café Munich, your go-to spot for a sweet retreat in...

Vetted4 weeks ago

Here’s a new version of the review for “The Creative Spark: Unleashing Your Inner Artist”:

2025

top shower scrubbers 2024 top shower scrubbers 2024
Vetted4 weeks ago

15 Best Shower Scrubbers to Make Cleaning a Breeze in 2025

Discover the top 15 shower scrubbers of 2025 that promise effortless cleaning—find out which one will transform your scrubbing experience!

top storm doors 2024 top storm doors 2024
Vetted4 weeks ago

The 15 Best Storm Doors of 2025 – Enhance Your Home's Curb Appeal and Protection

Optimize your home's curb appeal and security with the 15 best storm doors of 2025—discover the unique features that could...

ultimate comfort chair massagers ultimate comfort chair massagers
Vetted4 weeks ago

15 Best Back Massagers for Your Chair: Ultimate Comfort and Relief

Have you been searching for the perfect back massager to elevate your comfort? Discover the 15 best options that promise...

healthier caffeine free mushroom coffees healthier caffeine free mushroom coffees
Vetted4 weeks ago

14 Best Caffeine-Free Mushroom Coffees for a Healthier Brew

Mushroom coffees offer a healthier brew alternative—discover the 14 best caffeine-free options that might just transform your morning routine!

stylish outdoor dining sets stylish outdoor dining sets
Vetted4 weeks ago

15 Best Outdoor Dining Sets for Stylish Al Fresco Dining in 2025

Browse our curated list of the 15 best outdoor dining sets for stylish al fresco dining in 2025, and discover...

top stackable washer dryers top stackable washer dryers
Vetted4 weeks ago

15 Best Stackable Washer Dryers of 2025 – Space-Saving Solutions for Your Laundry Room

Get ready to discover the 15 best stackable washer dryers of 2025 that will transform your laundry room into a...

top cordless lawn mowers top cordless lawn mowers
Vetted4 weeks ago

15 Best Cordless Electric Lawn Mowers of 2025 – Power and Convenience Combined

Harness the power of convenience with the 15 best cordless electric lawn mowers of 2025—discover which one will revolutionize your...

top mushroom coffees for gut top mushroom coffees for gut
Vetted4 weeks ago

15 Best Mushroom Coffees for Gut Health That You Need to Try

Find out the 15 best mushroom coffees for gut health that can transform your morning routine and discover their unique...

mushroom coffee pods selection mushroom coffee pods selection
Vetted4 weeks ago

15 Best Mushroom Coffee Pods to Boost Your Morning Brew

Uncover the top 15 mushroom coffee pods that can transform your morning routine and unleash a new level of energy...

top bathroom fans 2024 top bathroom fans 2024
Vetted4 weeks ago

15 Best Bathroom Fans of 2025 – Quiet, Efficient, and Stylish Options

You won't believe the stylish and efficient bathroom fans of 2025 that promise quiet operation and enhanced ventilation—discover your perfect...

Trending