Connect with us

Espresso

Is Espresso Coffee? Discover the Differences!

Get ready to uncover the surprising distinctions between espresso and coffee, and why they're not interchangeable terms.

Published

on

espresso versus regular coffee

You may be curious if espresso is simply a more potent version of coffee, but in reality, it is a unique brew with its own special characteristics. From the high-pressure brewing method to the finer grind size and bolder flavor profile, espresso distinguishes itself from regular coffee. With a higher caffeine content and specialized equipment, it’s no surprise that espresso has garnered a devoted following. However, there is more than meets the eye – as you delve into the realm of espresso, you will uncover the intricacies that make it unique and explore the methods and subtleties that elevate it to a true artisanal craft.

Key Takeaways

  • Espresso is brewed using high pressure and a finer grind size, resulting in a concentrated beverage with a richer flavor profile.
  • The coffee-to-water ratio for espresso is 1:2, compared to 1:18 for regular coffee, affecting consistency and flavor concentration.
  • Espresso machines utilize high pressure for rapid brewing, producing a beverage with a thick crema and bold flavors.
  • Despite its higher concentration, espresso often has less total caffeine than brewed coffee due to smaller serving sizes.

Understanding Coffee and Espresso Basics

As you explore the world of coffee, it's vital to understand the fundamental differences between regular coffee and espresso. Regular coffee is brewed with hot water passing through ground coffee beans using a filter, resulting in a larger, more diluted cup of coffee. Espresso, on the other hand, is made with a small amount of hot water being forced through finely ground coffee beans at high pressure, producing a concentrated shot of coffee. When choosing the right coffee, it’s important to consider your preferred taste and strength, as well as the brewing method that best suits your lifestyle and needs. Whether you opt for a smooth and mellow cup of drip coffee or a bold and intense shot of espresso, understanding the differences will help you make the perfect choice for your daily coffee fix.

One key distinction lies in the brewing process. Espresso is created by forcing hot water through finely ground coffee at high pressure, resulting in a concentrated shot with a layer of crema on top. In contrast, regular coffee can be brewed using various methods like drip or pour-over, relying on gravity.

This difference in brewing affects the coffee-to-water ratio, with espresso using a 1:2 ratio and regular coffee using a 1:18 ratio, resulting in a thicker consistency in espresso.

When it comes to the beans themselves, espresso beans are roasted longer and darker than those intended for regular coffee, contributing to distinct flavor profiles. The roast level of espresso beans is typically darker, which enhances the bold and rich flavor of espresso.

Understanding these differences between coffee and espresso is essential in appreciating the unique characteristics of each beverage.

Advertisement

Key Differences in Brewing Techniques

As you explore the world of coffee and espresso, you'll notice that the brewing techniques couldn't be more different.

You'll need to use an espresso machine, which is specifically designed to create high pressure and precise temperature control, unlike drip coffee makers that rely on simpler methods.

Now, let's take a closer look at how these differences in machinery, pressure, and grind size impact the final product.

Espresso Machines Vs. Drip

You're likely familiar with the two most popular brewing methods: espresso machines and drip coffee makers, but do you know what sets them apart when it comes to brewing techniques? The answer lies in the way they extract flavors from ground coffee beans.

Here are the key differences:

Advertisement
  • Pressure and Time: Espresso machines use high pressure (around 15 bars) to extract coffee in just 20-30 seconds, while drip coffee makers rely on gravity, taking 6-12 minutes to brew.
  • Grind Size and Flavor: Espresso requires a fine grind for ideal extraction, resulting in a rich, concentrated shot, whereas drip coffee uses a medium-coarse grind, producing a larger, less concentrated beverage.
  • Water-to-Coffee Ratio and Caffeine: Espresso machines use a 1:2 water-to-coffee ratio, resulting in a higher caffeine concentration, whereas drip coffee makers use a 1:18 ratio, producing a less caffeinated brew.

These differences in brewing techniques have a significant impact on the flavor, texture, and caffeine content of your coffee.

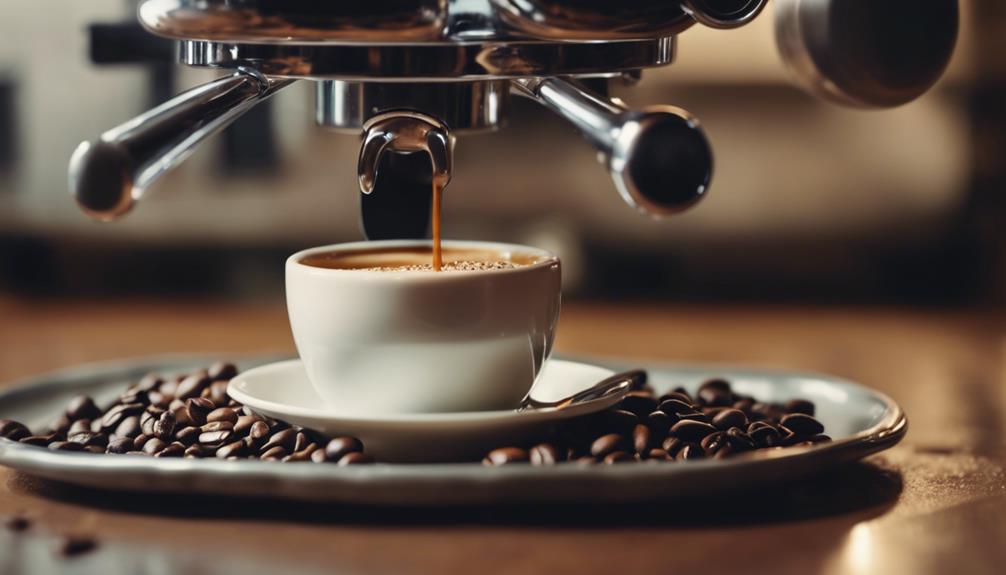
High Pressure Brewing Methods

Forcing hot water through finely-ground coffee at high pressure, typically around 9 bars, yields a concentrated beverage with rich crema, a hallmark of high-pressure brewing methods like espresso.

When you brew espresso, you're using a process that's fundamentally different from traditional coffee brewing. The high pressure and finely ground coffee come together to create a unique extraction process that's both swift and intense.

This process takes only 20-30 seconds, compared to the 6-12 minutes it takes to brew coffee. The water-to-coffee ratio is also drastically different, with espresso using a 1:2 ratio versus coffee's 1:18.

This results in a beverage that's not only stronger but also has a bolder flavor profile. The high-pressure brewing method requires precision techniques like tamping and dosing to guarantee peak extraction, which isn't necessary for traditional coffee brewing.

The end result is a distinctive beverage that's thicker and more concentrated than brewed coffee.

Advertisement

Finer Grind Size Matters

When brewing espresso, you need to grind your coffee beans to an extremely fine texture, similar to sand, to guarantee ideal extraction under the high pressure of the espresso machine. This finer grind size is essential because it allows for a higher surface area, facilitating quicker extraction of flavors and oils during the brewing process. As a result, you'll get a richer and more concentrated shot.

Here's why a finer grind size matters:

  • Flavors released: With a finer grind, more flavors and oils are extracted, giving you a richer and more complex taste experience.
  • Faster extraction: The shorter extraction time of 20-30 seconds is made possible by the finer grind, which allows for optimal flavor extraction in a short period.
  • Packed grounds: The compact coffee bed created by the fine grind can withstand the high pressure of the espresso machine, ensuring a perfect shot every time.

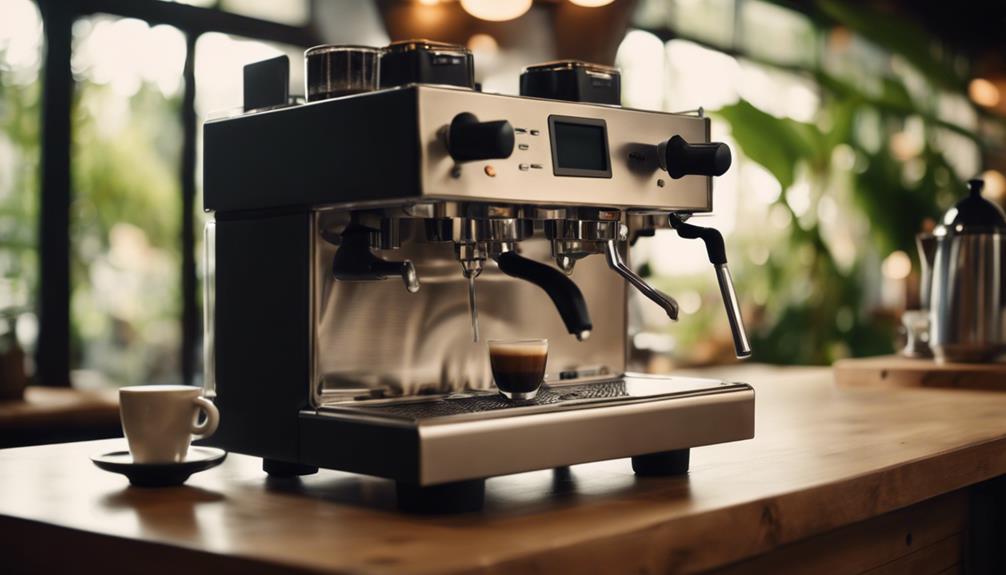
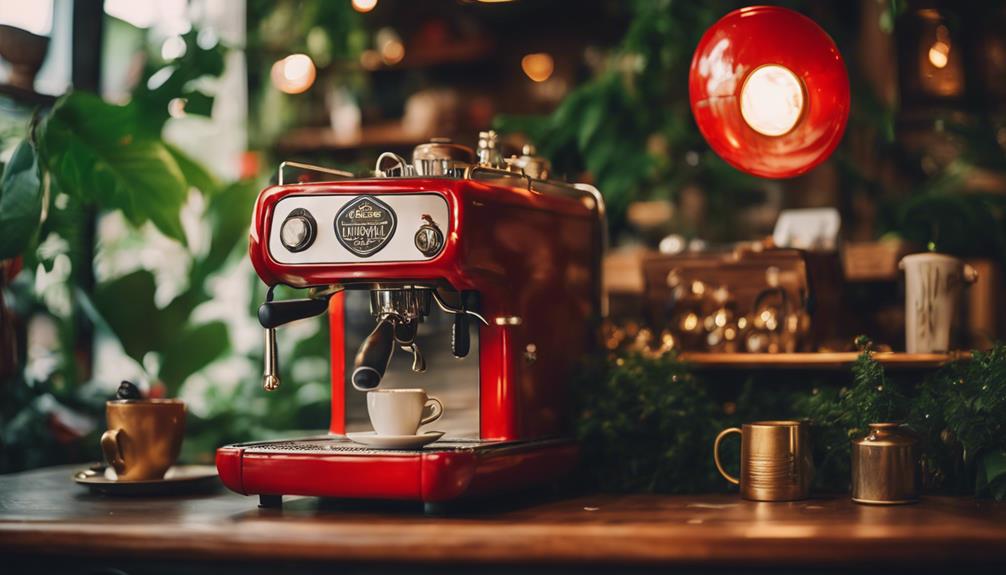
Espresso Machines and Coffee Makers

coffee brewing equipment essentials

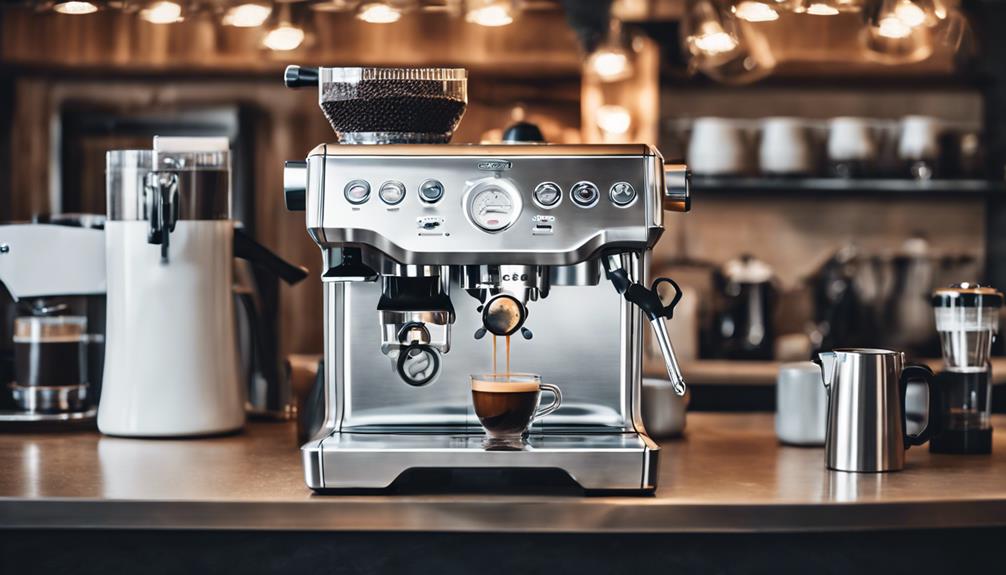
When it comes to making espresso, you'll need to contemplate the type of machine that's right for you.

You'll have to decide between automatic and semi-automatic options, each with their own benefits and drawbacks.

As you explore your choices, think about the brewing time and pressure that will give you the perfect shot.

Espresso Machine Options

How do you choose the perfect espresso machine from the numerous options available, taking into account your desired level of control and convenience?

Advertisement

With so many types of espresso machines out there, it's important to know what you want. Do you prefer a fully automatic machine that simplifies the brewing process, or a semi-automatic one that gives you more control over the shot?

Some key features to bear in mind when selecting an espresso machine include:

  • Customizable shot dosage to create your perfect cup
  • Automation options to streamline the brewing process
  • High-quality construction to guarantee durability and longevity

Investing in a quality espresso machine can elevate your home brewing experience, allowing you to experiment with various recipes and techniques.

Automatic Vs. Semi-Automatic

You're faced with an essential decision when selecting an espresso machine: do you opt for the convenience of an automatic model or the control of a semi-automatic one? This choice affects your brewing process and the quality of your espresso drink.

Here's a breakdown of the key differences:

Feature Automatic Espresso Machines Semi-Automatic Espresso Machines
Brewing Process Handles entire process, including grinding and tamping Requires user to grind and tamp coffee
Control Limited control over brewing parameters Offers more control over extraction time and pressure
Convenience One-touch operation, ideal for busy users Requires more user involvement
Customization Limited customization options Allows for customization of brewing parameters

Automatic espresso machines are perfect for those who want a hassle-free experience, while semi-automatic machines offer more control and customization options for coffee enthusiasts. Coffee makers, on the other hand, use a different brewing method and are designed for larger quantities of coffee. Consider your needs and preferences when choosing between these options.

Advertisement

Brewing Time and Pressure

Now that you've reflected on the type of espresso machine that suits your needs, it's time to explore the brewing time and pressure that sets espresso apart from coffee made with coffee makers.

The brewing time is a significant factor in the difference between espresso and coffee. Espresso machines utilize high pressure, around 15 bars, to force hot water through finely-ground coffee in 20-30 seconds, resulting in a concentrated shot with a rich crema. In contrast, coffee makers rely on gravity, allowing water to seep through medium-coarse coffee grounds over a longer brewing period of 6-12 minutes.

Here are some key takeaways to evaluate:

  • Lightning-fast brewing time: Espresso machines can produce a shot in under 30 seconds, while coffee makers take around 6-12 minutes.
  • Pressure makes the difference: Espresso machines use high pressure to extract flavors, resulting in a bold and rich taste.
  • Flavor profile: The quick brewing time of espresso contributes to its bold flavor profile, while the slower process in coffee makers allows for a lighter, more diluted taste.

Caffeine Content and Serving Sizes

When it comes to caffeine content, a key difference between espresso and coffee lies in their serving sizes, which can greatly impact the total amount of caffeine you ultimately consume. While espresso packs a punch with approximately 64 mg of caffeine per ounce, brewed coffee has about 11.5 mg of caffeine per ounce. However, since coffee is typically served in larger portions, you may end up consuming more caffeine overall.

Here's a breakdown of the caffeine content in different types of coffee:

Type of Coffee Caffeine per Ounce Serving Size Total Caffeine Intake
Espresso 64 mg 1 oz 64 mg
Brewed Coffee 11.5 mg 8 oz 92 mg
French Press 12.5 mg 8 oz 100 mg
Drip Coffee 10 mg 8 oz 80 mg
Turkish Coffee 13 mg 6 oz 78 mg

As you can see, the serving sizes of coffee can greatly impact your total caffeine intake. While espresso is stronger regarding caffeine concentration, the total caffeine consumed may be higher in coffee due to larger serving sizes. This is important to take into account when thinking about your coffee flavor and caffeine needs.

Advertisement

Roasting and Grind Size Matters

roasting affects grind size

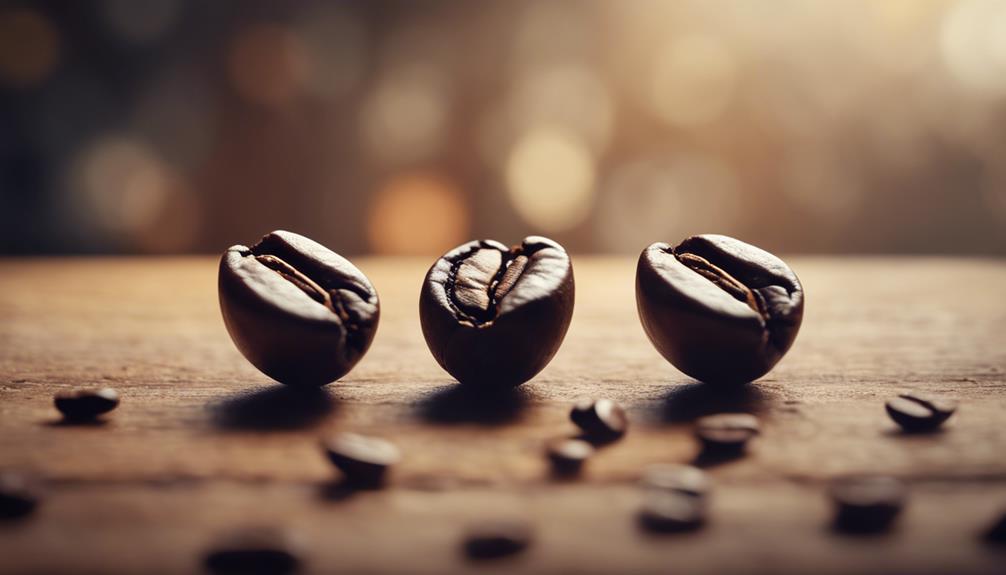
Roasting espresso beans to a darker level and grinding them to a finer texture are essential steps that set espresso apart from regular coffee. You may think it's just a matter of degree, but the difference is profound. Espresso beans are roasted longer and darker, resulting in a bolder flavor profile and a rich crema when brewed.

The grind size is also much finer, resembling sand, which is necessary for ideal extraction during the brewing process.

Here are some key things to keep in mind:

  • A dark roast is necessary for bringing out the full flavor of espresso beans.
  • The roasting process often reaches a second crack, releasing oils that contribute to the creamy texture and body of the final espresso drink.
  • A proper grind allows for high-pressure extraction, where water is forced through the coffee grounds at around 130 lbs of pressure.

Brewing Methods and Flavor Profiles

You'll notice a dramatic shift in flavor profile and brewing time when you switch from traditional coffee to espresso, thanks to the distinct methods used to extract the ideal shot.

Espresso brewing methods involve high pressure, around 9 bars, to quickly extract flavors and create a rich crema on top. This differs considerably from traditional coffee brewing methods like drip, which rely on gravity and take longer to extract flavors.

The grind size for espresso is also finer, resembling a sandy texture, allowing for optimal extraction under high pressure. As a result, espresso's flavor profile is characterized by a bolder, less acidic taste, often with notes of chocolate and caramel.

In contrast, regular coffee can have a wider range of flavor notes depending on the brewing method and beans used. With espresso, you can expect a brewing time of 20-30 seconds, whereas coffee can take anywhere from 6 to 12 minutes.

Advertisement

This affects the overall flavor and strength of the final beverage. By understanding these differences in brewing methods and flavor profiles, you'll appreciate the unique qualities of espresso vs coffee.

The Art of Espresso Making at Home

home espresso making guide

Your journey to create authentic espresso at home begins with investing in an espresso machine that can deliver the necessary 9 bars of pressure, an essential factor in achieving ideal flavor extraction and a velvety crema.

With the right machine, you can experiment with different types of espresso beans and roasts to find your perfect cup.

To make espresso like a pro, you'll need to master the tamping process, ensuring even water flow during extraction.

Don't be discouraged if it takes some trial and error – the payoff is worth it!

Here are some tips to get you started:

Advertisement
  • Invest in a high-quality home espresso machine that can deliver 9 bars of pressure.
  • Experiment with different grind sizes and extraction times to perfect your taste and body.
  • Practice steaming milk to create a rich, creamy texture for your lattes and cappuccinos.

Debunking Common Coffee and Espresso Myths

As you master the art of espresso making, it's equally important to separate fact from fiction and debunk common myths surrounding coffee and espresso. One of the most prevalent myths is that espresso and coffee beans are different. In reality, any coffee bean can be used for both, but the roasting process and grind size distinguish their use.

Myth Reality Why it Matters
Espresso beans are different Any coffee bean can be used Understanding the roasting process and grind size is key
Espresso has more caffeine Coffee has more caffeine overall Don't assume espresso is always the stronger choice
Espresso is just stronger coffee Unique brewing techniques and equipment required Appreciate the art of espresso making
Espresso needs special beans Roasting process and grind size make the difference Experiment with different kinds of beans

Frequently Asked Questions

Is Espresso Coffee Different Than Regular Coffee?

You're wondering if espresso is just regular coffee, but it's not! You'll notice a richer flavor, thicker consistency, and more caffeine in espresso, setting it apart from the coffee you brew at home every morning.

Does Espresso Affect You Differently Than Coffee?

You might wonder if espresso treats you differently than coffee. Well, its intense caffeine kick can give you a quicker energy boost, making you feel more alert and focused, but beware of the potential crash later on.

What Is Unique About Espresso Coffee?

You're wondering what makes espresso coffee unique – it's the precise 1:2 water-to-coffee ratio, high-pressure brewing, and dark roasts that create a thick, rich drink with a creamy crema and bold flavor profile that sets it apart.

Does Espresso Make Coffee Taste Different?

You might think it's just a stronger brew, but trust us, it's not! When you use espresso instead of regular coffee, you'll notice a deeper, richer flavor with a velvety texture that elevates your coffee game.

Conclusion

Now that you've uncovered the differences between coffee and espresso, you might be wondering: will you ever look at your morning cup the same way again?

Advertisement

From brewing techniques to roasting and grind size, every detail matters when it comes to bringing out the unique flavors and aromas of these beloved beverages.

So, what's next – will you become an espresso aficionado, or stick to your daily coffee grind?

The choice is yours, but one thing's for sure: your taste buds will thank you!

Advertisement

Espresso

Espresso Recipe – How to Brew the Perfect Shot!

Master the art of brewing the perfect shot of espresso by unlocking the secrets of dose, yield, and time in this expert guide.

Published

on

By

perfect espresso brewing guide

Get ready to uncover the magic tricks to making the perfect shot of espresso by mastering dose, yield, and time. Shoot for a standard brew ratio of 1:1.5 to 1:2, using about 18 grams for a double shot. Fine-tune your brewing time to 25-30 seconds, and keep the water temperature between 188-205°F. By consistently measuring your dose and yield, you’ll achieve a well-rounded flavor profile. Once you nail down these crucial components, you’ll be on the path to brewing a shot that’s flavorful, full-bodied, and rich – and there’s a whole world of espresso exploration waiting for you to take it up a notch. So, get ready to elevate your espresso game!

Key Takeaways

  • Use a consistent dose of 16-18 grams of coffee for a double shot, with a brew ratio of 1:1.5 to 1:2 for optimal flavor.
  • Aim for a brewing time of 25-30 seconds, adjusting grind size to achieve the ideal flow rate of 1-1.5 grams per second.
  • Ensure even coffee distribution and tamping with 30 lbs of pressure at a 90-degree angle to prevent channeling and under-extraction.
  • Preheat the espresso machine, group head, and cups to achieve thermal stability, and flush the group head with water before brewing.

Essential Espresso Recipe Components

When crafting an espresso recipe, you'll need to focus on three key components: dose, yield, and time, as they work together to produce a perfectly balanced shot. These vital elements will help you achieve the perfect blend of flavors in your espresso. The dose refers to the amount of coffee used, while the yield is the amount of liquid espresso produced. The time, of course, is the duration of extraction.

A standard brew ratio for espresso is important, typically ranging from 1:1.5 to 1:2. This means for every gram of coffee used, you should aim to produce between 1.5 to 2 grams of liquid espresso. To guarantee peak extraction, aim for a brewing time of 25 to 30 seconds. This will help you achieve a balanced flavor profile in your espresso.

When it comes to dosing, consider common amounts like 18 grams for a double shot to maintain consistency and quality in your espresso preparation. By mastering these vital components, you'll be well on your way to brewing the perfect shot of espresso.

Understanding Dose and Yield Ratios

Now that you've got your essential espresso recipe components in place, it's time to fine-tune your dose and yield ratios.

You'll want to strike the perfect balance between the amount of coffee you use and the liquid espresso you produce, as this will greatly impact the flavor profile of your shot.

Advertisement

Dose Ratios Explained

Get familiar with the concept of dose ratios, as they play an essential role in perfecting your espresso shots. The dose refers to the amount of ground coffee used, ranging from 7-10g for a single shot to 20-22g for a triple shot. Yield, on the other hand, is the total weight of the espresso shot, aiming for a brew ratio between 1:1 to 1:3. Clive's signature recipe suggests a 1:1.5 ratio (20g coffee to 30g liquid espresso).

Here's a breakdown of the ideal dose and yield ratios for different espresso shots:

Shot Type Dose (g) Yield (g) Brew Ratio
Single 7-10 14-20 1:1.4 to 1:2
Double 16-18 24-36 1:1.5 to 1:2
Triple 20-22 30-44 1:1.5 to 1:2
Clive's Recipe 20 30 1:1.5

Coffee to Liquid Balance

To perfect your espresso shots, you need to strike a delicate balance between the dose of ground coffee and the yield of liquid espresso, as this ratio greatly impacts the flavor profile of your brew.

The dose, or weight of ground coffee, typically ranges from 7-10g for a single shot, 16-18g for a double, and 20-22g for a triple shot.

The yield, or total weight of the espresso shot, usually ranges from 30g to 40g for a double shot, based on a common brew ratio of 1:2. However, Clive's signature recipe features a 1:1.5 brew ratio, using 20g of coffee to yield 30g of liquid espresso, vital for achieving a balanced flavor.

Advertisement

Adjusting the grind size can help you achieve the ideal extraction time of 25-30 seconds, which is essential for a perfect espresso shot.

Understanding the relationship between dose and yield ratios is key to optimizing espresso quality, as higher ratios produce stronger flavors while lower ratios yield milder profiles.

Optimizing Brewing Time and Technique

brewing time optimization techniques

When you're perfecting your espresso recipe, you know that timing is everything.

You're about to learn how to optimize your brewing time and technique to extract the perfect shot.

Shot Timing Essentials

Mastering shot timing is essential in espresso brewing, as it directly impacts the flavor profile of your final product. Achieving the perfect shot time requires attention to detail and a clear understanding of the brewing process. Typically, the ideal shot time falls between 25 to 30 seconds, allowing for optimal extraction of flavors from the coffee grounds.

Shot Time Grind Size Flavor Profile
< 25 seconds Coarse Under-extracted, sour
25-30 seconds Best Balanced, optimal extraction
> 30 seconds Fine Over-extracted, bitter
Varies Varies Inconsistent brewing

To fine-tune your shot timing, adjust your grind size accordingly. A coarser grind will accelerate extraction, while a finer grind will slow it down. Consistent brewing is key, so use a scale to measure both the yield and dose of coffee to achieve repeatable results. By monitoring your shot time and making adjustments as needed, you'll be well on your way to crafting the perfect espresso recipe.

Advertisement

Ideal Water Flow

Achieving ideal water flow is critical to enhancing brewing time and technique, as it directly impacts the flavor profile of your espresso shot. You want to aim for a flow rate of 1 to 1.5 grams of espresso per second during extraction, which will give you balanced and consistent results.

The key to achieving this is adjusting your grind size. A finer grind will slow down the water flow, while a coarser grind will speed it up, so you'll need to make adjustments based on your shot timing.

When you're tamping, make sure to maintain a level coffee bed to enhance water flow and prevent channeling, which can lead to uneven extraction. If your shots are pulling too quickly, you'll need a coarser grind, while shots that are pulling too slowly require a finer grind.

Consistent Grind Size

To optimize brewing time and technique, you need to maintain a consistent grind size, which is essential for ensuring uniform water flow through the coffee bed and preventing channeling. A consistent grind size, similar to confectionary sugar, allows for even pressure and prevents water from passing through the puck unevenly.

As you brew espresso, you'll find that fine adjustments to the grind setting may be necessary as coffee ages. A coarser grind can lead to faster extraction times, while a finer grind slows down the flow. If your shot is pulling too quickly, try a finer grind, and if it's pulling too slowly, try a coarser grind. The ideal shot time is between 25-30 seconds, and a consistent grind size helps you achieve this.

Advertisement

Perfecting Distribution and Tamping

You'll get the best out of your espresso by first leveling the coffee bed, an essential step that prevents channeling and guarantees even extraction. To achieve this, use a distribution tool or tap the portafilter to distribute the coffee grounds evenly and break up any clumps. This makes sure that the coffee is evenly saturated during brewing, resulting in a perfect shot of espresso.

Distribution Technique Tamping Pressure Puck Preparation
Weiss Distribution Technique (WDT) 30 lbs Uniform puck for ideal extraction
Tap portafilter gently Consistent pressure Even distribution of coffee grounds
Use a distribution tool 90-degree angle Prevents channeling and clumping

When tamping, apply consistent pressure, ideally around 30 lbs, at a 90-degree angle to create a uniform puck. Consistency in tamping pressure and technique is key, as variations can lead to significant differences in extraction quality. By mastering distribution and tamping, you'll be well on your way to brewing a perfect shot of espresso with even extraction and rich flavor. Remember, it's not about the force you apply, but rather the consistency and technique you use.

Mastering the Art of Shot Pulling

expert techniques for shot pulling

By the time you're ready to pull a shot, your espresso machine should be fully warmed up and clean, with water flushed through the group head to achieve ideal temperature.

Now, it's time to master the art of shot pulling. As you prepare to pull a shot, make certain you've got the right grind size to achieve the perfect extraction. Aim for a shot time of 25-30 seconds, adjusting the grind size accordingly if it pulls too quickly or slowly.

You're aiming for a double shot of espresso with a yield of 36-40 grams. Remember to maintain a consistent tamping technique, applying around 30 lbs of pressure to create a level coffee bed for even extraction.

As you pull the shot, observe the crema color and flow rate. A pale crema suggests under-extraction, while dark crema indicates over-extraction.

Advertisement

With practice, you'll develop a sense of what works best for your espresso brewing. By nailing these details, you'll be well on your way to pulling the perfect shot, complete with a rich crema on top.

Key Equipment and Preparation Tools

Now that you've mastered the art of shot pulling, it's time to focus on the essential tools of the trade.

You'll need a reliable espresso machine that can deliver consistent results, and a high-quality grinder that can produce a precise grind.

In this section, we'll explore the must-haves for your espresso setup, from machine essentials to grinder selection tips.

Espresso Machine Essentials

Equip yourself with the right gear, and you'll be well on your way to crafting exceptional espresso shots. A quality espresso machine is vital for achieving ideal extraction. For under $500, the Breville Infuser is a great beginner-friendly option.

Advertisement
Equipment Purpose Recommendation
Espresso Machine Achieve ideal extraction Breville Infuser
Coffee Grinder Fine and consistent grind size Baratza Encore
Portafilter Hold coffee grounds Included with machine

A burr coffee grinder is essential for fresh, high-quality coffee. The Baratza Encore is the best value grinder since 2015. You'll also need a scale to measure coffee doses accurately – a typical double shot requires 13-18 grams of coffee. Necessary tools include a tamper for compressing coffee grounds evenly into the portafilter and a distribution tool to prevent channeling during extraction. Don't forget to maintain a clean machine and regular equipment care to guarantee consistent espresso quality and prevent off-flavors from old coffee oils. With these essentials, you'll be well-equipped to brew the perfect shot!

Grinder Selection Guide

You'll want to invest in a high-quality grinder that can produce a fine, consistent grind size, as it's an essential factor in achieving ideal espresso extraction. A good espresso machine can only do so much if the coffee grinders aren't up to par.

Look for grinders with flat burrs of at least 55mm and stepless grind settings to allow for precise adjustments based on the coffee's age and characteristics. If you're just starting out, manual grinders like the 1Zpresso J-Max provide excellent control and value.

Remember to regularly clean and maintain your grinder to prevent stale coffee oils from affecting the flavor and quality of your espresso shots.

When it comes to measuring coffee doses, invest in a scale to verify you're using the best 16-18 grams of coffee for a double shot.

Advertisement

With a good grinder and the right amount of coffee, you'll be well on your way to brewing good espresso. It just takes practice and patience to get the grind just right. Ground correctly, your coffee will be clean and dry, and you'll be enjoying perfect shots in no time.

Crucial Factors for Brewing Success

essential elements for brewing

Frequently, a perfect shot of espresso hinges on attention to a few essential factors that can make all the difference between a mediocre brew and a sublime one.

To brew the perfect shot, you'll want to focus on getting the grind size just right – think confectionary sugar. This fine grind guarantees peak extraction and flavor transfer during brewing.

Next, maintain a consistent tamping pressure of around 30 lbs to prevent under-extraction or over-extraction, which can affect the flavor profile of your shot.

You'll also want to monitor the shot time, aiming for 25-30 seconds to achieve a balanced and flavorful espresso.

The brew ratio is another vital factor, with a common range of 1:1.5 to 1:2, allowing you to adjust based on personal taste preferences.

Advertisement

Finally, regularly check and maintain the water temperature between 188-205°F, depending on the roast type, to maximize extraction and enhance the overall flavor of your espresso.

Espresso Puck Preparation Techniques

As you prepare the espresso puck, measuring and grinding 18 grams of coffee to a fine consistency, similar to confectionary sugar, is vital for ideal extraction during brewing. This guarantees you're working with the perfect amount of coffee for peak extraction.

Next, use a distribution tool or gently tap the portafilter to evenly distribute the coffee grounds in the basket. This prevents channeling and promotes uniform extraction.

Before brewing, flush the group head with water to guarantee cleanliness and peak brewing temperature, essential for achieving the best flavor extraction.

Consider using the Weiss Distribution Technique (WDT) to break up clumps in the coffee grounds, guaranteeing even distribution and enhancing the flow of water through the puck during extraction.

Advertisement

Tamping Process and Techniques Explained

tamping techniques explained thoroughly

By mastering the tamping process, you're guaranteeing that the coffee grounds are evenly compressed, which is essential for achieving ideal extraction and preventing channeling during brewing.

To achieve this, you need to apply consistent tamping pressure of around 30 lbs. Anything more doesn't improve the flavor, and under-tamping can lead to under-extraction.

Before tamping, make sure you've distributed the coffee grounds evenly in the portafilter to create a level coffee bed. This prevents channeling and guarantees even extraction.

Hold the tamper at a 90-degree angle, gripping it like a doorknob, and apply gentle, consistent pressure throughout the process.

Consider using a distribution tool or the Weiss Distribution Technique (WDT) to eliminate clumps and promote uniformity in the coffee puck.

Remember, practice is key to mastering tamping techniques. Developing a steady hand and repeatable motions will lead to more consistent espresso shots over time.

Advertisement

With consistent tamping, you'll be well on your way to brewing perfect espresso shots.

Brewing and Serving the Perfect Espresso

With your coffee grounds expertly tamped, you're ready to brew the perfect espresso shot, aiming for a total yield of 36-40 grams with a brew time of 25-30 seconds. To achieve this, guarantee your coffee dose is around 18 grams for a double shot, utilizing a brew ratio of 1:2 to balance strength and flavor.

Here's a quick reference guide to help you brew the perfect espresso:

Variable Ideal Range Impact on Flavor
Brew Time 25-30 seconds Balances acidity and body
Coffee Dose 18 grams Affects strength and flavor
Crema Color Light brown to reddish Indicates ideal extraction
Thermal Stability Preheat cups and group head Guarantees consistent extraction
Brewing Variables Document and refine Maintains flavor quality

Frequently Asked Questions

How to Make a Perfect Shot of Espresso?

To make a perfect shot of espresso, you'll need to focus on precise measurements, grinding, and tamping. You're aiming for a smooth, balanced flavor, so don't skip the details – it's worth the extra effort!

How to Perfectly Brew Espresso?

You're on a quest to perfectly brew espresso! To achieve this, you'll need to nail the coffee-to-water ratio, grind size, and tamping pressure, then monitor the shot's flow and crema color to guarantee ideal extraction.

Advertisement

What Are the 4 Qualities of a Perfect Espresso Shot?

You're looking for the perfect espresso shot, and it's all about four key qualities: a rich, golden crema; a balanced flavor profile; a smooth, consistent flow; and an inviting aroma that complements the taste.

What Is the Best Ratio for Espresso Shots?

"A million ratios to choose from, but which one's the magic number for you? The best ratio for espresso shots is subjective, but generally, a 1:1 to 1:3 range is ideal, with 1:2 being a popular starting point for a balanced flavor."

Conclusion

You've reached the crescendo of espresso mastery! With each shot, you're now a conductor, harmonizing dose and yield, brewing time and technique, distribution and tamping.

The puck's preparation is a waltz, the tamping process a gentle press. As you brew and serve, the aromas swirl, a symphony of flavors.

Your perfect shot is a work of art, a masterpiece born from precision and practice. Savor the silence, for in this moment, you're the maestro of espresso.

Advertisement
Continue Reading

Espresso

Brown Sugar Oat Milk Shaken Espresso – A Sweet and Creamy Treat!

Savor the rich flavors of brown sugar, cinnamon, and oat milk in this decadent espresso drink that will leave you craving more.

Published

on

By

sweet creamy espresso delight

Get ready to indulge in the delectable Brown Sugar Oat Milk Shaken Espresso, a delicious drink that is sure to become your new go-to coffee favorite. This delightful beverage combines a strong espresso base with brown sugar syrup and a hint of warm cinnamon, perfectly complemented by the creamy texture of oat milk. To prepare it, simply mix espresso, syrup, and ice in a shaker, then strain into a glass and add a generous serving of oat milk on top. With endless customization options available, including various flavored syrups and alternative milk choices, you can personalize this drink to suit your palate. As you experiment with different variations, you’ll unlock even more ways to enjoy this delightful and creamy treat.

Key Takeaways

  • This drink combines bold espresso, brown sugar syrup, and creamy oat milk for a rich, sweet, and harmonious flavor profile.
  • Brown sugar syrup is made by boiling brown sugar, water, and cinnamon, adding a deep sweetness and warm spice flavor.
  • To prepare, combine espresso, ice, and brown sugar syrup in a shaker, shake vigorously, and strain into a glass topped with oat milk.
  • Customization options include flavored syrups, spices, and milk alternatives to tailor the drink to individual tastes and dietary needs.

Rich Flavor Profile Explained

With each sip, you're greeted by a rich flavor profile that masterfully balances the boldness of espresso with the deep, velvety sweetness of brown sugar syrup and a hint of warm cinnamon.

This harmonious blend is what makes the Iced Brown Sugar Oat Milk Shaken Espresso a standout drink. The brown sugar syrup, made by boiling brown sugar with water, cinnamon, and a pinch of salt, adds a complex sweetness that enhances the overall flavor experience.

Meanwhile, the creamy oat milk contributes a smooth texture and a subtle nutty flavor, perfectly complementing the boldness of the espresso. As you sip, the sweetness from the syrup and the bitterness from the espresso meld together in perfect harmony, creating a revitalizing and invigorating drink.

You'll find that the Oat Milk Shaken Espresso is more than just a drink – it's an experience that will leave you wanting more. With its unique flavor profile and creamy texture, it's no wonder this drink has become a favorite among coffee lovers.

Easy Preparation Steps Uncovered

Now that you've got a handle on the rich flavor profile of this drink, it's time to get hands-on!

Advertisement

You'll start by combining the essential ingredients – Brown Sugar Syrup, ice, and espresso – in a way that sets the tone for the entire drink.

Brown Sugar Syrup

Making brown sugar syrup from scratch is a breeze, and you'll be rewarded with a rich, velvety sweetener that elevates your Iced Brown Sugar Oat Milk Shaken Espresso to new heights.

To make it, combine 1 cup of brown sugar, 1/2 cup of water, and a pinch of cinnamon in a saucepan and bring it to a boil. Then reduce to a simmer for 5-10 minutes until it thickens.

Alternatively, you can mix 1 tablespoon of brown sugar with 1 tablespoon of water and microwave for 10 seconds to dissolve the sugar for a quick fix.

This homemade syrup not only enhances the flavor of your Iced Brown Sugar Oat Milk Shaken Espresso but can also be used in other beverages for added sweetness.

Advertisement

You can store it in a sealed jar in the refrigerator for up to 4 weeks, making it convenient for multiple servings of iced drinks.

Plus, you can adjust the quantity of brown sugar in the syrup to customize the sweetness level to your preference, ensuring a tailored flavor experience.

Ice and Espresso Mix

By combining your freshly brewed espresso with brown sugar syrup and ice in a shaker or mason jar, you'll set the stage for a perfectly chilled and flavorful Iced Brown Sugar Oat Milk Shaken Espresso.

Start by adding 1-2 tablespoons of brown sugar syrup to the shaker or jar, depending on your desired level of sweetness. Then, fill the container with ice to achieve the desired chilling effect.

Next, shake the mixture vigorously for 15-20 seconds to create a frothy texture and mix the ingredients thoroughly. This step is essential in combining the rich flavors of the espresso and brown sugar syrup.

Advertisement

Once you've shaken the mixture, strain it into a glass filled with ice, allowing the ice to chill the drink as it's poured.

Your Iced Brown Sugar Oat Milk Shaken Espresso is now ready for the final touch – topping it with 4-6 oz of oat milk. Adjust the amount of oat milk to suit your taste preferences for creaminess.

With these easy steps, you'll be enjoying a deliciously sweet and creamy Shaken Espresso in no time!

Customization Options Galore

endless personalization possibilities available

As you explore the world of Brown Sugar Oat Milk Shaken Espresso, you'll discover a plethora of customization options to make your drink truly unique.

You can experiment with flavorful twist options, such as adding vanilla or hazelnut syrups, to create a taste experience that's all your own.

Flavorful Twist Options

You can open up a world of flavors by experimenting with various customization options that take your Brown Sugar Oat Milk Shaken Espresso to the next level. One way to do this is by incorporating flavored syrups into your drink. Try adding a drizzle of vanilla or hazelnut syrup to give your espresso a unique twist.

Advertisement

Here are a few ideas to get you started:

  • Add a splash of pumpkin spice syrup during fall for a festive touch to your beverage.
  • Substitute oat milk with other plant-based options like almond or soy milk for different flavor profiles and creaminess levels.

Milk Alternatives Available

With a plethora of plant-based milk alternatives at your disposal, the Brown Sugar Oat Milk Shaken Espresso can be tailored to suit your unique taste buds and dietary needs.

Oat milk is a popular choice, providing a creamy, dairy-free alternative that complements the drink's flavor profile. You can opt for Califia oat milk for its rich taste or try Chobani Extra Creamy and Oatly Barista Style for excellent texture.

However, if you prefer a different flavor, you can substitute oat milk with almond or soy milk, offering a variety of taste experiences.

Customization of the drink extends to the type of milk used, allowing you to experiment with different brands and types to find your preferred combination.

Whether you're vegan, lactose intolerant, or simply prefer plant-based options, the Brown Sugar Oat Milk Shaken Espresso can cater to your dietary requirements.

Advertisement

With plant-based milk alternatives, you can enjoy a delicious and creamy drink that suits your lifestyle.

Nutritional Information Revealed

Typically, a serving of the Iced Brown Sugar Oat Milk Shaken Espresso packs a caloric punch of approximately 162 calories.

As you savor this sweet treat, you'll be consuming a total of 37g of carbohydrates, with 33g coming from sugars.

On the plus side, each serving provides 2g of protein to help keep you going throughout the day.

Here's a snapshot of what you can expect from this drink:

Advertisement
  • A creamy blend of oat milk, which is lower in calories compared to whole milk, making it a healthier dairy-free alternative
  • A boost of essential minerals, including 199mg of calcium and 1mg of iron per serving

Syrup Storage and Handling

syrup storage best practices

One essential step in enjoying the Brown Sugar Oat Milk Shaken Espresso is properly storing and handling the brown sugar syrup, ensuring its flavor and quality remain intact for future use.

You'll be happy to know that you can store the brown sugar syrup in a sealed jar or container in the refrigerator for up to 4 weeks. This allows you to make multiple batches of the espresso drink without having to prepare the syrup each time.

When you store the syrup correctly, you'll maintain its rich flavor and quality, which is vital for a delicious Brown Sugar Oat Milk Shaken Espresso. Remember, the syrup is a key component of this drink, so it's worth taking the time to store it properly.

Essential Ingredients and Tools

You'll need a few key ingredients and tools to whip up a delicious Brown Sugar Oat Milk Shaken Espresso. First, let's talk about the essentials: a double shot of espresso, homemade or store-bought brown sugar syrup, oat milk, and ice.

You can also add a pinch of cinnamon to the brown sugar syrup or use it as a topping for extra flavor. When it comes to oat milk, Chobani Extra Creamy and Oatly Barista Style are great options for a creamy texture.

Here are the must-haves for preparation:

Advertisement
  • A coffee maker or espresso machine to brew the perfect shot
  • A cocktail shaker or mason jar to mix and shake the ingredients

With these ingredients and tools, you'll be well on your way to creating a Brown Sugar Oat Milk Shaken Espresso that's sure to impress.

You can always customize the drink further with flavored syrups to suit your taste preferences. Now that you have the essentials covered, it's time to move on to the next step!

Shaking Technique Mastered

mastered shaking technique successfully

Combine ice, espresso, and brown sugar syrup in a cocktail shaker or mason jar, then shake vigorously for 15-20 seconds to create a frothy layer and infuse the ingredients with air. You'll know it's done when the container feels cold to the touch. This step is essential to achieve the perfect balance of flavors in your brown sugar oat milk shaken espresso.

Shaking Technique Benefits Tips
Shake vigorously Creates frothy layer, infuses air Use generous ice to minimize dilution
Shake for 15-20 seconds Achieves perfect balance of flavors Feel the container for coldness
Strain over fresh ice Smooth pour, ideal presentation Top with oat milk for creamy texture

After mastering the shaking technique, you're one step closer to enjoying your delicious coffee drink. Remember to strain the mixture over fresh ice and top it with oat milk to maintain the creamy texture and enhance the overall appeal of your brown sugar oat milk shaken espresso.

Serving and Enjoyment Tips

With your shaken espresso mixture ready, it's time to focus on serving and enjoying your brown sugar oat milk shaken espresso to its fullest potential. Now, it's all about creating an unforgettable experience. Here are some serving and enjoyment tips to elevate your Iced Brown Sugar Oat Milk Shaken Espresso:

  • Pour the mixture over a generous amount of ice to maintain its invigorating chilled effect.
  • Sprinkle ground cinnamon on top before serving to enhance both the aroma and taste, if you desire an added flavor boost.

As you sip your Brown Sugar Oat Milk Shaken Espresso, savor the balance of flavors, enjoying the creamy oat milk combined with the rich espresso and sweet brown sugar notes.

Experiment with different oat milk brands, like Chobani Extra Creamy or Oatly Barista Style, to find the texture and creaminess that suits your palate.

Frequently Asked Questions

What to Add to Brown Sugar Oatmilk Shaken Espresso?

When wondering what to add to your drink, consider a sprinkle of cinnamon for a warm touch, or flavored syrups like vanilla or hazelnut to introduce new flavors, and don't forget about rich chocolate or cocoa powder for a decadent twist.

Advertisement

Is the Shaken Brown Sugar Espresso Sweet?

You're wondering if your shaken espresso is a sweet indulgence? Let's just say it's got a "generous" amount of sugar, courtesy of the brown sugar syrup, but you can always adjust to your taste!

How Many Calories Are in a Brown Sugar Shaken Espresso With Oat Milk?

You're wondering how many calories are in a brown sugar shaken espresso with oat milk? Well, a serving of this drink contains approximately 162 calories, making it a relatively low-calorie pick-me-up option for your daily routine.

Does the Brown Sugar Oatmilk Shaken Espresso Have Dairy?

You might be surprised that 65% of the global population has some degree of lactose intolerance! To answer your question, no, the Brown Sugar Oat Milk Shaken Espresso doesn't have dairy since it uses oat milk as a creamy alternative.

Conclusion

As you savor the last drop of your brown sugar oat milk shaken espresso, you're left with a sense of satisfaction, like finding the missing piece to a puzzle.

Just as a perfectly crafted melody harmonizes disparate notes, this drink combines rich flavors to create a symphony of sweetness and creaminess.

Advertisement

With every sip, you'll be hooked, just like the 75% of coffee lovers who crave a daily dose of caffeine – and for good reason!

Continue Reading

Espresso

Pumpkin Espresso Martini – The Fall Cocktail You’ll Love!

Indulge in the Pumpkin Espresso Martini, a decadent fall cocktail that will leave you craving its rich, velvety flavors long after the last sip.

Published

on

By

fall inspired pumpkin espresso martini

You will absolutely love the Pumpkin Espresso Martini, a uniquely delicious fall cocktail that combines espresso, pumpkin puree, and coffee liqueur. With just 5 minutes of preparation and approximately 250-300 calories per serving, this autumn-inspired drink is ideal for Thanksgiving gatherings and festive celebrations. You can easily increase the recipe for larger groups, and also customize it with non-alcoholic, vegan, or low-calorie options. From the delightful flavors of pumpkin and espresso to the velvety texture of the creamer, each sip will transport you to the cozy embrace of fall – and there’s so much more to discover in this seasonal delight.

Key Takeaways

  • This Pumpkin Espresso Martini combines espresso, pumpkin puree, and coffee liqueur for a delicious fall cocktail perfect for autumn festivities.
  • With approximately 250-300 calories per serving, it's a relatively low-calorie indulgence for the season.
  • Preparation is quick and easy, taking only about 5 minutes to make, and can be scaled up for larger gatherings.
  • The flavor profile is rich and smooth, with the pumpkin puree adding autumnal warmth and creaminess to the strong espresso base.

Fall Cocktail Essentials

As you start planning your fall festivities, consider stocking up on these essential ingredients to create a seasonal cocktail menu that will impress your guests.

To craft the perfect Pumpkin Espresso Martini, you'll need a few key items. First, grab a cocktail shaker to mix and chill your ingredients. Next, pick up some pumpkin puree to add a rich, velvety texture to your drink. You'll also need a coffee liqueur, like Kahlua, to give your martini a deep, espresso flavor.

Don't forget to sprinkle a pinch of pumpkin pie spice on top for an extra burst of autumn flavor. With these ingredients in hand, you'll be well on your way to creating a fall-inspired cocktail menu that's sure to delight.

And the best part? This Pumpkin Espresso Martini is quick to whip up, taking only 5 minutes to prepare. So go ahead, get creative, and shake up a batch of these delicious drinks to serve at your next fall gathering!

Pumpkin Martini Recipe Details

You'll need to combine a few key ingredients to create the perfect Pumpkin Espresso Martini, with a unique blend of flavors and textures that will leave your guests wanting more.

Advertisement

To start, you'll need 2 oz of vodka, 3 oz of Kahlua, 3 oz of freshly brewed espresso, 2 oz of creamer, and 1 tbsp of pumpkin puree. This classic espresso martini gets a fall twist with the addition of pumpkin flavor, which pairs perfectly with the rich coffee flavor.

You can enhance the pumpkin flavor by adding a sprinkle of pumpkin pie spice during preparation or as a garnish. With these simple ingredients, you can create a delicious fall cocktail that's sure to impress.

The best part? It only takes about 5 minutes to prepare and serves approximately 250-300 calories per serving. Plus, the recipe is easily scalable, so you can double or triple the ingredients to serve multiple guests at your autumn gatherings.

With the right equipment, including a cocktail shaker, measuring tools, a strainer, and chilled martini glasses, you'll be well on your way to crafting the perfect Pumpkin Espresso Martini.

Autumn-Inspired Flavor Profile

seasonal fall flavor combination

With the ingredients combined, you're left with a rich, velvety cocktail that embodies the warmth and coziness of autumn, thanks to the perfect balance of espresso, pumpkin puree, and pumpkin pie spice.

The Pumpkin Espresso Martini is a true reflection of the fall season, with its inviting aroma and flavors that evoke feelings of comfort and nostalgia. The addition of Kahlua deepens the coffee flavor, making it a perfect choice for coffee lovers during the fall season.

Advertisement
Flavor Component Description Impact
Espresso Rich, bold, and smooth Provides a strong coffee base
Pumpkin Puree Sweet, creamy, and velvety Adds autumnal warmth and coziness
Pumpkin Pie Spice Warm, aromatic, and inviting Evokes feelings of nostalgia and comfort

The result is a cocktail that's not only delicious but also Instagram-worthy. With its creamy espresso texture and autumn-inspired flavors, the Pumpkin Espresso Martini is the perfect choice for your fall gatherings and Thanksgiving celebrations.

Easy Preparation Steps Guide

Now that you're ready to create your Pumpkin Espresso Martini, it's time to walk through the easy preparation steps.

You'll need to focus on a few key elements, including proper ice preparation, essential mixing techniques, and martini glass essentials, to guarantee a smooth and delicious drink.

Ice Preparation Tips

Chilling your Pumpkin Espresso Martini to perfection starts with preparing the right kind of ice, an essential step that can make or break the flavor and texture of your cocktail. To get it right, fill an ice cube tray with water and freeze it for several hours, ensuring you have enough ice to chill your cocktail shaker adequately.

For a more premium experience, use larger ice cubes or spheres to slow down dilution, allowing your cocktail to remain cold without watering it down quickly. If you want to elevate the visual appeal, consider freezing coffee or espresso in ice cube trays to create coffee-flavored ice cubes for serving.

Advertisement

Don't forget to chill your martini glasses by placing them in the freezer for about 10-15 minutes before serving to keep the cocktail cold longer. With these ice preparation tips, you'll be well on your way to crafting a chilled martini that's sure to impress.

Essential Mixing Techniques

To craft a perfectly balanced Pumpkin Espresso Martini, you'll need to master a few essential mixing techniques that will elevate your cocktail game.

Start by filling a cocktail shaker with a generous amount of ice to chill the ingredients effectively before shaking. Next, combine 2 oz of vodka, 3 oz of Kahlua, 3 oz of brewed espresso, 2 oz of creamer, and 1 tbsp of pumpkin puree directly into the shaker for a balanced flavor profile.

Shake the mixture vigorously for about 30 seconds to guarantee all ingredients are well combined and chilled while creating a frothy texture. This will help to emulsify the cream and vodka, giving your martini a silky smooth consistency.

After shaking, use a strainer to pour the mixture into chilled martini glasses, guaranteeing a smooth pour without any ice shards. Finally, for an extra touch, garnish the cocktail with a sprinkle of pumpkin pie spice or a few espresso beans on top to enhance presentation and flavor.

Advertisement

With these essential mixing techniques, you'll be well on your way to creating a delicious Pumpkin Espresso Martini that's sure to impress.

Martini Glass Essentials

You'll want to prepare your martini glasses in advance by storing them in the freezer or filling them with ice water, guaranteeing they're chilled to perfection when it's time to serve your Pumpkin Espresso Martini. This step may seem minor, but it makes a significant difference in the overall presentation and temperature of your cocktail.

When you're ready to serve, use a strainer to pour the mixed ingredients from the shaker into the chilled martini glass. This will prevent any ice shards from getting into your drink and guarantee a smooth, velvety texture.

To elevate your cocktail experience, consider using chilled stemmed glasses, which add an air of elegance and complement the seasonal theme of your pumpkin espresso martini.

Seasonal Garnish Ideas

creative seasonal garnish suggestions

Five seasonal garnish ideas can elevate your Pumpkin Espresso Martini from ordinary to extraordinary. You can choose one or combine a few to create a unique look and flavor profile.

Here are some ideas to get you started:

Advertisement
Garnish Description
Pumpkin Pie Spice Sprinkle a pinch to enhance autumn flavors and add visual appeal
Whipped Cream Top with a dollop for a creamy texture and festive look
Espresso Beans Add a few for a classic, elegant touch and to emphasize the coffee flavor
Caramel Sauce Drizzle over whipped cream or around the rim of the glass for sweetness and decadence
Chocolate Shavings Use for a rich, chocolatey finish that pairs well with pumpkin flavor

These garnish ideas will take your Pumpkin Espresso Martini to the next level. You can experiment with different combinations to find your favorite. Remember, the key is to have fun and be creative!

Variations and Dietary Options

Now that you've mastered the art of garnishing your Pumpkin Espresso Martini, it's time to explore the many ways you can adapt this recipe to suit various tastes and dietary needs.

One of the best things about this cocktail is its versatility, offering plenty of variations to cater to different preferences.

If you're hosting a gathering with non-drinkers, you can easily transform the recipe into a non-alcoholic mocktail by substituting the vodka and Kahlua with coffee, flavored syrups, or espresso.

For those with dietary restrictions, rest assured that this recipe is gluten-free and can be made dairy-free with non-dairy creamers.

Advertisement

You can also make it refined sugar-free by using natural sweeteners instead of simple syrup.

Feel free to experiment with flavored vodkas, like vanilla or caramel, to enhance the richness of the cocktail without adding extra calories.

And, with a few tweaks, you can even make it vegan by using plant-based creamers and dairy-free toppings.

With these variations, you can enjoy your Pumpkin Spice Espresso Martini while catering to all your guests' needs.

Frequently Asked Questions

Can I Make a Virgin Version of the Pumpkin Espresso Martini?

You're wondering if you can make a virgin version of a certain fall-inspired drink. Absolutely, you can! Simply substitute the vodka with a non-alcoholic alternative, like cream soda or sparkling water, and keep the rest of the ingredients the same.

Advertisement

How Long Does It Take to Prepare This Fall Cocktail?

You're wondering how long it takes to prepare this fall cocktail? It'll take you around 10-15 minutes to mix and shake the ingredients, and that's including the time it takes to chill the martini glasses!

Can I Use Fresh Pumpkin Instead of Canned Puree?

"Oh, you think you're a rebel, don't you, wanting to use fresh pumpkin? Go ahead, waste your time roasting and pureeing, but honestly, canned is fine, and you'll get the same flavor with way less hassle."

Is the Pumpkin Espresso Martini Suitable for a Halloween Party?

You're wondering if this drink fits a Halloween party vibe, and the answer is yes! The pumpkin flavor and espresso kick will be a hit with your spooky celebration crowd, so go ahead and serve it up!

Can I Store the Martini Mixture in the Refrigerator Overnight?

"As you prep for the spookiest night of the year, you're wondering if your martini mixture can chill overnight. Yes, you can store it in the refrigerator, but give it a good stir before serving to revive the flavors and textures."

Conclusion

You've just conjured up the most divine, life-changing, and Instagram-worthy fall cocktail of the season – the pumpkin espresso martini!

Advertisement

With every sip, the warm, spiced flavors will transport you to a cozy autumn evening, surrounded by golden leaves and crackling fireplaces.

Your taste buds will do the happy dance, and your friends will beg for the recipe.

Trust us, this martini is the epitome of fall in a glass – you'll be obsessed!

Continue Reading
Advertisement

Affiliate disclaimer

As an affiliate, we may earn a commission from qualifying purchases. We get commissions for purchases made through links on this website from Amazon and other third parties.

Advertisement

Vetted

Tanpopo Konditorei Café Munich Tanpopo Konditorei Café Munich
Vetted2 months ago

Indulge in Delights at Tanpopo Konditorei Café Munich

Savor the exquisite pastries and serene ambiance at Tanpopo Konditorei Café Munich, your go-to spot for a sweet retreat in...

Vetted2 months ago

Here’s a new version of the review for “The Creative Spark: Unleashing Your Inner Artist”:

2025

top shower scrubbers 2024 top shower scrubbers 2024
Vetted2 months ago

15 Best Shower Scrubbers to Make Cleaning a Breeze in 2025

Discover the top 15 shower scrubbers of 2025 that promise effortless cleaning—find out which one will transform your scrubbing experience!

top storm doors 2024 top storm doors 2024
Vetted2 months ago

The 15 Best Storm Doors of 2025 – Enhance Your Home's Curb Appeal and Protection

Optimize your home's curb appeal and security with the 15 best storm doors of 2025—discover the unique features that could...

ultimate comfort chair massagers ultimate comfort chair massagers
Vetted2 months ago

15 Best Back Massagers for Your Chair: Ultimate Comfort and Relief

Have you been searching for the perfect back massager to elevate your comfort? Discover the 15 best options that promise...

healthier caffeine free mushroom coffees healthier caffeine free mushroom coffees
Vetted2 months ago

14 Best Caffeine-Free Mushroom Coffees for a Healthier Brew

Mushroom coffees offer a healthier brew alternative—discover the 14 best caffeine-free options that might just transform your morning routine!

stylish outdoor dining sets stylish outdoor dining sets
Vetted2 months ago

15 Best Outdoor Dining Sets for Stylish Al Fresco Dining in 2025

Browse our curated list of the 15 best outdoor dining sets for stylish al fresco dining in 2025, and discover...

top stackable washer dryers top stackable washer dryers
Vetted2 months ago

15 Best Stackable Washer Dryers of 2025 – Space-Saving Solutions for Your Laundry Room

Get ready to discover the 15 best stackable washer dryers of 2025 that will transform your laundry room into a...

top cordless lawn mowers top cordless lawn mowers
Vetted2 months ago

15 Best Cordless Electric Lawn Mowers of 2025 – Power and Convenience Combined

Harness the power of convenience with the 15 best cordless electric lawn mowers of 2025—discover which one will revolutionize your...

top mushroom coffees for gut top mushroom coffees for gut
Vetted2 months ago

15 Best Mushroom Coffees for Gut Health That You Need to Try

Find out the 15 best mushroom coffees for gut health that can transform your morning routine and discover their unique...

mushroom coffee pods selection mushroom coffee pods selection
Vetted2 months ago

15 Best Mushroom Coffee Pods to Boost Your Morning Brew

Uncover the top 15 mushroom coffee pods that can transform your morning routine and unleash a new level of energy...

top bathroom fans 2024 top bathroom fans 2024
Vetted2 months ago

15 Best Bathroom Fans of 2025 – Quiet, Efficient, and Stylish Options

You won't believe the stylish and efficient bathroom fans of 2025 that promise quiet operation and enhanced ventilation—discover your perfect...

Trending