Espresso
How Much Caffeine Is in an Espresso Shot? The Numbers Explained!
Hoping to fuel up with a precise caffeine kick, but unsure how much is in your espresso shot?
You are likely to receive approximately 63-75 milligrams of caffeine from a single shot of espresso, but the exact amount can vary depending on factors such as the type of coffee beans used and the roast level. A double shot contains around 126 milligrams of caffeine, and espresso has a higher caffeine concentration than regular coffee. The brewing method, amount of coffee grounds, and brand of coffee also influence caffeine levels. With so many variables at play, it is evident that comprehending caffeine content in espresso extends beyond a mere number – and there is more to the narrative.
Key Takeaways
- A single shot of espresso typically contains 63-75 milligrams of caffeine, depending on the brand and type of coffee beans used.
- The caffeine content of an espresso shot can vary significantly, with some shots containing as little as 50 milligrams or as much as 100 milligrams.
- The ideal brewing conditions, including water temperature and extraction time, can affect the amount of caffeine extracted from the coffee grounds.
- The type of coffee beans used, such as Arabica or Robusta, can also impact the caffeine content, with Robusta beans generally containing more caffeine.
Espresso Basics and Preparation
When you brew espresso, you're fundamentally forcing hot water through finely-ground coffee, which results in a concentrated beverage that's rich in flavor and caffeine.
To get the perfect espresso shot, you need to make certain you're using the right grind size – fine, similar to table salt. This allows for proper extraction of flavors and caffeine during brewing.
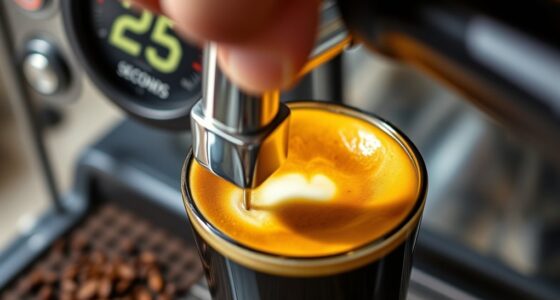
Next, verify your espresso machine is set to the ideal brewing conditions: a water temperature between 190°F and 205°F and an extraction time of 25 to 30 seconds. This will give you the best flavor profile in your brewed coffee.
Remember, the goal is to produce a shot that's around 1 ounce in volume, which will contain a specific amount of caffeine.
Caffeine Content in Espresso and Coffee
You're likely curious about the amount of caffeine that ends up in your espresso shot compared to a regular cup of coffee. When it comes to caffeine content, there are some key differences between espresso and brewed coffee.
Here are some key points to evaluate:
A single shot of espresso typically contains about 63 mg of caffeine per 1 ounce, while a double shot has approximately 126 mg of caffeine.
In comparison, an 8-ounce cup of brewed coffee generally contains between 96 to 128 mg of caffeine, depending on brewing method and coffee type.
The caffeine concentration in espresso is higher, with about 40 mg of caffeine per ounce, compared to regular brewed coffee, which averages around 10-16 mg per ounce.
Espresso's preparation method enhances caffeine extraction, yielding a more concentrated beverage compared to brewed coffee.
Factors like coffee bean type, roast level, and brewing time can influence caffeine content in both espresso and coffee.
Factors Influencing Caffeine Levels
The brand of coffee you use can considerably impact the amount of caffeine in your espresso shot, with some brands packing a higher caffeine punch due to their unique sourcing and processing methods.
But that's not all – the type of coffee beans you choose also plays a significant role. For instance, if you opt for Robusta beans, you can expect about twice as much caffeine as you'd from Arabica beans.
The roast type is another factor to contemplate, as darker roasts tend to have lower caffeine levels due to the prolonged roasting process breaking down caffeine molecules.
When it comes to brewing, the amount of coffee grounds you use directly influences the amount of caffeine extracted. More coffee grounds mean higher caffeine levels, so be mindful of your grind.
The brewing method itself is also vital, as espresso provides a higher caffeine concentration per ounce compared to regular coffee.
By understanding these factors, you can take control of your caffeine intake and customize your espresso shot to your liking.
Whether you're a caffeine junkie or just looking for a gentle boost, it's important to know what goes into your daily cup.
Caffeine in Espresso Drinks
Now that you know how much caffeine is in a single shot of espresso, you're probably wondering how that amount changes when it's part of a larger drink.
You'll find that espresso drinks like lattes and cappuccinos have varying levels of caffeine depending on their size, with some drinks packing a bigger caffeine punch than others.
As you explore the world of espresso drinks, you'll see that sizes, ingredients, and even the number of shots used can greatly impact the amount of caffeine you're getting.
Espresso Drink Caffeine Levels
On average, your typical espresso drinks pack a caffeine punch, with a single shot of espresso containing approximately 63-75 mg of caffeine. But what about the caffeine levels in different espresso drinks? Let's break it down:
Espresso Drink Caffeine Levels:
Cappuccinos and lattes typically have 75 mg of caffeine for short/tall sizes and 150 mg for grande/venti sizes, depending on the number of espresso shots used.
Mocha drinks can have 90 mg of caffeine for short/tall sizes and up to 180 mg for venti sizes due to the addition of chocolate.
Americanos have varying caffeine content, ranging from 75 mg for short sizes to 300 mg for venti sizes, based on the number of espresso shots included.
Decaf espresso options yield considerably less caffeine, with a single shot containing approximately 8 mg and a double shot about 16 mg.
Double shots (doppio) of espresso contain around 150 mg of caffeine, making them a popular choice for those who need an extra boost.
Caffeine in Lattes and More
You'll find that lattes, cappuccinos, and other espresso-based drinks can pack a considerable caffeine punch, with amounts varying depending on the type and size of your drink.
A typical latte or cappuccino contains 75 mg of caffeine for short or tall sizes, which is equivalent to one shot of espresso. However, if you upgrade to a grande or venti size, you'll get two shots of espresso, doubling the caffeine content to 150 mg.
Mocha drinks follow a similar pattern, with 90 mg of caffeine for short or tall sizes and 180 mg for venti sizes, thanks to the added chocolate.
Meanwhile, Americanos can vary greatly, with 75 mg for short sizes and up to 300 mg for venti sizes, depending on the number of espresso shots used.
When ordering, it's crucial to take into account the serving size and brewing method to gauge your total caffeine intake.
As you can see, the number of shots used plays a considerable role in determining the caffeine content of your espresso drink. If you prefer a stronger caffeine kick, then opting for a double espresso over a single can make a significant difference. For example, a single shot of espresso typically contains around 63 milligrams of caffeine, while a double espresso can contain around 125 milligrams. Therefore, the caffeine content of double espresso is nearly double that of a single shot.
Variation in Drink Sizes
With varying drink sizes comes a notable difference in caffeine content, and understanding these differences is key to managing your caffeine intake. As you order your favorite espresso drink, the size of your cup can notably impact the amount of caffeine you consume.
Here's a breakdown of the caffeine content in different espresso drinks and sizes:
- A single shot of espresso contains approximately 75 mg of caffeine, while a double shot contains about 150 mg.
- Cappuccinos and lattes have around 75 mg of caffeine for short/tall sizes and 150 mg for grande/venti sizes.
- Mochas vary from 90 mg for short/tall sizes to 180 mg for venti sizes due to the added chocolate.
- Americanos range from 75 mg for short sizes to 300 mg for venti sizes, depending on the number of espresso shots used.
Perception of Caffeine Effects
Since you down an espresso shot quickly, you're more likely to feel a sudden, intense jolt from the caffeine. This is because espresso is typically consumed rapidly, whereas a cup of coffee is sipped slowly, allowing the caffeine to be absorbed more gradually. The rapid consumption of espresso enhances the immediate effect of the caffeine on your central nervous system.
Beverage | Caffeine per Ounce | Average Caffeine Content |
---|---|---|
Espresso | 63-75 mg | 63 mg per shot |
Brewed Coffee | 12-16 mg | 95-200 mg per cup |
Instant Coffee | 25-100 mg | 25-100 mg per cup |
Cold Brew | 10-20 mg | 100-200 mg per cup |
Decaf Coffee | 0-12 mg | 3-12 mg per cup |
Your individual tolerance to caffeine also plays a role in how you perceive its effects. Some people may feel a stronger jolt from a single shot of espresso, while others may not feel as much of an impact. Additionally, psychological factors, such as expecting a boost from espresso, can influence how you perceive the effects of caffeine, potentially leading to a heightened sense of alertness.
Health Recommendations and Safety
As you consider your daily espresso habit, you'll want to know how much caffeine is safe for you to consume.
You should be aware of the recommended daily intake and factors that affect your sensitivity to caffeine, like age and body size.
Safe Daily Intake
You should be aware that the FDA sets a maximum safe daily caffeine intake of 400 mg for healthy adults, a limit that's equivalent to about four 8-ounce cups of brewed coffee. As you enjoy your espresso, it's important to keep this limit in mind to avoid excessive caffeine consumption.
Here are some key points to take into account:
- A single shot of espresso generally contains about 63-75 mg of caffeine, making it a controlled choice for caffeine consumption.
- Consuming two to four 8-ounce cups of brewed coffee is regarded as safe and can fit within the recommended caffeine limits.
- You can enjoy espresso with milk-based drinks like lattes, which may enhance enjoyment while managing overall caffeine intake.
- It's vital to monitor your caffeine consumption, as personal tolerance and sensitivity can vary considerably.
Caffeine Sensitivity Factors
Your individual sensitivity to caffeine plays a significant role in determining how much espresso you can safely consume daily, and it's a factor the FDA considers when setting its recommended daily limits. This sensitivity can vary greatly, with some people experiencing heightened effects at lower doses while others can tolerate much higher amounts without adverse reactions.
Caffeine Content | Individual Tolerance | Effects |
---|---|---|
Low (63 mg) | High | Quick boost, no jitters |
Medium (125 mg) | Medium | Noticeable energy, some anxiety |
High (250 mg) | Low | Jitters, rapid heartbeat |
When consuming espresso, you should consider your psychological factors, such as mood and expectations, as they can influence how you perceive the effects of caffeine. This, in turn, affects your individual tolerance levels. To control your caffeine intake, a single shot of espresso can be a strategic choice, providing a quick boost without the higher total caffeine content found in larger servings of brewed coffee. By understanding your unique caffeine sensitivity, you can enjoy the benefits of espresso while minimizing potential side effects.
Healthy Consumption Guidelines
Four hundred milligrams of caffeine, the FDA's daily recommended limit, is roughly equivalent to the amount found in four 8-ounce cups of brewed coffee, making a single shot of espresso a relatively modest contribution to your daily intake.
As you enjoy your espresso, it's important to keep this daily limit in mind to guarantee healthy consumption.
Here are some guidelines to help you make informed choices:
- A single shot of espresso contains approximately 63 mg of caffeine, a controlled amount for those monitoring their intake.
- Consuming two to four 8-ounce cups of brewed coffee is generally considered safe and may provide health benefits.
- Be mindful of espresso drinks that can vary in caffeine content, such as double shots containing around 150 mg.
- Adding milk to your espresso can help moderate caffeine consumption and enhance flavor.
Coffee and Espresso Equipment Essentials
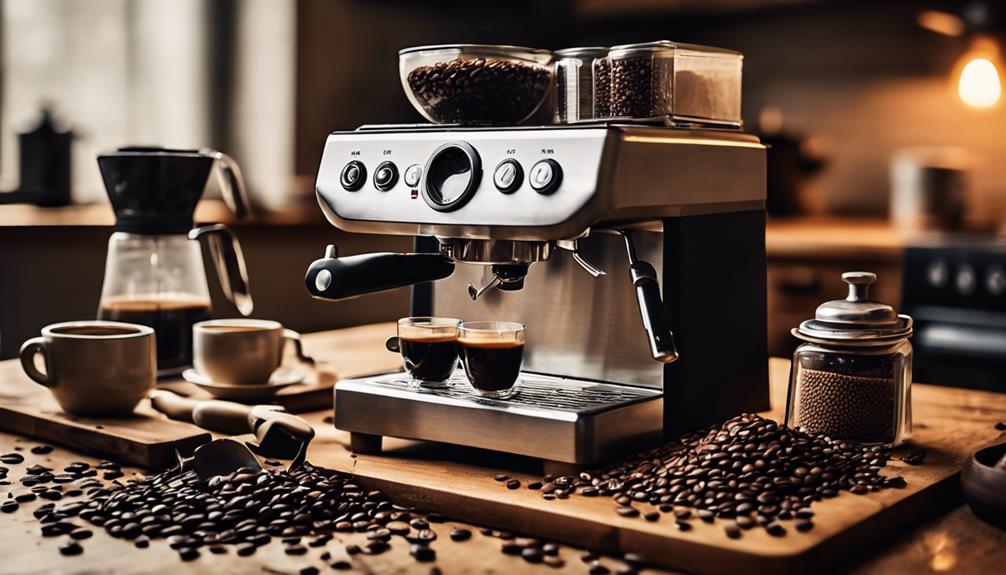
Opting for a high-quality espresso machine is an essential step in perfecting your brewing technique, as it greatly impacts the flavor and caffeine content of your shot. When choosing an espresso machine, consider the type of coffee you want to make and the level of convenience you need. Traditional machines, stovetop Moka pots, and portable espresso makers are popular options.
Equipment | Characteristics |
---|---|
Traditional Espresso Machine | Utilizes pressurized water for efficient flavor and caffeine extraction |
Stovetop Moka Pot | Convenient and portable, great for home brewing |
Portable Espresso Maker | Easy to use and clean, perfect for on-the-go espresso |
High-Quality Grinder | Essential for ideal grind size, affecting caffeine content and flavor |
Caffeine Content Comparison and Insights
Compare the caffeine content of your favorite espresso shots to that of brewed coffee, and you'll find that espresso packs a more concentrated punch. When you look at the numbers, it's clear that espresso has more caffeine per ounce than a cup of brewed coffee.
Here are some key caffeine counts to keep in mind:
- A single shot of espresso typically contains about 63 mg of caffeine per 1 ounce.
- An 8-ounce cup of brewed coffee generally has between 95 to 128 mg of caffeine.
- Starbucks espresso contains approximately 75 mg of caffeine per 0.75 ounces.
- The caffeine content in brewed coffee can vary greatly based on factors like the type of bean, roast level, and brewing method.
With these numbers in mind, it's no wonder that espresso provides a quick and intense caffeine boost. The rapid consumption of espresso leads to quicker caffeine absorption, which can enhance the perceived effects compared to the slower sipping of regular brewed coffee.
Frequently Asked Questions
How Much Caffeine Is in a Single Shot of Espresso?
You're wondering how much caffeine is in a single shot of espresso? Typically, it's around 63 mg per 1-ounce serving, but the amount can vary from 29 to 100 mg depending on factors like bean type and roast level.
Is 2 Shots of Espresso a Lot of Caffeine?
You're wondering if 2 shots of espresso is a lot of caffeine? Honestly, it's moderate – comparable to a cup of brewed coffee. But for you, it might feel like a lot, depending on your sensitivity to caffeine.
Is 1 Shot of Espresso Equal to 1 Cup of Coffee?
Coincidentally, you're wondering if 1 shot of espresso equals 1 cup of coffee, but surprisingly, it doesn't – you'd need about 1.5 shots to match the caffeine content of a standard 8-ounce cup of brewed coffee.
Is 7 Espresso Shots Bad?
You're wondering if 7 espresso shots are bad for you, and the answer is yes, it's excessive. Consuming that much caffeine daily can lead to jitteriness, insomnia, and dependence, exceeding the FDA's recommended daily limit.
Conclusion
As you now know the secrets of espresso's caffeine kick, you're equipped to navigate the world of coffee like a seasoned connoisseur.
But remember, with great power comes great responsibility – just like Spiderman's Uncle Ben, too much caffeine can be a villain.
So, brew wisely and indulge in moderation, lest you fall prey to the dark side of the coffee force.
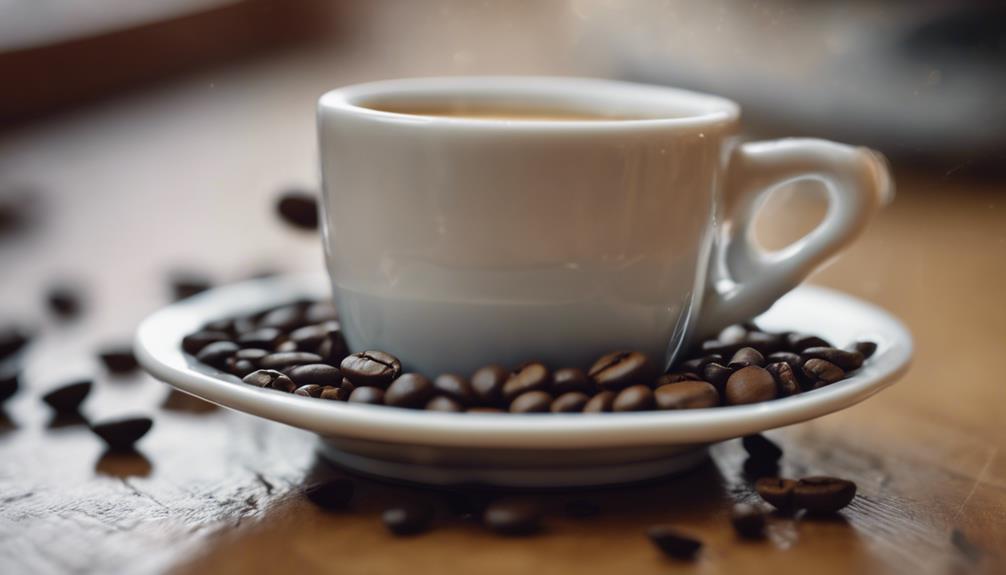
Espresso
Espresso Cookie Recipes – Sweet Treats for Coffee Lovers!
Indulge in the ultimate coffee-infused cookie experience with these rich, decadent espresso cookie recipes that will leave you craving for more!
You are on the verge of experiencing the ultimate sweet treat for coffee lovers, as incorporating espresso powder into your cookie recipes elevates the flavor to a whole new level, providing a deeper, richer taste profile that is sure to satisfy your caffeine cravings. With its concentrated coffee flavor, espresso powder enhances the chocolate flavors without overpowering the dessert, making it essential for coffee enthusiasts. If you do not have espresso powder, instant coffee can be used as a substitute, although the flavor will be less intense. Now, prepare yourself to discover the secrets to making the perfect espresso cookie that will leave you craving for more!
Key Takeaways
- Espresso powder adds a deeper, richer flavor profile to chocolate desserts, perfect for coffee enthusiasts.
- Substitute instant coffee for espresso powder at a 1:1 ratio, but note the less intense flavor.
- Use high-quality chocolate chips and add a pinch of baking soda to enhance flavor in your espresso cookie recipe.
- Chill the dough for 3-4 hours or overnight to prevent spreading and achieve the perfect chewy center.
The Role of Espresso Powder
By incorporating espresso powder into your cookie recipe, you can reveal a deeper, richer flavor profile that elevates the taste of chocolate to new heights.
As a coffee lover, you'll appreciate the complexity it adds to your baked goods. Unlike instant coffee, espresso powder delivers a more concentrated coffee flavor, making it the perfect ingredient for baking. When used in small amounts, it doesn't overpower the dessert, but instead enhances the flavor of chocolate beautifully.
In essence, espresso powder is a versatile baking ingredient that can be used in various chocolate recipes to add depth to the overall flavor profile.
It's a game-changer for coffee enthusiasts, as it takes the taste of cookies to a whole new level. Quality espresso powder can greatly improve the overall taste of your desserts, making it a must-have ingredient for anyone who loves coffee.
Substituting Instant Coffee Options
If you don't have espresso powder on hand, you can turn to instant coffee as a substitute in your cookie recipe, although be aware that the flavor will be slightly different due to the varying levels of concentration.
Instant coffee can effectively replace espresso powder in a 1:1 ratio, maintaining the intended coffee flavor in your cookies. You can easily find instant coffee powder in most grocery stores, making it a convenient option for bakers.
While instant coffee works well, keep in mind that espresso powder is preferred for its rich flavor and ability to enhance chocolate flavors in coffee desserts.
If you want a deeper flavor profile, consider using chopped dark chocolate in your recipe, which adds both richness and a satisfying texture.
When substituting instant coffee, remember that the flavor mightn't be as intense as espresso powder, but it'll still result in delicious cookies.
Creating the Perfect Espresso Cookie
You'll be well on your way to creating the perfect espresso cookie by combining the right ingredients and following a few key techniques. To start, use high-quality chocolate chips or chopped chocolate to add depth and texture to your cookies. When preparing the cookie dough, you can skip the mixer and do it by hand, making it accessible to beginners. Don't forget to add a pinch of baking soda to enhance the flavor.
Technique | Why | Tips |
---|---|---|
Chilling the dough | Prevents spreading, allows flavors to meld | 3-4 hours or overnight |
Using high-quality chocolate | Improves flavor and texture | Choose dark or semisweet chocolate |
Monitoring baking time | Achieves chewy center and golden edges | 350°F for 8-12 minutes |
Nutritional Information and Facts
Espresso cookies pack a nutritional punch, with a single serving typically containing around 295 calories, 39g of carbohydrates, and 14g of total fat.
As you indulge in these sweet treats, it's important to be aware of their nutritional values. You'll get around 3g of protein and 23g of sugar in each cookie, contributing to their rich flavor profile.
Here are some key facts to keep in mind:
- Serving sizes are standardized at one cookie, making it easy to track your caloric intake.
- Nutritional values can vary based on your ingredient choices, such as using dark or milk chocolate chips, which affects the overall calorie and fat content.
Baking Tips and Professional Secrets
With a solid understanding of the nutritional values of espresso cookies, it's time to focus on perfecting the baking process to bring out the best in these treats. To attain the ideal texture and flavor, follow these baking tips and professional secrets.
Baking Tips
Tip | Description |
---|---|
Measure ingredients accurately | Weigh ingredients with a kitchen scale to guarantee accuracy |
Handle flour with care | Fluff flour before measuring and spoon into measuring cups |
Monitor baking time | Remove cookies from the oven when edges are golden brown |
Chill dough when needed | Refrigerate dough for 10-15 minutes to maintain shape and prevent spreading |
Frequently Asked Questions
What Is a Good Cookie to Have With Coffee?
When you're looking for a cookie to pair with coffee, you want one that complements its flavor. You'll love cookies with rich chocolate or espresso flavors, chewy textures, or nuts/toffee for a delightful contrast that enhances your coffee experience.
Are Espresso Cookies Good?
You're the master chef of your coffee break, and espresso cookies are the perfect sous chef, elevating your coffee game with rich flavors. Yes, they're good – ridiculously good, in fact, with a perfect balance of chocolate and coffee that will leave you craving more! Pair these espresso cookies with a freshly brewed cup of coffee for the ultimate delicious energy boost that will power you through the rest of your day. The combination of the caffeine in the coffee and the indulgent flavors of the cookies will provide the perfect pick-me-up, leaving you feeling invigorated and satisfied. So go ahead, indulge in this delightful coffee break pairing and savor every moment of the delicious energy boost it brings. If you’re looking to take your coffee break to the next level, consider investing in the ultimate espresso machine. With the ability to brew barista-quality espresso right in your own kitchen, you’ll be able to elevate your coffee game even further. Imagine pairing those rich and decadent espresso cookies with a perfectly crafted espresso shot – it’s a match made in coffee heaven. Treat yourself to this indulgent experience and savor every sip and bite.
How Much Caffeine Is in an Espresso Cookie?
You're wondering how much caffeine is in an espresso cookie? Typically, a cookie contains 30-50 mg of caffeine, depending on the brand and amount of espresso powder used, which is roughly 1/2 to 3/4 of a standard espresso shot.
What Is the Cookie You Put on Top of a Coffee Cup?
You've probably wondered about the magical cookie that crowns your coffee cup – it's a million times more than just a sweet treat! That cookie is commonly known as a 'coffee cookie' or 'cookie lid,' designed to perfectly complement your coffee's flavor.
Conclusion
As you wrap up your espresso cookie adventure, remember that the perfect blend of flavors is just a shot away.
Don't be afraid to experiment and adjust the ratio of espresso to sugar to create your ideal cookie.
After all, as the saying goes, 'variety is the spice of life' – and in this case, the spice is espresso!
With these recipes, you'll be brewing up a storm of sweet treats that'll leave coffee lovers begging for more.
Espresso
Starbucks Brown Sugar Shaken Espresso – How to Make It at Home!
Treat your taste buds to a velvety smooth coffee experience by learning the simple secrets to recreating Starbucks' Brown Sugar Shaken Espresso at home.
You can easily make your own version of Starbucks’ Brown Sugar Shaken Espresso at home by combining rich flavors like bold espresso, deep brown sugar syrup, creamy oat milk, and a hint of warm cinnamon. To get started, prepare your brown sugar syrup by heating equal parts sugar and water until dissolved, then cool and refrigerate it for up to two weeks. Then, brew your espresso, shake it with the syrup and ice, and top it off with oat milk. Adjust the sweetness and creaminess to your liking, and get ready to enjoy a velvety smooth coffee drink – and that’s just the beginning of what you’re about to enjoy. With this easy espresso recipe at home, you can also try different types of milk, such as almond or coconut, to customize the flavor to your preference. You can even add a sprinkle of nutmeg or a drizzle of caramel for an extra touch of indulgence. The best part is, once you have perfected this recipe, you can make your favorite Starbucks drink whenever you please, without having to wait in line.
Key Takeaways
- Combine equal parts brown sugar and water to create a syrup, heating until sugar dissolves for a rich, caramel-like flavor.
- Use freshly brewed espresso, preferably blonde roast, for a smoother and lighter taste experience in your iced coffee.
- Add a pinch of ground cinnamon to the syrup for an extra layer of warmth and spice in your brown sugar shaken espresso.
- Mix espresso, syrup, and oat milk in a cocktail shaker filled with ice, shaking vigorously for 20 seconds to meld flavors and textures.
Rich Flavor Profile Explained
As you take your first sip of the Brown Sugar Shaken Espresso, the boldness of the freshly brewed espresso hits your taste buds, followed by the deep, caramel-like sweetness of brown sugar syrup that lingers pleasantly. The rich flavor profile of this drink is a perfect balance of strong coffee and sweet indulgence.
The addition of oat milk contributes a creamy texture, smoothing out the boldness of the espresso and creating a velvety sensation in your mouth. If you choose to add a pinch of ground cinnamon, it will add warmth and spice, further enriching the flavor complexity of the drink.
The use of blonde roast espresso provides a lighter, smoother taste compared to darker roasts, making it a rejuvenating choice for iced coffee lovers. With homemade brown sugar syrup, you can customize the sweetness and flavor intensity to your liking, tailoring the drink to your personal preferences.
As you savor the Brown Sugar Shaken Espresso, you'll appreciate the delightful harmony of flavors that come together to create a truly unique coffee experience.
Easy Syrup Preparation Steps
You'll need to combine equal parts brown sugar and water in a saucepan to start making your brown sugar syrup.
Heat the mixture over medium heat, stirring occasionally, until the sugar completely dissolves, which should take around 10 minutes. For an extra flavor boost, consider adding a pinch of cinnamon and a drop of vanilla extract during the heating process.
Once the syrup has thickened, remove it from the heat and let it cool in a heat-proof container, such as a mason jar. Refrigerate the syrup and it'll keep for up to 2 weeks, making it easy to whip up a Brown Sugar Shaken Espresso whenever you crave it.
If you want to make a larger batch, simply double or quadruple the recipe. Alternatively, you can prepare the syrup in a microwave-safe bowl by stirring and heating in short intervals until the sugar dissolves.
This simple syrup is a game-changer, and with these easy steps, you'll be sipping on a delicious Brown Sugar Shaken Espresso in no time!
Customizing to Your Taste
Now that you've mastered the art of brown sugar syrup preparation, it's time to make your Brown Sugar Shaken Espresso truly yours by experimenting with flavor combinations that cater to your unique taste buds.
To customize your drink, start by adjusting the sweetness level to your liking by adding more or less brown sugar syrup. You can also experiment with different milk alternatives, such as almond, soy, or coconut milk, to create a unique creamy texture and flavor.
Add a dash of flavor enhancers like vanilla extract or nutmeg to give your espresso a boost of flavor. If you prefer a stronger or weaker drink, modify the number of espresso shots to suit your taste preferences.
For a fun twist, try adding cold foam or a drizzle of caramel on top for a visually appealing and delicious finishing touch.
Essential Ingredients and Tools
To craft the perfect Brown Sugar Shaken Espresso, gather these must-haves: brewed espresso, brown sugar syrup, oat milk, ice, and ground cinnamon for topping.
You'll also need an espresso machine or alternative brewing method to prepare the coffee. If you don't have brown sugar syrup, it's easy to make by dissolving equal parts brown sugar and water in a saucepan.
For a creamy texture, use unsweetened oat milk, but feel free to experiment with other non-dairy milks like almond or soy milk based on your personal preferences.
A cocktail shaker or mason jar is necessary for mixing the ingredients. You'll also need ice to chill and dilute the drink.
Optional tools include a tall glass for serving and a milk frother to achieve a creamier consistency in the finished drink.
With these essentials, you'll be well on your way to creating a delicious Brown Sugar Shaken Espresso that rivals the original.
Don't forget to store your leftover brown sugar syrup in the refrigerator for up to two weeks – it's perfect for future drinks!
Quick Preparation and Assembly
Now it's time to shake and combine the ingredients to achieve a frothy texture.
You'll fill a cocktail shaker or mason jar with ice, add the brewed espresso and brown sugar syrup, and shake vigorously for about 20 seconds.
Shake and Combine Ingredients
Get ready to mix it up by combining the freshly brewed espresso and brown sugar syrup in a shaker filled with ice, setting the stage for a velvety-smooth drink.
You'll need to shake vigorously for about 20 seconds to guarantee the sugar dissolves and the flavors meld together perfectly. This step is vital in creating a well-integrated flavor profile that's reminiscent of the original Starbucks recipe.
As you shake, the brown sugar syrup will dissolve into the espresso, giving it a rich and sweet flavor. The ice cubes will help to chill and dilute the mixture to the right consistency.
Once you've finished shaking, pour the mixture over a glass filled with ice and top it off with your preferred amount of creamy oat milk. You can adjust the amount of oat milk to your liking, but remember that it's fundamental in creating a smooth and velvety texture.
Frothy Texture Achievement
You're just one vigorous shake away from achieving a velvety-smooth frothy texture in your Brown Sugar Shaken Espresso.
Simply combine your freshly brewed espresso, brown sugar syrup, and ice in a cocktail shaker or mason jar. Then, shake vigorously for about 20 seconds to dissolve the syrup and chill the mixture.
The ice included in the shaker is vital for achieving the desired frothy consistency once poured over ice. For an extra creamy texture, consider frothing your oat milk before adding it to the shaken espresso mixture. This guarantees a smooth blend when combined.
Remember to shake just before serving to maintain the drink's freshness and ideal frothiness.
Your homemade version of the Brown Sugar Shaken Espresso is almost ready! With these simple steps, you'll be enjoying a rich, creamy, and velvety-smooth shaken espresso that rivals the Starbucks original.
Storage and Variation Tips
Storing your brown sugar syrup in the refrigerator for up to two weeks enables you to whip up multiple drinks at home with ease, whenever the craving strikes.
Consider doubling or quadrupling the brown sugar syrup recipe to guarantee you always have some on hand, making easy preparation a breeze. You can also adjust the sweetness of your drink to your taste by varying the amount of syrup used. If you're looking for a less sweet flavor, try reducing the amount of syrup.
When it comes to milk, you're not limited to traditional options. Experiment with almond, soy, or other milk alternatives to cater to your personal taste preferences or dietary restrictions.
Take your Brown Sugar Shaken Espresso to the next level by adding flavor variations like nutmeg or vanilla cold foam. With these storage and variation tips, you'll be well on your way to creating a drink that's tailored to your unique preferences.
Frequently Asked Questions
What Are the Ingredients in a Brown Sugar Oatmilk Shaken Espresso?
You'll need brewed espresso, brown sugar syrup, unsweetened oat milk, and ice to make a Brown Sugar Oatmilk Shaken Espresso; optional toppings include ground cinnamon, and you can customize with flavored syrups or spices.
How Many Pumps of Syrup Are in a Brown Sugar Oatmilk Shaken Espresso?
You'll be surprised to know that Starbucks baristas pump syrup with precision, with each pump averaging 0.5 ounces. To answer your question, a standard Brown Sugar Oatmilk Shaken Espresso typically contains three pumps of brown sugar syrup, totaling 1.5 ounces.
How Do You Make a Shaken Espresso Starbucks Quizlet?
You're wondering how to make a shaken espresso, right? To do it like Starbucks, you'll need to brew three shots of espresso, mix with brown sugar syrup, and shake it with ice in a jar for 20 seconds! Once the espresso and syrup are shaken together, strain the mixture into a glass and enjoy! These easy espresso making steps will ensure you have a delicious and refreshing drink in no time. It’s a great way to enjoy a quick pick-me-up during the day.
How Much Is a Small Brown Sugar Shaken Espresso at Starbucks?
You're wondering how much a small Brown Sugar Shaken Espresso costs at Starbucks? Well, you can expect to pay around $4.25 to $4.75, depending on the location, for a tall size with premium ingredients like espresso and oat milk.
Conclusion
You've made it! Congratulations on not giving in to the temptation of shelling out five bucks for a Brown Sugar Shaken Espresso at Starbucks.
Now, you can impress your friends with your DIY skills and pretend you're a coffee connoisseur.
Just don't forget to Instagram your creation with a pretentious caption, and you're golden.
Go ahead, pat yourself on the back – you've earned it.
Espresso
Perfecting the Espresso Shot – Tips From the Pros!
Master the art of espresso with expert tips on ratio, grind, and tamping to unlock the perfect shot, but that's just the beginning.
You’re on the verge of becoming an expert in perfecting your espresso shot! To begin, focus on mastering the recipe components: dose, yield, and brewing time. Aim for a ratio of 1:1 to 1:3, with a brewing time of 25-30 seconds. Then, adjust your grind size and distribution to ensure a uniform coffee bed. Tamping with precision is crucial, applying around 30 pounds of force at a 90-degree angle. By fine-tuning these factors, you’ll be on your way to pulling the ideal shot – with more to explore to enhance your espresso skills! To truly excel in the art of perfect espresso shots, it’s vital to pay attention to the finer points. This includes the temperature of your machine, the quality of your water, and the cleanliness of your equipment. Additionally, experimenting with different coffee beans and adapting your technique to their unique attributes can further elevate your espresso expertise. With dedication and practice, you’ll soon be crafting consistently flawless espresso shots that will impress even the most discerning coffee aficionados.
Key Takeaways
- Precise measurement of dose and yield is crucial for consistency and optimal flavor extraction in espresso brewing.
- Ideal grind size is essential, and regular adjustments are needed as coffee ages to maintain optimal brewing conditions.
- Even coffee bed distribution is vital for peak extraction and uniform water flow, preventing channeling and poor shot quality.
- Proper tamping technique, with consistent pressure, prevents channeling and ensures balanced acidity and strength in espresso shots.
Mastering Espresso Recipe Components
To craft the perfect espresso shot, you need to master the three key components of an espresso recipe: dose, yield, and time, which work in harmony to deliver a balanced and flavorful beverage.
The dose refers to the amount of coffee you use, typically ranging from 16-18g for a double shot. However, experimenting with different doses, like Clive's signature 20g recipe, can yield unique flavor profiles.
The yield is the amount of liquid espresso you're aiming to produce, usually between 1:1 to 1:3 of the dose.
The brewing time, typically between 25-30 seconds, can be adjusted by modifying the grind size. Coarser grinds result in faster flow, while finer grinds slow it down.
By finding the perfect balance of these components, you'll be able to extract the full potential of your coffee beans.
Remember, precision is key, so use a scale to measure both the dose and yield during the brewing process.
With practice and patience, you'll be able to consistently craft espresso shots that impress even the most discerning coffee connoisseurs.
Dose, Yield, and Brewing Time Essentials
As you endeavor to perfect your espresso shot, you'll need to get a handle on the essentials of dose, yield, and brewing time.
You'll want to calculate the right dose of coffee, balance it with the ideal yield ratio, and optimize your brewing time to bring out the best flavors.
Dose Calculations
You'll need to dial in the perfect dose, yield, and brewing time to craft exceptional espresso shots that consistently impress.
When it comes to dose calculations, it's important to get it just right. For a double espresso shot, aim for a dose of 16g to 18g of ground coffee, and for a triple shot, use 20g to 22g. This will guarantee you're extracting the ideal amount of flavor from your beans.
But it's not just about the dose; the grind size also plays a significant role. A finer grind will slow down the flow and may extend the brewing time, while a coarser grind will accelerate it. You're aiming for an ideal brewing time of 25 to 30 seconds, which helps enhance flavor extraction.
By adjusting the grind size, you can achieve this sweet spot. Remember, consistent measurements and monitoring of both dose and yield are critical for replicating quality shots and guaranteeing optimal flavor profiles.
With practice, you'll find the perfect balance to craft espresso shots that impress even the most discerning palates. By experimenting with different grind sizes, tamping pressures, and extraction times, you’ll gradually develop a keen sense of how to achieve the ideal flavor profile. Using an espresso tamper tool can also help ensure a consistent and even tamp, resulting in a more uniform extraction. With dedication and attention to detail, you’ll be able to consistently create espresso shots that are smooth, rich, and full of complexity.
Yield Ratios Matter
Mastering the art of espresso requires a deep understanding of yield ratios, which involve a delicate balance of dose, yield, and brewing time to extract the perfect shot. You're likely wondering, what's the ideal yield ratio for a great espresso shot? The answer lies in finding the sweet spot between dose, yield, and brewing time.
Dose (g) | Yield (g) | Brewing Time (s) |
---|---|---|
16-18 | 30-36 | 25-30 |
20 | 30 | 25-30 |
Varies | Varies | 25-30 |
Varies | Varies | Varies |
For a double shot, aim for a dose of 16-18 grams of ground coffee, which should produce a yield of approximately 30-36 grams of liquid espresso. A common brew ratio for espresso is 1:1.5, meaning for every 20 grams of coffee, you're aiming for a yield of 30 grams of liquid espresso. Remember, consistent measurements using a scale for both dose and yield are essential for replicating successful shots and maintaining quality. By adjusting the grind size in response to yield and brew time, you can achieve the desired flavor profile.
Brew Time Optimization
Optimize your brew time by targeting the sweet spot of 25-30 seconds, where the perfect balance of flavor extraction and crema formation occurs. This ideal brew time allows for the best balance of flavors to shine through in your espresso shot.
To achieve this, you'll need to dial in the right dose and yield. Aim for a dose of 16-18 grams of coffee and a yield of 30-36 grams of liquid espresso for a balanced shot.
Adjusting the grind size is essential for controlling brew time; a finer grind slows down the extraction, while a coarser grind speeds it up. Regularly monitor the yield during shot pulling with a scale to maintain consistency and aim for a brew ratio of 1:1.5 to achieve the desired flavor profile.
Finally, make certain you're using fresh coffee beans that have been rested for at least 14 days post-roast to allow for CO2 release, which aids in achieving a more stable and flavorful extraction during brewing.
Distribution, Tamping, and Extraction Techniques
As you endeavor to perfect your espresso shot, you'll need to focus on distributing coffee grounds evenly in the portafilter and tamping them with the right pressure.
You're aiming for a uniform coffee bed that allows water to flow through consistently, which is essential for balanced flavor.
Even Coffee Bed Distribution
You take the first step towards perfecting your espresso shot by ensuring the coffee grounds are evenly distributed across the portafilter basket. This is vital for peak extraction, as it promotes uniform water flow and prevents channeling during the brewing process.
To achieve an even coffee bed, gently tap the portafilter to settle the grounds before tamping. This espresso tip will help you avoid uneven distribution, which can lead to poor shot quality.
Using a bottomless portafilter can also help you identify and correct distribution errors in real-time, allowing you to adjust your technique accordingly. Remember, an even coffee bed is essential for a perfect espresso shot, so take your time and get it right.
Optimal Tamping Technique
With your coffee bed evenly distributed, it's time to focus on tamping, a crucial step that requires precision and control to guarantee proper extraction.
Hold your tamper at a 90-degree angle and apply gentle, consistent pressure, aiming for about 30 pounds of force. This will assure your coffee puck is compact without being overpacked. A well-tamped puck prevents channeling, which can lead to uneven extraction and undesirable flavors in your espresso shot.
As you adjust the grind size based on tamping pressure, you'll achieve an ideal extraction time of 25-30 seconds, balancing acidity and strength effectively.
Remember to clean your portafilter after each use to prevent old coffee oils and residues from affecting the flavor of your next shot.
Pulling the Perfect Shot: Tips and Tricks
To master the art of pulling the perfect shot, start by nailing down the fundamentals: a precise dose of coffee, an even tamp, and a carefully calibrated grind.
For a double shot, aim for 20-22g of freshly ground coffee, which should yield approximately 30-36g of liquid espresso within a 25-30 second extraction time. Use a scale to monitor both the coffee dose and the liquid yield during extraction, as precision in measurements is vital for replicating successful shots.
When it comes to grind size, adjust it based on shot timing. If your shot is pulling too quickly, make the grind finer; if it's too slow, coarsen the grind to achieve the ideal flow rate.
Additionally, verify your espresso machine is properly preheated and clean before brewing, as this will help maintain the correct brewing temperature and prevent off-flavors in your shots.
Coffee Bean Resting and Grind Size Adjustment
Freshly roasted coffee beans demand a 14-day resting period post-roast, allowing CO2 to dissipate and releasing a sweeter, more textured espresso. During this time, you'll notice a significant difference in the flavor profile of your fresh coffee.
Now, it's time to think about grind size adjustment. When it comes to brewing espresso, the ideal grind is essential. You're aiming for a texture similar to table salt, which allows for adequate water flow and extraction during the brewing process.
However, you'll need to make regular adjustments to your grind size as your coffee ages. If your shots are taking too long, it's likely your grind is too fine, and if they're too short, it's too coarse. Monitor your shot timing and adjust your grind size accordingly.
For shots over 30 seconds, use a coarser grind, and for shots under 25 seconds, use a finer grind. By getting your coffee grounds just right, you'll be well on your way to perfecting your espresso shot.
Espresso and Milk Integration Secrets
You're now ready to reveal the secrets of combining espresso and milk, an essential step in crafting exceptional milk-based drinks.
When pouring milk into your perfect espresso shot, use a controlled, steady motion to achieve better layering and create distinct patterns like hearts or rosettas.
Swirling the espresso while pouring the milk helps to create a shiny and vibrant finish, enhancing the overall visual appeal of the drink.
To guarantee even flavor distribution, proper integration of espresso with milk is key.
Mastering this technique not only elevates the drink's flavor but also improves the overall quality of espresso beverages served at home or in cafés.
Tricks to help you accomplish this include using the ideal milk temperature of 150°F to 155°F for a creamy texture without scalding the milk.
By following these tips, you'll be able to create milk-based drinks that are both visually stunning and bursting with flavor.
With practice, you'll be a pro at integrating espresso and milk, taking your coffee game to the next level.
Avoiding Common Brewing Miscalculations
Your espresso machine is only as good as the brew it produces, and even the slightest miscalculation can throw off the entire shot. To perfect your espresso recipe, it's crucial to avoid common brewing mistakes that can ruin your coffee.
Here are some common brewing miscalculations to watch out for:
- Incorrect brewing time: Aim for an extraction time between 25 to 30 seconds. Over-extraction (above 30 seconds) leads to bitter flavors, while under-extraction (below 20 seconds) results in weak and sour flavors.
- Inconsistent tamping pressure: Make sure you apply a consistent pressure of around 30 pounds to avoid uneven extraction and channeling.
- Incorrect water temperature: Maintain a temperature between 195°F to 205°F for peak flavor. Water outside this range can lead to undesirable flavors in your espresso.
- Poor machine maintenance: Regularly clean and descale your espresso machine to prevent off-flavors and maintain consistent quality in every shot.
Frequently Asked Questions
How to Get the Perfect Espresso Shot?
You're on a mission to get the perfect espresso shot! Start by measuring your coffee dose accurately, then grind it to a medium-fine consistency, and tamp it with consistent pressure to guarantee a balanced flavor.
What Are the 4 Qualities of a Perfect Espresso Shot?
When you're on the hunt for the ultimate espresso experience, you're looking for a shot that checks four essential boxes: rich crema, perfect balance, velvety body, and a flavor profile that's nothing short of sublime.
How Do You Make an Espresso Shot Better?
You're wondering how to make an espresso shot better? Start with freshly roasted beans, adjust the grind size, and maintain consistent tamping pressure. Then, monitor water temperature and regularly clean your machine for a superior shot.
How Do You Make Espresso Like a Pro?
You'll be surprised to know that 67% of espresso shots are brewed incorrectly! To make espresso like a pro, start by measuring a precise dose of 18-20 grams of freshly ground coffee, then adjust grind size and tamping to achieve ideal flavor extraction.
Conclusion
You've made it to the end of this espresso-perfecting journey, and what a relief!
You're probably still far from a pro, but hey, that's what makes the pursuit of the perfect shot so thrilling, right?
The good news is, with these expert tips, you'll be well on your way to creating a shot that'll make even the most discerning barista nod in approval.
Now, go forth and experiment – and don't worry, it's okay to mess up (again, and again, and again).
-
Ryze Coffee3 hours ago
Ryze Mushroom Coffee Vs Other Brands – How Does It Compare?
-
Vetted4 days ago
15 Best Lavazza for Espresso
-
Industry News6 days ago
Does Jacobs Coffee Support Israel?
-
Ryze Coffee17 hours ago
Ryze Mushroom Coffee Vs Everyday Dose – Which Is Better for You?
-
Vetted5 days ago
15 Best Instant Espressos for Drinking Anytime, Anywhere – Taste Test Results & Reviews
-
Industry News7 days ago
Does Coffee Bean Support Israel?
-
French Press7 days ago
Understanding How French Press Coffee Makers Work
-
Brewing Guides7 days ago
Brew Perfectly: How to Make Coffee with Coffee Maker