

To create thick, velvety foam for latte art, focus on properly steaming your milk with the right angle and technique to develop microbubbles. Keep the pitcher close to the coffee surface when pouring and gradually lift it to control flow. Tap and swirl the milk to remove large bubbles and guarantee a consistent, smooth texture. Mastering these steps helps produce the perfect foam for stunning designs—keep going, and you’ll discover even more tips for flawless latte art.
Key Takeaways
- Steam milk to a warm, velvety texture with microbubbles, avoiding over-aeration to ensure thick foam.
- Use proper steaming techniques by introducing steam at the correct angle and position for microfoam development.
- Gently tap and swirl the steamed milk to eliminate large bubbles and achieve a smooth, dense consistency.
- Keep the milk pitcher close to the surface during pouring to control flow and shape the foam effectively.
- Practice pouring with a steady hand and controlled flow to create contrast and detailed latte art patterns.

Have you ever wondered how baristas create those intricate patterns atop your cappuccino? It’s a skill that combines artistry with technique, and mastering it begins with understanding the fundamentals of milk pouring techniques and foam consistency. When you pour milk into espresso, the way you handle the pitcher and how you control the flow directly influence the quality of your latte art. The key is to develop a steady hand and a good sense of timing, which allows you to manipulate the milk and foam into beautiful shapes.
The first step in creating stunning latte art is perfecting your milk pouring techniques. You want to start by tilting the cup slightly, so the milk flows smoothly into the espresso. As you pour, keep the pitcher close to the surface of the coffee, then gradually raise it as the cup begins to fill. This control over the height and speed of your pour helps you create contrast and form. For intricate designs, you’ll need to focus on the flow rate, slowing down or speeding up your pour to build layers or add details. A common mistake is pouring too quickly or too high, which can disturb the foam and ruin the pattern.
Foam consistency plays a vital role in achieving the right latte art. You want your milk to be textured into a silky, smooth foam with tiny, microbubbles. This thick foam should feel velvety and have a sheen that indicates uniformity. If the foam is too airy or frothy, it won’t pour smoothly and will be difficult to control. Conversely, if it’s too thick or clumpy, it won’t integrate well into the espresso. To get the perfect foam consistency, steam your milk just right: heat it until it’s warm but not scalded, and create microbubbles by introducing steam at the right angle and position. Once done, gently tap the pitcher on the counter to remove larger bubbles and swirl the milk to ensure even texture. Developing a good foam texture is essential for creating detailed patterns and is often achieved through proper steaming techniques.
Once your milk is textured and your pouring technique is smooth, you can start practicing simple shapes like hearts or rosettas. Focus on the motion of your wrist and the flow of milk to guide the foam into the desired pattern. As you gain confidence, experiment with more complex designs. Remember, creating eye-catching latte art takes patience and practice, but with attention to milk pouring techniques and foam consistency, you’ll soon be able to produce beautiful, professional-looking cappuccinos that impress every time.
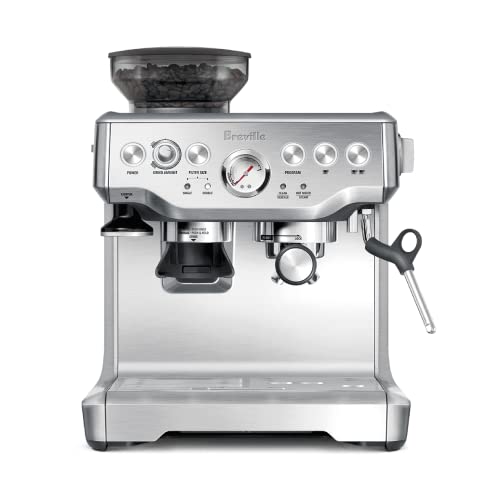
Breville Barista Express Espresso Machine BES870XL, Brushed Stainless Steel
The Breville Barista Express delivers third wave specialty coffee at home using the 4 keys formula and is...
As an affiliate, we earn on qualifying purchases.
Frequently Asked Questions
What Tools Are Best for Creating Latte Art?
You’ll want high-quality milk frothing tools like a stainless steel steam wand or a manual frother to create perfect thick foam. Use proper steaming techniques to develop microfoam, which is essential for latte art. A good thermometer helps you monitor milk temperature, ensuring ideal foam consistency. Practice controlling steam and frothing techniques to get smooth, velvety foam, making your latte art designs crisp and beautiful every time.
How Do I Fix Mistakes in My Foam?
Picture your perfect foam as soft clouds ready to be shaped. If mistakes happen, gently swirl or tap the pitcher to smooth out uneven bubbles, then re-froth with precise milk frothing techniques. For foam consistency troubleshooting, adjust your steaming angle or temperature to create a silky, dense foam. Remember, patience and gentle adjustments turn flawed foam into a canvas for beautiful latte art, making your cup truly mesmerizing.
What Types of Milk Produce the Best Foam?
You should choose whole milk or 2% milk for the best foam, as their fat and protein content create rich, stable bubbles. Skim milk froths easily and produces a light, airy foam perfect for intricate latte art. Use proper milk frothing techniques—start with cold milk, submerge the steam wand just below the surface, and maintain steady steam to achieve thick, glossy foam. Experiment to find what works best for your preferred texture.
How Long Does It Take to Master Latte Art?
Mastering latte art takes dedication, and you’ll find it varies from person to person. With consistent practice, expect to spend weeks or even months refining your pour and perfecting milk texture. The key lies in a steady pouring technique and achieving the right foam consistency. As you experiment and stay patient, you’ll see your designs improve, transforming your coffee experience into an artful masterpiece over time.
Can I Make Latte Art at Home Without Professional Equipment?
Yes, you can make latte art at home without professional equipment. Focus on beginner techniques like steaming milk with a simple handheld frother and pouring carefully to create designs. Use whole milk for thick foam, which is easier to work with. Practice your home brewing skills daily, experimenting with pouring styles and milk textures. With patience, you’ll improve your latte art skills and enjoy beautiful designs right in your kitchen.

CASABREWS 5418 PRO Espresso Machine 20 Bar, Upgraded Espresso Maker with Powerful Steam Milk Frother, Stainless Steel Coffee Machine with Fast Heating System for Cappuccino, Latte, Silver
Espresso Machine with Flashheat Technology: CASABREWS 5418 PRO espresso maker delivers professional-grade speed for enthusiasts. Its innovative heating...
As an affiliate, we earn on qualifying purchases.
Conclusion
Now that you’ve learned how to create thick foam for latte art, you’re ready to turn your cup into a canvas of dreams. Remember, each pour is like planting a seed—practice patiently, and soon your designs will bloom beautifully. Don’t be discouraged by initial hiccups; even the most talented artists started with simple strokes. With passion and persistence, your coffee art will become a masterpiece that warms both the palate and the soul.

Electactic Espresso Machine 20 Bar, Super Compact Espresso Maker Stainless Steel with Touch Screen, Professional Coffee Machine, Automatic Milk Frother for Cappuccino
𝐖𝐡𝐲 𝐂𝐡𝐨𝐨𝐬𝐞 𝐎𝐮𝐫 𝐄𝐬𝐩𝐫𝐞𝐬𝐬𝐨 𝐌𝐚𝐜𝐡𝐢𝐧𝐞? Our advanced Thermo Block Heating System ensures your machine is ready to brew...
As an affiliate, we earn on qualifying purchases.

ANYCOLD Espresso Machine 20 Bar, Compact Espresso Maker, Stainless Steel Expresso Coffee Machines with Steam Milk Frother & 34oz Removable Water Tank for Cappuccino, Latte, Home Office Use, Silver
Professional 20 Bar Pump: A 20-bar pressure system and 1450W motor deliver a stable 9-10 bar extraction pressure—the...
As an affiliate, we earn on qualifying purchases.