If you want professional-quality foam at home, a steam wand creates smooth, velvety microfoam but requires practice and an espresso machine. A handheld frother is affordable and quick, giving light, airy foam with some effort. DIY methods like shaking or whisking are simple but produce less refined foam. Each method has pros and cons; experimenting further will help you find what works best for your perfect cup. Keep exploring to master your milk frothing skills.
Key Takeaways
- Steam wands produce professional-quality microfoam with control over temperature and bubble size, ideal for barista-level drinks.
- Handheld frothers are affordable and quick, creating airy foam suitable for everyday use but with less density than steam wands.
- DIY methods like shaking or using a whisk are accessible and inexpensive but often produce less smooth, bubbly foam.
- Proper technique, such as controlling milk temperature and airflow, is crucial regardless of the method to achieve good froth.
- Practice and experimentation help improve foam quality, making even simple DIY approaches more effective over time.
Ever wondered how to get that perfect froth right in your own kitchen? Achieving the ideal milk texture can seem tricky, but with the right frothing techniques, you can create barista-quality foam at home. Whether you’re using a steam wand, a handheld frother, or DIY methods, mastering the art of milk frothing is all about understanding how to manipulate milk to get the best results.
Master the art of milk frothing for barista-quality foam at home with simple techniques.
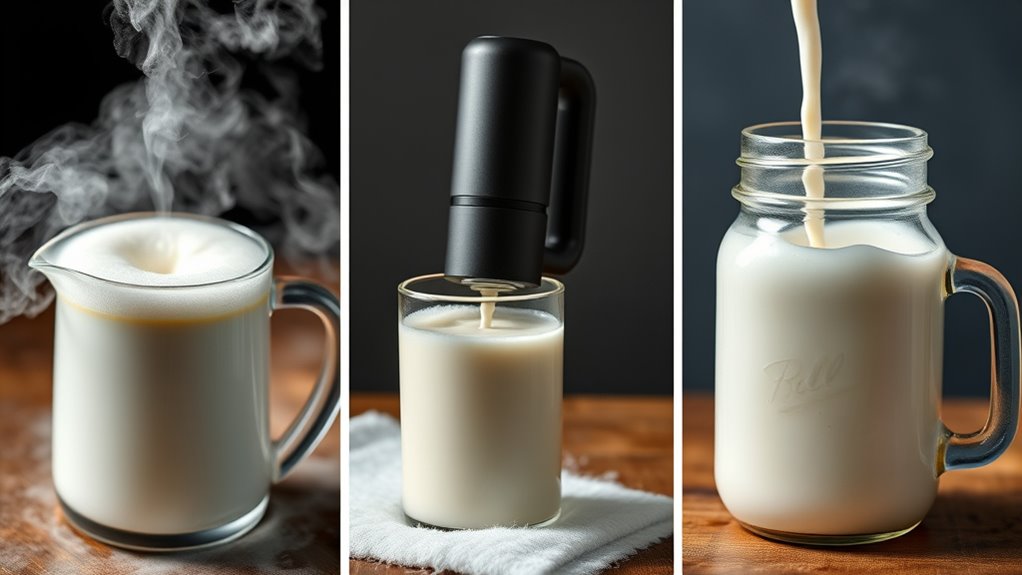
If you have a espresso machine with a steam wand, you’re already equipped with one of the most effective tools for creating velvety froth. The key is to introduce steam into the milk while controlling the temperature and positioning the wand just below the surface. This creates microfoam, giving you that smooth, glossy milk texture perfect for lattes or cappuccinos. The frothing techniques involve steady airflow and gentle movement to prevent large bubbles, ensuring the foam stays creamy and consistent. Keep the milk between 140-150°F; overheating can ruin the texture, causing it to become grainy or burnt-tasting. Practice makes perfect, but with patience, you’ll develop an intuitive sense of how to produce that rich, silky foam in no time.
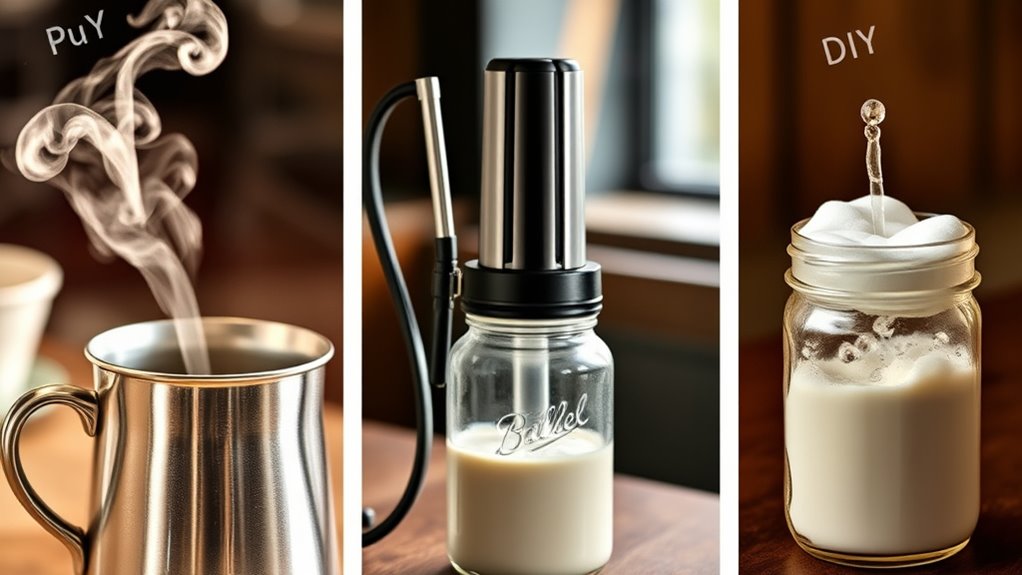
If a steam wand isn’t part of your setup, a handheld electric frother can be a game-changer. These devices are affordable, easy to use, and portable. To get the best milk texture, warm your milk first (not boiling, just warm enough to help create foam), then submerge the frother’s tip near the surface of the milk. Turn it on and move it in small circles to introduce air and create froth. The result should be airy, light foam with smaller bubbles, which is ideal for topping your drinks. Keep in mind that while handheld frothers are convenient, they often produce less dense foam compared to steam wands, but with some practice, you can still achieve a pleasing consistency.
DIY methods are also worth exploring if you’re seeking a simple, low-cost way to froth milk. One popular approach involves shaking warm milk vigorously in a sealed jar for about 30-60 seconds until frothy. This method introduces air and creates a bubbly foam, but it tends to be less smooth and more textured. Alternatively, using a whisk or even a blender can help incorporate air into the milk quickly. While these methods may not produce the same refined milk texture as professional frothing techniques, they’re perfect for quick, casual drinks or when equipment options are limited. Additionally, knowing the right techniques can help you improve your results with any method you choose.
No matter which frothing method you choose, patience and attention to detail will help you master the craft. Focus on controlling temperature, incorporating air evenly, and experimenting with different frothing techniques. Soon, you’ll be confidently creating that perfect foam to elevate your home coffee experience.
Frequently Asked Questions
Can I Use Plant-Based Milk for Frothing at Home?
Yes, you can definitely use plant-based alternatives for frothing at home. They often froth well, but the frothing consistency can vary depending on the type you choose. For best results, opt for options like soy or oat milk, which tend to produce creamier, more stable foam. Keep in mind, some plant-based milks require gentle heating and specific techniques to achieve the desired frothiness.
How Do I Clean and Maintain My Milk Frothing Equipment?
Ever wonder how to keep your frothing tools in tip-top shape? You should establish a regular cleaning schedule for your equipment, like rinsing after each use and deep cleaning weekly. Use warm water and mild soap, avoiding harsh chemicals. Proper maintenance not only guarantees your frother stays hygienic but also extends its longevity. Remember, consistent care keeps your coffee moments delicious and your equipment working perfectly for years to come.
What’s the Best Temperature for Frothed Milk?
The best temperature for frothed milk is around 140°F to 150°F, which guarantees ideal frothed milk with a creamy texture and sweet flavor. You should use temperature control if available, as it helps you reach and maintain this perfect range without overheating. Keep in mind, exceeding 160°F can scald the milk, ruining the taste and texture, so aim for that ideal temperature for the best frothing results.
Can I Make Latte Art With DIY Frothing Methods?
Imagine pouring a swirl of creamy milk into your coffee, creating a delicate heart or leaf. With DIY frothing techniques, you can achieve sufficient foam for simple latte art, though it might not be as crisp as professional designs. Focus on creating smooth, glossy microfoam, and practice steady pouring. While your latte art possibilities are more limited, with patience, you can still craft charming designs that impress.
How Long Does It Take to Froth Milk Manually?
Frosting duration with manual frothing varies depending on your technique and milk type, but generally, it takes about 1 to 2 minutes of steady whisking or shaking to achieve creamy, frothy milk. The manual frothing time is quite short, so you should start seeing good results quickly. Keep in mind, consistent movement and proper temperature are key to getting the perfect foam in that time frame.
Conclusion
Now, imagine yourself effortlessly swirling that warm, velvety foam into your favorite mug, transforming simple milk into a cloud of silky perfection. Whether you choose the steam wand’s precise steam, the handheld frother’s quick whirl, or a DIY method, you’re crafting a cozy moment each morning. With a little practice, you’ll turn your kitchen into a café, filling the air with the comforting aroma of freshly frothed milk and the promise of your next delicious sip.