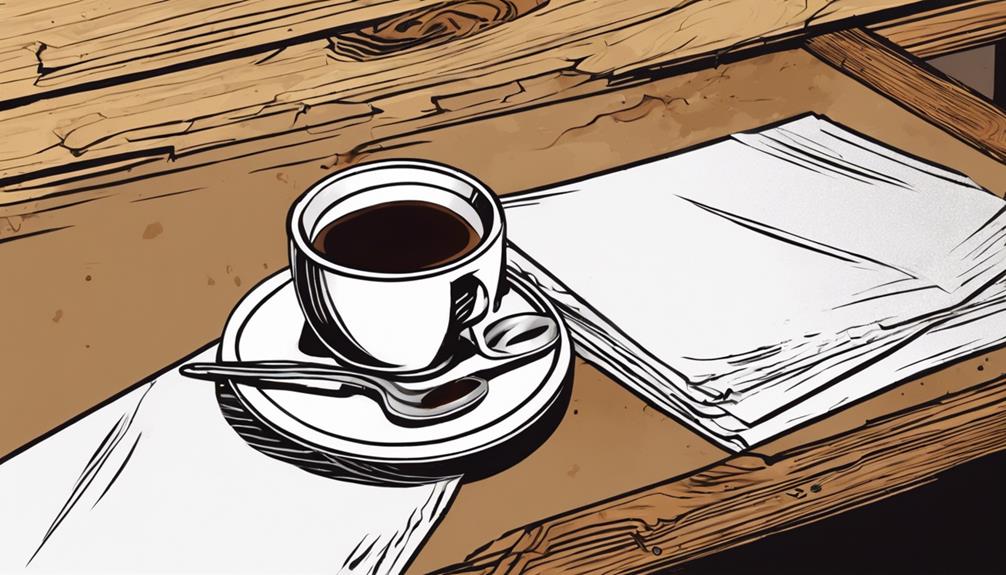
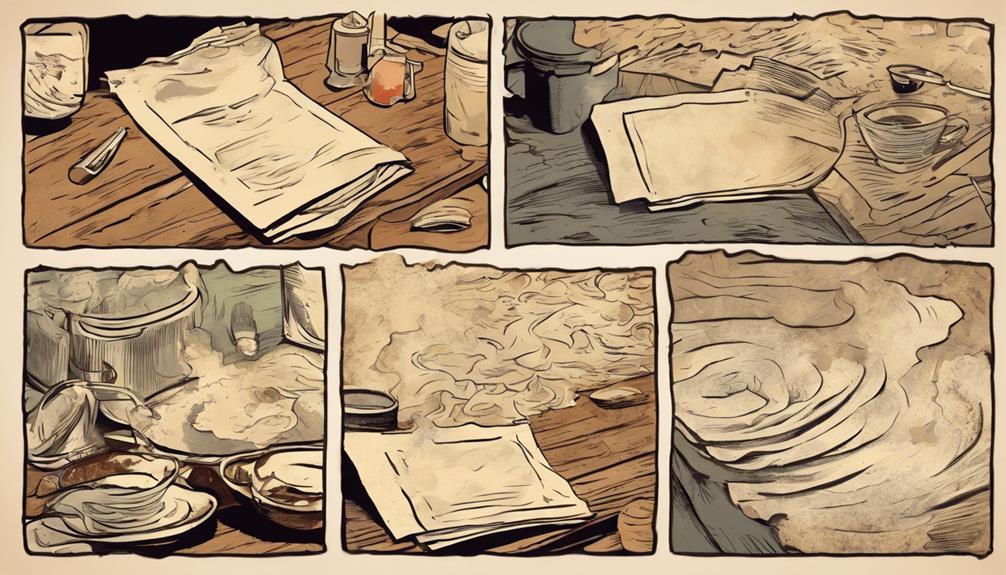
Connect with us

Tips and Tricks

Vintage Craft: How to Age Paper With Coffee for a Rustic Look!

Fancy giving your paper an antique vibe? Learn how to age it with coffee for a rustic look and uncover more vintage crafting secrets!

Published

on

aging paper with coffee

Get a rustic look by aging paper with coffee. Crumple the paper for texture. Dilute instant coffee in hot water, adjust for shade, then dry. Spread a mix evenly or spot for darker areas. Burn edges for antique style. Experiment with tea and coffee types. If curious for more techniques and cool uses, keep exploring vintage projects and new ideas!

Key Takeaways

  • Dilute instant coffee in hot water for an antique appearance.
  • Apply coffee evenly with a sponge or brush.
  • Experiment with coffee concentrations for varied rustic shades.
  • Allow the paper to dry completely after applying the coffee mixture.
  • Crumple the paper before soaking for added texture.

Aging Paper Techniques

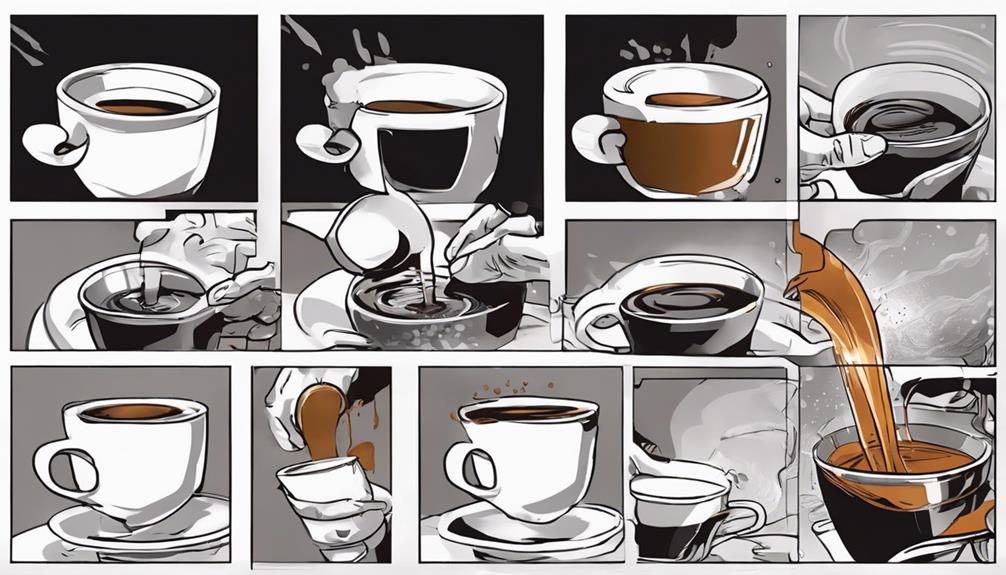
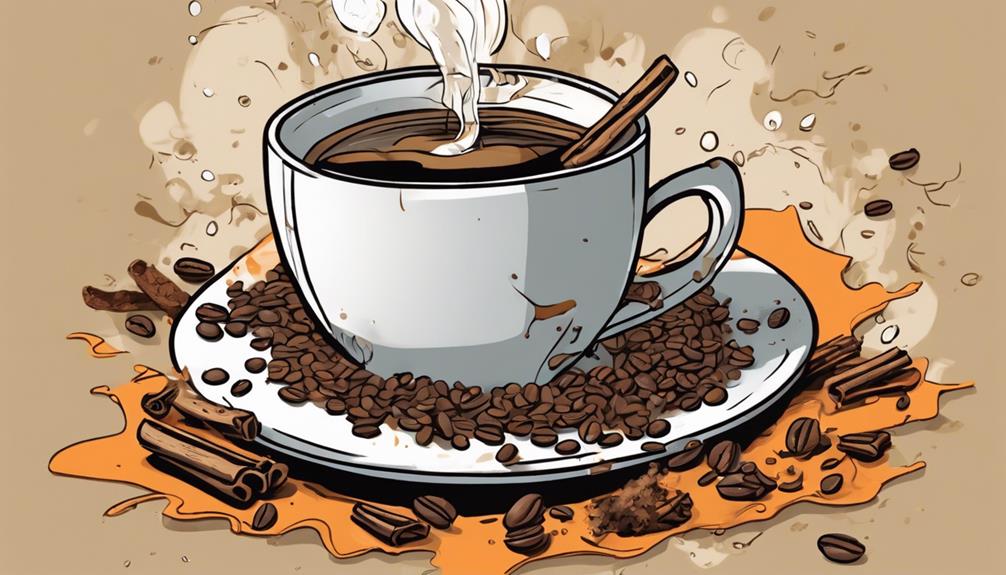
To achieve a vintage look, start by experimenting with various aging techniques such as coffee staining on your paper. Coffee staining is a simple yet effective method to give your paper an antique appearance. Dilute 2 teaspoons of instant coffee in 1/4 cup of hot water for a rich, aged effect. Adjust the concentration of the coffee to achieve different shades of antiquing.

After applying the coffee mixture to the paper, allow it to dry completely. This process can take 2-3 hours if air drying or just 2 minutes at 200 degrees in the oven for a quicker result.

When aging paper using coffee, keep in mind that tea staining is another option, but be aware that tea-stained paper may lose some of its archival quality due to the tannic acid present in black tea. Experimenting with various techniques and concentrations of coffee or tea can lead to unique and versatile results perfect for crafts like scrapbooking, card making, art journals, and home decor projects.

Aged Paper Projects

vintage paper craft ideas

You can craft vintage cards, explore art journal ideas, and find inspiration for home decor projects using aged paper.

Enhance your creativity by incorporating aged paper into your crafting endeavors, adding a touch of nostalgia and uniqueness to your creations.

Experiment with different techniques and styles to bring your aged paper projects to life.

Advertisement

Crafting Vintage Cards

Crafting vintage cards with aged paper adds a charming and nostalgic element to your handmade creations. By incorporating coffee stains and aging techniques, you can achieve a unique antique look for your vintage cards. Experimenting with different paper types and concentrations of coffee can help you customize the level of aging to suit your design preferences.

To create stunning vintage cards, consider using the following techniques:

Technique Description
Tea Staining Achieve a subtle aged effect with tea
Coffee Stains Create rich, antique-looking stains with coffee
Layering Combine different aging methods for depth
Hand-lettering Add personalized messages for a special touch

Vintage cards made with aged paper are perfect for special occasions like birthdays, anniversaries, or holidays. Whether used as backgrounds, embellishments, or the main feature of the card, aged paper adds a touch of nostalgia and craftsmanship to your handmade creations.

Art Journal Ideas

Consider integrating aged parchment into your art diary projects to infuse a weathered and classical allure into your creative pages. Aged parchment, achieved through coffee staining, is ideal for crafting vintage art diary spreads with a historic look.

Experimenting with different strengths of coffee can assist you in achieving various tones of aged parchment, enhancing character and dimension to your art diary pages. When combined with diverse media techniques, aged parchment can offer a distinct and textured appearance to your art diary entries.

Advertisement

Home Decor Inspiration

Integrate the charm of aged paper into your home decor with creative projects that infuse a touch of nostalgia and character. Aging book pages can be repurposed in various ways to add a vintage aesthetic to your living space.

For instance, consider framing aged book pages from your favorite novels as unique wall art pieces or using them as a backdrop for displaying cherished photos. This aged appearance adds a sense of history and personalization to your home decor.

Furthermore, incorporating aged paper into crafts like scrapbooking and card making can elevate the overall look and feel of your creations. Experiment with different concentrations of coffee or tea to achieve various aged effects, allowing you to tailor the appearance of the paper to suit your desired aesthetic.

Whether you're creating vintage Christmas canvas art or painting characters on aged paper, these projects offer a creative way to infuse warmth and character into your home decor.

Aging Paper Tutorial

how to age paper

Let's start by walking through the steps for aging paper using coffee, which involves steeping a tea bag in hot water or dissolving coffee in water.

The coffee staining process includes blotting or painting the liquid onto the paper and allowing it to dry naturally or using an oven for quicker results.

Advertisement

Special tips for beginners include experimenting with different concentrations of coffee or tea for varied aging effects.

Steps for Aging Paper

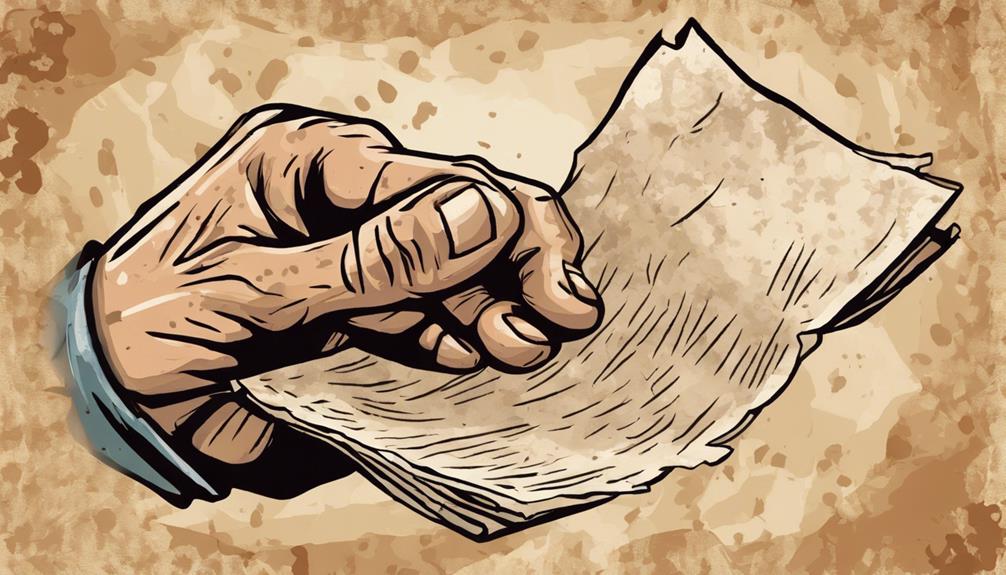
To begin aging paper using coffee or tea, steep a tea bag in hot water for 1 minute or dissolve instant coffee in hot water. Once you have your aging solution ready, grab a brush and start applying the tea or coffee liquid onto the paper. Brush it on or gently blot it to achieve the desired effect.

After applying the solution, allow the paper to dry naturally for 2-3 hours. If you're in a hurry, you can speed up the drying process by baking the paper at 200 degrees for 2 minutes.

For a more unique outcome, experiment with different concentrations of tea or coffee to see how it affects the aging of the paper. And if you want to take it a step further, consider crumpling the paper after it has dried. This extra touch will give your paper a more distressed and aged appearance, perfect for achieving that rustic look you desire.

Coffee Staining Process

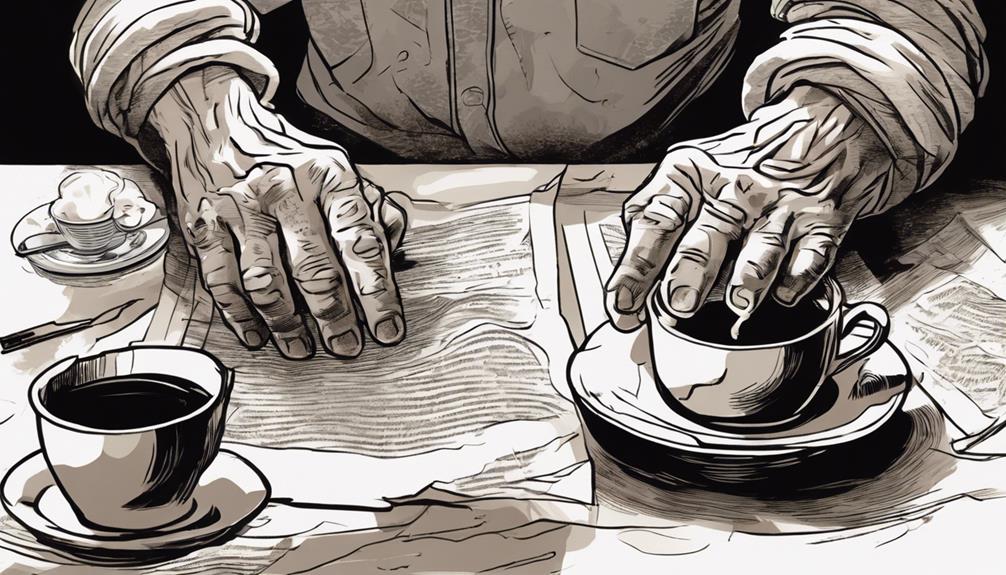
Prepare a staining solution by combining coffee grounds and boiling water in a pan for the coffee staining process when aging paper. Submerge your paper into the staining solution, allowing it to soak until reaching the desired darkness. Remember to remove the paper when it appears slightly lighter than your ideal shade to prevent over-staining. Once you have achieved the antique look you desire, carefully hang the paper to air dry. Be cautious during this step, as wet coffee-stained paper can be delicate and prone to tearing.

Advertisement

The coffee staining process imparts a weathered appearance to the paper, perfect for enhancing various crafting projects. The resulting antique look adds a rustic charm and authenticity to your creations. Whether you're working on scrapbooking, journaling, or other DIY endeavors, coffee-stained paper can elevate the aesthetic appeal of your finished pieces.

Experiment with different soaking times and concentrations to achieve the perfect aged effect for your crafting projects.

Special Tips for Beginners

For beginners looking to age paper with coffee, incorporating special tips can enhance the vintage effect of your crafting projects. To achieve a beautifully aged look, follow these essential tips:

  1. Use a plastic tray: Prevent any accidental spills and protect your workspace by using a plastic tray when working with the coffee solution.
  2. Dab paper with care: Apply the coffee solution evenly onto the paper by gently dabbing it with a brush or sponge for a rustic appearance.
  3. Blot excess coffee: Keep extra napkins nearby to blot excess coffee and control the aging effect on the paper, ensuring the desired level of antiquing.
  4. Carefully burn edges: Utilize a candle with caution to carefully burn the edges of the paper, creating an ancient and weathered look that adds to the overall vintage aesthetic.

Materials and Preparation

materials and preparation are essential

Gather a quarter cup of hot, black coffee and a teaspoon of instant coffee to begin aging paper with a distressed appearance in your paper crafts project.

Lay out the paper on a baking sheet or cookie sheet, ensuring to crumple it to enhance the distressed effect.

Use a sponge brush or soft bristle brush to evenly spread the coffee over the paper, staining it for that rustic look you desire.

Advertisement

Once you have applied the coffee, bake the paper in the oven at the lowest setting for approximately five minutes.

This step helps set the stain and accelerates the aging process. Be cautious not to leave it in the oven for too long to avoid burning the paper.

Enhancing the Aged Paper Effect

enhancing vintage paper texture

To further enhance the aged paper effect, consider experimenting with different types of teas or coffees to achieve varied hues and tones. By exploring various options, you can create a more authentic and unique look for your aged paper.

Here are some tips to help you achieve the desired distressed appearance and antique look:

  1. Crumple Effect: Before soaking the paper, crumple it to add texture and enhance the distressed appearance.
  2. Concentrated Coffee Spots: Use a paintbrush to apply concentrated coffee solution for darker, aged spots on the paper, adding depth to the overall look.
  3. Edge Burning: Lightly burn the edges of the paper for an antique look and to give it added character, mimicking the wear and tear of time.
  4. Sepia Tone: Apply a diluted coffee solution to achieve a sepia tone effect on the aged paper, giving it a vintage and nostalgic appearance.

Supplies You'll Need for Aging Paper

aging paper supplies list

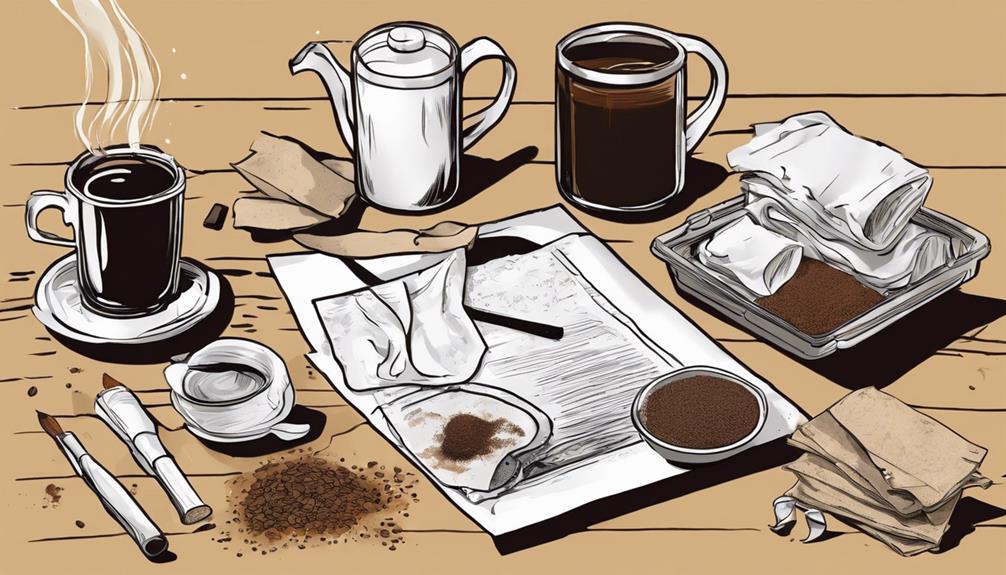
Consider preparing the necessary supplies for aging paper by gathering a piece of paper, 1/4 cup of hot, black coffee, a teaspoon of instant coffee, a baking sheet, and a sponge brush or soft bristle brush.

These items will help you achieve a beautifully aged look on your paper. The coffee will act as a natural dye, giving the paper an antique appearance.

The baking sheet will be used to hold the paper while you work on it, ensuring easy cleanup and organization. The sponge brush or soft bristle brush will help you apply the coffee evenly onto the paper, allowing for a consistent aging effect.

Advertisement

How To Give Paper an Aged Look

create vintage paper effect

For an aged appearance, start by crumpling the paper before laying it flat on a baking tray. This technique helps create a distressed effect that adds character to your paper.

Follow these steps to give your paper an antiqued look:

  1. Prepare the Base: Pre-heat the oven to the lowest setting to get it ready for the aging process. This step ensures that the paper will dry evenly and the coffee stains will set properly.
  2. Add the Coffee: Pour hot coffee over the paper and sprinkle instant coffee to create a rustic appearance. The coffee will seep into the paper, giving it a stained and aged look.
  3. Bake to Perfection: Place the paper in the oven for about five minutes. Baking the paper helps set the aging effect and enhances the vintage appearance.
  4. Enjoy the Results: Consider framing the aged paper as art or using it to make unique handmade cards. The antiqued paper will add a charming touch to your crafts.

What To Do With Your Vintage Sheet

repurpose vintage sheets creatively

Once you have transformed your paper into a vintage sheet using coffee staining and baking techniques, explore creative ways to incorporate it into your projects. Frame your aged paper to create unique art pieces or personalized Valentine's cards.

The depth and character that aged paper adds can enhance the visual appeal of any craft project. Consider using aged paper to give an authentic touch to handwritten letters, maps, books, or historical documents. By incorporating aged paper, you can create a sense of nostalgia and authenticity in your crafts.

Use aged paper to add a rustic, vintage look to various creations such as ancient scrolls or antique wedding invitations. Experiment with different ways to showcase your aged paper in craft projects to bring a touch of old-world charm and uniqueness to your creations.

Let your creativity flow as you explore the endless possibilities of using aged paper in your artistic endeavors.

Frequently Asked Questions

How to Stain Paper With Coffee to Make It Look Old?

To make paper look old, stain it with coffee. Dilute 2 tsp instant coffee in 1/4 cup hot water. Soak paper in the solution for desired darkness. Experiment with different concentrations for varied effects. Dry and optionally bake at low temperatures to set the stain.

Advertisement

How Do You Make Paper Look Old and Rusty?

Soak paper in brewed coffee for a vintage look with a light brown tint. Coffee staining adds character to artwork, letters, and invitations, creating an authentic and nostalgic feel. Combine with crumpling or burning for rustic effects.

How to Make Paper Look Old With Using Tea or Coffee?

To make paper look old with tea or coffee, steep tea bags or dissolve instant coffee in hot water. Apply the mixture using a brush or sponge, then let it dry naturally or speed up the process with an oven at low heat.

How Do You Make Paper Look Brown and Old?

To make paper look brown and old, soak it in a hot coffee and instant coffee blend. Adjust the coffee concentration for various shades of brown. Avoid black tea as it can harm paper quality. Bake the stained paper at low heat for faster drying and added rustic charm.

Conclusion

So go ahead and grab your coffee and get ready to turn plain paper into a masterpiece with a touch of vintage charm!

Let your creativity flow like a river and watch as your projects come to life with a rustic look that will make them stand out like a diamond in the rough.

Advertisement

Aging paper with coffee is a simple yet effective technique that will add a unique and antiqued vibe to your crafts. If you’re looking to give your paper a classic, aged appearance, this method is perfect for achieving that desired look. All you need is some brewed coffee in a shallow container, and you can easily transform your plain paper into a vintage piece. And while you’re at it, why not try out a delicious coffee swiss roll recipe to enjoy while you work on your crafts?

Get brewing and start creating today!

Continue Reading
Advertisement

Tips and Tricks

Circular Design: How to Build a Round Coffee Table!

Leverage your woodworking skills to craft a stylish round coffee table that will elevate your living space – discover the step-by-step process here!

Published

on

By

building a round table

Create a round coffee table with a sleek design using a single sheet of wood, simple legs, and customized size. Make sure it fits well with your furniture and room layout. For DIY ideas, watch a detailed video tutorial with step-by-step instructions. Consider wood types, dimensions, and finishing for a professional touch. Explore various styles like square base or hairpin legs, with rustic stains or two-tone finishes. To achieve a perfect result, pay attention to detail, quality materials, and project completion tips. Additional design options and resources are available for your unique round coffee table.

Key Takeaways

  • Opt for a sleek and simple round design using plywood for cost-effectiveness.
  • Customize size to fit room layout and furniture dimensions harmoniously.
  • Follow a detailed DIY-friendly tutorial for constructing the table professionally.
  • Consider minimalist legs for a modern aesthetic and open living space atmosphere.
  • Explore staining, painting, and varnishing finishes for a unique look that complements home decor.

Modern Round Coffee Table

When building a modern round coffee table, opt for a sleek and simple design that effortlessly enhances your living space. This DIY project can be achieved using a single sheet of wood for the table's top, making it a cost-effective choice.

The round shape of the table adds a unique touch to your room, serving as a focal point for gatherings or quiet evenings. To maintain a modern aesthetic, consider minimalist legs that elevate the table without overpowering its design.

Customizing the size of your round coffee table allows you to adapt it to different room dimensions, ensuring a perfect fit for your space. The minimalist look of this table style complements a variety of decor styles, from contemporary to Scandinavian.

Embrace the beauty of simplicity with a modern round coffee table that combines practicality with elegance in your living area.

Full Project Video

project completion video compilation

The full project video provides a detailed tutorial on constructing a round coffee table from scratch, guiding you through each step of the process.

Here's what you can expect from the full project video:

Advertisement
  1. Step-by-Step Process: The video showcases the entire process of constructing the round coffee table, starting from cutting the top to assembling the base and finishing the piece.
  2. DIY Friendly: Viewers can easily follow the instructions to build their own round coffee table using just a single sheet of plywood.
  3. Customizing Tips: Learn how to customize the table size according to your preferences and how to attach the base securely to the top.
  4. Professional Finish: The video includes guidance on applying a clear poly finish, giving your coffee table a polished and professional look.

Dimensions

exploring space time continuum depths

When considering the dimensions of your round coffee table, it's important to think about size, proportion, and style.

The diameter should harmonize with your seating arrangement and room layout.

Make sure the table's height allows for comfortable reach from your seating area.

Size Considerations

Consider the dimensions of your living space when selecting the diameter of your round coffee table. The size of the round coffee table should harmonize with the proportions of your sofa for a balanced and visually appealing look.

Here are some key points to keep in mind:

  1. Room Layout: Assess the layout of your living room to determine how much space you have available for the coffee table. Make sure there's enough room for movement around the table.
  2. Sofa Proportionality: Match the diameter of the coffee table with the size of your sofa. A 40-inch diameter table complements larger sectional sofas, while a 28-inch diameter table works well with 3-seater sofas.
  3. Personal Preference: Consider your personal style and design preferences when choosing the size of the round coffee table. It should reflect your taste and fit seamlessly into your decor.
  4. Circular Design: Embrace the circular design of the table to create a cohesive and fluid look in your living space. The round shape adds a touch of elegance and sophistication to the room.

Proportion and Style

For a well-balanced and visually appealing living space, make certain the round coffee table's dimensions harmonize with the surrounding furniture. When considering the proportion and style of your round coffee table, keep in mind that typical diameters range from 28 to 40 inches. This size range guarantees that the table complements the seating arrangement without overpowering the room.

Round coffee tables are versatile pieces that can adapt to various design styles, from modern to farmhouse, depending on their design and finish. The height of the coffee table is also essential; it should align with the seating height for comfort and functionality. Choosing a round coffee table can help create a more open and inviting atmosphere in your living space compared to rectangular or square tables.

Advertisement

Questions & Comments

engaging in interactive discussions

Got questions about building a round coffee table?

Want to share your thoughts or pictures of your DIY projects?

Engage with the community here and connect with fellow builders.

Your comments and interactions can inspire others and help create a vibrant discussion around building round coffee tables.

Comment Interaction

Engage with the DIY community by actively participating in the comment section, sharing your questions, thoughts, and experiences on building a round coffee table. Connecting with fellow DIY enthusiasts can enhance your project journey.

Here's how you can interact in the comment section:

Advertisement
  1. Ask Questions: Seek clarification on any steps, materials, or techniques used in the circular design of the coffee table.
  2. Share Ideas: Contribute your unique thoughts and ideas to inspire others and spark interesting discussions.
  3. Provide Feedback: Offer constructive feedback on other builders' projects to foster a supportive environment within the DIY community.
  4. Share Pictures: Upload images of your completed round coffee table project to showcase your craftsmanship and receive feedback from the author and fellow readers.

Community Engagement

Feel free to initiate insightful discussions and seek advice from fellow DIY enthusiasts in the comment section below. Community engagement is key to enriching your DIY experience.

Share pictures of your completed projects to inspire others and showcase your craftsmanship. Stay connected with the author and other readers by interacting in the comments.

Engage with the community by participating in discussions and sharing your thoughts on different aspects of the project. Don't hesitate to ask questions if you need clarification or seek additional tips to enhance your coffee table creation.

The comment section is a valuable space to connect with like-minded individuals, exchange ideas, and learn from each other's experiences. So, take advantage of this platform to immerse yourself in a supportive DIY community where collaboration and shared knowledge thrive.

Your active participation won't only benefit you but also contribute to the collective growth and creativity within the DIY community.

Easy DIY Fluted Coffee Table

fluted coffee table project

Craft a unique and stylish round coffee table with ease through the straightforward DIY Fluted Coffee Table project. To get started, you'll need a round table top made from a single sheet of plywood.

The following steps will guide you through the process:

Advertisement
  1. Prepare the Materials: Gather your tools, including a pocket hole jig, table legs, wood glue, jig saw, round table top, and pocket hole screws.
  2. Cut and Assemble the Base: Follow the detailed cut lists and instructions provided to create the base and legs for your coffee table.
  3. Customization Options: Adjust the lengths of the legs and braces to fit your desired table size perfectly.
  4. Finishing Touches: Consider different attachment methods such as half laps, wood screws, or figure 8 fasteners during assembly. Finish off by applying clear poly to seal the wood for a modern look.

With these steps, you'll have your DIY fluted coffee table ready to enhance your living space.

Round Coffee Table Tutorial

diy round coffee table

To construct a round coffee table using a single sheet of plywood, follow the step-by-step tutorial for cutting, assembling, and finishing the table.

Begin by selecting the size and design that best fits your space and style preferences. With DIY spirit, you can customize the round coffee table to match your vision.

When building, consider the attachment methods available for securing the different components together. Whether you opt for screws, glue, or another method, secure a sturdy and stable construction.

As you assemble the pieces, pay attention to the details to achieve a professional-looking result.

Finally, when finishing the round coffee table, explore various options such as staining, painting, or varnishing to add the desired aesthetic touch.

More Like Home: DIY Styles

home diy project ideas

Explore the array of DIY styles offered by More Like Home for building your own round coffee table. Whether you have woodworking experience or are a beginner looking for a new project, More Like Home has options for you.

Here are some key features of the DIY styles available:

Advertisement
  1. Square Base Tables: These tables offer a sturdy and classic design that can complement various home decor styles.
  2. Hairpin Leg Tables: For a more modern look, consider building a round coffee table with hairpin legs for a sleek and stylish finish.
  3. Slanted Base Tables: Add a unique touch to your living space with a round coffee table featuring slanted bases for a contemporary feel.
  4. Finish Options: More Like Home provides suggestions for finishes like rustic stain or a trendy two-tone finish to customize your DIY round coffee table.

Find detailed cut lists, project completion tips, and more on More Like Home to help you successfully complete your project.

Frequently Asked Questions

How Do You Set up a Round Coffee Table?

To set up a round coffee table, position it at the center of your seating area for easy access. Leave enough space around it for movement and comfort. Use it for serving drinks or snacks. Add a rug underneath to anchor the space visually.

What Diameter Should a Round Coffee Table Be?

For a cozy living room look, your round coffee table's diameter should match your furniture size. Consider a 40-inch table for a large sectional and a 28-inch one for a three-seater sofa. Balance matters!

How Do You Make a Circular Side Table?

To make a circular side table, cut a round table top from plywood. Build a sturdy base with wood pieces like legs. Assemble following detailed instructions for alignment. Finish with stain or paint for a personalized touch.

Should a Round Coffee Table Have a Round Tray?

For a cohesive look, a round coffee table can be enhanced with a round tray. Stack books on it to add height and visual interest. Personal preference guides your choice in selecting the shape and style of the tray.

Conclusion

To wrap up, building a round coffee table is as easy as pie! With the right tools and materials, you can create a stylish piece of furniture that will be the cherry on top of your living room decor.

Advertisement

So roll up your sleeves, grab your saw, and get ready to craft a coffee table that's as round and smooth as a polished river stone.

Happy building!

Continue Reading

Tips and Tricks

DIY Bar: How to Build a Coffee Bar for Your Home!

Transform your home with a DIY coffee bar that will revolutionize your morning routine – learn how to create the perfect setup and elevate your coffee game!

Published

on

By

home coffee bar guide

Create your own comfortable coffee spot at home with a DIY coffee bar! Start by building a sturdy base and staining it for a sleek look. Construct a concrete countertop for a modern touch. Personalize with chalkboards and vintage decor. Perfect your equipment layout for convenience. Guarantee excellent coffee quality with a suitable water filtration system. Get ready to elevate your daily coffee routine with these helpful tips and ideas!

Key Takeaways

  • Purchase detailed plans for guidance on building a sturdy base and concrete countertop.
  • Personalize with chalkboards, lighting, and vintage decor to align with your aesthetic.
  • Optimize equipment layout for efficient workflow, positioning machines strategically.
  • Prioritize water quality with a reliable filtration system like the LARQ PureVis Pitcher.
  • Incorporate hidden storage and functional design tailored to your brewing preferences.

Building the Coffee Bar Base

To begin constructing your coffee bar base, consider purchasing detailed plans to guide you through the process effectively.

For the DIY coffee bar structure, utilize sturdy 2x4s for added support and wood planks for the legs.

Stain the wood planks with Rust-Oleum Ultimate Wood Stain in Kona to achieve a rich finish that complements your space.

When building the base, it's crucial to construct it in place due to its size and complexity. This approach guarantees a seamless integration with your existing layout and allows for easier customization.

Incorporate hidden storage within the coffee bar base using weathered wood planks for a rustic yet functional touch.

Advertisement

This hidden storage option not only enhances the aesthetic appeal of the coffee bar but also provides a practical solution for organizing your coffee essentials.

Concrete Countertop Construction

precise concrete countertop crafting

Consider crafting a concrete countertop for your DIY coffee bar to achieve a modern and durable surface. When creating your concrete top, make sure you have the necessary materials and tools handy.

Follow these steps for a successful concrete countertop construction:

  • Begin by setting up the form construction to shape the countertop.
  • Use Quikrete Countertop Mix for a smoother texture and professional finish.
  • Rent a concrete mixer to streamline the pouring process and guarantee a consistent mix.

Personalization and Customization Tips

tailoring content to individuals

Enhance your DIY coffee bar by incorporating personalized touches that reflect your unique style and preferences. Consider adding a chalkboard to display daily specials or leave personal messages for a cozy touch. Opt for undermount lighting to create a warm ambiance and increase the functionality of your coffee bar, making it easier to brew your favorite drinks.

When choosing a color scheme, select hues that resonate with your personal aesthetic and complement the existing decor in your kitchen. To further personalize your space, include decorative elements like vintage signage or artwork to make your coffee bar a true reflection of your personality.

Customization is key when designing a functional coffee bar tailored to your needs. Select machines and appliances that align with your brewing preferences while fitting seamlessly within the available space. By incorporating these personalization and customization tips, you can create a coffee bar that not only serves your daily caffeine fix but also adds a touch of charm to your home.

DIY Coffee Bar Equipment Layout

coffee bar setup tips

In planning your DIY coffee bar, strategically layout your equipment to optimize workflow and accessibility.

Position the espresso setup on the left side near the sink, fridge, and waste bin for convenient access.

Advertisement

Arrange the filter setup on the right side of the cart to optimize workflow and organization.

Utilize the central area as a versatile workspace for both coffee setups to enhance efficiency.

Guarantee easy access to all equipment and supplies by strategically laying out the coffee bar equipment.

Optimize the functionality of the coffee cart by positioning equipment and accessories for seamless operation.

By following these layout guidelines, you can create a space that not only looks organized but also functions efficiently, making your coffee-making experience a breeze.

Advertisement

Water Quality and Filtration Considerations

water treatment and purification

When setting up your coffee bar at home, the quality of water you use is essential for a delicious brew. Choose a reliable filtration system like the LARQ PureVis Pitcher to guarantee your water is free from impurities.

Enhancing water quality will lead to better-tasting coffee every time you brew.

Filtration System Selection

Consider selecting a filtration system like the LARQ PureVis Pitcher with UV-C light to guarantee clean and great-tasting water for your home coffee bar.

When choosing a filtration system, opt for simplicity to purify water and eliminate pollutants effectively. This won't only enhance the quality of your water but also improve the overall taste of your brewed coffee.

To ensure your water remains odor-free and devoid of contaminants, it's essential to select the right filtration system tailored to your coffee bar's needs.

  • Prioritize water quality by following recommended purification methods.
  • Choose a system that effectively purifies water for better coffee brewing.
  • Opt for a solution that can efficiently eliminate pollutants to enhance the flavor of your coffee.

Water Quality Importance

Why is water quality essential for your home coffee bar?

Water quality directly impacts the taste and aroma of your coffee. Ensuring your water is free from pollutants and odors is vital for enhancing the flavor of your brews.

Advertisement

Consider using a suitable water filtration system like the LARQ PureVis Pitcher with UV-C light to remove impurities and guarantee clean water for brewing. Alternatively, a water softener can help eliminate contaminants and improve water quality, leading to better-tasting coffee.

By prioritizing water quality, you can elevate your brewing process and enhance your overall coffee experience. Remember, taste improvement starts with the water you use in your coffee bar setup.

Make the most of your brewing endeavors by focusing on water quality and selecting the right filtration method to remove pollutants effectively.

Creative Coffee Bar Design Ideas

innovative coffee shop concepts

Enhance your coffee bar's aesthetic appeal by incorporating smart storage solutions like a walnut wood cabinet to hold dishware and coffee essentials.

Designing a multifunctional coffee corner in a butler's pantry can elevate the elegance of your space.

Consider hanging a cabinet skirt to discreetly conceal large coffee machines and glassware, giving your setup a sleek and organized look.

Advertisement

To add both storage and visual interest, utilize floating shelves in your creative coffee bar design. Floating shelves not only provide practical storage solutions but also contribute to the overall aesthetic of the space.

Additionally, create a cozy and inviting coffee nook by incorporating natural wood shelves that exude warmth and charm.

These design elements combined can transform your DIY bar into a stylish and functional area where you can enjoy your favorite brews in a comfortable setting.

Frequently Asked Questions

How to Make Your Own Coffee Bar at Home?

You can make your own coffee bar at home by transforming an unused space, utilizing vertical space efficiently, and incorporating storage solutions like shelves and hooks. Personalize it with elements like chalkboard paint and unique shelving.

What Should a Coffee Bar Include?

A coffee bar in your home should include a designated area with easy access to brewing equipment, storage for supplies like mugs and beans, shelves for organization, and personal touches for style and functionality.

Advertisement

How to Set up a Coffee Bar for a Party?

To set up a coffee bar for a party, designate a cozy area with various brewing methods and a range of coffee beans, syrups, and toppings. Offer guests the chance to personalize their drinks and create a welcoming atmosphere to enjoy their coffee.

How Tall Should a Home Coffee Bar Be?

You might wonder about the ideal height for a home coffee bar. Typically, it should be around 36 inches tall, matching kitchen countertops. For added comfort, taller individuals may prefer 40-42 inches. Customize to suit your needs!

Conclusion

To sum up, building your own coffee bar at home can be a fun and rewarding project. Did you know that on average, Americans spend over $1,000 a year on coffee outside of the home?

By creating your own coffee bar, you can save money and enjoy your favorite brew anytime. So grab your tools and get started on creating a personalized space that will elevate your coffee drinking experience!

Advertisement
Continue Reading

Tips and Tricks

Street Cafe: How to Build a Coffee Cart for Street Sales!

A beginner's guide to launching a coffee cart business on the streets, offering practical tips and insights for success on the go.

Published

on

By

building a mobile coffee cart

Ready to hit the streets with your coffee cart? Start by researching local vending regulations, health standards, and licensing requirements. Understand your target market's preferences and scout locations with high foot traffic. Get your business license, choose a suitable cart model, and offer a diverse menu. Do it yourself with budget-friendly plans and essential tools like a drill set, miter saw, and work tables. Craft a vision statement to guide your coffee cart journey. Get ready to brew success one cup at a time.

Key Takeaways

  • Choose a compact yet functional cart design.
  • Focus on portability and durability for street sales.
  • Include necessary equipment for coffee preparation.
  • Ensure compliance with health and safety regulations.
  • Optimize storage space for ingredients and supplies.

Legal Requirements and Compliance

To legally operate your coffee cart for street sales, thoroughly research and understand the specific vending regulations in your city. Start a coffee cart by securing compliance with health standards related to product handling, storage, and preparation. It's vital to check the commissary requirements, which entail operating from a licensed kitchen to meet food safety regulations.

Moreover, determine the equipment specifications and hygiene policies needed for your coffee cart to operate smoothly on the streets. This includes having the necessary sanitation practices in place to maintain cleanliness and uphold health standards.

Additionally, obtaining the required business licenses and permits is essential to legally run your coffee cart business on the streets. Make sure to adhere to all legal requirements and compliance measures to avoid any issues while operating your coffee cart for street vending.

Research and Business Strategy Development

strategic research for businesses

Understand your target market's preferences and behaviors to effectively tailor your offerings before analyzing potential locations for best trading opportunities based on foot traffic.

Researching your target market's coffee preferences will guide your menu selection and pricing strategy. Take into account the competition in the area to differentiate your coffee cart business. By identifying gaps in the market or unique selling points, you can attract more customers and stand out from the competition.

When starting a DIY coffee cart, developing a solid business strategy is essential for success. Continuously evolving your strategy based on research findings and customer feedback will help you adapt to changing market conditions and consumer preferences.

Advertisement

Consider the 'why' behind customer choices to craft a compelling value proposition that resonates with your target audience. By staying informed and flexible, you can build a strong foundation for your coffee cart business and increase your chances of long-term success.

Starting a Coffee Cart Business – Step by Step Guide

coffee cart business guide

When launching your coffee cart business, the initial step involves researching legal requirements and securing necessary permits. To guarantee a successful start to your mobile coffee cart business, follow these steps:

  1. Obtain a Business License: Register your coffee cart as a legal entity to operate within the regulations set for street food vendors.
  2. Choose a Suitable Coffee Cart Model: Select a cart that meets the requirements for street sales and aligns with your business goals.
  3. Offer Diverse Menu Options: Provide a range of beverages and snacks to cater to different customer preferences. Let customers choose from a variety of options to increase satisfaction.
  4. Identify Profitable Trading Locations: Conduct research and testing to determine the best locations where foot traffic is high and demand for coffee is prevalent. Adapting your strategy to fit these locations can enhance your sales and success in the competitive street cafe industry.

Vision for DIY Coffee Cart

dreaming of mobile cafe

You need to understand the importance of a clear vision statement to guide your DIY coffee cart project.

Delve into budget-friendly DIY plans that will help you bring your vision to life without breaking the bank.

Get an overview of the licensing process to guarantee you meet all the legal requirements for operating your coffee cart on the streets.

Vision Statement Importance

Crafting a compelling vision statement for your DIY coffee cart business is essential for setting a clear direction and motivating your entrepreneurial journey. When creating your vision statement, consider the following:

  1. Disrupting the Industry: Your vision should aim to disrupt the coffee trucking industry by offering a unique and innovative approach through your DIY coffee cart.
  2. Beginner-Friendly and Budget-Conscious: Focus on providing beginner-friendly information and starting on a budget to make the DIY coffee cart business accessible to aspiring entrepreneurs.
  3. Promoting the American Dream: Emphasize the American Dream by encouraging individuals to take the first step in starting their own DIY coffee cart and achieving success through hard work and determination.
  4. Empowerment and Inspiration: Inspire aspiring entrepreneurs by highlighting the potential for success in the coffee cart industry and empowering them to start their entrepreneurial journey and learn along the way.

Crafting a vision statement that encompasses these elements won't only guide your business decisions but also inspire others to pursue their dreams in the DIY coffee cart industry.

Budget-Friendly DIY Plans

To achieve your vision of disrupting the coffee trucking industry with a budget-friendly approach, exploring DIY plans for building your coffee cart is a strategic step forward.

Advertisement

Mobile coffee carts are a popular choice for entrepreneurs entering the street sales market, and DIY plans offer a cost-effective way to kickstart your business. These budget-friendly DIY plans provide detailed instructions on constructing a professional coffee cart without breaking the bank.

By following these step-by-step guides, you can avoid costly mistakes and confidently launch your venture into street sales. The aim of these DIY plans is to challenge the traditional coffee trucking industry by offering a more affordable and accessible alternative.

With expert guidance at your fingertips, building a DIY coffee cart becomes a rewarding and financially viable option for those looking to enter the mobile coffee business. Embrace the DIY approach and watch your vision of a successful street cafe come to life.

Licensing Process Overview

During the initial stages of planning your DIY coffee cart venture, understanding the licensing process is essential for ensuring compliance and legitimacy in your street sales business.

When it comes to setting up your coffee cart business, make sure to:

Advertisement
  1. Obtain a business license online to operate your coffee cart legally.
  2. Understand the local Health Department's licensing requirements to comply with food safety regulations.
  3. Follow the steps outlined by the Health Department to secure a health department license for your coffee cart business.
  4. Familiarize yourself with the specific regulations governing coffee cart businesses to navigate the licensing process smoothly.

Tools Needed for Coffee Cart Build

coffee cart construction essentials

You'll need essential tools like a drill set, miter saw, and various fasteners for building your coffee cart.

Make certain to have specific tools such as drill bits and clamps to guarantee smooth assembly.

Consider investing in quality drill sets for long-lasting and efficient construction.

Essential Tools List

An essential component of building a coffee cart for street sales is ensuring you have the necessary tools on hand. To construct a mobile coffee shop that stands out among hot dog carts and other street vendors, you'll need the following tools:

  1. Drill Sets: Essential for creating holes for bolts, nuts, and screws, as well as attaching various components securely.
  2. Miter Saw: Ideal for making precise and angled cuts on wood or metal, ensuring the cart's frame is sturdy and well-fitted.
  3. Bolts, Nuts, Washers: These fasteners are vital for assembling the cart frame, equipment, and ensuring structural integrity.
  4. Sheet Metal Screws: Necessary for attaching sheet metal components securely, providing durability and stability to the coffee cart structure.

With these tools at your disposal, you can efficiently and effectively build a professional and durable coffee cart for successful street sales. Remember, investing in quality tools will pay off in the long run, ensuring a smooth construction process and a high-quality final product.

Recommended Tables

When selecting tables for your coffee cart build, opt for GRIDMANN NSF stainless steel commercial kitchen prep and work tables for a sturdy and spacious workspace. These tables are ideal for mobile coffee businesses as they provide ample room for equipment and preparation, ensuring efficient workspace organization.

Additionally, the Borroughs adjustable height workbench with a solid hardwood top and bottom shelf is another excellent option for your coffee cart construction. These recommended tables not only contribute to workspace organization but also help in meeting health and safety standards essential for food and beverage businesses.

Advertisement

Drill Sets Required

For the construction of your coffee cart, the recommended drill sets include the Milwaukee Drill and Impact Set 2 Battery Combo and the Milwaukee Drill Bit Set, offering versatility for various drilling needs.

When building your coffee cart, having the right tools is essential for a smooth construction process. Here are the drill sets required:

  1. Milwaukee Drill and Impact Set 2 Battery Combo: This set provides the power and efficiency needed to drive screws and bolts during the assembly of your coffee cart.
  2. Milwaukee Drill Bit Set: An essential component for drilling precise holes and ensuring secure fittings in the construction of your coffee cart.
  3. Quick Grip Clamps: These clamps are handy for securing materials in place while you work on assembling your coffee cart.
  4. Miter Saw with Laser: Ideal for cutting precise angles, this tool will assist you in achieving accurate cuts for your coffee cart build.

Having these drill sets at your disposal will make the construction of your coffee cart a much more manageable task.

Recommended Tables for Coffee Cart Build

coffee cart table options

Consider selecting the GRIDMANN NSF Stainless Steel Commercial Kitchen Prep & Work Table for a sturdy foundation when constructing your coffee cart. This table offers durability and functionality necessary for a successful coffee cart build. Its stainless steel construction guarantees longevity, while the ample workspace allows for efficient coffee preparation.

For a customizable coffee cart setup, the Borroughs Adjustable Height Work Bench with Solid Hardwood Top is an excellent choice. This table provides versatility, allowing you to customize your cart to your specific needs.

To maximize storage space on your coffee cart, select the Borroughs Adjustable Height Work Bench with Bottom Shelf. This table offers additional storage space for ingredients, equipment, and supplies, keeping everything organized and within reach.

Additionally, investing in the GRIDMANN NSF Stainless Steel Commercial Kitchen Prep & Work Table ensures easy maintenance and cleanliness, essential for a hygienic workspace. Choose the appropriate table to create a robust, customizable, and functional coffee cart that fulfills all your requirements.

Advertisement

Frequently Asked Questions

Can a Coffee Cart Make Money?

Yes, a coffee cart can make money. It offers high profit margins, lower start-up costs, and flexibility in operation. With the increasing demand for mobile coffee options, you have the opportunity to cater to various locations and events.

How Do I Market My Coffee Cart?

To market your coffee cart effectively, engage with social media, collaborate with local businesses, offer promotions, attend events, and create eye-catching branding. These strategies will help boost visibility, attract customers, and grow your business successfully.

How Much Money to Start a Coffee Stand?

To start a coffee stand, you need to invest anywhere from EUR 4,000 for a basic cart to EUR 20,000 for a fancier setup. Factors like cart size, equipment, and location fees impact costs.

What Is a Coffee Cart Business?

To start, a coffee cart business is a mobile setup selling coffee and related items. It's like having a mini café on wheels! With lower costs, you can serve hot and cold drinks wherever customers crave caffeine.

Conclusion

To sum up, creating a coffee cart for street sales is a great way to bring your passion for coffee to the public. By following the steps outlined in this article, you can guarantee that your coffee cart isn't only legally compliant but also strategically solid.

Advertisement

Remember, a successful coffee cart is like a well-maintained machine – it requires meticulous planning and focus on specifics to operate smoothly and draw in customers.

So grab your tools and get started on building your ideal coffee cart today!

Continue Reading
Advertisement

Affiliate disclaimer

As an affiliate, we may earn a commission from qualifying purchases. We get commissions for purchases made through links on this website from Amazon and other third parties.

Advertisement

Vetted

Tanpopo Konditorei Café Munich Tanpopo Konditorei Café Munich
Vetted1 month ago

Indulge in Delights at Tanpopo Konditorei Café Munich

Savor the exquisite pastries and serene ambiance at Tanpopo Konditorei Café Munich, your go-to spot for a sweet retreat in...

Vetted1 month ago

Here’s a new version of the review for “The Creative Spark: Unleashing Your Inner Artist”:

Book Review: “The Creative Spark: Unleashing Your Inner Artist” Illuminating the Path to Creative Awakening Fried Rice and Marinara Amazon...

top shower scrubbers 2024 top shower scrubbers 2024
Vetted2 months ago

15 Best Shower Scrubbers to Make Cleaning a Breeze in 2024

Discover the top 15 shower scrubbers of 2024 that promise effortless cleaning—find out which one will transform your scrubbing experience!

top storm doors 2024 top storm doors 2024
Vetted2 months ago

The 15 Best Storm Doors of 2024 – Enhance Your Home's Curb Appeal and Protection

Optimize your home's curb appeal and security with the 15 best storm doors of 2024—discover the unique features that could...

stylish outdoor dining sets stylish outdoor dining sets
Vetted2 months ago

15 Best Outdoor Dining Sets for Stylish Al Fresco Dining in 2024

Browse our curated list of the 15 best outdoor dining sets for stylish al fresco dining in 2024, and discover...

top cordless lawn mowers top cordless lawn mowers
Vetted2 months ago

15 Best Cordless Electric Lawn Mowers of 2024 – Power and Convenience Combined

Harness the power of convenience with the 15 best cordless electric lawn mowers of 2024—discover which one will revolutionize your...

top stackable washer dryers top stackable washer dryers
Vetted2 months ago

15 Best Stackable Washer Dryers of 2024 – Space-Saving Solutions for Your Laundry Room

Get ready to discover the 15 best stackable washer dryers of 2024 that will transform your laundry room into a...

ultimate comfort chair massagers ultimate comfort chair massagers
Vetted2 months ago

15 Best Back Massagers for Your Chair: Ultimate Comfort and Relief

Have you been searching for the perfect back massager to elevate your comfort? Discover the 15 best options that promise...

healthier caffeine free mushroom coffees healthier caffeine free mushroom coffees
Vetted2 months ago

14 Best Caffeine-Free Mushroom Coffees for a Healthier Brew

Mushroom coffees offer a healthier brew alternative—discover the 14 best caffeine-free options that might just transform your morning routine!

top bathroom fans 2024 top bathroom fans 2024
Vetted2 months ago

15 Best Bathroom Fans of 2024 – Quiet, Efficient, and Stylish Options

You won't believe the stylish and efficient bathroom fans of 2024 that promise quiet operation and enhanced ventilation—discover your perfect...

adaptogenic mushroom coffee benefits adaptogenic mushroom coffee benefits
Vetted2 months ago

15 Best Adaptogenic Mushroom Coffees to Boost Your Wellness Routine

The 15 best adaptogenic mushroom coffees promise to elevate your wellness routine—discover how these blends can transform your health and...

mushroom coffee pods selection mushroom coffee pods selection
Vetted2 months ago

15 Best Mushroom Coffee Pods to Boost Your Morning Brew

Uncover the top 15 mushroom coffee pods that can transform your morning routine and unleash a new level of energy...

Advertisement

Trending