Tips and Tricks
Your Guide to Drinking Coffee With Braces
Keen on enjoying coffee with braces? Discover essential tips to savor your favorite brew without compromising your dental health.
When wearing braces, be cautious when drinking coffee to avoid harming your hardware and oral health. Coffee's acidity can weaken enamel and orthodontic adhesive, leading to potential damage. Staining is more noticeable on clear braces, and neglecting oral hygiene increases plaque and decay risks. Brush after consuming coffee to prevent stains settling on your teeth and braces. Regularly clean your braces to avoid plaque buildup. Safely enjoy coffee by using a straw, moderating consumption, and rinsing your mouth after drinking. Choosing lighter roasts can further protect your braces. Implement these strategies to safeguard your oral health while enjoying your coffee.
Key Takeaways
- Use a straw to minimize teeth contact.
- Brush teeth after coffee consumption.
- Rinse mouth with water post-coffee.
- Choose lighter coffee roasts.
- Moderate coffee intake for brace protection.
Risks of Coffee on Braces
Regularly drinking coffee with braces can pose several risks to your oral health and the integrity of your orthodontic treatment. The acidity of coffee can weaken tooth enamel and the adhesive that holds your orthodontic appliances, potentially leading to damage.
This weakening effect can be particularly concerning for individuals with clear braces, as staining from coffee can impact the appearance of brackets and wires. Additionally, consuming coffee while undergoing orthodontic treatment may increase the risk of plaque buildup, decay, and gum disease if proper oral hygiene practices aren't followed.
Neglecting oral hygiene while enjoying your favorite brew can't only prolong your time in braces but also have lasting effects on your overall oral health. It's important to be mindful of how coffee can affect your braces and to prioritize good oral care habits to mitigate these risks.
Regular dental check-ups are essential to monitor the effects of coffee consumption on both your braces and oral health.
Coffee Staining and Oral Health
Coffee's composition, including tannins, chromogens, and acidity, contributes to staining tooth enamel and braces, posing risks to oral health. The staining effects of coffee are particularly noticeable on ceramic or clear braces, impacting the aesthetic appearance of your smile.
Additionally, the acidic nature of coffee can weaken enamel, the adhesive holding braces, and metal wires, potentially leading to complications with your orthodontic treatment. This acidity also increases the vulnerability to tooth decay, especially when coupled with added sugars commonly found in flavored coffee drinks.
To maintain good oral health while enjoying your coffee, it's essential to schedule regular dental check-ups. These check-ups are vital for monitoring any enamel erosion, decay, or damage to the braces caused by coffee consumption. By staying proactive and addressing any concerns promptly, you can continue to savor your coffee without compromising your oral health or the effectiveness of your metal braces.
Brushing After Coffee Consumption
To prevent staining and maintain oral hygiene with braces, brushing your teeth after consuming coffee is essential. Coffee stains can adhere to your teeth and braces due to its pigmented nature, leading to discoloration over time.
By incorporating regular post-coffee brushing into your routine, you can reduce the risk of these stains settling on your teeth surfaces and orthodontic hardware. Immediate brushing after coffee consumption helps remove pigments that could cause discoloration and prevent residue from settling on brackets and wires.
This practice not only aids in maintaining oral hygiene but also decreases the likelihood of bad breath associated with coffee consumption. By prioritizing post-coffee brushing, you can protect your enamel from demineralization and reduce the risk of staining and erosion.
Make sure to brush thoroughly and effectively after enjoying your coffee to keep your smile clean and bright while wearing braces.
Cleaning Braces Regularly
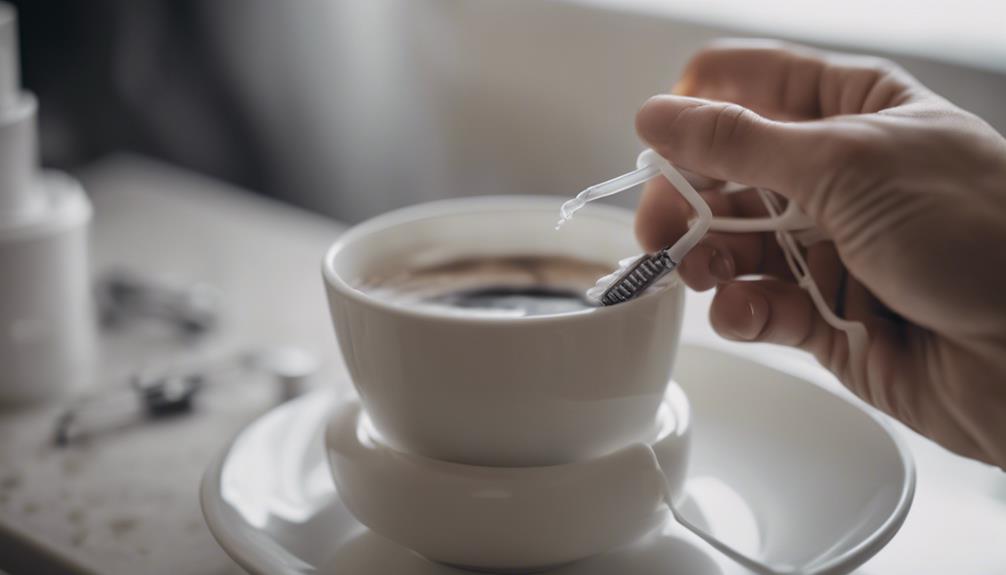
To maintain the cleanliness of your braces, remember to brush your teeth after every meal to prevent food particles from getting stuck.
Incorporate flossing into your daily routine using interdental brushes or floss threaders to clean between wires and brackets effectively.
Utilizing orthodontic tools recommended by your orthodontist will help you keep your braces in excellent condition and guarantee good oral hygiene.
Brush After Meals
Maintaining diligent oral hygiene by brushing after meals is vital for keeping your braces clean and preventing staining and plaque buildup. Brushing after meals, especially after consuming coffee, helps reduce the risk of enamel erosion and decay.
Proper oral hygiene is essential during orthodontic treatment to prevent plaque buildup and bacterial growth around the brackets and wires of your braces. By removing food particles and coffee residue through regular cleaning, you can minimize the chances of bacterial growth that could harm your teeth and gums.
Consistent brushing after meals, including after enjoying a cup of coffee, supports overall oral health and contributes to healthier teeth and gums while wearing braces. Remember, a thorough cleaning routine not only helps maintain the appearance of your braces but also promotes the longevity of your orthodontic treatment.
Prioritizing brushing after meals is a simple yet effective way to care for your braces and ensure a healthy smile.
Floss Daily
Regular flossing with braces is essential for removing food particles and plaque trapped around your orthodontic appliances. Flossing daily using the proper flossing technique is vital to prevent gum disease, decay, and staining around brackets and wires. By engaging in regular flossing with braces, you greatly reduce the risk of encountering oral health issues during your orthodontic treatment.
Incorporating tools like floss threaders or interdental brushes can facilitate flossing around braces effectively, ensuring that you reach all areas that may be challenging to access with traditional floss. Consistent flossing plays a key role in promoting good oral hygiene and maintaining the health of your teeth and gums while you have braces.
Make it a habit to floss daily to keep your braces clean and your oral health in check. Remember, proper flossing can make a significant difference in the cleanliness and health of your teeth and gums during your orthodontic treatment.
Use Orthodontic Tools
Start incorporating orthodontic tools like interdental brushes and floss threaders into your daily routine to guarantee proper cleaning of your braces and prevent plaque buildup. These specialized tools are designed to reach the challenging areas around brackets and wires where food particles can easily get trapped.
By using interdental brushes and floss threaders regularly, you can ensure better oral hygiene and greatly reduce the risk of decay and gum disease associated with braces. Orthodontists highly recommend incorporating these tools into your daily oral care regimen to achieve best results in maintaining your braces.
Proper cleaning with orthodontic tools not only enhances your oral health but also contributes to a smoother and quicker orthodontic treatment process. Remember, taking the time to clean your braces with these tools is an important step in preventing plaque buildup and maintaining overall dental health while undergoing orthodontic treatment.
Safely Enjoying Coffee With Braces

In order to safely enjoy coffee with braces, one must be mindful of potential staining and damage to your orthodontic appliances. Coffee contains tannins and chromogens that can discolor tooth enamel and braces. The acidity in coffee can also weaken tooth enamel and impact the adhesive that holds braces in place. To protect your braces and maintain oral hygiene, it is essential to brush and floss after consuming coffee.
Using a straw to drink coffee can help minimize direct contact with your teeth, reducing the risk of staining. Additionally, moderating your coffee intake, rinsing your mouth with water after drinking, and choosing lighter coffee roasts can further safeguard your braces from damage. Below is a table summarizing key tips for enjoying coffee safely with braces:
Tips for Enjoying Coffee Safely With Braces |
---|
Use a straw to drink coffee |
Brush and floss after consuming coffee |
Moderate coffee consumption |
Rinse mouth with water after drinking |
Impact of Coffee Brewing Methods

Various brewing methods greatly impact the acidity levels and staining potential of coffee. Cold brew coffee, for example, tends to be less acidic than other brewing methods, making it a better choice for those with braces as it reduces the risk of enamel erosion.
On the other hand, French press coffee may contain higher levels of cafestol, a compound that could potentially raise cholesterol levels.
If you enjoy drip coffee, be mindful that its acidity can vary based on factors like the quality of the beans and the brewing time.
Additionally, espresso, while concentrated, contains less liquid volume compared to other brewing methods, which can affect its overall impact on your braces.
Understanding these differences in coffee brewing methods can help you make informed choices to protect your braces from potential harm while still enjoying your favorite cup of joe.
Protecting Braces From Stains
To safeguard your braces from coffee stains, it's crucial to take preventive measures. Make sure you clean your braces properly after consuming coffee.
Using a straw for sipping can help minimize direct contact between coffee and your braces, reducing the chances of staining.
Preventing Coffee Stains
Keep your braces free from coffee stains by implementing simple preventive measures. Coffee stains can easily adhere to the brackets and wires of your braces, causing noticeable discoloration. To prevent this, consider brushing your teeth immediately after enjoying your coffee. This simple step can help prevent stains from setting on your braces and teeth.
Another effective way to minimize coffee stains on your braces is to use a straw when drinking coffee. By using a straw, you can reduce direct contact between the coffee and your teeth, lowering the risk of staining.
Additionally, avoiding sugary additives in your coffee can help prevent additional plaque buildup and staining on your braces.
Cleaning Braces Properly
Maintain the cleanliness of your braces by diligently brushing after each coffee consumption to prevent staining. Coffee residue can easily cling to the brackets and wires of your braces, leading to unsightly discoloration if not taken care of promptly.
Use a fluoride toothpaste and brush gently but thoroughly to make certain all surfaces of your braces are clean. In addition to brushing, consider incorporating a water flosser or interdental brushes into your oral care routine to reach areas that are challenging to access with a regular toothbrush. These tools can help dislodge any trapped coffee particles and reduce plaque buildup around your braces.
After enjoying your coffee, rinse your mouth with water to help wash away any remaining residue and decrease the acidity levels in your mouth, which can contribute to staining. By maintaining a consistent cleaning regimen and being mindful of your coffee choices, you can protect your braces from stains and keep your smile bright throughout your orthodontic treatment.
Using Straw for Sipping
After diligently cleaning your braces to prevent staining, consider using a straw when sipping coffee to further protect your orthodontic appliances.
Using a straw for sipping can be a simple yet effective way to shield the brackets and wires of your braces from the coffee pigments that may lead to discoloration. By opting for a straw, you can minimize direct contact between the coffee and your teeth, reducing the risk of staining.
Additionally, sipping coffee through a straw can help in preventing coffee residue from accumulating around your braces, thereby aiding in your oral hygiene maintenance routine.
Enjoying your coffee through a straw not only allows you to savor your favorite beverage but also assists in decreasing the likelihood of stains on both your teeth and braces. By incorporating this small adjustment into your routine, you can help preserve the appearance and integrity of your orthodontic appliances.
Alternatives to Coffee
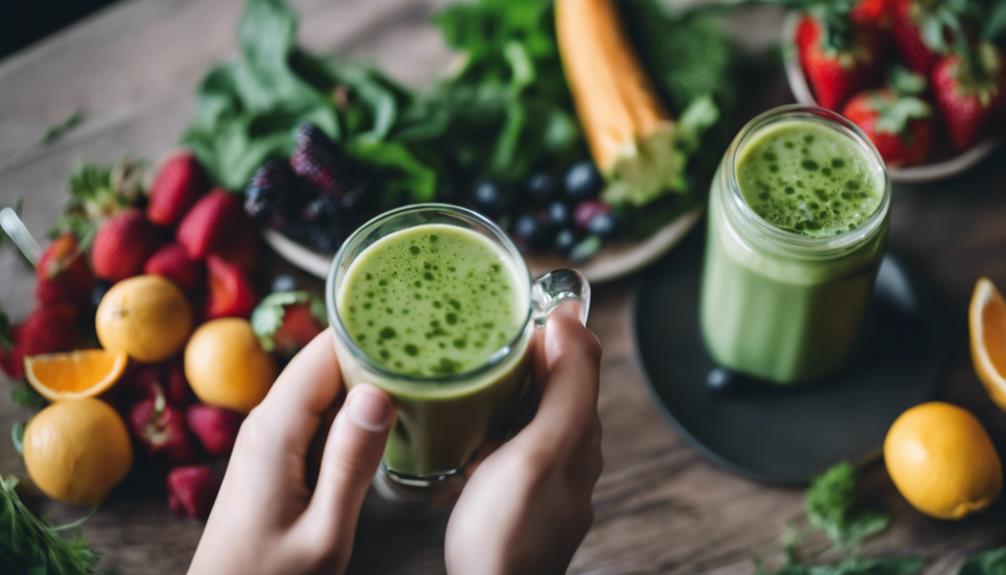
Explore caffeine-free alternatives to coffee that are invigorating on your teeth and braces, such as herbal teas, milk-based drinks, and fruit smoothies.
Herbal teas offer a soothing and flavorful option without the caffeine found in coffee, reducing the risk of staining your teeth.
Additionally, milk-based drinks like lattes provide a creamy and braces-friendly alternative to coffee, minimizing potential damage to your braces.
Fruit smoothies aren't only revitalizing but also gentle on your teeth, offering a fruity burst of flavor without the staining effects of coffee.
Hydrating with plain or infused water can help wash away any acidity from coffee, promoting good oral hygiene while wearing braces.
By exploring these alternatives to coffee, you can enjoy a variety of flavors while maintaining the health of your teeth and braces.
Drinking Coffee With Clear Aligners

When drinking coffee with clear aligners, make sure to brush your teeth after consuming to prevent stains and residue transfer.
Be sure to clean your aligners regularly to maintain their transparency and hygiene.
Timing your coffee consumption to align with aligner removal can help you enjoy your favorite beverage without compromising your orthodontic treatment.
Coffee Stain Prevention
To prevent coffee stains while enjoying your favorite beverage with clear aligners, consider removing them before drinking. Here are some tips to help you minimize the risk of staining your clear aligners and maintain good oral hygiene:
- Remove Aligners: Before savoring your coffee, take out your clear aligners to prevent them from getting stained.
- Brush After Drinking: After enjoying your coffee, make sure to brush your teeth to remove any residue that could lead to staining.
- Combat Bad Breath: Coffee residues mixed with saliva can contribute to bad breath; combat this by practicing good oral hygiene.
- Enjoy Convenient Cleaning: Clear aligners offer the flexibility to be easily cleaned, allowing you to maintain good oral hygiene while still enjoying your coffee.
Aligner Cleaning Tips
To uphold the cleanliness of your clear aligners while savoring your coffee, make sure to clean them regularly with mild soap or specific cleaners.
Proper orthodontic care is essential to prevent staining and bacterial growth on your aligners.
When enjoying your coffee, it's best to remove your clear aligners to avoid trapping acidic beverages against your teeth, which can lead to discoloration and decay.
After indulging in your favorite brew, remember to brush your teeth before putting your aligners back in place to prevent any residue transfer.
Clear aligners offer flexibility in dietary choices, making it convenient to remove them before consuming coffee.
By maintaining good oral hygiene practices and giving your aligners the necessary attention, you can continue to enjoy your coffee without compromising the effectiveness of your orthodontic treatment.
Take care of your aligners, and they'll take care of your smile.
Timing Coffee Consumption
Enjoying coffee with clear aligners requires careful planning to prevent potential damage and maintain their effectiveness in your orthodontic treatment. To guarantee you can still enjoy your daily dose of coffee without compromising your treatment, follow these tips:
- Remove Aligners: Before sipping your coffee, take out your clear aligners to prevent staining and warping.
- Brush After: After enjoying your coffee, brush your teeth before putting your aligners back on to minimize residue transfer and maintain oral hygiene.
- Minimize Enamel Damage: Consuming coffee with aligners on can lead to enamel damage due to its acidity, so it's best to limit the contact time.
- Timing is Key: Consider timing your coffee consumption strategically to allow for aligner removal, teeth brushing, and aligner reinsertion to protect both your aligners and your oral health.
Prioritizing Oral Hygiene
Maintain excellent oral hygiene by prioritizing regular brushing and flossing when drinking coffee with braces. Brushing your teeth after consuming coffee is essential to prevent staining and enamel erosion.
Flossing regularly is also vital to remove any trapped particles and maintain good oral hygiene.
When drinking coffee, consider using a straw to minimize direct contact with your teeth and reduce the risk of staining.
After enjoying your coffee, rinse your mouth with water to help remove coffee residue and counteract its acidity.
Additionally, make sure to schedule regular dental check-ups to monitor your oral health while indulging in coffee with braces.
Frequently Asked Questions
Can Coffee Stain Clear Braces?
Yes, coffee can indeed stain clear braces. The pigmented nature of coffee, combined with the porous surface of clear braces, makes them particularly susceptible to staining.
Compared to metal braces, clear braces are more prone to noticeable discoloration from coffee.
To prevent this, it's essential to maintain proper oral hygiene, including regular cleaning of your clear braces. Limiting your coffee intake and following good oral care practices can help preserve the appearance of your clear braces.
Is Coffee Not Allowed for Braces?
Coffee is generally allowed with braces, but precautions are important to prevent issues like staining and enamel erosion. Factors such as acidity, temperature, and sugar content in coffee can impact oral health when wearing braces.
To maintain good oral hygiene, it's necessary to brush your teeth after consuming coffee. Using a straw, rinsing with water, and limiting coffee intake can help minimize risks associated with braces.
Regular dental check-ups and following orthodontist recommendations are important for effective braces management while enjoying coffee. However, it’s important to be mindful of the potential for coffee stains on teeth while undergoing orthodontic treatment. In addition to regular check-ups and following the orthodontist’s recommendations, individuals should consider using a straw when consuming coffee to minimize direct contact with the teeth. Additionally, maintaining good oral hygiene practices, such as brushing and flossing after consuming coffee, can also help in avoiding coffee stains on teeth.
Do I Need to Brush My Teeth After Coffee With Braces?
You absolutely need to brush your teeth after drinking coffee with braces. Coffee residue easily gets stuck in your braces, leading to staining and plaque buildup.
Brushing immediately after helps remove pigments from brackets and wires, maintaining your braces' appearance. Regular brushing post-coffee consumption prevents bad breath and tooth decay.
Proper oral care, including thorough brushing, is essential to keep your braces clean and your teeth healthy. So, grab that toothbrush and give your pearly whites some love!
How to Drink Coffee With Braces?
When drinking coffee with braces, use a straw to minimize teeth contact and staining. Rinse your mouth with water afterward to remove residue and protect braces.
Limit sugar to prevent decay and plaque buildup. Brush your teeth thoroughly post-coffee to prevent staining and maintain oral hygiene with braces.
Choose lighter roasts or milk-based drinks to reduce acidity that can weaken enamel. These steps will help protect your braces and keep your smile healthy.
Conclusion
To sum up, remember to take care of your braces while enjoying your coffee. Stains and damage can be avoided with proper maintenance and cleaning.
So, make sure to brush after drinking coffee, clean your braces regularly, and consider alternatives if needed.
Remember, a little extra care now can prevent bigger issues down the road. Stay diligent and enjoy your coffee without worrying about the impact on your braces.
Tips and Tricks
Vermouth Spritz
You’ll love the refreshing twist of a Vermouth Spritz, but wait until you discover the perfect garnishes to elevate your cocktail experience!
A Vermouth Spritz combines the herbal complexity of vermouth with bubbly soda water for a refreshing cocktail. It's perfect as an aperitif or on warm days, and you can easily customize it by choosing between dry or sweet vermouth. To prepare, chill your glass, fill it with ice, pour in 3 oz of vermouth, then add 2 oz of soda. Garnish with fresh herbs and citrus slices for added flair. This drink not only tastes delightful but also looks stunning, making it a great choice for any occasion. Stick around to discover tips and variations for your perfect spritz!
Key Takeaways
- The Vermouth Spritz combines vermouth with sparkling water, creating a refreshing aperitif ideal for warm weather and social gatherings.
- Key ingredients include 3 oz of vermouth, 2 oz of sparkling water, ice cubes, fresh herbs, and citrus slices.
- The drink can be customized with different types of vermouth and flavored garnishes to suit personal preferences.
- Presentation is important; use fresh herbs and citrus for visual appeal and to enhance the aroma of the drink.
- Enjoy the Vermouth Spritz responsibly, celebrating its rich history and versatility across various occasions.
History
The history of vermouth spritz is a fascinating journey through time and culture. You'll find that this delightful cocktail has roots tracing back to Italy in the late 19th century. Initially, vermouth, an aromatic fortified wine, was enjoyed neat or on the rocks.
But as social gatherings evolved, so did the way people enjoyed their drinks. In the early 20th century, the spritz emerged in Venice, where locals mixed wine with soda water for a refreshing twist. Vermouth found its place in the spritz during this period, thanks to its herbal complexity.
As you sip on a vermouth spritz today, you're tasting a blend of Italian tradition and innovation. The drink gained popularity outside of Italy, particularly in the post-war era. You might notice how vermouth spritz became a symbol of leisure in stylish European cafes, embodying the art of slow living.
Its light and refreshing qualities make it perfect for sunny afternoons, inviting conversations and relaxation. Today, the vermouth spritz continues to evolve, adapting to modern tastes while honoring its rich heritage.
Each sip connects you to a vibrant history of social culture and culinary creativity.
Recipe
The Vermouth Spritz is a refreshing and stylish cocktail that perfectly balances the herbal notes of vermouth with the effervescence of sparkling water or soda. Ideal for warm days or as an aperitif before a meal, this spritz isn't only easy to make but also versatile. You can customize it by choosing different types of vermouth – dry, sweet, or even flavored – to suit your taste preferences, making it a delightful addition to any gathering.
To create the perfect Vermouth Spritz, you need to focus on the quality of your ingredients. A good vermouth is essential, as it serves as the foundation of the drink. Pair it with a crisp sparkling water or a flavored soda for a twist, and don't forget the garnishes, which can elevate the drink's presentation and flavor profile.
This cocktail isn't only visually appealing but also offers a refreshing sip that can be enjoyed throughout the evening.
Ingredients:
- 3 oz vermouth (dry or sweet, depending on preference)
- 2 oz sparkling water or soda
- Ice cubes
- Fresh herbs (like rosemary or mint) for garnish
- Citrus slices (lemon or orange) for garnish
To prepare the Vermouth Spritz, fill a wine glass with ice cubes to chill it. Pour in the vermouth first, followed by the sparkling water or soda. Stir gently to combine the ingredients without losing the bubbles. Finally, garnish with fresh herbs and citrus slices, allowing the aromatics to enhance the overall drinking experience.
When crafting your Vermouth Spritz, consider experimenting with different garnishes and flavor combinations. You could add a splash of fruit juice for a fruity twist, or infuse the drink with additional herbs such as basil or thyme for a more complex flavor.
Additionally, using high-quality ice can make a difference in the overall presentation and temperature of your cocktail. Enjoy your refreshing Vermouth Spritz responsibly!
Cooking Steps
To start making your Vermouth Spritz, chill your glass to keep the drink refreshing.
Next, add ice cubes generously before pouring in the vermouth.
Step 1. Chill Your Glass
Chilling your glass is essential for serving a refreshing Vermouth Spritz. It enhances the overall drinking experience by keeping your drink cool and crisp. Start by selecting the right glass; a large wine glass or a highball glass works beautifully.
To chill your glass, fill it with ice water and let it sit for a few minutes. This quick method ensures the glass cools evenly. While you wait, prepare your other ingredients, so you're ready to assemble your spritz as soon as the glass is chilled.
After a few minutes, empty the ice water and dry the glass with a clean towel. This step is crucial, as any residual water can dilute your drink. You want the glass to be dry to maintain the right balance of flavors.
Alternatively, you can place your glass in the freezer for about 10-15 minutes if you prefer a quicker chill. Just be cautious not to leave it too long, as you don't want it to freeze.
Once your glass is perfectly chilled, you'll be ready to create that refreshing Vermouth Spritz that's sure to impress!
Step 2. Add Ice Cubes Generously
With your glass now perfectly chilled and ready to go, it's time to add ice cubes generously. Grab a handful of ice and fill your glass to the brim. The goal here is to create a refreshing drink that stays cold, so don't be shy with those ice cubes!
Choose larger cubes if you can; they melt slower and keep your spritz from getting watered down too quickly. As you add the ice, listen for that satisfying clink as the cubes settle. This will help ensure your drink remains frosty for longer.
Arrange the ice cubes so they touch the sides of the glass, creating a nice aesthetic while maximizing surface area for chilling. You want to create a solid foundation for your upcoming ingredients.
If you're feeling adventurous, consider using flavored ice cubes, like those made from fruit juices or herbal infusions. These can add an extra layer of flavor as they melt.
Just remember, the main focus here is to chill your glass and prepare for a delightful drink. Once your ice is in place, you're all set for the next step in crafting your perfect Vermouth Spritz.
Step 3. Pour in the Vermouth
Now that your glass is brimming with ice, it's time to pour in the vermouth. Grab your favorite vermouth—whether you prefer sweet or dry—and measure out about two ounces.
Position the bottle above your glass, tilting it slightly to create a gentle stream. Don't rush; you want to pour slowly enough to control the flow and avoid splashing. As the liquid cascades over the ice, watch it mingle with the cubes, creating a refreshing chill.
The vermouth won't only add flavor but also deepen the drink's complexity. If you're feeling adventurous, you can even experiment with flavored vermouths, like herbal or citrus-infused varieties, to elevate your spritz.
Just remember that the type of vermouth you choose will influence the final taste, so pick one that excites your palate.
Once you've poured in the vermouth, take a moment to admire the vibrant colors swirling together in your glass. This is your chance to savor the anticipation of what's to come.
Now, you're one step closer to creating a delightful Vermouth Spritz that's perfect for any occasion!
Step 4. Add Soda Water Gently
Next, gently add about three ounces of soda water to your glass. This step is crucial as it brings a delightful effervescence to your vermouth, making each sip refreshing.
Pour slowly to prevent excessive fizzing, which can cause your drink to overflow. As the bubbles rise, they'll blend with the vermouth, enhancing its flavor without overwhelming it. You want to maintain a balanced ratio, so stick to the three-ounce guideline.
Adjust the amount slightly based on your taste preferences, but remember that too much soda can dilute the drink's character. While pouring, keep an eye on the glass's contents. If you notice the bubbles starting to foam up, pause and let them settle before continuing.
This way, you'll avoid losing any precious liquid. A gentle stir with a spoon may help incorporate the soda water evenly, but be cautious not to agitate the mixture too much.
Once you've added your soda water, take a moment to admire the beautiful blend of colors. Your vermouth spritz is shaping up nicely, and you're just a step away from finishing it off perfectly.
Step 5. Garnish With Fresh Herbs
To elevate your vermouth spritz, it's time to add a touch of freshness with herbs. Fresh herbs not only enhance the drink's aroma but also add a vibrant visual appeal.
Start by selecting your favorite herbs—basil, mint, or rosemary work particularly well. Each brings its unique flavor profile to the mix.
Once you've chosen your herbs, give them a gentle rinse to remove any dirt or debris. Pat them dry with a clean towel.
Now, take a few sprigs and place them in your glass. If you're using mint or basil, consider gently slapping the leaves between your palms before adding them. This releases their essential oils, boosting their fragrance and flavor.
As you garnish, be mindful of the balance. You want the herbs to complement the vermouth spritz, not overpower it.
Place them strategically in the glass so that they float just above the liquid, allowing their aroma to waft up as you sip.
Final Thoughts
Savoring the complexity of a Vermouth Spritz can elevate any gathering, making it a delightful choice for both casual and refined occasions. This refreshing cocktail isn't just about the ingredients; it's about the experience. The blend of aromatic vermouth, bubbly wine, and a splash of soda creates a symphony of flavors that dance on your palate.
As you enjoy this drink, consider how the astrological influences of your guests might enhance the experience; for example, horoscope insights can provide a fun twist to your gathering.
As you explore this drink, consider the nuances it brings to your gatherings. Whether you're hosting friends for a casual brunch or celebrating a special occasion, the Vermouth Spritz adapts beautifully. Its versatility allows you to experiment with various garnishes, enhancing the drink's character and tailoring it to your guests' preferences.
Don't forget the importance of presentation. A well-crafted Vermouth Spritz, adorned with fresh herbs or vibrant citrus slices, not only tastes good but looks stunning, making it a true centerpiece in your drink lineup.
Frequently Asked Questions
What Type of Vermouth Is Best for a Spritz?
When choosing vermouth for a spritz, you'll want a dry or bianco variety. These options balance sweetness and bitterness perfectly, enhancing your drink's flavor profile while keeping it refreshing and light for any occasion.
Can I Use Sparkling Water Instead of Soda?
Absolutely, you can use sparkling water instead of soda! It'll give your drink a lighter, refreshing taste. Just remember to adjust the proportions to maintain the balance of flavors you're aiming for. Enjoy experimenting!
How Can I Make a Non-Alcoholic Version?
To make a non-alcoholic version, mix equal parts of flavored sparkling water and tonic. Add a splash of fresh citrus juice for brightness. Garnish with herbs or fruit slices for extra flavor and visual appeal. Enjoy!
What Garnishes Pair Well With a Vermouth Spritz?
When garnishing your drink, think about fresh herbs like basil or mint, citrus slices, or even olives. These add vibrant flavors and visual appeal, enhancing your overall experience while enjoying a refreshing beverage.
How Should I Store Leftover Vermouth?
To store leftover vermouth, keep it in the refrigerator. Use an airtight bottle to maintain freshness, and enjoy it within a month for the best flavor. Don't forget to label the date you opened it!
Tips and Tricks
Hugo Spritz
Juicy and refreshing, the Hugo Spritz is the ideal cocktail for any occasion—discover how to elevate your gatherings with this delightful drink!
The Hugo Spritz is a delightful cocktail that's perfect for warm weather or festive gatherings. You combine 3 oz of prosecco, 1 oz of elderflower syrup, and a splash of soda water, then garnish with fresh mint and a lime wedge. This drink offers a refreshing balance of sweetness and carbonation, making it a lighter alternative to other spritz variations. With its vibrant presentation, it's sure to impress your guests and spark conversation. Plus, it's easy to make multiple servings for gatherings. Stick around, and you'll discover even more tips and tricks for crafting the perfect Hugo Spritz!
Key Takeaways
- Hugo Spritz originated in Northern Italy, combining prosecco, elderflower syrup, soda water, and fresh mint for a refreshing cocktail.
- It gained popularity in the early 2000s as a lighter alternative to traditional bitter Spritz variations.
- The drink is visually appealing, often garnished with mint leaves or lime slices, making it perfect for gatherings.
- Easy to prepare in large batches, Hugo Spritz is ideal for summer events and social occasions.
- Its balanced flavor profile offers a sweet, effervescent experience, customizable based on personal taste preferences.
History
The rich history of the Hugo Spritz reflects both innovation and tradition in the world of cocktails. You might be surprised to learn that this refreshing drink originated in Northern Italy, specifically the Trentino-Alto Adige region. It gained popularity in the early 2000s, capturing the hearts of locals and travelers alike.
The cocktail emerged as a lighter alternative to the more bitter Spritz variations, emphasizing a delightful balance of flavors.
As you sip on a Hugo Spritz, you're savoring a blend of prosecco, elderflower syrup, sparkling water, and fresh mint. This combination highlights the Italian penchant for using locally sourced ingredients, showcasing a commitment to freshness and quality.
The drink's rise can be attributed to social media and its vibrant presentation, making it a favorite for summer gatherings and aperitivo moments.
Over the years, the Hugo Spritz has evolved, maintaining its essence while adapting to various tastes and preferences. You'll find it on menus across the globe, symbolizing the trend of lighter, herb-infused cocktails.
Its journey from a regional favorite to an international sensation illustrates how traditions can innovate, inviting you to enjoy a taste of Italy, no matter where you are.
Recipe
The Hugo Spritz is a refreshing Italian cocktail that perfectly blends the herbal notes of elderflower syrup with the crispness of Prosecco and a splash of soda water.
It's an ideal drink for summer afternoons or festive gatherings, offering a delightful balance of sweetness and effervescence. The addition of mint and lime gives it a vibrant twist, making it not just a beverage but a refreshing experience.
To prepare the Hugo Spritz, you'll want to gather your ingredients and have a few simple tools on hand, such as a jigger for measuring, a stirring spoon, and a glass to serve it in.
This cocktail is incredibly easy to make, allowing you to whip up multiple servings in no time. Once you have everything ready, you can impress your guests with this elegant drink that's sure to become a favorite.
Ingredients:
- 3 oz Prosecco
- 1 oz elderflower syrup
- 1 oz soda water
- Fresh mint leaves
- 1 lime wedge
- Ice cubes
Instructions:
In a large wine glass filled with ice cubes, pour in the Prosecco, elderflower syrup, and soda water.
Gently stir the mixture to combine the flavors. Squeeze the lime wedge into the drink, then drop it in for added zest.
Finally, add a few fresh mint leaves and stir lightly to release their aroma before serving.
Extra Tips:
For an extra touch of elegance, consider garnishing your Hugo Spritz with additional mint leaves or even a slice of cucumber.
You can adjust the sweetness by varying the amount of elderflower syrup according to your taste.
If you want to make a larger batch for a party, simply scale up the ingredients while maintaining the same proportions, and serve it in a pitcher for easy self-service.
Enjoy your refreshing cocktail!
Cooking Steps
To make the perfect Hugo Spritz, you'll want to start by chilling your glass with ice.
Next, add the Aperol and Prosecco, then garnish with fresh mint.
Step 1. Chill Glass With Ice
Chilling your glass with ice is a simple yet effective way to enhance your Hugo Spritz experience.
Start by selecting your favorite glass, whether it's a wine glass or a large tumbler. Next, grab some ice cubes from your freezer. Fill your glass about halfway with ice, making sure not to overfill it. This will help keep your drink cold without diluting it too quickly.
Let the ice sit for a few minutes, allowing the glass to chill thoroughly. You can even swirl the ice gently to speed up the cooling process. As the glass chills, you're setting the stage for a refreshing drink.
Once you feel your glass has cooled enough, carefully discard the ice. You can do this by tipping the glass over the sink or a bowl, ensuring all the ice is removed.
Now, your glass is perfectly prepped to hold your Hugo Spritz ingredients. A chilled glass not only keeps your drink at the ideal temperature but also enhances the overall presentation.
You'll notice the difference in your drink's taste and enjoyment when you take that first sip. Cheers to a refreshing start!
Step 2. Add Aperol and Prosecco
With your glass now chilled and ready, it's time to layer in the key ingredients that make a Hugo Spritz so delightful.
Start by pouring in a generous shot of Aperol—about 2 ounces. It's the vibrant orange liqueur that gives your drink a slightly bitter yet refreshing kick. Pour it gently over the ice to keep everything chilled.
Next, grab your bottle of Prosecco. You'll want to add about 3 ounces of this sparkling wine, which adds a bubbly effervescence that elevates the entire drink. Pour it slowly over the Aperol, allowing the two to mix naturally without creating too much foam.
As you watch the colors swirl together, you'll notice the beautiful orange hue complemented by the golden bubbles.
Don't be afraid to adjust the ratios slightly based on your taste preferences; some enjoy a more pronounced Aperol flavor, while others prefer the sweetness of the Prosecco. Just remember, balance is key!
Once you've combined these two delicious ingredients, your Hugo Spritz is almost complete.
Take a moment to admire your creation before moving on to the final touch.
Step 3. Garnish With Fresh Mint
Fresh mint leaves add a burst of aroma and a touch of elegance to your Hugo Spritz. To incorporate this refreshing ingredient, start by selecting fresh, vibrant mint leaves. Look for leaves that are bright green and free from any wilting or browning.
Once you've got your mint, gently rinse the leaves under cold water to remove any dirt or residue. Pat them dry with a clean towel.
Next, take a few leaves—about three to five should do the trick—and place them in your glass. You can either leave them whole or give them a gentle slap between your hands to release more of their aromatic oils. If you prefer a stronger mint flavor, feel free to muddle them lightly in the glass before adding your other ingredients.
As you finish assembling your Hugo Spritz, position the mint leaves so they're visible above the ice. This not only enhances the drink's visual appeal but also releases a lovely scent as you sip.
The fresh mint will elevate your cocktail experience, making each sip refreshing and fragrant. Enjoy your beautifully garnished Hugo Spritz!
Step 4. Stir Gently to Combine
After you've garnished your Hugo Spritz with fresh mint, it's time to mix the ingredients together.
Start by grabbing a long spoon or a stirrer. You'll want to gently stir the mixture to ensure all the flavors meld nicely without losing the fizz.
First, dip your spoon into the glass, reaching all the way to the bottom where the syrup and other ingredients settle. Slowly lift the spoon and then push it back down.
Repeat this motion, making sure not to agitate the drink too much. The goal is to combine the elderflower syrup, wine, and mint without causing too many bubbles to rise and spill over the rim.
Take your time with this step; a gentle stir will help to integrate the flavors while keeping the drink refreshing and vibrant.
You might notice the mint leaves start to release their aromatic essence as you stir, enhancing the overall scent and taste.
Once you feel satisfied with the blending, take a moment to admire your creation. The beautiful layers of color and the aromatic mint will have you eager to take that first sip.
Enjoy the process!
Step 5. Add a Splash of Soda
Now that you've gently combined the flavors of your Hugo Spritz, it's time to add a splash of soda.
Grab your favorite soda water or tonic—both work beautifully. Pour about two ounces into your glass, letting the bubbles dance through the mixture. This step not only adds effervescence but also balances the sweetness of the elderflower liqueur and the bitterness of the Prosecco.
As you pour, give the drink a gentle stir with a spoon or a straw. You want to incorporate the soda without losing that refreshing fizz. The goal here is to enhance the drink's lightness while keeping the vibrant flavors intact.
Once you've added the soda, take a moment to taste your creation. Adjust the soda to your liking; if you prefer a lighter drink, feel free to add more. Remember, the key to a great Hugo Spritz is finding that perfect balance between sweetness and carbonation.
Garnish your drink with a fresh sprig of mint and a slice of lime for that final touch.
Now you're ready to sip and enjoy your delightful Hugo Spritz! Cheers!
Final Thoughts
As you reflect on the delightful experience of enjoying a Hugo Spritz, it's clear that this refreshing cocktail has the potential to elevate any gathering. Its bright flavors, combining elderflower cordial, Prosecco, and fresh herbs, create a drink that's not only pleasing to the palate but also visually appealing.
You'll find that the simplicity of the ingredients allows for easy customization, making it a versatile choice for any occasion.
When you craft a Hugo Spritz, you're not just mixing a drink; you're creating a moment. Whether it's a sunny afternoon on the patio or a festive evening with friends, this cocktail invites conversation and connection. It encourages you to savor the experience, taking time to appreciate the little things.
As you consider hosting your next event, think about incorporating this delightful beverage into the mix. It's an effortless way to impress your guests while keeping the atmosphere light and enjoyable.
Frequently Asked Questions
What Is the Origin of the Name "Hugo Spritz"?
The name "Hugo" has Germanic origins, meaning "mind" or "intellect," while "Spritz" comes from the German word for "splash." Together, they evoke a lively, refreshing essence, perfect for a vibrant drink.
Can I Use Non-Alcoholic Alternatives in a Hugo Spritz?
Absolutely, you can use non-alcoholic alternatives! Try a non-alcoholic sparkling wine, elderflower syrup, and soda water. Mix them together for a refreshing drink that captures the essence of the original without the alcohol.
What Type of Glass Is Best for Serving a Hugo Spritz?
You'll want to serve your drink in a large wine glass or a stemmed glass. This shape enhances the presentation and allows for adequate space to appreciate the aromas and flavors in your refreshing beverage.
How Can I Make a Large Batch of Hugo Spritz for a Party?
To make a large batch for a party, mix equal parts prosecco and elderflower syrup in a pitcher. Add soda water, fresh mint, and lime slices. Serve over ice, and enjoy your refreshing drink with guests!
What Are Some Popular Food Pairings With a Hugo Spritz?
When enjoying a refreshing spritz, consider pairing it with light appetizers. Think bruschetta, seafood tapas, or fresh salads. These flavors complement your drink's herbal notes, enhancing the overall experience for you and your guests.
Tips and Tricks
St-Germain Spritz
Fizzy and floral, the St-Germain Spritz is a refreshing cocktail that promises delightful sips—discover how to craft this elegant drink yourself!
The St-Germain Spritz is your go-to refreshing cocktail, elegantly combining the floral sweetness of elderflower liqueur with crisp prosecco and a splash of soda water. To make it, chill a stylish glass, add 2 oz of St-Germain, then fill with 3 oz of prosecco and a splash of soda. Garnish with fresh herbs like mint or basil for added flavor and appeal. This delightful drink is perfect for warm days or lively gatherings, offering a wonderful balance of sweetness and effervescence. If you're curious about other tips and tricks for perfecting your spritz, keep exploring!
Key Takeaways
- The St-Germain Spritz combines elderflower liqueur, prosecco, and soda water for a refreshing, effervescent cocktail perfect for warm days.
- Originating in the French Alps, St-Germain liqueur is made from hand-picked elderflowers, providing a unique floral flavor.
- The ideal ratio for the drink is 3 oz of prosecco to 1.5 oz of St-Germain, with a splash of soda for balance.
- Garnish with fresh herbs or fruit slices to enhance the drink's aroma and presentation.
- The St-Germain Spritz is versatile, suitable for various occasions, and can be easily prepared in large batches for gatherings.
History
The St-Germain Spritz, a refreshing cocktail that showcases the delicate flavors of elderflower liqueur, has roots that trace back to the early 20th century. During this time, the elderflower was harvested in the French Alps, where it grew wild.
The liqueur itself, St-Germain, was created in 2007 by Robert Cooper, who wanted to capture the essence of these blossoms. He meticulously developed a process to hand-pick the flowers at their peak, ensuring a unique flavor profile.
As the cocktail culture blossomed in the 21st century, the St-Germain Spritz quickly gained popularity among mixologists and cocktail enthusiasts. You'll find it served at trendy bars and upscale restaurants, often enjoyed on sunny terraces or during festive gatherings.
Its sophisticated yet approachable taste makes it a crowd-pleaser, appealing to both seasoned drinkers and those new to cocktails.
The cocktail embodies a blend of tradition and innovation. By combining classic French ingredients with modern mixology, the St-Germain Spritz transports you to a sun-drenched afternoon in Europe.
Recipe
The St-Germain Spritz is a refreshing cocktail that beautifully combines the floral notes of elderflower liqueur with sparkling wine and soda water. This elegant drink is perfect for warm days and festive gatherings, offering a delightful balance of sweetness and effervescence.
Its simplicity makes it easy to whip up in large batches, ensuring that your guests will be satisfied with a light and invigorating beverage.
To make the St-Germain Spritz, you'll need just a few key ingredients that highlight the liqueur's delicate flavors. The combination of prosecco, soda water, and St-Germain creates a sparkling treat that's both sophisticated and approachable.
Garnished with a slice of lemon or a sprig of mint, this cocktail is as pleasing to the eye as it's to the palate, making it a standout option at any celebration.
Ingredients:
- 2 oz St-Germain elderflower liqueur
- 3 oz prosecco
- 1 oz soda water
- Ice cubes
- Lemon slice or mint sprig (for garnish)
To prepare the St-Germain Spritz, fill a wine glass with ice cubes, then pour in the St-Germain elderflower liqueur. Next, add the prosecco and top it off with soda water.
Gently stir the mixture to combine, being careful not to lose the bubbles. Finally, garnish with a slice of lemon or a sprig of mint for an extra touch of freshness.
For the best St-Germain Spritz experience, use chilled prosecco and soda water to maintain a refreshing temperature. You can also experiment with different garnishes, such as fresh berries or cucumber slices, to create your own twist on this classic cocktail.
Remember to serve it immediately after mixing to ensure the drink remains bubbly and vibrant. Enjoy this delightful spritz as a perfect companion to sunny afternoons or celebratory evenings!
Cooking Steps
To start making your St-Germain Spritz, you'll want to chill your glass with ice first.
Then, add the St-Germain liqueur and sparkling wine.
Step 1. Chill Glass With Ice
Chilling your glass with ice is a crucial step that often enhances the overall experience of a St-Germain Spritz. By taking this simple action, you ensure that your drink stays cool longer, allowing the refreshing flavors to shine through without dilution.
To chill your glass, start by selecting a stylish, stemmed glass—preferably a wine glass or a large coupe. Fill it generously with ice cubes, allowing them to cover the bottom and rise a bit up the sides.
Next, let the ice sit for about five minutes. This brief wait gives the glass time to reach a desirable temperature, which is key for serving the spritz at its best.
While you wait, you can prepare other ingredients. Once your glass is chilled to perfection, simply discard the ice. If you want, you can wipe the inside with a clean cloth to remove any excess moisture.
This ensures that your St-Germain Spritz will be served in a perfectly cold glass, ready to impress. Enjoy the crisp, invigorating flavors that the St-Germain liqueur will bring to your drink!
Step 2. Add St-Germain Liqueur
With your glass perfectly chilled, it's time to add the star of the show: St-Germain liqueur. Grab your bottle of this exquisite elderflower liqueur and pour 1.5 ounces into your glass. As you do, take a moment to appreciate the floral aroma that fills the air. This liqueur is what makes your spritz truly special, so don't skimp on the pour.
Once you've added the St-Germain, gently swirl the glass to combine the liqueur with the ice that's already chilling it. You want to ensure that the flavors meld beautifully. Remember, this step is crucial, as the liqueur's delicate sweetness will balance out the other components you'll add later.
If you want to elevate your drink even further, consider adding a few fresh herbs or slices of fruit at this stage. They'll infuse the drink with additional layers of flavor, enhancing the overall experience.
Now that you've added the St-Germain liqueur, you're one step closer to enjoying this delightful spritz. Your drink is shaping up beautifully, just wait until you add the sparkling wine next!
Step 3. Add Sparkling Wine
Now that your glass is infused with the floral notes of St-Germain, it's time to add the sparkling wine.
Choose a dry sparkling wine that complements the sweetness of the liqueur. A Brut Prosecco or Champagne works beautifully, enhancing the overall flavor without overpowering it.
Pour gently into the glass, filling it about two-thirds full. You'll want to maintain that effervescent quality, so be careful not to pour too aggressively.
As the bubbles rise, they'll mix with the St-Germain, creating a delightful visual effect.
Once you've added the sparkling wine, give it a gentle stir with a bar spoon or a straw. This combines the ingredients without losing the fizz.
Taste your spritz at this stage; if you prefer it a bit stronger, feel free to add a splash more St-Germain.
Step 4. Garnish With Fresh Herbs
Elevate your St-Germain Spritz by finishing it off with a garnish of fresh herbs. Adding herbs not only enhances the drink's aesthetic but also infuses it with fresh, aromatic flavors.
For a refreshing twist, consider using herbs that are known for their aromatic properties, similar to how airless paint sprayers enhance the finish of surfaces by providing a smooth application proper priming ensures smooth paint flow. Start by selecting your favorite herbs—basil, mint, or thyme work beautifully. Each brings its unique note, so choose according to your taste preference.
Once you've picked your herbs, give them a gentle rinse under cold water to remove any dirt or residue. Pat them dry with a clean towel to avoid excess moisture in your drink.
Next, take a sprig of your chosen herb and lightly bruise it by tapping it between your fingers. This releases the oils and maximizes the flavor.
Now, it's time to garnish your St-Germain Spritz. Place the bruised herb sprig on top of the drink or nestle it alongside the ice for a delightful presentation.
If you're feeling adventurous, you can even add a few small herb leaves directly into the drink. This not only looks lovely but also enhances each sip with a fresh herbal aroma.
Enjoy your beautifully garnished Spritz, and savor the refreshing experience!
Step 5. Add a Splash of Soda
Adding a splash of soda to your St-Germain Spritz not only enhances its effervescence but also balances the sweetness of the elderflower liqueur. To achieve this, you'll want to use a high-quality soda water or sparkling water.
Start by pouring your St-Germain and sparkling wine into a glass filled with ice. Aim for a 3:1 ratio of wine to St-Germain for the perfect blend.
Once you've got your base ready, take your soda and gently pour it over the mixture. About a splash—roughly two ounces—should do the trick, but you can adjust to your taste.
Give it a gentle stir to combine the ingredients without losing too much fizz.
Now, it's time to enjoy your creation! The addition of soda not only adds a refreshing quality but also makes the drink lighter and more invigorating, perfect for warm days or lively gatherings.
Don't forget to add your fresh herb garnish from the previous step; it'll elevate both the flavor and presentation.
Sip slowly and savor the delightful balance of flavors in your St-Germain Spritz. Cheers!
Final Thoughts
When you take that first sip of a St-Germain Spritz, the refreshing blend of elderflower liqueur and sparkling wine transports you to a sun-drenched terrace.
This cocktail isn't just a drink; it's an experience that embodies the joy of leisurely afternoons and warm gatherings. Each ingredient plays a crucial role in crafting a perfect balance of sweetness and effervescence.
The enjoyment of this spritz can be enhanced by pairing it with a light tea, as many teas offer distinct flavor profiles that complement its freshness, making it a great option for those exploring health benefits of tea alongside delightful cocktails.
As you savor the flavors, you'll appreciate how versatile this spritz is.
Whether you're hosting a brunch or unwinding after a long day, it fits seamlessly into any occasion. You can easily customize it to your liking, adding fresh herbs or fruit to elevate the presentation and taste.
Don't hesitate to share this delightful concoction with friends, as it's sure to impress.
The St-Germain Spritz encourages connection and conversation, making it the ideal choice for social moments.
Frequently Asked Questions
What Is St-Germain and Where Does It Come From?
You might be curious about St-Germain; it's a French elderflower liqueur, crafted from hand-picked elderflowers. Originating in the French Alps, its delicate flavor makes it a popular choice for cocktails and culinary creations.
Can I Substitute St-Germain With Another Liqueur?
Yes, you can substitute St-Germain with another liqueur, like elderflower liqueur or a floral gin. Just remember, the flavor might change slightly, so adjust other ingredients to maintain balance in your drink.
What Type of Wine Pairs Best With St-Germain Spritz?
When pairing wine, you'll want something crisp and refreshing. A dry Prosecco or a sparkling Sauvignon Blanc works beautifully, enhancing the flavors without overpowering them. These wines elevate your experience, making it even more delightful.
Is St-Germain Spritz Suitable for Special Occasions?
Absolutely, a refreshing cocktail can elevate any special occasion. Whether you're celebrating a birthday or hosting a dinner party, a well-crafted drink adds a touch of sophistication and enjoyment to the festivities. You won't regret it!
How Should I Store Leftover St-Germain?
To store leftover St-Germain, keep it in a cool, dark place. Make sure the cap's tightly sealed to maintain freshness. It'll last for about a year, so enjoy it whenever you're ready!
-
Ryze Coffee3 weeks ago
Mushroom Coffee Benefits and Side Effects – What to Know
-
Ryze Coffee2 weeks ago
Mushroom Coffee in Stores – Where to Find It
-
Ryze Coffee3 weeks ago
Everyday Mushroom Coffee – Is It Worth Trying?
-
Ryze Coffee4 weeks ago
Reviews on Mushroom Coffee – Honest Opinions
-
Espresso3 weeks ago
Find the Best Espresso Martinis Near You!
-
Espresso4 weeks ago
Tip Top Espresso Martini – A Ready-to-Drink Delight!
-
Tips and Tricks3 weeks ago
Chill Drink: How to Bring Iced Coffee to School!
-
Tips and Tricks3 weeks ago
Clean Brew: How to Avoid Coffee Grounds in Your Cup!