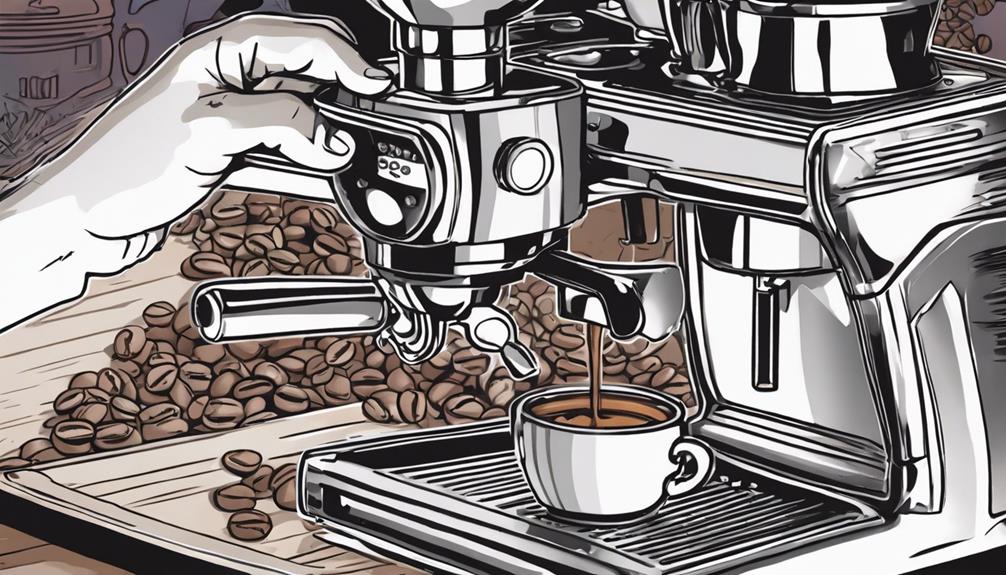
To make coffee in a percolator, grind fresh beans coarsely. Add 1 tablespoon of grounds per cup of water. Fill the basket and add water below the line. Brew for 7-10 minutes, monitoring for changes in color and scent. Appreciate the rich aroma as it brews. For the ideal cup, try different grounds and brew times. Experience the thrill of that traditional coffee scent filling your kitchen. Your mornings will never be the same!
Key Takeaways
- Grind beans coarsely for optimal flavor extraction.
- Use 1 tbsp of coffee grounds per 8 oz of water.
- Watch brewing closely for 8-10 minutes.
- Adjust coffee amounts for personal taste preference.
- Check color, aroma, and bubbling for completion.

Amazon Basics Basket Coffee Filters for 8-12 Cup Coffee Makers, White, 200 Count, Packaging May Vary
- Package Quantity: 200 white basket filters
- Compatibility: Fits 8-12 cup coffee makers
- Filtration Quality: Excellent sediment removal
As an affiliate, we earn on qualifying purchases.
Percolator Basics
To brew coffee in a percolator, you need to understand the basic components and how they work together to create a flavorful cup of coffee. The percolator is equipped with a basket where the grounds are placed. This basket is essential for holding the grounds during the brewing process. The grounds are kept separate from the brewed coffee, allowing the water to pass through and extract the flavors without letting the grounds mix into the final brew. The percolator also has a vertical tube that allows the hot water to rise from the bottom chamber to the top, where it percolates through the grounds and back down into the bottom chamber. This continuous cycle of water passing through the grounds helps to extract the flavors and aromas, resulting in a rich and robust cup of coffee. Understanding these brewing coffee basics is key to using a percolator effectively and making a delicious cup of coffee.
When brewing in a percolator, it's essential to use coarse grounds. This prevents the grounds from dissolving and entering the brewed coffee, ensuring a clean cup of joe. Additionally, using freshly ground whole beans enhances the aroma and flavor of the coffee.
The basket in the percolator plays a significant role in controlling the brewing process, making sure that only the extracted coffee flows through the stem and into the reservoir for a strong and bold brew.
Coffee Preparation

When preparing your coffee in a percolator, start by grinding fresh whole beans for a more aromatic experience. Remember to use coarse grounds to prevent them from dissolving during percolation.
Using the correct water-to-coffee ratio is essential for achieving the best flavor in your percolator-brewed coffee.
Grounding Coffee Beans
For best percolator brewing, make certain your coffee beans are coarsely ground to maintain flavor integrity and prevent bitterness in the final brew. When you grind your beans, aim for a coarser grind to avoid them from dissolving during the percolation process. To achieve the right coarseness, try grinding the beans in short pulses rather than a continuous grind.
Using coarse grounds is vital as they help preserve the flavor profile of the coffee. The recommended ratio for percolator brewing is 1 tablespoon of ground coffee per 8 ounces of water. This ratio guarantees a balanced and flavorful brew without any overpowering bitterness.
Opting for freshly ground whole beans over pre-ground coffee is ideal for a more aromatic and rich coffee experience. The coarse grounds not only contribute to a robust flavor but also play an important role in preventing the coffee from turning bitter during the brewing process.
Water-to-Coffee Ratio
Maintaining the right water-to-coffee proportion in your percolator brewing is vital for achieving a balanced and flavorful cup of coffee. To guarantee optimal brewing in your percolator, use 1 tablespoon of coffee grounds per 8 ounces of water. This proportion plays a pivotal role in controlling the strength and intensity of your brewed coffee.
By adjusting the water-to-coffee proportion based on your personal preference, you can enhance the taste of the final brew. Whether you prefer a stronger or milder flavor, the water-to-coffee proportion is key to achieving the desired richness and aroma in your percolator coffee.
Brewing Process

To brew coffee in a percolator, water is cycled through coffee grounds continuously to achieve a strong and bold flavor. The brewing process involves monitoring the clear bubbles rising through the percolator knob to gauge the progress. Brew time typically ranges from 8-10 minutes, resulting in a robust coffee taste. Removing the stem and basket before serving ensures a smooth and flavorful coffee experience. Slowly heating the percolator on low heat prevents boiling and helps achieve the desired brew strength.
| Brewing Process | Percolator | Brewing Coffee |
|---|---|---|
| Cycling water | Steaming water | Strong flavor |
| Continuous flow | Clear bubbles | Bold taste |
| 8-10 minutes | Monitoring knobs | Robust coffee |
| Remove stem/basket | Low heat heating | Flavorful experience |
Stovetop Percolator Instructions

You're ready to master brewing coffee in a stovetop percolator.
Start by assembling the percolator and brewing your coffee with cold water and coarse grounds.
Keep a close eye on the brewing process to guarantee the perfect flavor extraction without boiling.
Assemble and Brew
Secure the filter basket onto the stem before adding your desired amount of coarsely ground coffee for brewing in a stovetop percolator. If your percolator includes a filter plate, insert it to enhance the brewing process. Next, refer to the table below for guidance on the ideal grounds per cup ratio and water level:
| Coffee Grounds (per cup) | Water Level |
|---|---|
| 1-2 tablespoons | Fill line |
| 3 tablespoons | Below fill line |
| 4 tablespoons | Just above the grounds |
After adding the coffee grounds, make sure the percolator is tightly closed to prevent any leaks during brewing. Place the percolator on the stovetop and let it percolate until the desired strength is achieved. Remember to remove the percolator from the heat once the brewing process is complete to avoid over-extraction. With these steps, you're on your way to enjoying a classic cup of percolator-brewed coffee.
Monitoring and Serving
Keep a close watch and ear on the percolation process as your coffee brews in a stovetop percolator. Listen for the bubbling sound and observe clear bubbles rising through the knob, indicating that the coffee is brewing.
The brewing time in a stovetop percolator typically ranges from 7 to 10 minutes, depending on your desired coffee strength. Once the brewing is complete, promptly remove the percolator from the heat source to prevent the coffee from becoming over-extracted, which can lead to bitterness.
Before serving, allow the coffee grounds to settle at the bottom of the percolator. This settling period helps guarantee that your cup of coffee is smooth and full of flavor.
After brewing, personalize your coffee to your liking by adding sugar, cream, or milk. Serve the freshly brewed coffee from the stovetop percolator while it's still hot to relish its rich and aromatic flavors to the fullest.
Tips for Success
How can you secure a flavorful and aromatic brew when using a stovetop percolator?
When brewing with a stovetop percolator, start by using cold water and coarse grounds to safeguard a robust coffee flavor.
Heat the percolator slowly on the stovetop to prevent boiling the water, giving you better control over the brewing process.
Watch for clear bubbles rising through the percolator's knob as this signals the beginning of the brewing cycle.
Let the coffee brew for 8-10 minutes without boiling to avoid over-extraction and bitterness in your cup.
Additionally, check that the percolator's spout is clear to prevent any potential overflow during brewing.
Benefits, Memories, and Maintenance

Maintaining a percolator secures its longevity and peak performance, while brewing coffee in it brings forth nostalgic memories and flavorful benefits. Percolators not only provide a strong and rich coffee taste but also evoke memories of simpler times, making each cup a delightful trip down memory lane.
To secure your percolator continues to brew perfect coffee, regular maintenance and cleaning are essential. By keeping your percolator in top condition, you can enjoy its durability and the traditional, stylish brewing method it offers.
In addition to the practical benefits of using a percolator, the retro charm and rich flavor profile of percolator-brewed coffee make it a popular choice for both outdoor activities and home brewing. Embrace the environmentally friendly and easy-to-control nature of percolators, allowing you to savor every cup with a sense of nostalgia and satisfaction.
Components of a Stovetop Coffee Percolator

Exploring the anatomy of a stovetop coffee percolator reveals essential components that work harmoniously to brew a delicious cup of coffee. The components of a stovetop percolator coffee pot include a base for water, a basket for coffee grounds, a stem connecting the base to the basket, a top for controlling water flow, and a mechanism for spreading boiling water over the grounds. Each component plays a pivotal role in the brewing cycle, ensuring a flavorful outcome.
| Component | Function |
|---|---|
| Base | Holds water for brewing |
| Basket | Contains coffee grounds during brewing |
| Stem | Connects base to grounds basket for water circulation |
| Top | Controls water flow onto coffee grounds |
During the brewing cycle, boiling water from the base travels up through the stem and spreads over the coffee grounds in the basket, extracting the rich flavors and aromas of the coffee. Understanding these components is vital to mastering the art of brewing coffee in a stovetop percolator.
Steps to Use a Percolator Coffee Pot

To properly utilize a percolator coffee pot, start by grinding coffee beans coarsely to maintain the integrity of the grounds during the brewing process. Coarse grounds prevent them from dissolving into the coffee, ensuring a smooth brew.
Use 1 tablespoon of ground coffee per cup of water for an ideal coffee-to-water ratio. Place the coarsely ground coffee into the percolator basket, making sure it's securely assembled.
Next, add water to the percolator pot, ensuring not to exceed the fill line. Place the percolator on the stove over medium heat. Monitor the brewing process closely for 7-10 minutes. Over-extracting can lead to bitterness, so adjust the brewing time based on your taste preference.
Once brewed to your liking, carefully remove the percolator from the heat source to prevent over-extraction. Enjoy your flavorful cup of coffee brewed using the classic percolator method.
Indicators of Percolator Coffee Completion

Watch for specific indicators to determine when your percolator coffee is ready for consumption. Here are the key signs to look out for to make sure your coffee is perfectly brewed:
- Aroma: As the percolator coffee nears completion, you'll notice a strong and inviting coffee aroma filling the air around you. This rich scent indicates that the coffee flavors are being properly extracted during the brewing process.
- Color: Keep an eye on the color of the coffee as it percolates. Initially dark, the coffee will gradually lighten as it brews. When the coffee reaches a medium-dark brown color, it's usually a good indicator that it's close to completion.
- Bubbling: Pay attention to the percolator's brewing cycle. As the coffee approaches readiness, the bubbling action will begin to slow down. This decrease in bubbling signals that the extraction process is reaching its peak.
- Taste Test: To confirm that your percolator coffee is complete, take a small taste test. If the flavor is balanced, rich, and suits your preference, then your coffee is likely ready to be served. Adjust the brewing time in the future to customize the taste to perfection.
Coffee Amount for Percolator Brewing

Pay attention to the coffee amount you use when brewing in a percolator to ensure peak flavor extraction and strength in your brewed coffee. The standard coffee-to-water ratio for percolator brewing is 1 tablespoon of coffee grounds per cup of water. This ratio guarantees a balanced and flavorful brew.
However, feel free to adjust the amount of coffee grounds based on your personal preference for the strength of the coffee. For a commonly used Bozeman 9 cup percolator, this means using 9 tablespoons of coffee grounds for 9 cups of water.
To make it easier, many percolators come with guidelines engraved on them indicating the ideal coffee-to-water ratio. Following these guidelines can help you achieve consistent results with each brew.
Additionally, if you prefer a milder or bolder flavor, you can experiment by adding more or less coffee grounds accordingly. Remember, adding hot water can also help you control the boldness of the coffee brewed in a percolator, giving you the flexibility to tailor each brew to your liking.
Frequently Asked Questions
How to Make Coffee in an Old Fashioned Percolator?
To make coffee in an old-fashioned percolator, use coarse grounds, watch the percolator to prevent boiling, brew for 8-10 minutes, remove from heat once done. Enjoy the rich flavor of classic percolator coffee for a nostalgic experience.
What Is the Ratio of Coffee to Water in a Percolator?
For a well-balanced brew in a percolator, aim for 1 tablespoon of coffee per 8 ounces of water. Adjust for your taste preferences. This ratio controls strength and flavor. Stick to it for a satisfying cup.
How Many Scoops of Coffee Do You Put in a Percolator?
You should typically use 1 tablespoon of coffee grounds per cup of water in a percolator. Adjust the amount based on your taste preference. Remember, too few grounds make weak coffee, while too many can lead to bitterness.
How Do You Brew in a Percolator?
So, you wanna master the art of percolator brewing, huh? Pour water, add coffee, heat 'til bubbly, then simmer. Watch the magic happen – perk every 2-3 seconds for perfect java. Experiment with roasts, control temp, savor the brew! For a different brewing experience, try brewing coffee with a french press. The process involves steeping coarsely ground coffee in hot water and then pressing the grounds to the bottom of the container using a plunger. This method allows for a bolder flavor and a richer coffee experience.
Conclusion
Now that you know how to brew coffee in a percolator, enjoy the classic taste and experience of this traditional method! If you’re looking for a different coffee brewing experience, consider trying French press coffee brewing. This method involves steeping coarsely ground coffee in hot water and then using a plunger to separate the grounds from the liquid. It produces a strong and flavorful cup of coffee that many coffee enthusiasts enjoy. Give it a try and see which method you prefer!
Remember, it may take a few tries to perfect your brew, but the delicious results are worth it.
Don't worry if it doesn't turn out perfectly the first time – just keep practicing and experimenting until you find the perfect ratio and timing for your taste preferences.
Happy brewing!