
To taste coffee like a pro at home, start by using consistent brew ratios and coarsely ground coffee. Place grounds in cups, pour hot water, and steep for about four minutes. Break the crust with a spoon to release aromas, then skim off the grounds. Smell the coffee to identify its nuanced aromas, then slurp to taste and evaluate flavor balance. Keep experimenting with ratios and parameters to refine your palate—more tips await if you continue exploring.
Key Takeaways
- Use consistent brew ratios, grind size, and steep time to accurately compare and evaluate different coffees.
- Break the coffee crust during steeping to release aromatic compounds for better aroma profiling.
- Slurp coffee to aerate and enhance flavor perception, focusing on balance and unique tasting notes.
- Take detailed notes on variables like ratio, grind, and steep time to refine your cupping technique.
- Practice regularly to develop your palate and gain confidence in identifying subtle aroma and flavor differences.
Cupping therapy, traditionally performed by professionals, can now be done at home with the right tools and knowledge. When it comes to tasting coffee like a pro, cupping is an essential step that helps you understand the nuances of different beans and roasts. By learning how to cup your coffee properly, you gain insight into its flavor profiles and develop a better appreciation for what makes each brew unique.
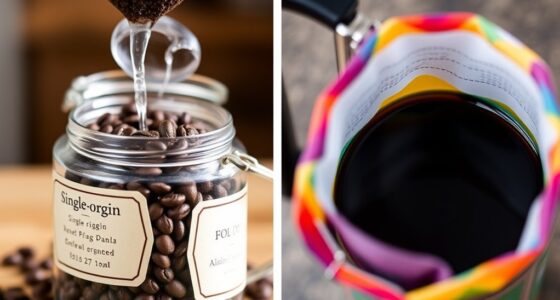
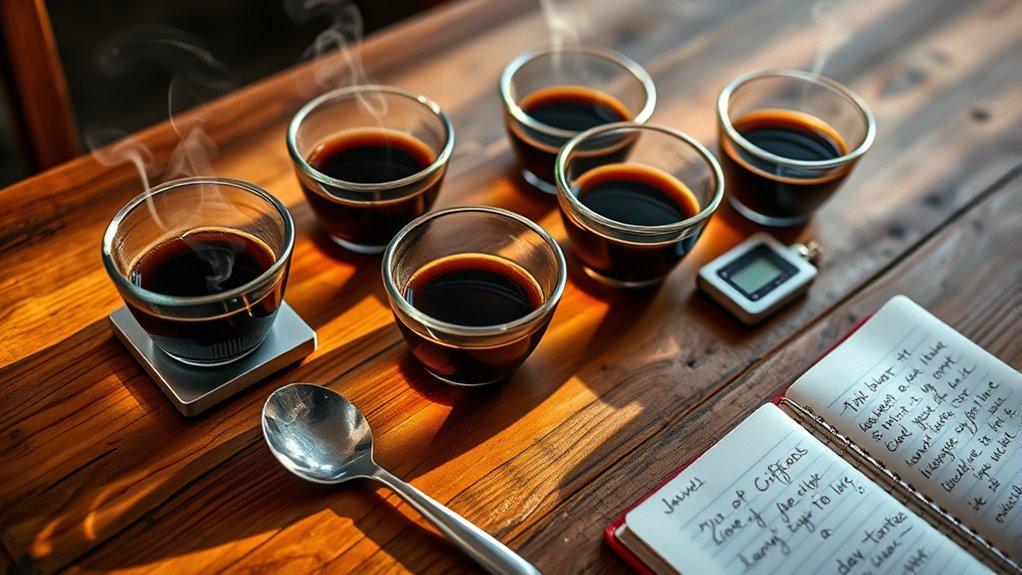
To start, you’ll need a few basic supplies: a cupping spoon, a grinder, a scale, and some cups or bowls. Before you brew, it’s crucial to pay attention to brew ratios—how much coffee you use relative to water. The standard ratio is about 1:15 to 1:17, meaning 1 gram of coffee for every 15 to 17 grams of water. This ratio influences the strength and extraction level of your brew, which in turn affects the flavor profiles you experience during tasting. Using consistent brew ratios ensures your comparisons are accurate and meaningful.
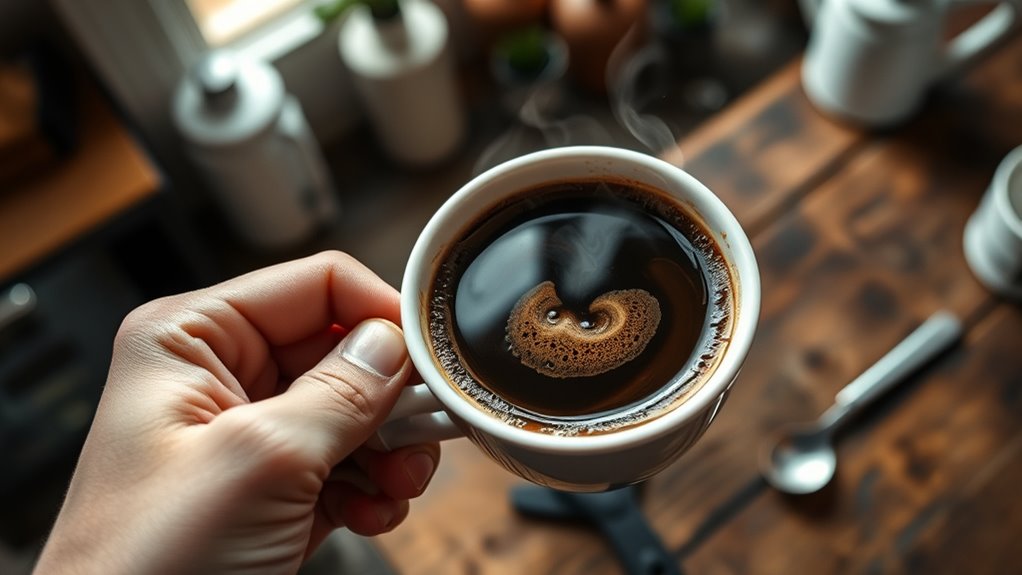
Once you’ve ground the coffee to a coarse, consistent size—similar to sea salt—you’ll place it into your cups according to your chosen brew ratio. Pour hot water just off the boil over the grounds, making sure to saturate all of them evenly. Allow the coffee to steep for about four minutes, and as it brews, you’ll notice the grounds forming a crust and releasing aromatic gases. This crust is a key indicator; breaking it with your spoon reveals more intense aromas that can guide your understanding of the coffee’s flavor profile.
After the steeping time, gently skim off the grounds and take a moment to smell the coffee. Aromas provide clues to the flavor profiles—notes of fruit, chocolate, spice, or floral elements. When you taste, use your cupping spoon to slurp the coffee, which aerates it and helps you identify the different flavor notes. Pay attention to the balance of sweetness, acidity, bitterness, and body. Adjusting your brew ratios in future cuppings will help you fine-tune these elements, revealing deeper insights into each coffee’s characteristics.
Practicing regularly at home allows you to hone your palate and become more skilled at discerning subtle differences. Keep notes on each cupping session, including brew ratios, grind size, steep time, and perceived flavor profiles. Over time, you’ll develop a more refined sense of how variables like brew ratios influence the final taste. This knowledge empowers you to craft perfect cups tailored to your preferences and to truly taste coffee like a professional, all from the comfort of your own kitchen.

Artizan Coffee Gear – Specialty Coffee Association (SCA) Professional Coffee Cupping Spoon – Stainless Steel (4 Spoons)
Meets SCA Standards, holding 0.135-0.169 fluid ounces / 4-5ml of coffee sample and is made from non-reactive metal.
As an affiliate, we earn on qualifying purchases.
As an affiliate, we earn on qualifying purchases.
Frequently Asked Questions
Can Cupping Be Done Without Professional Equipment?
Yes, you can do cupping without professional equipment by using basic DIY brewing and tasting techniques. Gather ground coffee, hot water, and small cups for tasting. Use a spoon to break the crust and smell the aromas. Then, sip and evaluate the flavor. While it’s not professional-grade, this simple approach lets you explore coffee’s nuances at home, honing your palate without needing specialized cupping gear.
How Do Different Roast Levels Affect Cupping Results?
The roast level influence considerably impacts cupping results, as it alters the flavor profile variation you experience. Light roasts tend to highlight bright, fruity, and acidic notes, while dark roasts emphasize bold, smoky, and bitter flavors. By tasting different roast levels, you can identify subtle differences and better understand each coffee’s unique characteristics. So, adjusting roast levels during cupping helps you explore a broader spectrum of flavors and refine your palate.
What’s the Ideal Storage Method for Cupping Samples?
You should store cupping samples in airtight, opaque storage containers to maintain coffee freshness. Avoid exposure to light, air, and humidity, which can degrade the coffee’s flavor profile. Use small containers to minimize oxygen contact, and keep them in a cool, dark place. Proper storage guarantees your samples stay fresh, so you can accurately assess the coffee’s true aroma and taste during cupping sessions.
How Often Should I Practice Cupping to Improve?
Like a knight honing their sword, your cupping skills improve with consistent practice. To see steady frequency improvement, practice at least once a week, but ideally two to three times. Staying consistent helps you recognize subtle flavor differences and build your palate. Skipping sessions slows progress, so make cupping a regular habit. Over time, you’ll develop a more refined taste and greater confidence in evaluating coffee like a true pro.
Are There Health Risks Associated With Cupping at Home?
You might wonder if there are health concerns with cupping at home. While it’s generally safe if you follow safety precautions, improper technique can cause skin irritation, bruising, or infection. To stay safe, clean your equipment thoroughly, use appropriate suction, and avoid cupping over broken skin or sensitive areas. If you notice persistent pain or unusual marks, consult a healthcare professional. Prioritizing safety precautions helps minimize risks and guarantees a positive experience.
Artizan Coffee Gear – Specialty Coffee Association (SCA) Professional Coffee Cupping Spoon – Stainless Steel (4 Spoons)
Meets SCA Standards, holding 0.135-0.169 fluid ounces / 4-5ml of coffee sample and is made from non-reactive metal.
As an affiliate, we earn on qualifying purchases.
As an affiliate, we earn on qualifying purchases.
Conclusion
Now that you’ve learned to cup at home, think of it as tuning a fine instrument—each sip reveals a new note in your coffee’s symphony. I once experimented with a bold Ethiopian bean, and discovering its bright, fruity notes felt like uncovering a hidden melody. With practice, you’ll become a coffee connoisseur, savoring every nuance. So, grab your scoop, embrace the process, and enjoy the rich, complex world of coffee tasting right in your own kitchen.

Lonkion Burr Coffee Grinder Electric – Adjustable Burr Grinder with 28 Precise Grind Settings for 12 Cups – Coffee Grinders for Home Use – Professional Coffee Bean Grinder – Stainless Steel
[Consistent Flavor Extraction]: Choose the coarseness you need from the 28 settings on the Lonkion burr coffee grinder….
As an affiliate, we earn on qualifying purchases.
As an affiliate, we earn on qualifying purchases.
UHIWALKER 9.7oz Espresso Cups Espresso Shot Glasses for OREA,275ml Glass Coffee Cups, Espresso Mugs Demitasse Cups Cappuccino Cup for Hot or Cold Latte, Tea
Made for coffee:We don't think that we have to avoid single wall glasses for specialty coffee. The neck…
As an affiliate, we earn on qualifying purchases.
As an affiliate, we earn on qualifying purchases.