Tips and Tricks
Hugo Spritz
Juicy and refreshing, the Hugo Spritz is the ideal cocktail for any occasion—discover how to elevate your gatherings with this delightful drink!
The Hugo Spritz is a delightful cocktail that's perfect for warm weather or festive gatherings. You combine 3 oz of prosecco, 1 oz of elderflower syrup, and a splash of soda water, then garnish with fresh mint and a lime wedge. This drink offers a refreshing balance of sweetness and carbonation, making it a lighter alternative to other spritz variations. With its vibrant presentation, it's sure to impress your guests and spark conversation. Plus, it's easy to make multiple servings for gatherings. Stick around, and you'll discover even more tips and tricks for crafting the perfect Hugo Spritz!
Key Takeaways
- Hugo Spritz originated in Northern Italy, combining prosecco, elderflower syrup, soda water, and fresh mint for a refreshing cocktail.
- It gained popularity in the early 2000s as a lighter alternative to traditional bitter Spritz variations.
- The drink is visually appealing, often garnished with mint leaves or lime slices, making it perfect for gatherings.
- Easy to prepare in large batches, Hugo Spritz is ideal for summer events and social occasions.
- Its balanced flavor profile offers a sweet, effervescent experience, customizable based on personal taste preferences.
History
The rich history of the Hugo Spritz reflects both innovation and tradition in the world of cocktails. You might be surprised to learn that this refreshing drink originated in Northern Italy, specifically the Trentino-Alto Adige region. It gained popularity in the early 2000s, capturing the hearts of locals and travelers alike.
The cocktail emerged as a lighter alternative to the more bitter Spritz variations, emphasizing a delightful balance of flavors.
As you sip on a Hugo Spritz, you're savoring a blend of prosecco, elderflower syrup, sparkling water, and fresh mint. This combination highlights the Italian penchant for using locally sourced ingredients, showcasing a commitment to freshness and quality.
The drink's rise can be attributed to social media and its vibrant presentation, making it a favorite for summer gatherings and aperitivo moments.
Over the years, the Hugo Spritz has evolved, maintaining its essence while adapting to various tastes and preferences. You'll find it on menus across the globe, symbolizing the trend of lighter, herb-infused cocktails.
Its journey from a regional favorite to an international sensation illustrates how traditions can innovate, inviting you to enjoy a taste of Italy, no matter where you are.
Recipe
The Hugo Spritz is a refreshing Italian cocktail that perfectly blends the herbal notes of elderflower syrup with the crispness of Prosecco and a splash of soda water.
It's an ideal drink for summer afternoons or festive gatherings, offering a delightful balance of sweetness and effervescence. The addition of mint and lime gives it a vibrant twist, making it not just a beverage but a refreshing experience.
To prepare the Hugo Spritz, you'll want to gather your ingredients and have a few simple tools on hand, such as a jigger for measuring, a stirring spoon, and a glass to serve it in.
This cocktail is incredibly easy to make, allowing you to whip up multiple servings in no time. Once you have everything ready, you can impress your guests with this elegant drink that's sure to become a favorite.
Ingredients:
- 3 oz Prosecco
- 1 oz elderflower syrup
- 1 oz soda water
- Fresh mint leaves
- 1 lime wedge
- Ice cubes
Instructions:
In a large wine glass filled with ice cubes, pour in the Prosecco, elderflower syrup, and soda water.
Gently stir the mixture to combine the flavors. Squeeze the lime wedge into the drink, then drop it in for added zest.
Finally, add a few fresh mint leaves and stir lightly to release their aroma before serving.
Extra Tips:
For an extra touch of elegance, consider garnishing your Hugo Spritz with additional mint leaves or even a slice of cucumber.
You can adjust the sweetness by varying the amount of elderflower syrup according to your taste.
If you want to make a larger batch for a party, simply scale up the ingredients while maintaining the same proportions, and serve it in a pitcher for easy self-service.
Enjoy your refreshing cocktail!
Cooking Steps

To make the perfect Hugo Spritz, you'll want to start by chilling your glass with ice.
Next, add the Aperol and Prosecco, then garnish with fresh mint.
Step 1. Chill Glass With Ice
Chilling your glass with ice is a simple yet effective way to enhance your Hugo Spritz experience.
Start by selecting your favorite glass, whether it's a wine glass or a large tumbler. Next, grab some ice cubes from your freezer. Fill your glass about halfway with ice, making sure not to overfill it. This will help keep your drink cold without diluting it too quickly.
Let the ice sit for a few minutes, allowing the glass to chill thoroughly. You can even swirl the ice gently to speed up the cooling process. As the glass chills, you're setting the stage for a refreshing drink.
Once you feel your glass has cooled enough, carefully discard the ice. You can do this by tipping the glass over the sink or a bowl, ensuring all the ice is removed.
Now, your glass is perfectly prepped to hold your Hugo Spritz ingredients. A chilled glass not only keeps your drink at the ideal temperature but also enhances the overall presentation.
You'll notice the difference in your drink's taste and enjoyment when you take that first sip. Cheers to a refreshing start!
Step 2. Add Aperol and Prosecco
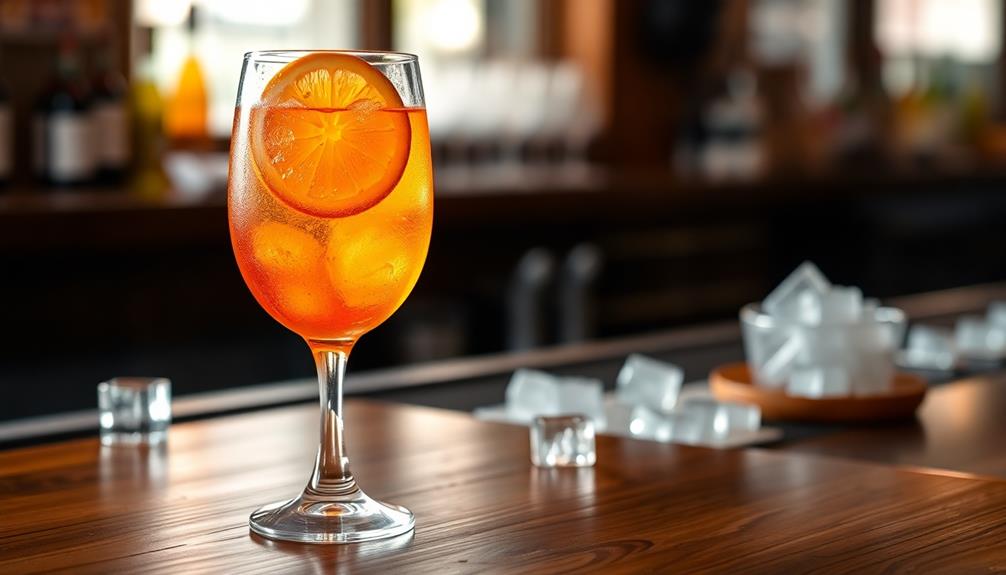
With your glass now chilled and ready, it's time to layer in the key ingredients that make a Hugo Spritz so delightful.
Start by pouring in a generous shot of Aperol—about 2 ounces. It's the vibrant orange liqueur that gives your drink a slightly bitter yet refreshing kick. Pour it gently over the ice to keep everything chilled.
Next, grab your bottle of Prosecco. You'll want to add about 3 ounces of this sparkling wine, which adds a bubbly effervescence that elevates the entire drink. Pour it slowly over the Aperol, allowing the two to mix naturally without creating too much foam.
As you watch the colors swirl together, you'll notice the beautiful orange hue complemented by the golden bubbles.
Don't be afraid to adjust the ratios slightly based on your taste preferences; some enjoy a more pronounced Aperol flavor, while others prefer the sweetness of the Prosecco. Just remember, balance is key!
Once you've combined these two delicious ingredients, your Hugo Spritz is almost complete.
Take a moment to admire your creation before moving on to the final touch.
Step 3. Garnish With Fresh Mint
Fresh mint leaves add a burst of aroma and a touch of elegance to your Hugo Spritz. To incorporate this refreshing ingredient, start by selecting fresh, vibrant mint leaves. Look for leaves that are bright green and free from any wilting or browning.
Once you've got your mint, gently rinse the leaves under cold water to remove any dirt or residue. Pat them dry with a clean towel.
Next, take a few leaves—about three to five should do the trick—and place them in your glass. You can either leave them whole or give them a gentle slap between your hands to release more of their aromatic oils. If you prefer a stronger mint flavor, feel free to muddle them lightly in the glass before adding your other ingredients.
As you finish assembling your Hugo Spritz, position the mint leaves so they're visible above the ice. This not only enhances the drink's visual appeal but also releases a lovely scent as you sip.
The fresh mint will elevate your cocktail experience, making each sip refreshing and fragrant. Enjoy your beautifully garnished Hugo Spritz!
Step 4. Stir Gently to Combine
After you've garnished your Hugo Spritz with fresh mint, it's time to mix the ingredients together.
Start by grabbing a long spoon or a stirrer. You'll want to gently stir the mixture to ensure all the flavors meld nicely without losing the fizz.
First, dip your spoon into the glass, reaching all the way to the bottom where the syrup and other ingredients settle. Slowly lift the spoon and then push it back down.
Repeat this motion, making sure not to agitate the drink too much. The goal is to combine the elderflower syrup, wine, and mint without causing too many bubbles to rise and spill over the rim.
Take your time with this step; a gentle stir will help to integrate the flavors while keeping the drink refreshing and vibrant.
You might notice the mint leaves start to release their aromatic essence as you stir, enhancing the overall scent and taste.
Once you feel satisfied with the blending, take a moment to admire your creation. The beautiful layers of color and the aromatic mint will have you eager to take that first sip.
Enjoy the process!
Step 5. Add a Splash of Soda
Now that you've gently combined the flavors of your Hugo Spritz, it's time to add a splash of soda.
Grab your favorite soda water or tonic—both work beautifully. Pour about two ounces into your glass, letting the bubbles dance through the mixture. This step not only adds effervescence but also balances the sweetness of the elderflower liqueur and the bitterness of the Prosecco.
As you pour, give the drink a gentle stir with a spoon or a straw. You want to incorporate the soda without losing that refreshing fizz. The goal here is to enhance the drink's lightness while keeping the vibrant flavors intact.
Once you've added the soda, take a moment to taste your creation. Adjust the soda to your liking; if you prefer a lighter drink, feel free to add more. Remember, the key to a great Hugo Spritz is finding that perfect balance between sweetness and carbonation.
Garnish your drink with a fresh sprig of mint and a slice of lime for that final touch.
Now you're ready to sip and enjoy your delightful Hugo Spritz! Cheers!
Final Thoughts
As you reflect on the delightful experience of enjoying a Hugo Spritz, it's clear that this refreshing cocktail has the potential to elevate any gathering. Its bright flavors, combining elderflower cordial, Prosecco, and fresh herbs, create a drink that's not only pleasing to the palate but also visually appealing.
You'll find that the simplicity of the ingredients allows for easy customization, making it a versatile choice for any occasion.
When you craft a Hugo Spritz, you're not just mixing a drink; you're creating a moment. Whether it's a sunny afternoon on the patio or a festive evening with friends, this cocktail invites conversation and connection. It encourages you to savor the experience, taking time to appreciate the little things.
As you consider hosting your next event, think about incorporating this delightful beverage into the mix. It's an effortless way to impress your guests while keeping the atmosphere light and enjoyable.
Frequently Asked Questions
What Is the Origin of the Name "Hugo Spritz"?
The name "Hugo" has Germanic origins, meaning "mind" or "intellect," while "Spritz" comes from the German word for "splash." Together, they evoke a lively, refreshing essence, perfect for a vibrant drink.
Can I Use Non-Alcoholic Alternatives in a Hugo Spritz?
Absolutely, you can use non-alcoholic alternatives! Try a non-alcoholic sparkling wine, elderflower syrup, and soda water. Mix them together for a refreshing drink that captures the essence of the original without the alcohol.
What Type of Glass Is Best for Serving a Hugo Spritz?
You'll want to serve your drink in a large wine glass or a stemmed glass. This shape enhances the presentation and allows for adequate space to appreciate the aromas and flavors in your refreshing beverage.
How Can I Make a Large Batch of Hugo Spritz for a Party?
To make a large batch for a party, mix equal parts prosecco and elderflower syrup in a pitcher. Add soda water, fresh mint, and lime slices. Serve over ice, and enjoy your refreshing drink with guests!
What Are Some Popular Food Pairings With a Hugo Spritz?
When enjoying a refreshing spritz, consider pairing it with light appetizers. Think bruschetta, seafood tapas, or fresh salads. These flavors complement your drink's herbal notes, enhancing the overall experience for you and your guests.

Tips and Tricks
Business Basics: How to Build a Coffee Shop Business Plan!
Lure in success with a comprehensive guide on crafting a top-notch coffee shop business plan – your recipe for entrepreneurial triumph!
In order to create a successful coffee shop business plan, begin by crafting a compelling summary and creating accurate financial projections. Research your target market, outline growth strategies, and define your ideal customer base. Utilize a useful template, analyze market data, and develop an effective marketing strategy. Promote your coffee shop on social media, organize engaging events, and collaborate with local influencers. Efficiently manage your inventory, consider your responsibilities, and perfect your production process. Analyze financial data, monitor cash flow, and determine your break-even point. Refine all of these elements to achieve success with your coffee shop venture!
Key Takeaways
- Utilize a structured business plan template to guide your coffee shop's development.
- Conduct thorough market research to understand your target audience and competition.
- Develop a detailed marketing plan to promote your coffee shop effectively.
- Consider startup costs in financial projections to ensure realistic planning.
- Start with a clear market analysis to identify opportunities and challenges.
Essential Components
Incorporate the necessary components in your coffee shop business plan to secure a detailed roadmap for success. The coffee shop business plan should include a comprehensive market analysis, identifying the target demographic, competition, and potential growth opportunities. It should also outline a detailed marketing strategy, including plans for social media, local advertising, and community engagement.
Additionally, the business plan should include a financial forecast, outlining start-up costs, projected revenue, and profit margins. It should also detail the necessary equipment, staffing requirements, and suppliers. If the coffee shop plans to expand, the business plan should also include potential strategies for growth, such as opening a street cafe coffee cart to reach new customers.
Start with a compelling executive summary that encapsulates the essence of your business.
Lay out your financial projections, including revenue forecasts, expenses, and profit margins.
Conduct a thorough market analysis to understand your competition, target demographic, and industry trends.
Outline growth strategies that focus on expansion, diversification, and sustainability.
Define your target market clearly and align your menu offerings to cater to their preferences and needs.
Provide operational details such as location, equipment, suppliers, and staffing requirements for seamless day-to-day management.
Develop cash flow projections that account for both expected and unexpected expenses to secure financial stability.
Implement customer service plans that prioritize satisfaction, retention, and loyalty.
Writing Strategies
Utilize a structured business plan template to effectively outline key aspects of your coffee shop business strategy.
When writing your coffee shop business plan, start with a clear market analysis to understand your target audience, competition, and industry trends. Conduct thorough market research to support your decisions on menu items, pricing, and positioning.
Develop a detailed marketing plan that includes strategies to reach your target market, differentiate your coffee shop, and promote customer loyalty.
In your financial projections, consider startup costs, operating expenses, and revenue forecasts to guarantee a realistic outlook for your business.
Detail your business operations, outlining day-to-day processes, staffing requirements, and supplier relationships.
Address key factors for success, such as operational efficiency and quality control, to maximize sustainability and profitability.
Marketing Tactics
Enhancing brand visibility and customer engagement can be achieved by leveraging social media platforms like Instagram and Facebook for your coffee shop marketing tactics. By actively posting about your menu offerings, special events, and behind-the-scenes glimpses, you can connect with your audience on a personal level.
Hosting special events such as open mic nights or art shows can draw in a diverse crowd and create a unique atmosphere that sets your coffee shop apart.
Collaborating with local influencers or businesses can expand your reach and attract new customers who trust the recommendations of those influencers. Implementing customer loyalty programs or offering discounts to regulars can foster a sense of belonging and encourage repeat visits.
Utilizing email marketing campaigns to showcase new menu items, upcoming events, or promotions can drive traffic to your coffee shop and keep your customers informed and engaged. Building partnerships within the community can also help in spreading the word about your coffee shop and establishing a strong presence in the local market.
Operational Management
To effectively manage the day-to-day operations of your coffee shop, overseeing customer service, point of sale systems, and inventory tracking is essential.
When it comes to operational management in a coffee shop, consider the following key aspects:
- Planning the supply chain for menu products to guarantee efficient inventory management and timely restocking.
- Deciding on owner/operator roles or hiring skilled management staff to maintain a smooth operation flow.
- Balancing quality, consistency, and speed in production to meet customer expectations in a cafe setting.
- Implementing effective inventory tracking systems to monitor stock levels and prevent shortages or overages.
- Addressing the complexities of management and production to guarantee overall success and sustainability of your coffee shop.
Financial Planning
How can you ensure the financial stability and growth of your coffee shop through effective planning and management?
Financial planning is crucial for the success of your coffee shop. Projecting cash flow guarantees that you can cover expenses and maintain stability.
The balance sheet summarizes your cafe's assets, liabilities, and overall net worth, providing a snapshot of your financial health.
Calculating the break-even point helps you understand when your coffee shop will begin to turn a profit.
To secure funding for growth, you need to set clear financial goals and strategies for business expansion.
Profit margins and ownership structure play an important role in determining the financial health of your coffee shop.
Effective financial management is key to sustaining profitability and ensuring long-term success in the competitive coffee shop industry.
Frequently Asked Questions
How to Write a Business Plan Step by Step for a Coffee Shop?
You start by outlining your vision, target market, products/services, and marketing strategy. Include sections like executive summary, market analysis, financial projections, and growth strategies. Research competition, analyze target market, define ownership structure, and develop a detailed marketing plan.
How Do I Plan a Coffee Shop Layout?
Imagine your coffee shop as a symphony. Arrange seating like harmonious notes, flow like a well-timed beat. Blend customer comfort with staff efficiency. Dance between aesthetics and functionality. Let regulations be your conductor.
How Do I Start Planning for a Cafe?
Start planning for your cafe by defining your concept, target market, and unique selling proposition. Research the local market, competition, and ideal location. Determine startup costs, budget, and funding sources. Develop a detailed menu, pricing strategy, and marketing plan.
How Profitable Is Owning a Coffee Shop?
Owning a coffee shop can be profitable, with margins typically ranging from 11-15%. Successful shops earn $200,000 to $500,000 annually. Strategic planning, unique offerings, and loyal customers are key to maximizing profitability and seeing ROI within 2-3 years.
Conclusion
Now that you have all the key components for your coffee shop business plan, you're ready to brew up success!
Remember, just like a perfectly roasted coffee bean, your plan needs time and attention to reach its full potential.
So grab your favorite mug, pour yourself a cup of motivation, and get ready to take on the world of coffee shop entrepreneurship.
The sky's the limit – or should I say, the foam on your latte!
Tips and Tricks
Counter Design: How to Build a Coffee Shop Counter for Efficient Service!
Amp up your coffee shop's efficiency with expert tips on building a stylish and functional counter that will impress your customers!
To create a successful coffee shop counter, focus on making precise cuts using tools like circular saws. Add matching trim and decorations for a cohesive appearance. Ensure accuracy in measurements and use high-quality materials for long-lasting durability. Improve stability with a counter joint filler and proper installation of carpet grip. Coordinate colors and textures to attract customers. Lastly, prioritize aesthetics to leave a positive impression on your patrons. Following these steps will help you not only set up a functional counter, but also please your customers. To ensure that your coffee shop counter aligns with your overall business objectives, include the design and construction process in your coffee shop business plan. This will help you allocate resources and schedule the work in a way that minimizes disruptions to your operations. Planning in advance will allow you to create a welcoming and efficient counter that leads to the success of your coffee shop.
Key Takeaways
- Use circular saws for precise cuts and miter joints for aesthetics.
- Coordinate colors, trim, and decorations for customer attraction.
- Install carpet grip for stability and safety.
- Prioritize aesthetics for enhanced customer experience.
- Incorporate stylish elements like curtains for ambiance.
Tools for Counter Construction
When constructing a coffee shop counter, you'll need a variety of tools to ensure precise cuts and professional results. Circular saws are essential for cutting materials like wood or laminate to the exact measurements required for the counter.
Window bay partitions can be crafted using these saws to match the counter, creating a seamless and cohesive design throughout the space.
Additionally, trim and decorations play a pivotal role in the overall appearance of the counter. Miter joints, often created using precise cuts from circular saws, are commonly used in trim work to give the counter a polished and refined look.
These details can elevate the aesthetics of the counter, making it more visually appealing to customers.
Matching Decor for Cohesive Design
When aiming for a cohesive design in your coffee shop counter, consider the placement of decorative trim and a coordinated color scheme. These elements can tie together the various components of your counter's decor, creating a unified and visually appealing space for your customers to enjoy.
Decorative Trim Placement
To achieve a coherent and visually appealing design for your coffee shop counter, focus on strategically placing decorative embellishments that complement the overall decor. Here are some key points to ponder when working on decorative embellishment placement:
- Utilize Miter Joints:
Incorporating trim with miter joints adds a level of professionalism and elegance to the counter design, creating clean and seamless shifts between embellishment pieces.
- Coordinate Trim with Counter Sides and Top:
Make sure that the decorative embellishment matches or complements the material and color of the counter sides and top. This consistency helps create a unified and harmonious look.
- Tie in with Overall Theme:
Select decorative embellishments that align with the theme and style of your coffee shop. This helps to tie in the counter design with the overall ambiance, providing a coherent and inviting atmosphere.
- Attention to Detail:
Paying attention to the precise placement of embellishments can notably enhance the perceived quality of the counter, showcasing a dedication to craftsmanship and design excellence.
Coordinated Color Scheme
A coordinated color scheme plays an essential role in creating a cohesive and visually appealing design for your coffee shop counter. Matching the color scheme of the counter with the overall decor sets the tone for the entire space.
When customers walk in, the first thing they notice is the harmonious blend of colors, creating a welcoming atmosphere that invites them to linger and enjoy their coffee. Throughout the day, the consistent color choices contribute to the branding of your coffee shop, making it easily recognizable and memorable.
Choosing complementary colors for the counter and surrounding elements not only enhances the aesthetics but also reflects professionalism and attention to detail. At the end of the day, the attention to detail in color coordination leaves a lasting impression on customers, influencing their perception and ensuring they've good times whenever they visit your coffee shop.
Finishing Touches for Durability
When finishing your coffee shop counter, make certain to apply durable trim for added strength and aesthetic appeal.
Fill in any joints to guarantee a smooth and precise finish, enhancing the counter's overall durability.
Adding grip to the carpeted area will improve stability and longevity, creating a sturdy foundation for your business operations.
Durable Trim Installation
For enhanced endurance and a refined finish, make certain the trim installation on your coffee shop counter is done meticulously. Here are some key points to keep in mind for durable trim installation:
- Accurate Measurements:
Precise measurements are essential for a smooth fit of the trim pieces. Take your time to measure each section carefully before cutting the trim.
- High-Quality Materials:
Invest in top-notch trim materials that are robust and able to withstand the daily wear and tear of a bustling coffee shop environment. Resilient materials will guarantee the longevity of your counter trim.
- Secure Fastening:
Firmly fasten the trim pieces to the counter using suitable tools and techniques. This will prevent the trim from loosening over time and maintain a professional appearance.
- Flawless Joints:
Miter joints offer a neat and refined look to the trim installation. Make sure that the joints are precisely cut and aligned for a seamless finish that enhances the overall aesthetics of your coffee shop counter.
Counter Joint Filler
To further strengthen the durability of your coffee shop counter, consider utilizing a counter joint filler for seamless and long-lasting construction. Joint filler serves to fill gaps and seams between counter sections, providing stability and resilience to guarantee a long-lasting build. The filler not only enhances the counter's structural integrity but also contributes to a smooth surface finish, elevating the overall appearance of your counter. Proper application of joint filler is crucial to achieving a professional and polished look, emphasizing the importance of attention to detail in this final stage of construction. When selecting a filler, opt for a color that matches the counter material to maintain a cohesive design aesthetic.
Benefits of Counter Joint Filler | Tips for Application |
---|---|
– Seamless finish | – Clean gaps thoroughly |
– Reinforced durability | – Use a putty knife |
– Improved stability | – Match filler color |
– Professional appearance | – Smooth excess filler |
– Cohesive design | – Allow proper drying time |
Carpet Grip Stability
Enhancing the stability and safety of your coffee shop flooring, carpet grip serves as an essential finishing touch for durability. Installing carpet grip in your high-traffic areas is pivotal to prevent slippage and guarantee the carpet stays in place, reducing the risk of accidents.
To maximize the benefits of carpet grip, follow these key steps:
- Proper Installation: Ensure the carpet grip is correctly installed to secure the carpet firmly to the floor, enhancing safety and longevity.
- Enhanced Safety: By providing stability and preventing slippage, carpet grip contributes significantly to the safety of your customers and staff.
- Professional Finish: The addition of carpet grip not only improves safety but also provides a polished and professional look to your coffee shop flooring.
- Improved Durability: Choosing the right type of carpet grip can boost the overall durability and performance of your flooring material, increasing its lifespan and reducing maintenance costs.
Attention to Carpentry and Joints
Accuracy in carpentry work plays a pivotal role in ensuring a seamless and professional finish when constructing a coffee shop counter. The connections in the counter are crucial for achieving both durability and aesthetic appeal. By ensuring that the connections are precise, you can create a cohesive design that not only looks good but also provides structural integrity. Sometimes, fillers may be necessary to perfect these connections and guarantee precision in the overall construction.
Paying attention to the details of the carpentry work will elevate the counter's appearance and make it more visually appealing to customers.
Well-executed connections are fundamental for the longevity of the coffee shop counter, as they contribute significantly to its stability and overall strength. By focusing on the carpentry and connections during the construction process, you can guarantee a counter that not only serves its practical function efficiently but also enhances the visual appeal of your coffee shop.
Ensuring Stability and Grip
To maintain the stability and grip of your coffee shop counter, consider using a non-slip material or grip underneath to prevent any unwanted movement.
Anchoring the counter securely to the floor and adding rubber feet can further enhance its stability.
Regularly testing and maintaining these stability techniques will help guarantee the durability and safety of your counter for both customers and staff.
Stability Techniques Overview
For best stability and grip in your coffee shop counter, consider implementing various techniques to secure the counter in place.
- Use a Grip Under the Counter:
Prevent sliding by using a grip under the counter to ensure steadiness during service.
- Add Rubber Feet or Pads:
Enhance grip on the floor surface by adding rubber feet or pads to the bottom of the counter.
- Secure with Brackets or Screws:
Improve stability by securing the counter to the wall or floor with brackets or screws.
- Implement Counterweight or Anchoring System:
Further enhance stability by implementing a counterweight or anchoring system to keep the counter steady.
Importance of Counter Grip
Constructing a stable coffee shop counter involves maintaining a firm hold to prevent movement and uphold safety during service. Counter hold is vital in preserving stability and averting any slipping or shifting during the rush and commotion of serving customers.
By having a proper grasp on the counter surface, you can ensure that items such as cups, plates, and utensils stay firmly in place, reducing the risk of accidents or spills.
To enhance hold on the counter, consider using materials like rubberized mats or applying non-slip coatings. These additions not only help maintain a professional appearance but also contribute significantly to the safety of both your staff and customers.
The stability achieved through proper counter hold not only improves efficiency but also facilitates a seamless and smooth customer service experience. So, make sure to prioritize counter hold when designing your coffee shop counter to guarantee a safe and efficient workspace.
Ensuring Counter Durability
Consider using rubber as a stable grip material for your coffee shop counter base to prevent sliding or shifting during service.
To assure the durability and stability of your counter, follow these essential tips:
- Leveling and Anchoring: Properly level and anchor the counter to the floor to maintain stability and prevent wobbling, especially during busy service hours.
- Anti-Slip Pads: Incorporate anti-slip pads or feet on the bottom of the counter legs to enhance grip and avoid unwanted movement on various surfaces, providing a secure foundation.
- Weight Distribution: Carefully consider the weight distribution and load capacity of the counter to prevent tipping or imbalance issues, guaranteeing it can withstand the demands of daily use.
- Regular Maintenance: Regularly inspect and maintain the counter's stability to address any wear and tear promptly, preserving its durability over time and ensuring a reliable workspace for your baristas.
Challenges in Service Coordination
Moving through the challenges of service coordination can be a complex task in ensuring timely completion of sign installation and glossing work for the coffee shop counter project. Coordinating tasks with service providers has proven to be difficult due to delays in obtaining quotes and responses.
Interactions with companies have added stress to the coordination process, making it more challenging to stay on schedule. The lack of communication from service providers has further complicated matters, leading to setbacks in the coordination of tasks.
Overcoming these challenges has become a primary focus this week, as ensuring that the sign installation and glossing work are completed efficiently is essential for the overall success of the coffee shop counter project. By addressing these coordination issues head-on and finding solutions to improve communication and response times, the project can move forward smoothly and meet its deadlines effectively.
Overcoming Delays and Communication
To address delays and improve communication, proactive engagement with service providers was essential in securing timely completion of glossing work for the coffee shop counter project. Despite initial challenges, effective strategies were implemented to navigate through the obstacles and keep the project on track.
Here are some key actions taken to overcome delays and enhance communication:
- Regular Follow-Ups: Consistent follow-ups were conducted with service providers to monitor progress and address any emerging issues promptly.
- Clear Communication Channels: Establishing transparent lines of communication helped streamline interactions and guarantee that all parties were on the same page regarding project requirements.
- Timely Decision-Making: Swift decision-making processes were adopted to prevent bottlenecks and facilitate the prompt resolution of any arising concerns.
- Flexibility and Adaptability: Being adaptable and flexible in scheduling and resource management enabled the team to adjust to unforeseen circumstances and maintain project momentum.
Future Plans for Shop Front
For the upcoming phase of the project, focus on finalizing glossing work on the shop front to enhance its visual appeal and allure to potential customers.
Make certain to coordinate with a chat for glossing work over the weekend to meet deadlines effectively.
By continuing efforts in completing remaining tasks and decorations, you can achieve a polished look that will attract customers.
As you plan the next steps in shop setup and design, consider how to create a welcoming environment that encourages customers to step inside.
Keep an eye on the overall progress and outlook for future work on the shop front to guarantee that it aligns with your goals of attracting more foot traffic.
Strategy for Customer Engagement
As you aim to draw in more customers with an inviting atmosphere and attractive aesthetics, developing a strategic approach for customer engagement is key to fostering a memorable experience at your coffee shop.
Here are four essential strategies to enhance customer engagement:
- Personalized Interactions: Train your staff to engage with customers on a personal level, remembering their preferences and making tailored recommendations. This creates a sense of belonging and encourages repeat visits.
- Community Events: Host events like open mic nights, book clubs, or art exhibitions to bring the community together and create a vibrant atmosphere that customers will want to be a part of.
- Feedback Loop: Encourage customer feedback through comment cards, online surveys, or social media. Actively listening to your customers' suggestions and concerns shows that you value their opinion and are committed to improving their experience.
- Loyalty Programs: Implement a loyalty program that rewards frequent customers with discounts, free items, or exclusive deals. This incentivizes repeat business and fosters a sense of loyalty among your customers.
Aesthetics for Customer Retention
Enhancing the aesthetic appeal of your coffee shop counter is vital for retaining customers and creating a lasting impression. Aesthetically pleasing counters can greatly impact customer retention by offering a welcoming and memorable experience.
Paying attention to detail in the design, such as ensuring that partitions, trim, and decorations match, can attract and retain customers. Coordinating colors, materials, and textures on the counter can particularly appeal to target demographics like women and mothers.
By incorporating stylish elements such as curtains, matching paper, and miter joints in trim, you can elevate the overall ambiance and enhance customer satisfaction. Remember, the visual appeal of your coffee shop counter plays an important role in engaging customers and leaving a positive impression.
Make sure to prioritize aesthetics to create a space that not only serves efficiently but also captivates and retains your valued customers.
Frequently Asked Questions
How High Should a Coffee Shop Counter Be?
For efficient service in a coffee shop, your counter should typically be between 36 to 42 inches high. Consider ADA guidelines for accessibility with a maximum height of 36 inches. Adjustable counters provide flexibility for various needs.
How Can I Improve My Coffee Shop Customer Service?
To enhance your coffee shop customer service, prioritize clear communication, efficient order processing, and friendly interactions. Utilize POS systems, train staff well, offer diverse payment options, and maintain a welcoming atmosphere. Consistent efforts will elevate customer satisfaction.
How Big Should a Cafe Counter Be?
To create a efficient cafe counter, aim for a height of 36-42 inches, a depth of 24-30 inches, and a length of 8-12 feet. Consider factors like traffic flow and staff numbers for best functionality.
What Is the Ideal Space for a Coffee Shop?
For a coffee shop, the ideal space should prioritize efficient movement of staff and customers. Consider counter height, width, and depth for equipment and interactions. Adequate storage and layout promote a smooth workflow and customer experience.
Conclusion
To sum up, building a coffee shop counter requires attention to detail and careful planning. Did you know that 85% of customers believe the design of a counter impacts their overall experience at a coffee shop?
By focusing on tools, decor, finishes, and stability, you can create an efficient and welcoming space for your customers.
Don't overlook the importance of a well-designed counter in providing a positive experience for your patrons.
Tips and Tricks
Pallet Project: How to Build a Coffee Table From Pallet Wood!
Want to transform pallet wood into a stunning coffee table?
Want to create a unique coffee table from pallet wood? Start by taking apart pallets and reusing the top boards. Build a strong base with leftover 2x4s and secure them with a nail gun. Customize the size to fit your space. Add a rustic touch by charring the wood, sanding it down, and applying a protective finish. Create sturdy legs using 4×4 pieces and attach them securely. Elevate the look with metal details. Remember to wear safety gear and work in a well-ventilated area when charring the wood. Dive into our detailed guide to craft your one-of-a-kind piece of furniture. Beginners will benefit greatly from this fun and creative project.
Key Takeaways
- Disassemble pallets, salvage wood, and construct a sturdy base.
- Torch wood for a rustic look and sand for a smooth finish.
- Select and attach 18-20 inch 4×4 legs securely.
- Apply protective finish, metal accents, and experiment with designs.
- Prioritize safety gear, ventilation for torching, and fire extinguisher readiness.
Disassembling the Pallets
To begin constructing your coffee table from pallet wood, make certain to carefully disassemble the pallets by separating the top boards from the rest of the structure. The first step involves prying the pallets apart to salvage the usable wood. Using a hammer, pry bar, or nail puller, remove any nails from the top pieces to guarantee a clean surface for your coffee table project.
After separating the top boards, gather scrap 2×4 pieces to create a sturdy base for the table. This base will provide the necessary stability and support for your coffee table. When assembling, use a brad nailer to securely attach the top boards to the base, creating a solid foundation for the table.
As you progress with the project, remember to trim any excess wood from the pallets using a circular saw. This step will allow you to achieve the desired size and shape for your coffee table.
Finishing the Top
Skirt the edges of the pallet wood coffee table top with remaining pieces to add a polished finishing touch. This step will give your table a clean and cohesive appearance.
Consider torching the wood surface for a rustic look that adds character. By lightly burning the wood, you can enhance the depth and texture of the grain, creating a unique and artistic finish.
After torching, make sure to sand the pallet wood surface thoroughly. This step is essential to achieving a smooth and visually appealing finish. Utilize an orbital sander to darken the wood, enhancing the overall aesthetic appeal of the coffee table.
The dark finish won't only look great but also provide a protective layer. By following these steps, you can transform your pallet wood into a stunning coffee table that will be a focal point in any room.
Creating the Legs
To create the legs for your coffee table, you'll need to carefully select sturdy 4×4 pieces of wood for stability.
Adjust the legs to your desired height, typically between 18-20 inches, for comfort and functionality.
When attaching the legs to the table base, consider various techniques to securely support the weight of the table and any items placed on top.
Leg Material Selection
Consider using robust 4×4 pieces of wood for the legs when crafting your coffee table from pallet wood to ensure stability and resilience. This choice of material guarantees that the legs can support the weight of the table and endure regular use without wobbling or breaking.
Trimming the legs to a height between 18 to 20 inches will offer the ideal proportions for your coffee table, allowing for comfortable use while seated on a standard couch or chair.
To enhance the visual appeal of your coffee table, you may want to torch the legs to create a textured and rustic look that complements the pallet wood top.
Once you have selected and prepared the legs, firmly attach them to the table frame to establish a sturdy and dependable foundation. For an added touch of industrial style, consider incorporating metal fasteners or brackets, which can both enhance the overall aesthetic and provide additional structural support to your coffee table.
Leg Height Adjustment
Crafting the legs for your coffee table involves cutting 4×4 wood pieces to a height between 18 to 20 inches for best comfort and stability. This height range guarantees that your table isn't too low or too high, making it ideal for both lounging and working purposes.
Once you have decided on the height, consider torching the legs to give them a textured and rustic appearance that complements the pallet wood top of the table beautifully.
To make sure that the legs can adequately support the weight of the table, it's important to securely attach them to the table base. You can explore using industrial-style fasteners or accents to add a unique and personalized touch to the legs, enhancing the overall aesthetic appeal of your coffee table.
Leg Attachment Techniques
Fasten the legs securely to the coffee table base using appropriate hardware to guarantee stability and support for the tabletop. Opt for 4×4 pieces of wood to maintain a sturdy foundation. Cut the legs to a height between 18-20 inches for balanced proportions. To enhance the rustic aesthetic, torch the legs for a textured finish that complements the pallet wood tabletop.
When securing the legs, choose hardware that can withstand the weight of the tabletop. Consider industrial-style fasteners or brackets to not only reinforce the attachment but also add a unique design element to the coffee table. Verify that the attachment is secure to prevent any wobbling or instability.
Final Assembly
Securely attaching the legs to the table is essential for providing stability and durability in the final assembly of your pallet wood coffee table. Once the legs are firmly fixed, you can move on to the finishing touches that will make your creation stand out.
Here are some steps to contemplate for the final assembly:
- Protective Coat: Apply a clear coat to your coffee table to safeguard it from everyday wear and tear while also giving it a sleek, glossy appearance.
- Enhance Wood Grain: Bring out the natural beauty of the wood by treating it with a suitable finishing product that enriches the grain patterns.
- Metal Accents: For an industrial and rustic look, ponder incorporating metal accents or fasteners into the design, adding an extra touch of character to your table.
- Share Your Creation: Be proud of your unique pallet wood coffee table and share your DIY journey with others to inspire creativity and showcase your skills.
Additional Tips
For additional tips to enhance the appearance and resilience of your pallet wood coffee table, consider experimenting with different finishes such as stains, paints, or varnishes. These finishes not only safeguard the wood but also allow you to achieve the desired aesthetic for your table. Personalizing the design is another way to make your coffee table stand out.
Add unique touches like metal accents, decorative hardware, or a custom inlay to give it a personalized touch that reflects your style.
When it comes to assembly, consider using alternative methods like wood glue, dowels, or screws to guarantee your coffee table is sturdy and long-lasting.
Enjoy the process of creating furniture from pallet wood as a rewarding DIY project that showcases your creativity and woodworking skills.
Share your results and experiences with others on social media, DIY forums, or at home gatherings to inspire fellow DIY enthusiasts to engage in their own pallet wood projects.
Tools and Materials Needed
Gather the necessary tools and materials to begin constructing your pallet wood coffee table. Here's what you'll need: Gather the necessary tools and materials to begin constructing your pallet wood coffee table. Here’s what you’ll need: a pallet, saw, sander, wood glue, nails, hammer, and a level. Consider a round coffee table design to give your space a stylish and modern look. This design not only adds a unique touch to the room but also provides a functional and visually appealing piece of furniture.
- Tools:
- Circular saw
- Brad nailer
- Torch
- Orbital sander
- Clear coat
- Materials:
- Pallet wood
- Scrap 2×4 pieces
- 4×4 pieces for legs
- Industrial-style fasteners
To trim the excess wood from the pallet pieces, you'll use the circular saw. The brad nailer will come in handy for securing the different parts together.
If you want to add a rustic texture to the legs and top of the table, the torch will be your go-to tool.
Once the construction is complete, applying the clear coat won't only protect your coffee table but also give it a glossy finish.
With these tools and materials at your disposal, you'll be all set to start creating your own unique pallet wood coffee table.
Safety Precautions
Make sure to always wear safety goggles and gloves when using power tools to keep your eyes and hands protected.
It's essential to use a dust mask during sanding and cutting to safeguard against inhaling harmful particles.
Remember to maintain proper ventilation when working with torches or finishes to steer clear of fume exposure.
Safety Gear Importance
Prioritize your safety by ensuring you have the necessary gear when working with pallet wood, including gloves, safety glasses, and a dust mask. Here are some key safety gear items to keep in mind:
- Gloves: Protect your hands from splinters, cuts, and rough surfaces while handling pallet wood.
- Safety Glasses: Shield your eyes from flying debris, dust, and potential eye injuries caused by tools or wood particles.
- Dust Mask: Prevent inhalation of wood dust, which can irritate your respiratory system and cause health issues.
- Closed-Toe Shoes: Wear sturdy footwear to safeguard your feet from falling objects, sharp nails, or tools.
Hazard Identification Tips
Inspect pallets thoroughly before starting your project to identify any potential hazards such as nails, splinters, or damage that could lead to accidents during the woodworking process.
Wear gloves, goggles, and a mask to protect yourself from splinters, dust, and eye injuries.
Before dismantling the pallets, check for nails, splinters, and damage to avoid accidents.
Use a sturdy work surface and clamps to secure wood pieces while cutting, torching, or assembling to prevent slipping or injuries.
Verify tools like saws, nailers, and torches are in good working condition to minimize the risk of accidents or malfunctions during the project.
When torching wood, work in a well-ventilated area to prevent harmful fumes, and keep a fire extinguisher nearby as a precaution.
Inspiration and Ideas
Explore a variety of design inspirations for your pallet wood coffee table, from rustic to modern styles, to kickstart your creative process. Here are some ideas to get you inspired:
- Rustic Charm: Embrace the natural look of pallet wood by keeping the design simple with a distressed finish and visible wood grains.
- Industrial Edge: Incorporate metal accents, such as hairpin legs or industrial piping, to give your coffee table a modern industrial vibe.
- Hidden Gems: Consider adding hidden compartments or built-in storage solutions to maximize functionality without compromising style.
- Personal Touch: Infuse your personality into the design by customizing the table with engravings, a splash of color, or other unique details.
Frequently Asked Questions
Can You Make a Table From Pallets?
Yes, you can create a table from pallets by disassembling them, using scrap wood for the base, and brad nailing the top. Customize the legs with torched 4x4s, secure them well, and add industrial-style fasteners for flair.
Can You Make Furniture Out of Pallet Wood?
Yes, you can make furniture from pallet wood. It's a popular choice for DIY projects due to its charm, affordability, and sustainability. Repurpose pallets to create unique pieces that match your style and decor perfectly.
How Do You Make a Pallet Bed Step by Step?
To make a pallet bed, gather pallets, disassemble them, cut wood, sand for smoothness, assemble with screws or nails, and finish with a clear coat or paint. Confirm dimensions fit your mattress for a sturdy frame.
How Do You Prepare Pallet Wood for Projects?
When prepping pallet wood for projects, start by gently separating the pallets and removing nails to salvage usable wood. Secure scrap 2x4s for stability, use a brad nailer for assembly, and trim with a circular saw for the perfect piece.
Conclusion
Now that you've tackled this pallet project and built your own unique coffee table, sit back and enjoy the fruits of your labor.
Remember, every piece of wood has a story to tell, just like the memories you'll create around your new table.
Let your creativity flow as you continue to repurpose and craft with pallet wood.
The possibilities are endless, just like the grains in the wood itself.
Happy building!
-
Espresso4 weeks ago
How Much Caffeine in an Espresso Shot? The Complete Guide!
-
Ryze Coffee4 weeks ago
What Are the Ingredients in Ryze Mushroom Coffee? – Full Disclosure
-
Espresso3 days ago
Espresso Lyrics by Sabrina Carpenter – The Song and Its Meaning!
-
Espresso4 weeks ago
Shot of Espresso Caffeine Content – The Numbers Explained!
-
Ryze Coffee4 weeks ago
Ryze Mushroom Coffee Weight Loss – Does It Really Work?
-
Vetted4 weeks ago
Indulge in Delights at Tanpopo Konditorei Café Munich
-
Espresso4 weeks ago
Double Espresso – Twice the Flavor, Twice the Fun!
-
Espresso4 weeks ago
How Much Is a Shot of Espresso? The Cost Explained!